Gatling初次体验
主要步骤:
1. 利用springboot编写了一个简单的服务jdktest
2.将jdktest利用docker在虚拟机中启动
3.创建一个scala工程,利用gatling提供的DSL编写性能脚本
4.执行并查看报告
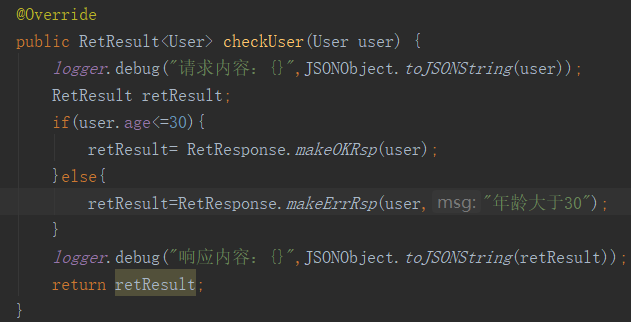
1.编写jdktest服务
接口名称:/common/check
 参数:一个User对象

 格式: json

 响应:

 年龄小于等于30,结果:{"code":200,"msg":"success","data":{"name":"hello","age":18}}

 年龄大于30,结果:{"code":400,"msg":"年龄大于30","data":{"name":"hello","age":50}}

2.部署服务
将jdktest打成jar包,并上传到服务器(我这里是虚拟机,并且已经安装了docker)上,在jar同级目录下创建Dockerfile
FROM primetoninc/jdk:1.8

MAINTAINER 3404924705@qq.com

ADD jdktest-0.0.2-SNAPSHOT.jar /usr/local/jdktest/

RUN mkdir /usr/local/jdktest/log

RUN chmod -R 755 /usr/local/jdktest

WORKDIR /usr/local/jdktest

EXPOSE 19801

ENTRYPOINT java -jar jdktest-0.0.2-SNAPSHOT.jar
然后在Dockerfile所在路径执行下面的命令,来创建镜像、启动容器以及运行服务
创建镜像(注意后面的路径“.”,下面的镜像名称是jdktest)

docker build -t jdktest:1.2 .

运行容器(下面的容器名称是cjdktest,宿主机上的日志路径是/usr/local/my/log)

docker run -d -p 8081:8081 -v /usr/local/my/log:/usr/local/jdktest/log --name cjdktest jdktest:1.2

如果出现log文件没有权限的问题,可能原因centos7中安全模块selinux把权限禁掉了

可以使用下面的命令

docker run -d -p 8081:8081 -v /usr/local/my/log:/usr/local/jdktest/log --privileged=true --name cjdktest jdktest:1.2
3.编写性能脚本(如果使用Gatling执行器来执行脚本,那么就可以跳过安装scala的开发环境)
3.1 安装scala的开发环境
本例中使用的是scala 2.12.8
参考:
https://www.runoob.com/scala/scala-install.html
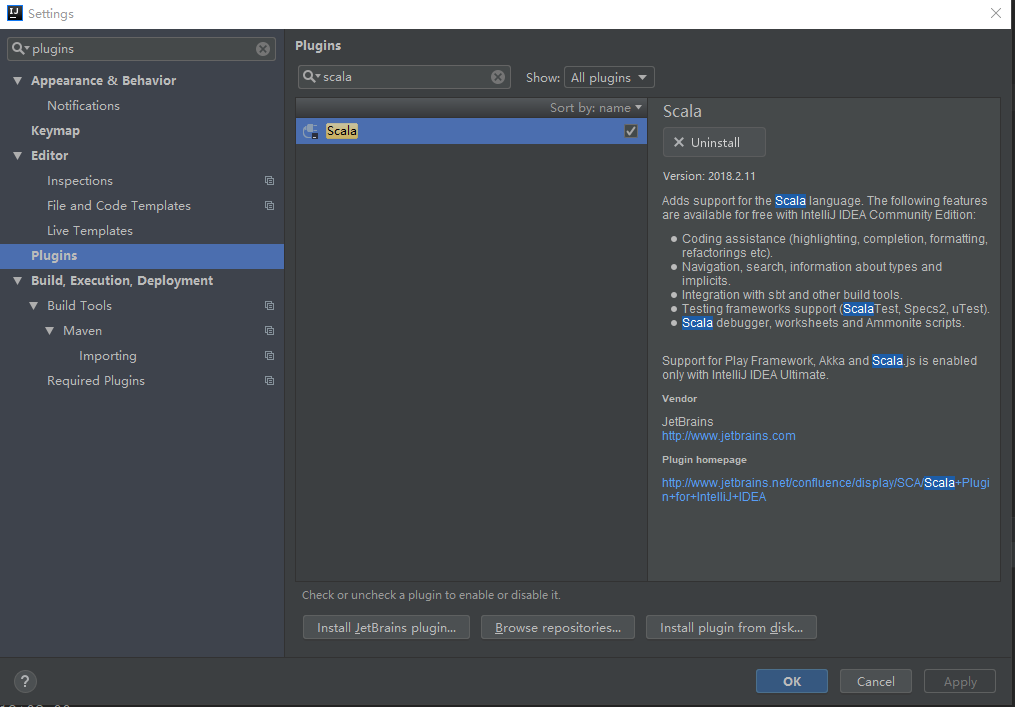
3.2 配置IDEA,并创建scala工程
安装scala插件,下面安装完成后的截图。
创建scala项目
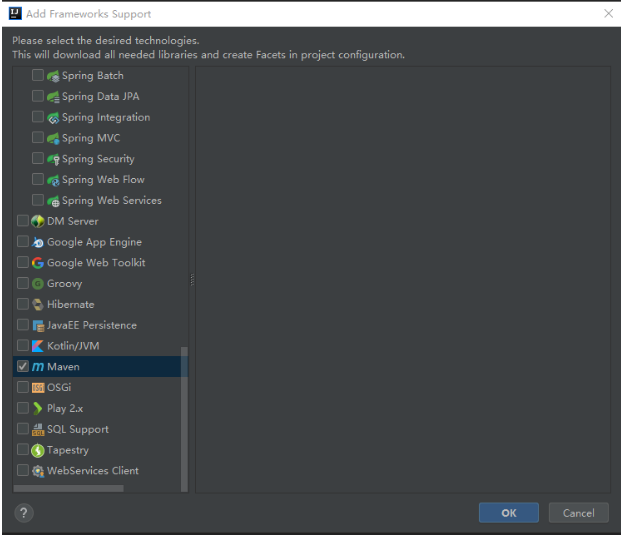
右击项目,选择Add FrameWorker support
选择maven
修改pom.xml
 <?xml version="1.0" encoding="UTF-8"?>

 <project xmlns="http://maven.apache.org/POM/4.0.0"

          xmlns:xsi="http://www.w3.org/2001/XMLSchema-instance"

          xsi:schemaLocation="http://maven.apache.org/POM/4.0.0 http://maven.apache.org/xsd/maven-4.0.0.xsd">

     <modelVersion>4.0.0</modelVersion>

     <groupId>groupId</groupId>

     <artifactId>gatlingtest</artifactId>

     <version>1.0-SNAPSHOT</version>

     <properties>

         <maven.compiler.source>1.8</maven.compiler.source>

         <maven.compiler.target>1.8</maven.compiler.target>

         <encoding>UTF-8</encoding>

         <gatling.version>3.0.3</gatling.version>

         <gatling-maven-plugin.version>3.0.1</gatling-maven-plugin.version>

     </properties>

     <dependencies>

         <dependency>

             <groupId>io.gatling.highcharts</groupId>

             <artifactId>gatling-charts-highcharts</artifactId>

             <version>${gatling.version}</version>

         </dependency>

         <dependency>

             <groupId>io.gatling</groupId>

             <artifactId>gatling-app</artifactId>

             <version>${gatling.version}</version>

         </dependency>

         <dependency>

             <groupId>io.gatling</groupId>

             <artifactId>gatling-recorder</artifactId>

             <version>${gatling.version}</version>

         </dependency>

     </dependencies>

     <build>

         <plugins>

             <plugin>

                 <groupId>org.scala-tools</groupId>

                 <artifactId>maven-scala-plugin</artifactId>

                 <version>2.15.2</version>

                 <executions>

                     <execution>

                         <goals>

                             <goal>compile</goal>

                             <goal>testCompile</goal>

                         </goals>

                     </execution>

                 </executions>

             </plugin>

             <plugin>

                 <groupId>io.gatling</groupId>

                 <artifactId>gatling-maven-plugin</artifactId>

                 <version>3.0.1</version>

                 <configuration>

                     <!-- 测试脚本 -->

                     <simulationClass>computerdatabase.ApiJdkTest</simulationClass>

                     <!-- 结果输出地址 -->

                     <resultsFolder>D:\z_softinstall\intellijidea\IdeaProjects\gatlingtest\report</resultsFolder>

                 </configuration>

             </plugin>

         </plugins>

     </build>

 </project>
注意修改gatling-maven-plugin的配置,simulationClass代表执行的是哪个脚本,resultsFolder表示报告的存放目录
将src目录下的文件和文件夹删除
选中src目录右击 选中MarkDirectory as 再选中Sources root
在src下面创建一个package 命名为computerdatabase(这个包名是gatling例子中的名称,同时也是gatling执行器中例子脚本存放的目录名称)
在该目录下创建一个scala文件 ApiJdkTest(这个名称要和pom.xml中simulationClass的配置对应起来,不然执行时会报找不到测试脚本)
编写脚本
 package computerdatabase

 import io.gatling.core.Predef._

 import io.gatling.http.Predef._

 import scala.concurrent.duration._

 class ApiJdkTest extends Simulation {

   //给年龄字段添加一个随机数Feeder

   //使用Feeder的原因:按照gatling的官方文档的解释,由于DSL会预编译,在整个执行过程中是静态的。因此Random在运行过程中就已经静态化了,不会再执行。

   //参考:https://www.jianshu.com/p/7f7a57a8c2bb

   val randomIdFeeder =

   Iterator.continually(Map("age" ->

     (scala.util.Random.nextInt(50))))

   //设置请求的根路径

   //这里是在虚拟机中jdktest的服务地址

   val httpConf = http.baseUrl("http://192.168.1.3:19801")

   /*

     运行秒数 during 默认单位秒,如果要用微秒 during(100 millisecond)

     下面内容可以参考:

     脚本结果:https://gatling.io/docs/current/general/concepts/

     post请求:https://gatling.io/docs/current/http/http_request/

     check:https://gatling.io/docs/current/http/http_check/#http-check

    */

   val scn = scenario("JdkTest")

     .during(100) {

       forever(

         feed(randomIdFeeder)

           .exec(http("UserCheck")

             .post("/common/check")

             .header("Content-Type", "application/json")

             .body(StringBody(s"""{"name":"hello","age":""" + "${age}" +"""}""")).asJson

             .check(status.is(200))

             .check(jsonPath("$.code").is("200"))

             .check(jsonPath("$.msg").is("success"))

           )

       )

     }

   /*

     设置并发

     参考

     https://gatling.io/docs/current/general/simulation_setup/

     */

   setUp(

     scn.inject(

       //在20秒内以线性斜坡方式完成注入20的用户,不是一下子注入20个,而是逐步增加(线性)。可以从报告看出。

       rampUsers(20) during (20 seconds)

     ).protocols(httpConf)

   )

 }
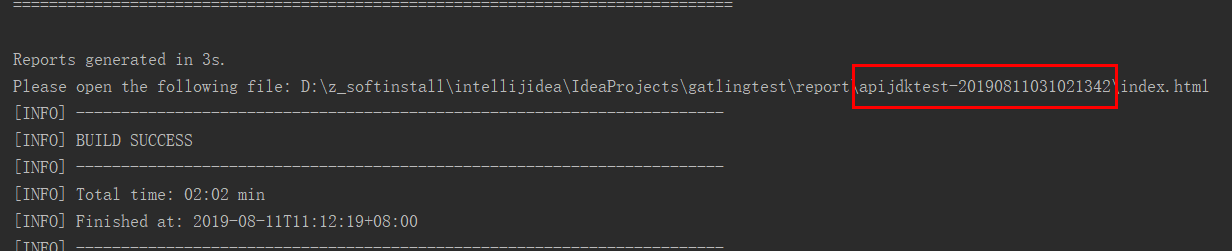
执行脚本
View-》Tool Windows-》Maven Projects 选择gatling:test

执行完成后,会提示报告存放路径
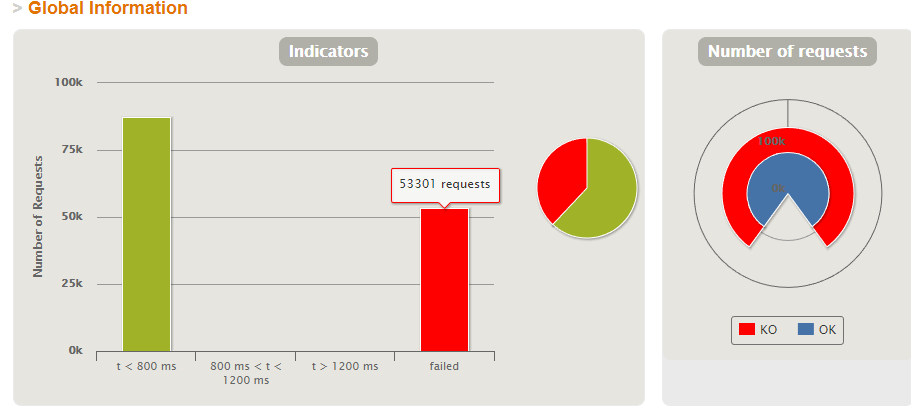
查看报告
下面是成功和失败(这里只包含check结果)的统计结果
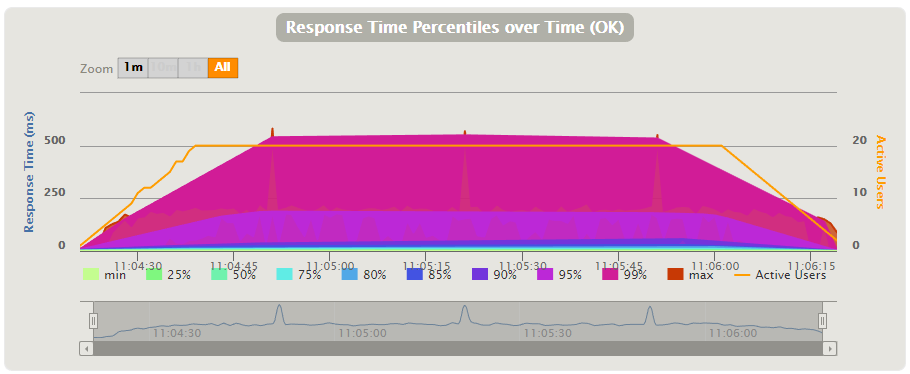
下面是响应
橙色的线表示用户数,可以看到从左侧开始,是逐步将用户数增加到20的
其它的代表响应时间
最新文章
- 【学习笔记】C语言之词法规则
- 快速入门系列--MVC--01概述
- SharedPreference写入-读取
- storm UI
- ES
- 使用Moses中tokenizer.perl无法正常工作:纠结的"<" 和">"(已解决)
- [改善Java代码]优先选择线程池
- 自己动手写缓存Version1
- string 数字序列大小比较
- Delphi中TApplication详解
- UTF-8笔记170330
- 51 Nod 1057 N的阶乘【Java大数乱搞】
- Linux系统挂载NTFS文件系统
- [论文阅读]Object detection at 200 Frames Per Second
- Nand_ECC_校验和纠错_详解
- WPF解决界面全屏化但不遮挡任务栏的问题
- SpringBank 开发日志 重新设计Action调用Service的参数传递 使用泛型解决类型转换问题
- DOS的几个常用命令
- [javaSE] 网络编程(URL)
- javascript快速入门15--节点