apache CXF Service 简单使用
2024-09-01 02:14:27
cxf介绍
框架官网:cxf.apache.org
支持多种协议:
SOAP1.1,1.2
XML/HTTP
CORBA(Common Object Request Broker Architecture公共对象请求代理体系结构,早期语言使用的WS。C,c++,C#)
并可以与Spring进行快速无缝的整合
灵活的部署:可以运行在Tomcat,Jboss,Jetty(内置),IBMWS,BeaWL上面。
入门案例(服务端)
第一步:创建动态web项目
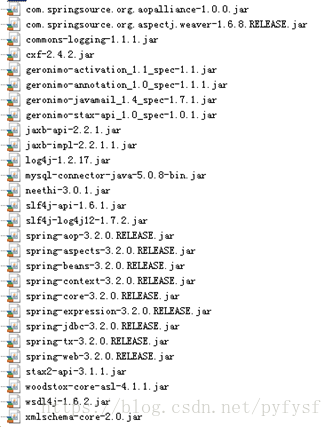
第二步:导入CXF相关jar包
第三步:在web.xml中配置CXF框架提供的一个Servlet
 <!-- 配置CXF框架提供的Servlet -->

  <servlet>

    <servlet-name>cxf</servlet-name>

    <servlet-class>org.apache.cxf.transport.servlet.CXFServlet</servlet-class>

    <!-- 通过初始化参数指定CXF框架的配置文件位置 -->

    <init-param>

        <param-name>config-location</param-name>

        <param-value>classpath:cxf.xml</param-value>

    </init-param>

  </servlet>

  <servlet-mapping>

    <servlet-name>cxf</servlet-name>

    <url-pattern>/service/*</url-pattern>

  </servlet-mapping>
第四步:在类路径下提供cxf.xml
<?xml version="1.0" encoding="UTF-8"?>

<beans xmlns="http://www.springframework.org/schema/beans"

xmlns:xsi="http://www.w3.org/2001/XMLSchema-instance"

xmlns:jaxws="http://cxf.apache.org/jaxws"

xmlns:soap="http://cxf.apache.org/bindings/soap"

xsi:schemaLocation="http://www.springframework.org/schema/beans

                    http://www.springframework.org/schema/beans/spring-beans.xsd

                    http://cxf.apache.org/bindings/soap

                    http://cxf.apache.org/schemas/configuration/soap.xsd

                    http://cxf.apache.org/jaxws

                    http://cxf.apache.org/schemas/jaxws.xsd">

    <!-- 引入CXF Bean定义如下,早期的版本中使用 -->

    <import resource="classpath:META-INF/cxf/cxf.xml" />

    <import resource="classpath:META-INF/cxf/cxf-extension-soap.xml" />

    <import resource="classpath:META-INF/cxf/cxf-servlet.xml" />

</beans>
第五步:开发一个接口和实现类
import javax.jws.WebService;

@WebService

public interface HelloService {

    public String sayHello(String name);

}
public class HelloServiceImpl implements HelloService{

    public String sayHello(String name) {

        System.out.println("基于CXF开发的服务端sayHello方法被调用了。。。。");

        return "hello " + name;

    }

}
第六步:注册服务
<?xml version="1.0" encoding="UTF-8"?>

<beans xmlns="http://www.springframework.org/schema/beans"

xmlns:xsi="http://www.w3.org/2001/XMLSchema-instance"

xmlns:jaxws="http://cxf.apache.org/jaxws"

xmlns:soap="http://cxf.apache.org/bindings/soap"

xsi:schemaLocation="http://www.springframework.org/schema/beans

                    http://www.springframework.org/schema/beans/spring-beans.xsd

                    http://cxf.apache.org/bindings/soap

                    http://cxf.apache.org/schemas/configuration/soap.xsd

                    http://cxf.apache.org/jaxws

                    http://cxf.apache.org/schemas/jaxws.xsd">

    <!-- 引入CXF Bean定义如下,早期的版本中使用 -->

    <import resource="classpath:META-INF/cxf/cxf.xml" />

    <import resource="classpath:META-INF/cxf/cxf-extension-soap.xml" />

    <import resource="classpath:META-INF/cxf/cxf-servlet.xml" />

    <bean id="helloService" class="com.itheima.service.HelloServiceImpl"/>

    <!-- 注册服务 -->

    <jaxws:server id="myService" address="/cxfService">

        <jaxws:serviceBean>

            <ref bean="helloService"/>

        </jaxws:serviceBean>

    </jaxws:server>

</beans>
入门案例(客户端)
方式一:使用jdk提供的wsimport命令生成本地代码完成调用
方式二:使用CXF提供的方式
第一步:创建Java项目并导入CXF相关jar包

第二步:使用wsimport或者CXF提供wsdl2java生成本地代码,只需要生成接口文件

第三步:将接口文件复制到项目中

第四步:提供spring配置文件,注册客户端代理对象
<?xml version="1.0" encoding="UTF-8"?>

<beans xmlns="http://www.springframework.org/schema/beans"

xmlns:xsi="http://www.w3.org/2001/XMLSchema-instance"

xmlns:jaxws="http://cxf.apache.org/jaxws"

xmlns:soap="http://cxf.apache.org/bindings/soap"

xsi:schemaLocation="http://www.springframework.org/schema/beans

                    http://www.springframework.org/schema/beans/spring-beans.xsd

                    http://cxf.apache.org/bindings/soap

                    http://cxf.apache.org/schemas/configuration/soap.xsd

                    http://cxf.apache.org/jaxws

                    http://cxf.apache.org/schemas/jaxws.xsd">

    <!-- 引入CXF Bean定义如下,早期的版本中使用 -->

    <import resource="classpath:META-INF/cxf/cxf.xml" />

    <import resource="classpath:META-INF/cxf/cxf-extension-soap.xml" />

    <import resource="classpath:META-INF/cxf/cxf-servlet.xml" />

    <!-- 注册CXF客户端代理对象,通过spring框架创建这个代理对象,使用代理对象实现远程调用 -->

    <jaxws:client id="myClient"

                address="http://192.168.115.87:8080/cxf_service/service/cxfService"

                serviceClass="cn.itcast.client.HelloService">

    </jaxws:client>

</beans>
第五步:读取spring配置文件,创建spring工厂,从工厂中获取代理对象,实现远程调用
import org.springframework.context.ApplicationContext;

import org.springframework.context.support.ClassPathXmlApplicationContext;

public class App {

    public static void main(String[] args) {

        ApplicationContext ctx = new ClassPathXmlApplicationContext("cxf.xml");

        HelloService proxy = (HelloService) ctx.getBean("myClient");

        String ret = proxy.sayHello("test");

        System.out.println(ret);

    }

}
最新文章
- Leetcode: Count The Repetitions
- sublime Text 2 制表符
- 用Android模拟器也可以开发和测试NFC应用
- ASP.NET MVC 请求流程:Controller
- TPL(Task Parallel Library)多线程、并发功能
- iOS基础 - XML & JSON
- swift AVAudioPlayer播放音频时声音太小
- DEDE中如何过滤掉Html标签,并且截取字符串长度
- jQuery中删除方法empty(),remove()和detach()的区别
- Windows Server 2003下DHCP服务器的安装与简单配置图文教程
- Linux分区知识及企业场景分区76
- nginx 301跳转
- 微信小程序:scroll滑到指定位置
- poj-2689-素数区间筛
- linux中kill命令
- Rope整理(可持久化神器)
- 在CMD下启动vmware、Xshell连接虚拟机以及控制Chrome浏览器自动执行js登录校园网
- 如何对抗、预防 SQL注入 攻击
- GIT 基础-基础命令
- css的高级选择器,后代选择器,子代选择器,并集选择器,交集选择器