[转]uipath team svn
2024-09-05 16:04:18
本文转自:https://docs.uipath.com/studio/docs/svn-version-control
SVN Version Control
Opening a Project from SVN
- In the Team page, select Open from SVN. The Open from SVN Repository window opens.
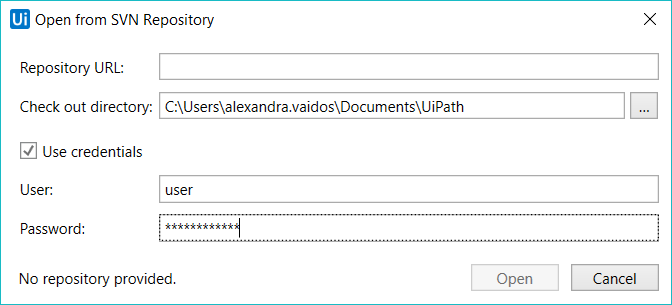
- Type in the Repository URL or use the
 button to open the repository browser. Expand or collapse folders in the repository, look inside folders, copy the Selected Path or select a file to open. Click OK.
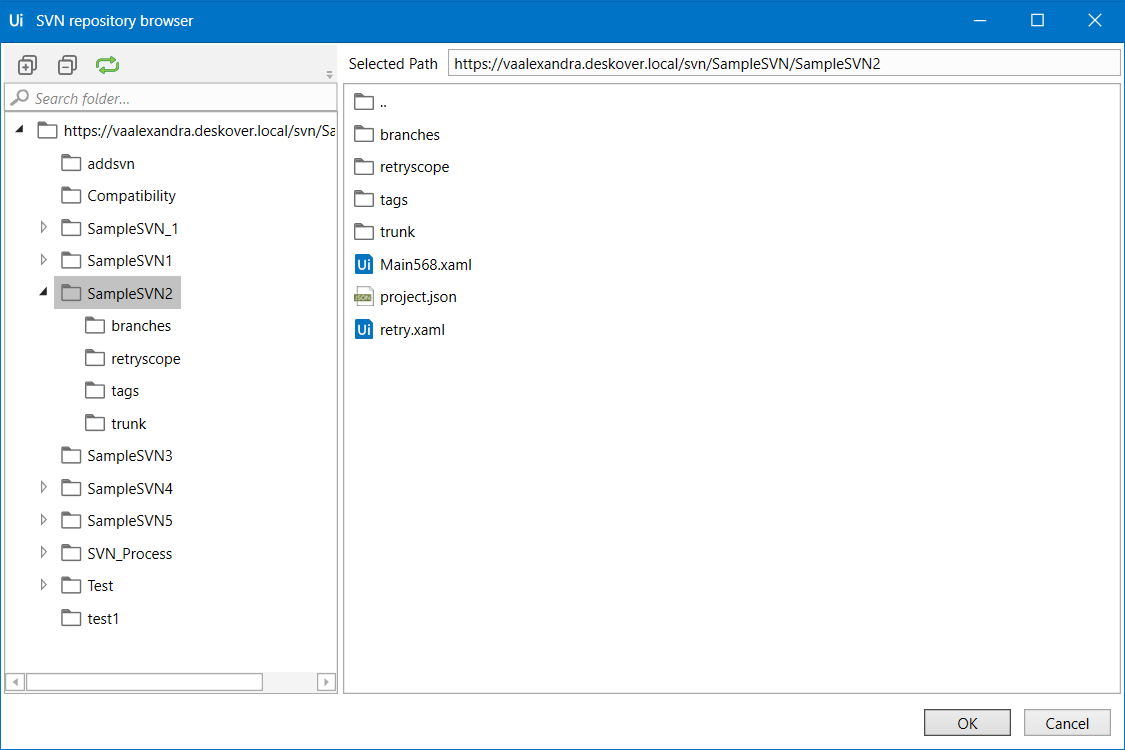
- Pick an empty Check out directory. Select the Use credentials box and fill in your Username and Password. Click Open. The project is now available in the check out directory.
- A Question dialog box is opened, with two options for pulling the
Main.xamlfile from the repository:- Check out latest and edit - opens the latest version of the
Main.xamlfile from the repository, in edit mode. The Break Lock option allows you to check out a project from a SVN repository that was previously checked out by a different user. - Open local as read only - opens the local version of the
Main.xamlfile in read-only mode. The Package Manager can be opened even if the files are in read-only mode, but in order to perform changes and install dependencies, theproject.jsonfile needs to be checked out.
- Check out latest and edit - opens the latest version of the
Adding a Project to SVN
Note:
Some SVN operations are not directly manageable through Studio. For this, and to ensure optimal compatibility, use a recent version of a SVN client. For TortoiseSVN, versions up to 1.9.7 are supported.
- Create or open a project in Studio from the Start tab in the Backstage view.
- Click on the Show Team Page button in the Project panel. This opens the Team page.
- Click on the Add to SVN button to open the Add to SVN window.
- Type in the Repository URL or use the button to open the repository browser. Select a file to open. Click OK. Provide a path to the Check out directory. The check out directory must be empty. If applicable, check the Use credentials check box, and type in the User and Password. Click Add to upload the project to the SVN repository.
- In the Check In Changes window, select the files that you would like to add to the repository and write a Commit Message.
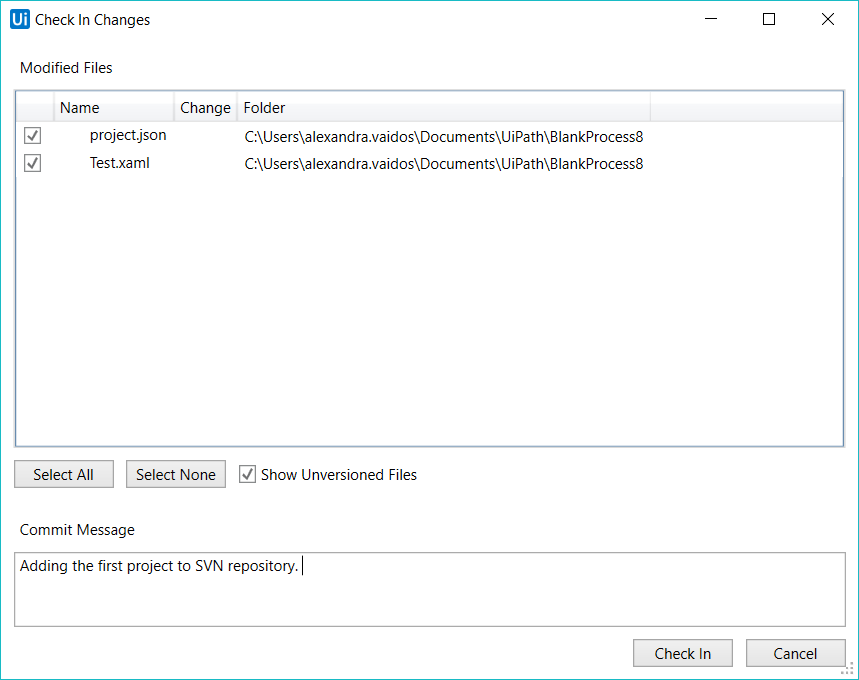
- Click Check In. The files are now available in the repository, together with the Commit message. The
project.jsonfile returns to read-only mode in Studio.
最新文章
- 换个角度理解云计算之MapReduce
- Realm简单使用小记
- wordpress对显示某分类目录的文章列表页时对单个文章显示字数限制和省略
- spring相关资源
- MySQL与Oracle 差异比较之六触发器
- 【开源项目8】Android开源项目分类汇总【畜生级别】
- cmd&Linux 下使用mysql全记录
- 编写Word宏使选中的图片改变为固定宽度并保持纵横比
- ios专题 - APP设计流程
- sourceTree安装与使用
- C#的百度地图开发(二)转换JSON数据为相应的类
- 数据库sql语句为什么要用绑定形式?
- (Java后端 Java web)面试时如何展示自己非技术方面的能力(其实就是综合能力)
- 《深入理解java虚拟机》学习笔记-----郑雨迪
- 2018-2019-2 20165319 《网络对抗技术》 Exp5:MSF基础应用
- windows下使用electron+sqlite3
- 监测c3动画过渡完成的事件
- no plugin found for prefix 'tomcat 7' in the current project and in the plugin groups的解决方法
- 四、Object.defineProperty总结
- 我永远无法学会的dp