一、Nginx多站点配置
2024-09-04 07:20:13
一、下载
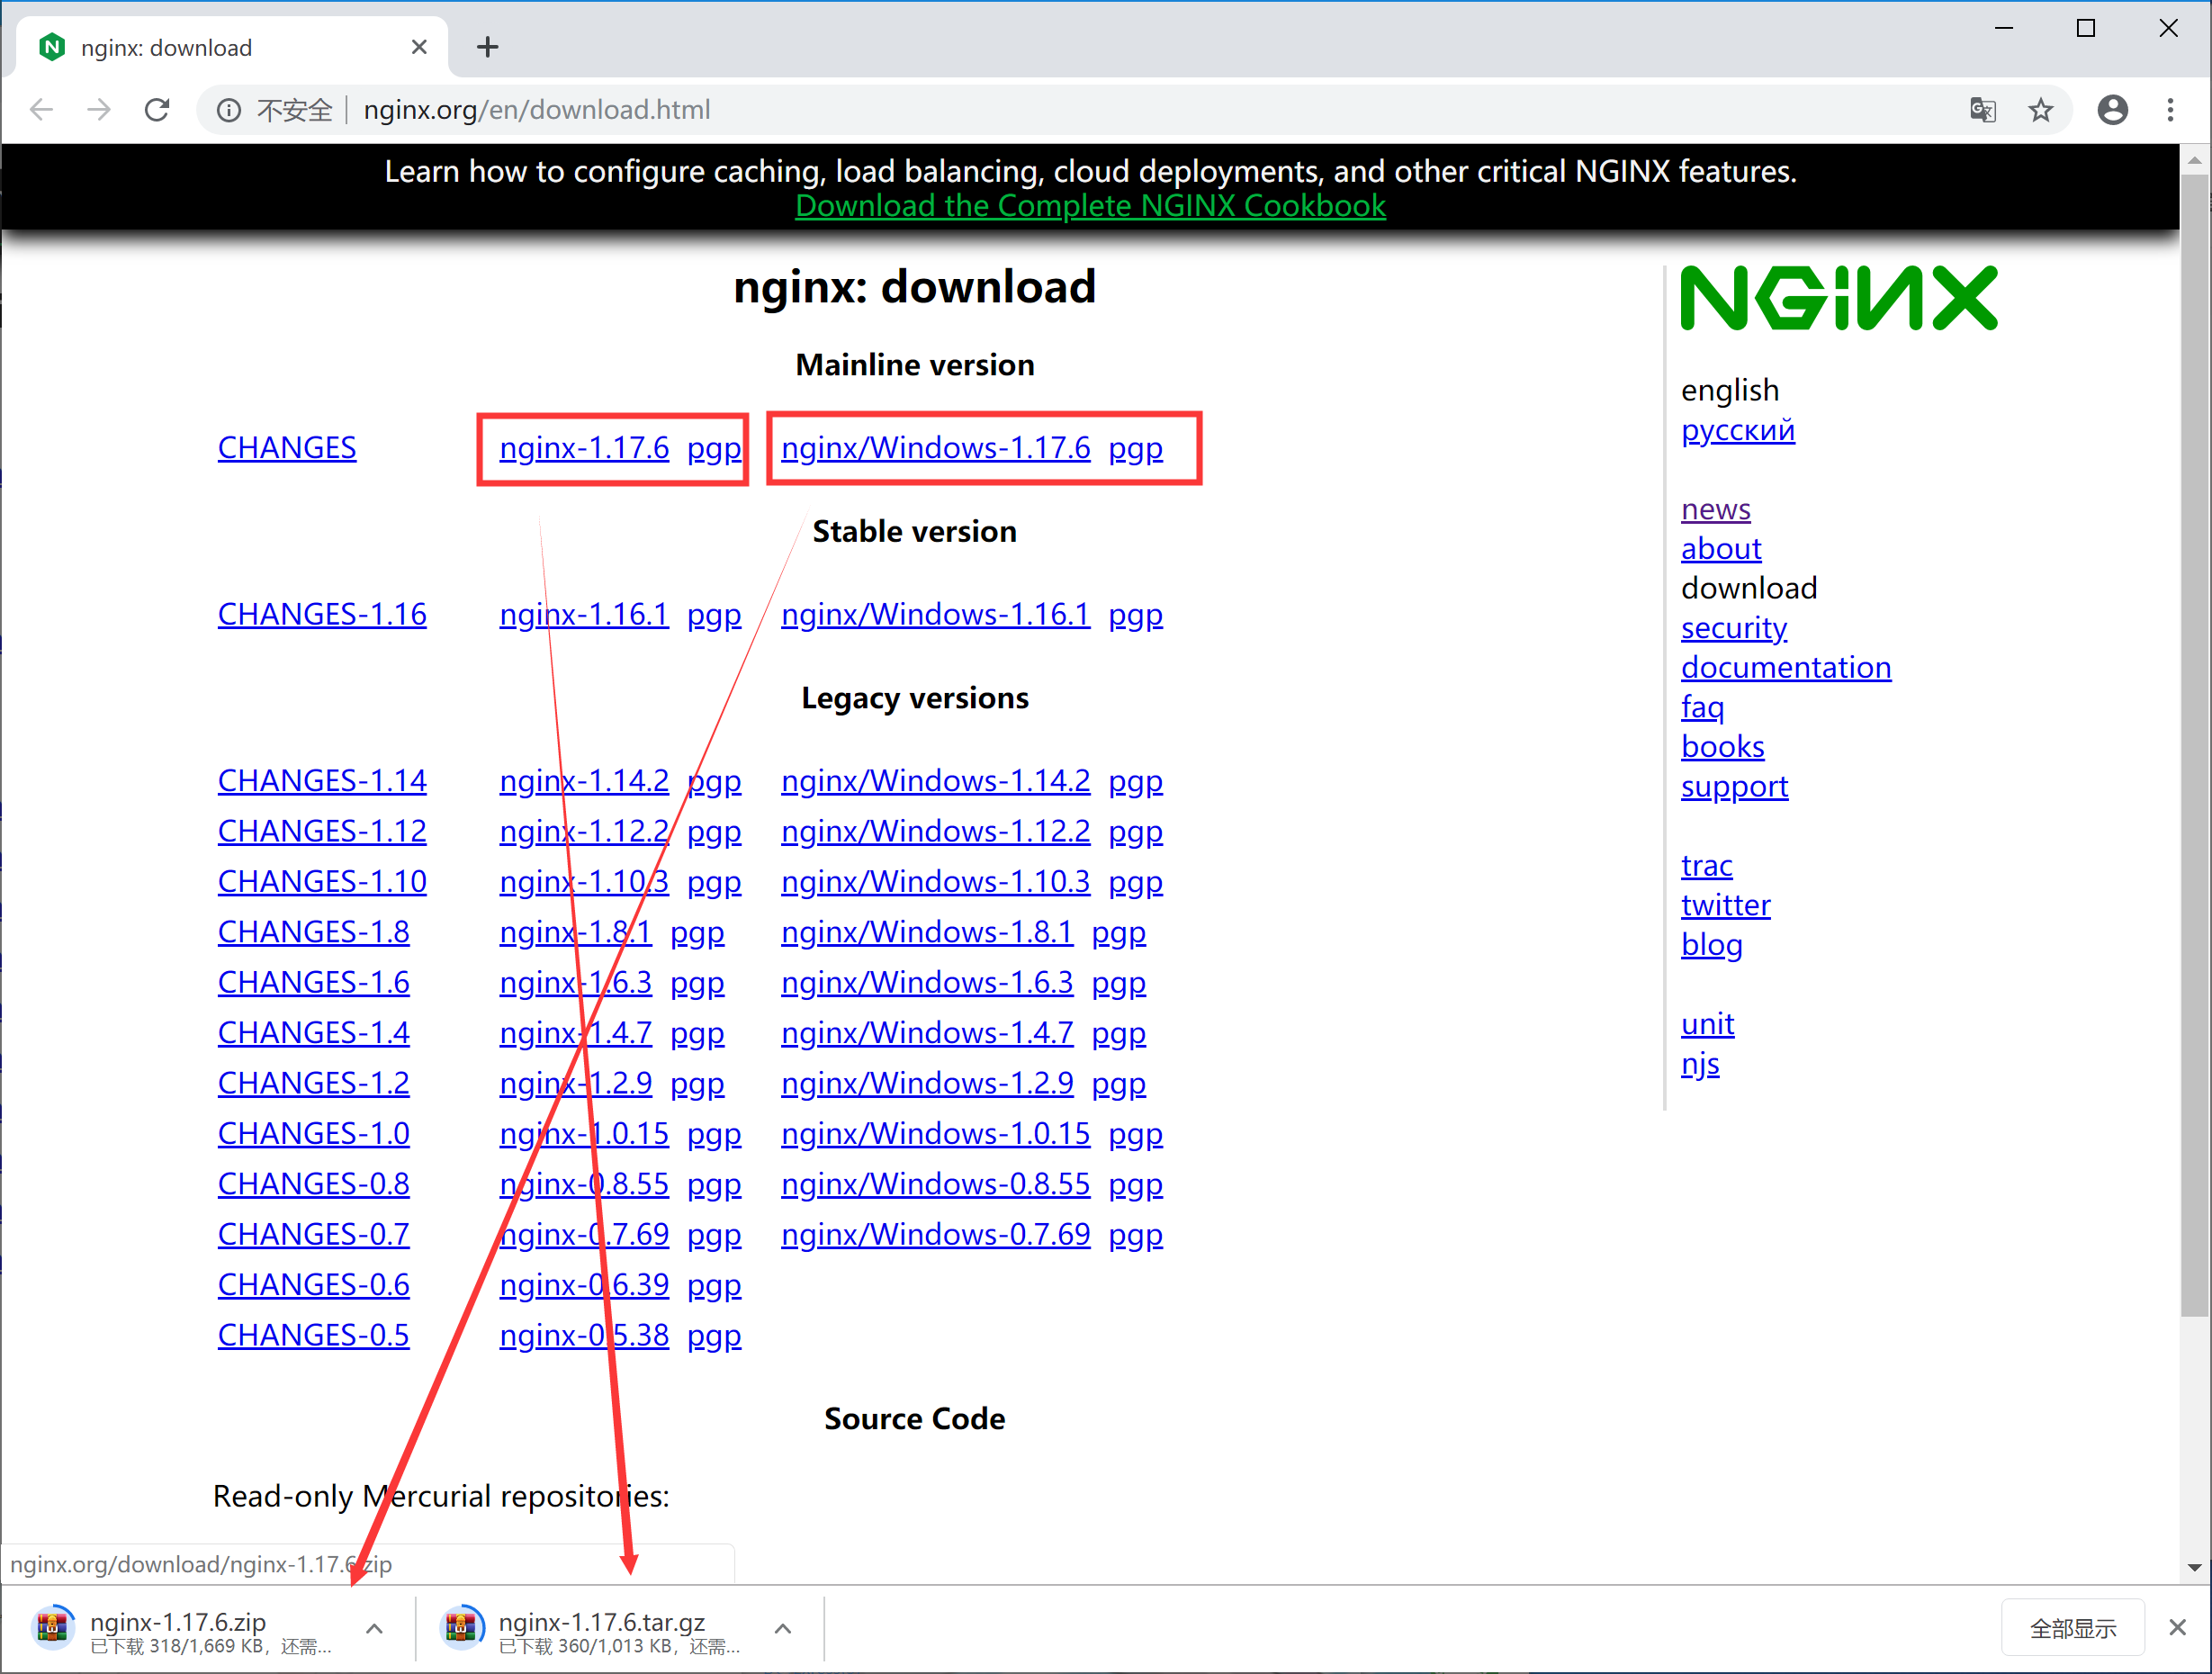
目录文件:
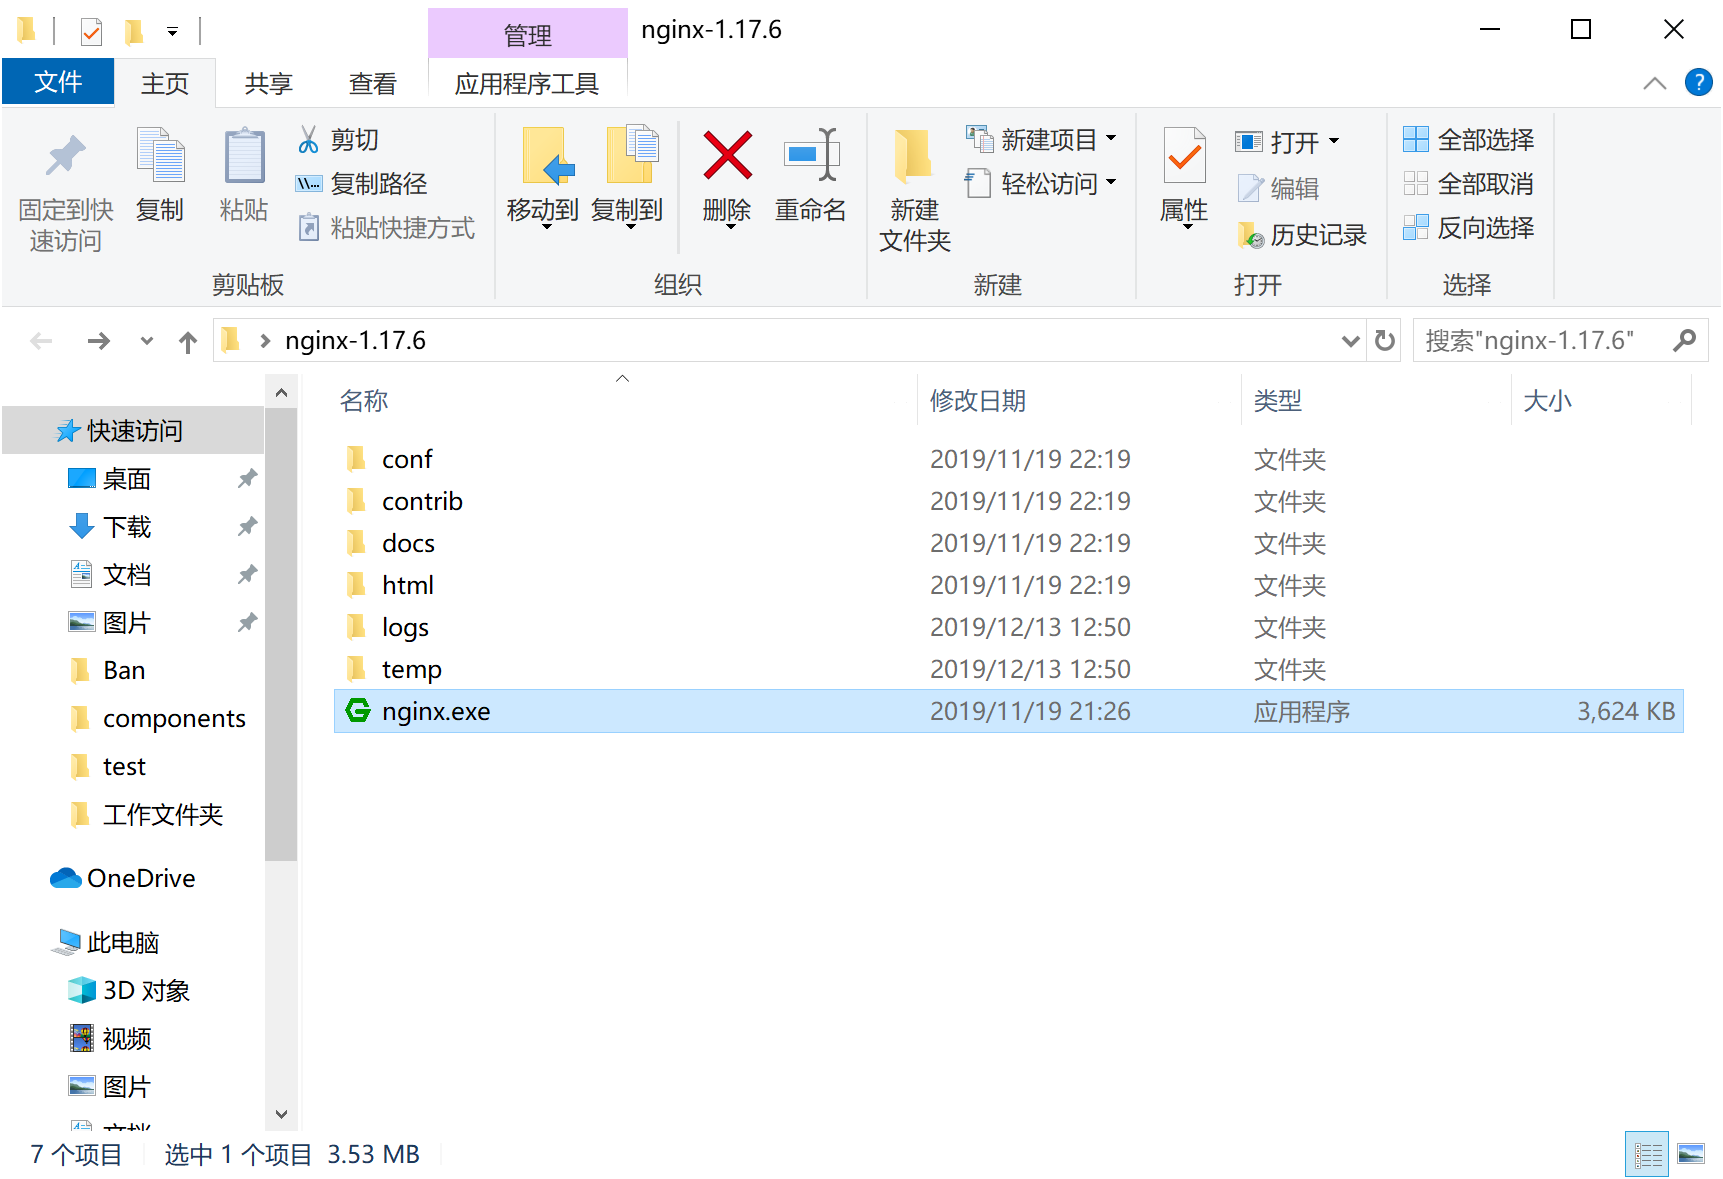
二、运行方式
(1)直接双击nginx.exe,双击后一个黑色的弹窗一闪而过
(2)打开cmd命令窗口,切换到nginx解压目录下,输入命令 nginx.exe 或者 start nginx ,回车即可
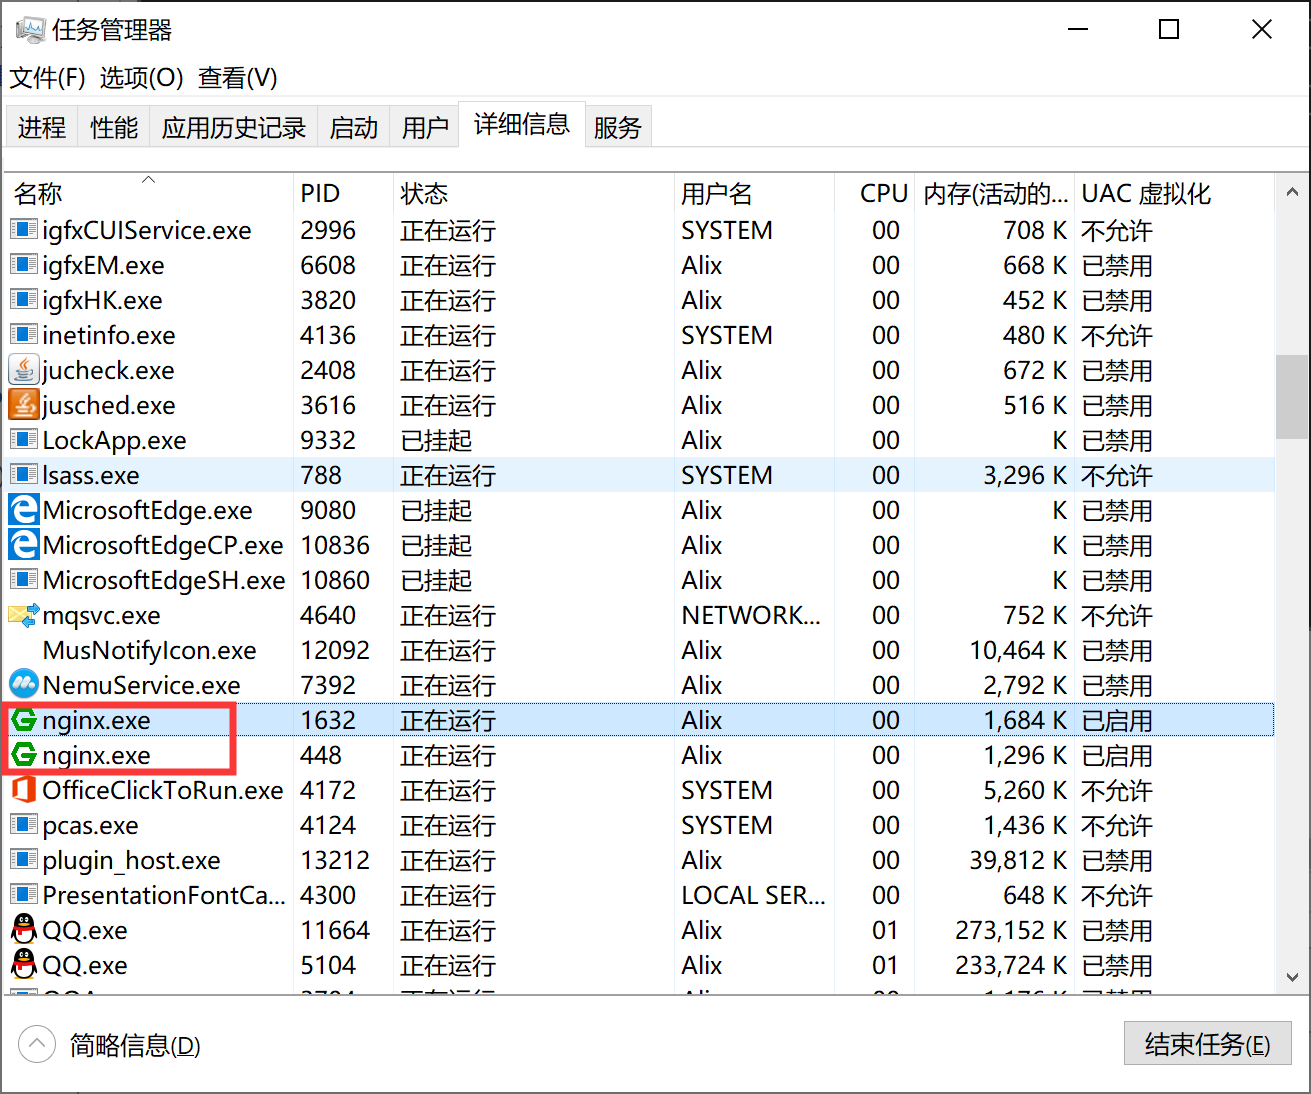
三、查看任务进程是否存在,dos或打开任务管理器都行
1、dos方式:
tasklist /fi "imagename eq nginx.exe"
如图:

2、任务管理器方式
打开任务管理器在进程中,打开详细信息里面能看到隐藏的nginx.exe进程
四、目录结构
如图所示:

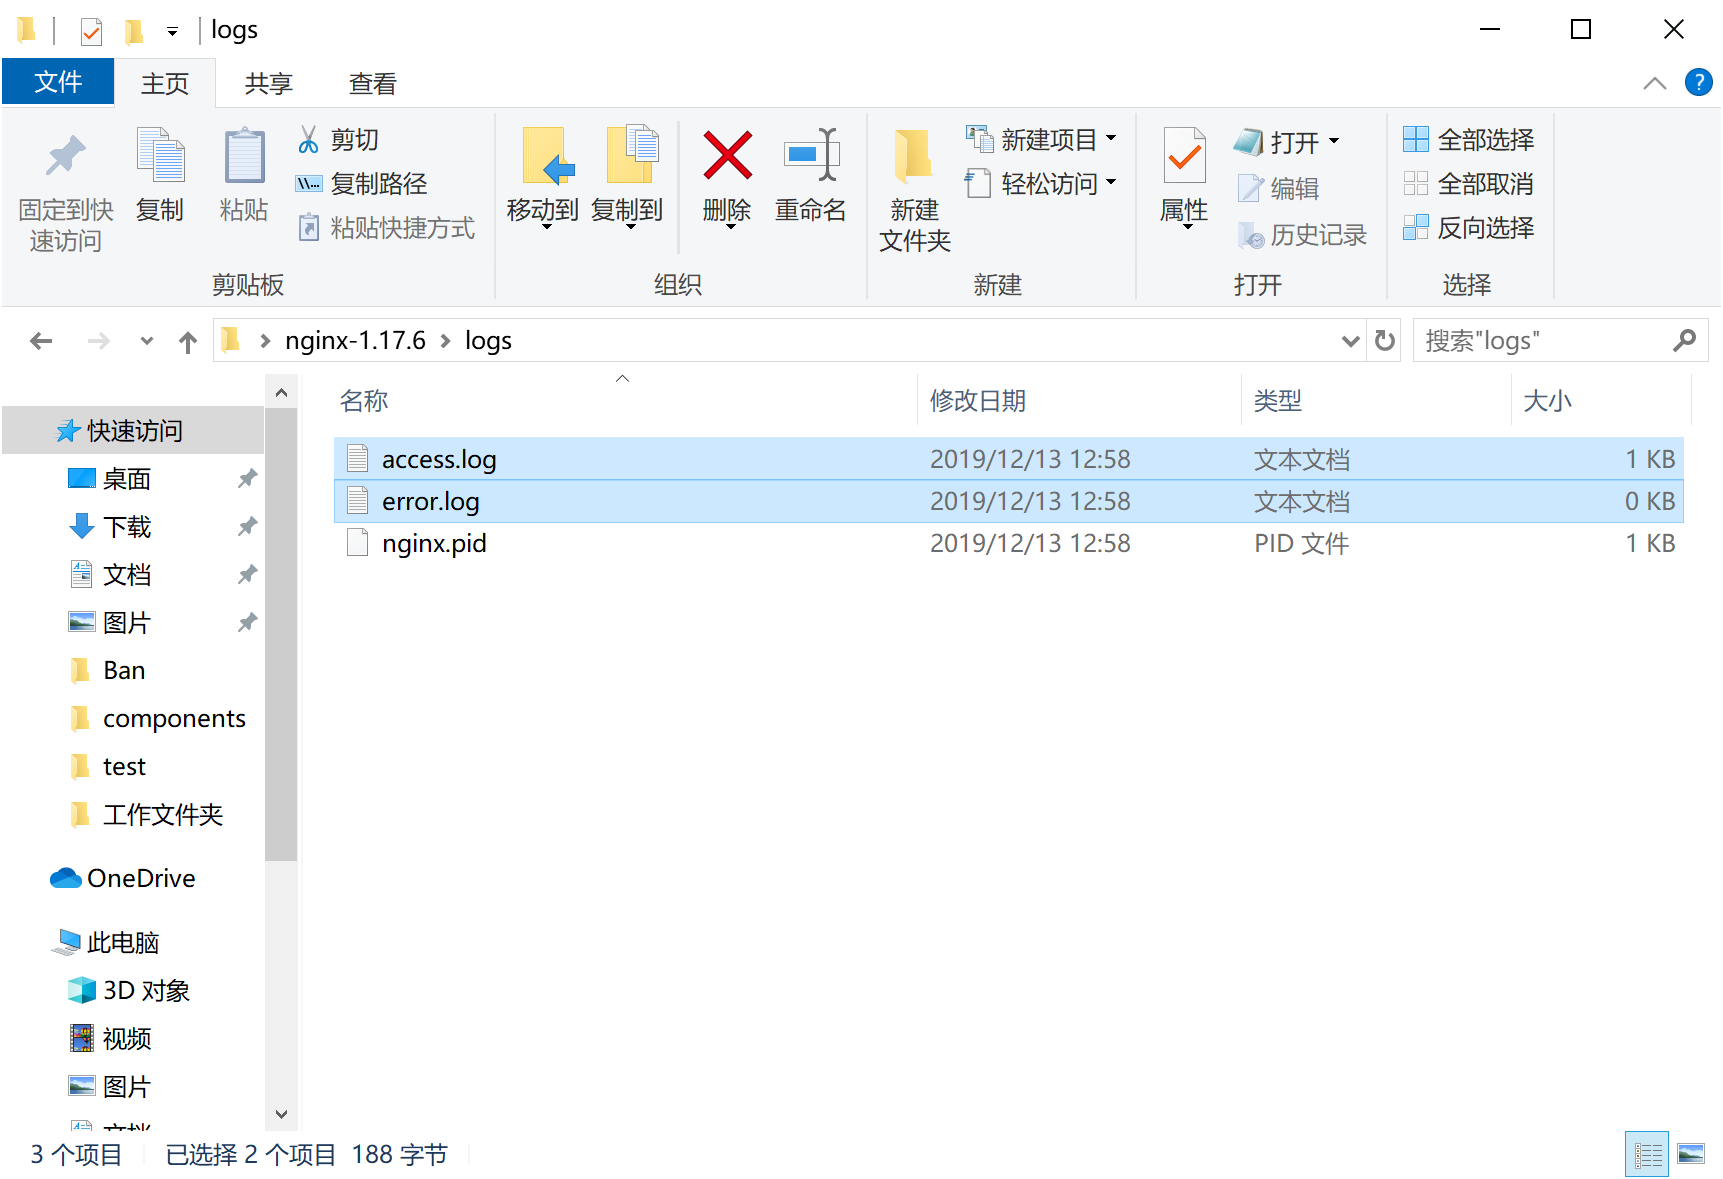
1、日志
在nginx目录中的logs文件夹下error.log是日志文件,access.log是请求日志文件
error.log常见的错误:
(1)端口号被占用
(2)nginx文件夹路径含中文
其他错误就详细看log中的描述
2、站点配置

3、nginx服务的配置文件
代码如下:
#user  nobody;

worker_processes  1;

#error_log  logs/error.log;

#error_log  logs/error.log  notice;

#error_log  logs/error.log  info;

#pid        logs/nginx.pid;

events {

    worker_connections  1024;

}

http {

    include       mime.types;

    default_type  application/octet-stream;

    #log_format  main  '$remote_addr - $remote_user [$time_local] "$request" '

    #                  '$status $body_bytes_sent "$http_referer" '

    #                  '"$http_user_agent" "$http_x_forwarded_for"';

    #access_log  logs/access.log  main;

    sendfile        on;

    #tcp_nopush     on;

    #keepalive_timeout  0;

    keepalive_timeout  65;

    #gzip  on;

    server {

        listen       80;

        server_name  localhost;

        #charset koi8-r;

        #access_log  logs/host.access.log  main;

        location / {

            root   html;

            index  index.html index.htm;

        }

        #error_page  404              /404.html;

        # redirect server error pages to the static page /50x.html

        #

        error_page   500 502 503 504  /50x.html;

        location = /50x.html {

            root   html;

        }

        # proxy the PHP scripts to Apache listening on 127.0.0.1:80

        #

        #location ~ \.php$ {

        #    proxy_pass   http://127.0.0.1;

        #}

        # pass the PHP scripts to FastCGI server listening on 127.0.0.1:9000

        #

        #location ~ \.php$ {

        #    root           html;

        #    fastcgi_pass   127.0.0.1:9000;

        #    fastcgi_index  index.php;

        #    fastcgi_param  SCRIPT_FILENAME  /scripts$fastcgi_script_name;

        #    include        fastcgi_params;

        #}

        # deny access to .htaccess files, if Apache's document root

        # concurs with nginx's one

        #

        #location ~ /\.ht {

        #    deny  all;

        #}

    }

    # another virtual host using mix of IP-, name-, and port-based configuration

    #

    #server {

    #    listen       8000;

    #    listen       somename:8080;

    #    server_name  somename  alias  another.alias;

    #    location / {

    #        root   html;

    #        index  index.html index.htm;

    #    }

    #}

    # HTTPS server

    #

    #server {

    #    listen       443 ssl;

    #    server_name  localhost;

    #    ssl_certificate      cert.pem;

    #    ssl_certificate_key  cert.key;

    #    ssl_session_cache    shared:SSL:1m;

    #    ssl_session_timeout  5m;

    #    ssl_ciphers  HIGH:!aNULL:!MD5;

    #    ssl_prefer_server_ciphers  on;

    #    location / {

    #        root   html;

    #        index  index.html index.htm;

    #    }

    #}

}
简化如下:
worker_processes  1;

events {

    worker_connections  1024; #1、worker进程连接数量

}

http {

    include       mime.types; #2、include表示纳入mime.types文件的配置

    default_type  application/octet-stream;

    #3、default_type如果Web程序没设置,Nginx也没找到对应文件的扩展名的话,就使用默认的Type,这个在Nginx 里用 default_type定义: default_type application/octet-stream,这是应用程序文件类型的默认值。

    sendfile        on;

    #4、sendfile: 设置为on表示启动高效传输文件的模式。sendfile可以让Nginx在传输文件时直接在磁盘和tcp socket之间传输数据。如果这个参数不开启,会先在用户空间(Nginx进程空间)申请一个buffer,用read函数把数据从磁盘读到cache,再从cache读取到用户空间的buffer,再用write函数把数据从用户空间的buffer写入到内核的buffer,最后到tcp socket。开启这个参数后可以让数据不用经过用户buffer。

    keepalive_timeout  65; #5、链接超时Nginx 返回 HTTP 408(Request Timed Out)。

    #6、服务配置

    server {

        listen       80;

        server_name  localhost;

        location / {

            root   html;

            index  index.html index.htm;

        }

        error_page   500 502 503 504  /50x.html;

        location = /50x.html {

            root   html;

        }

    }

}
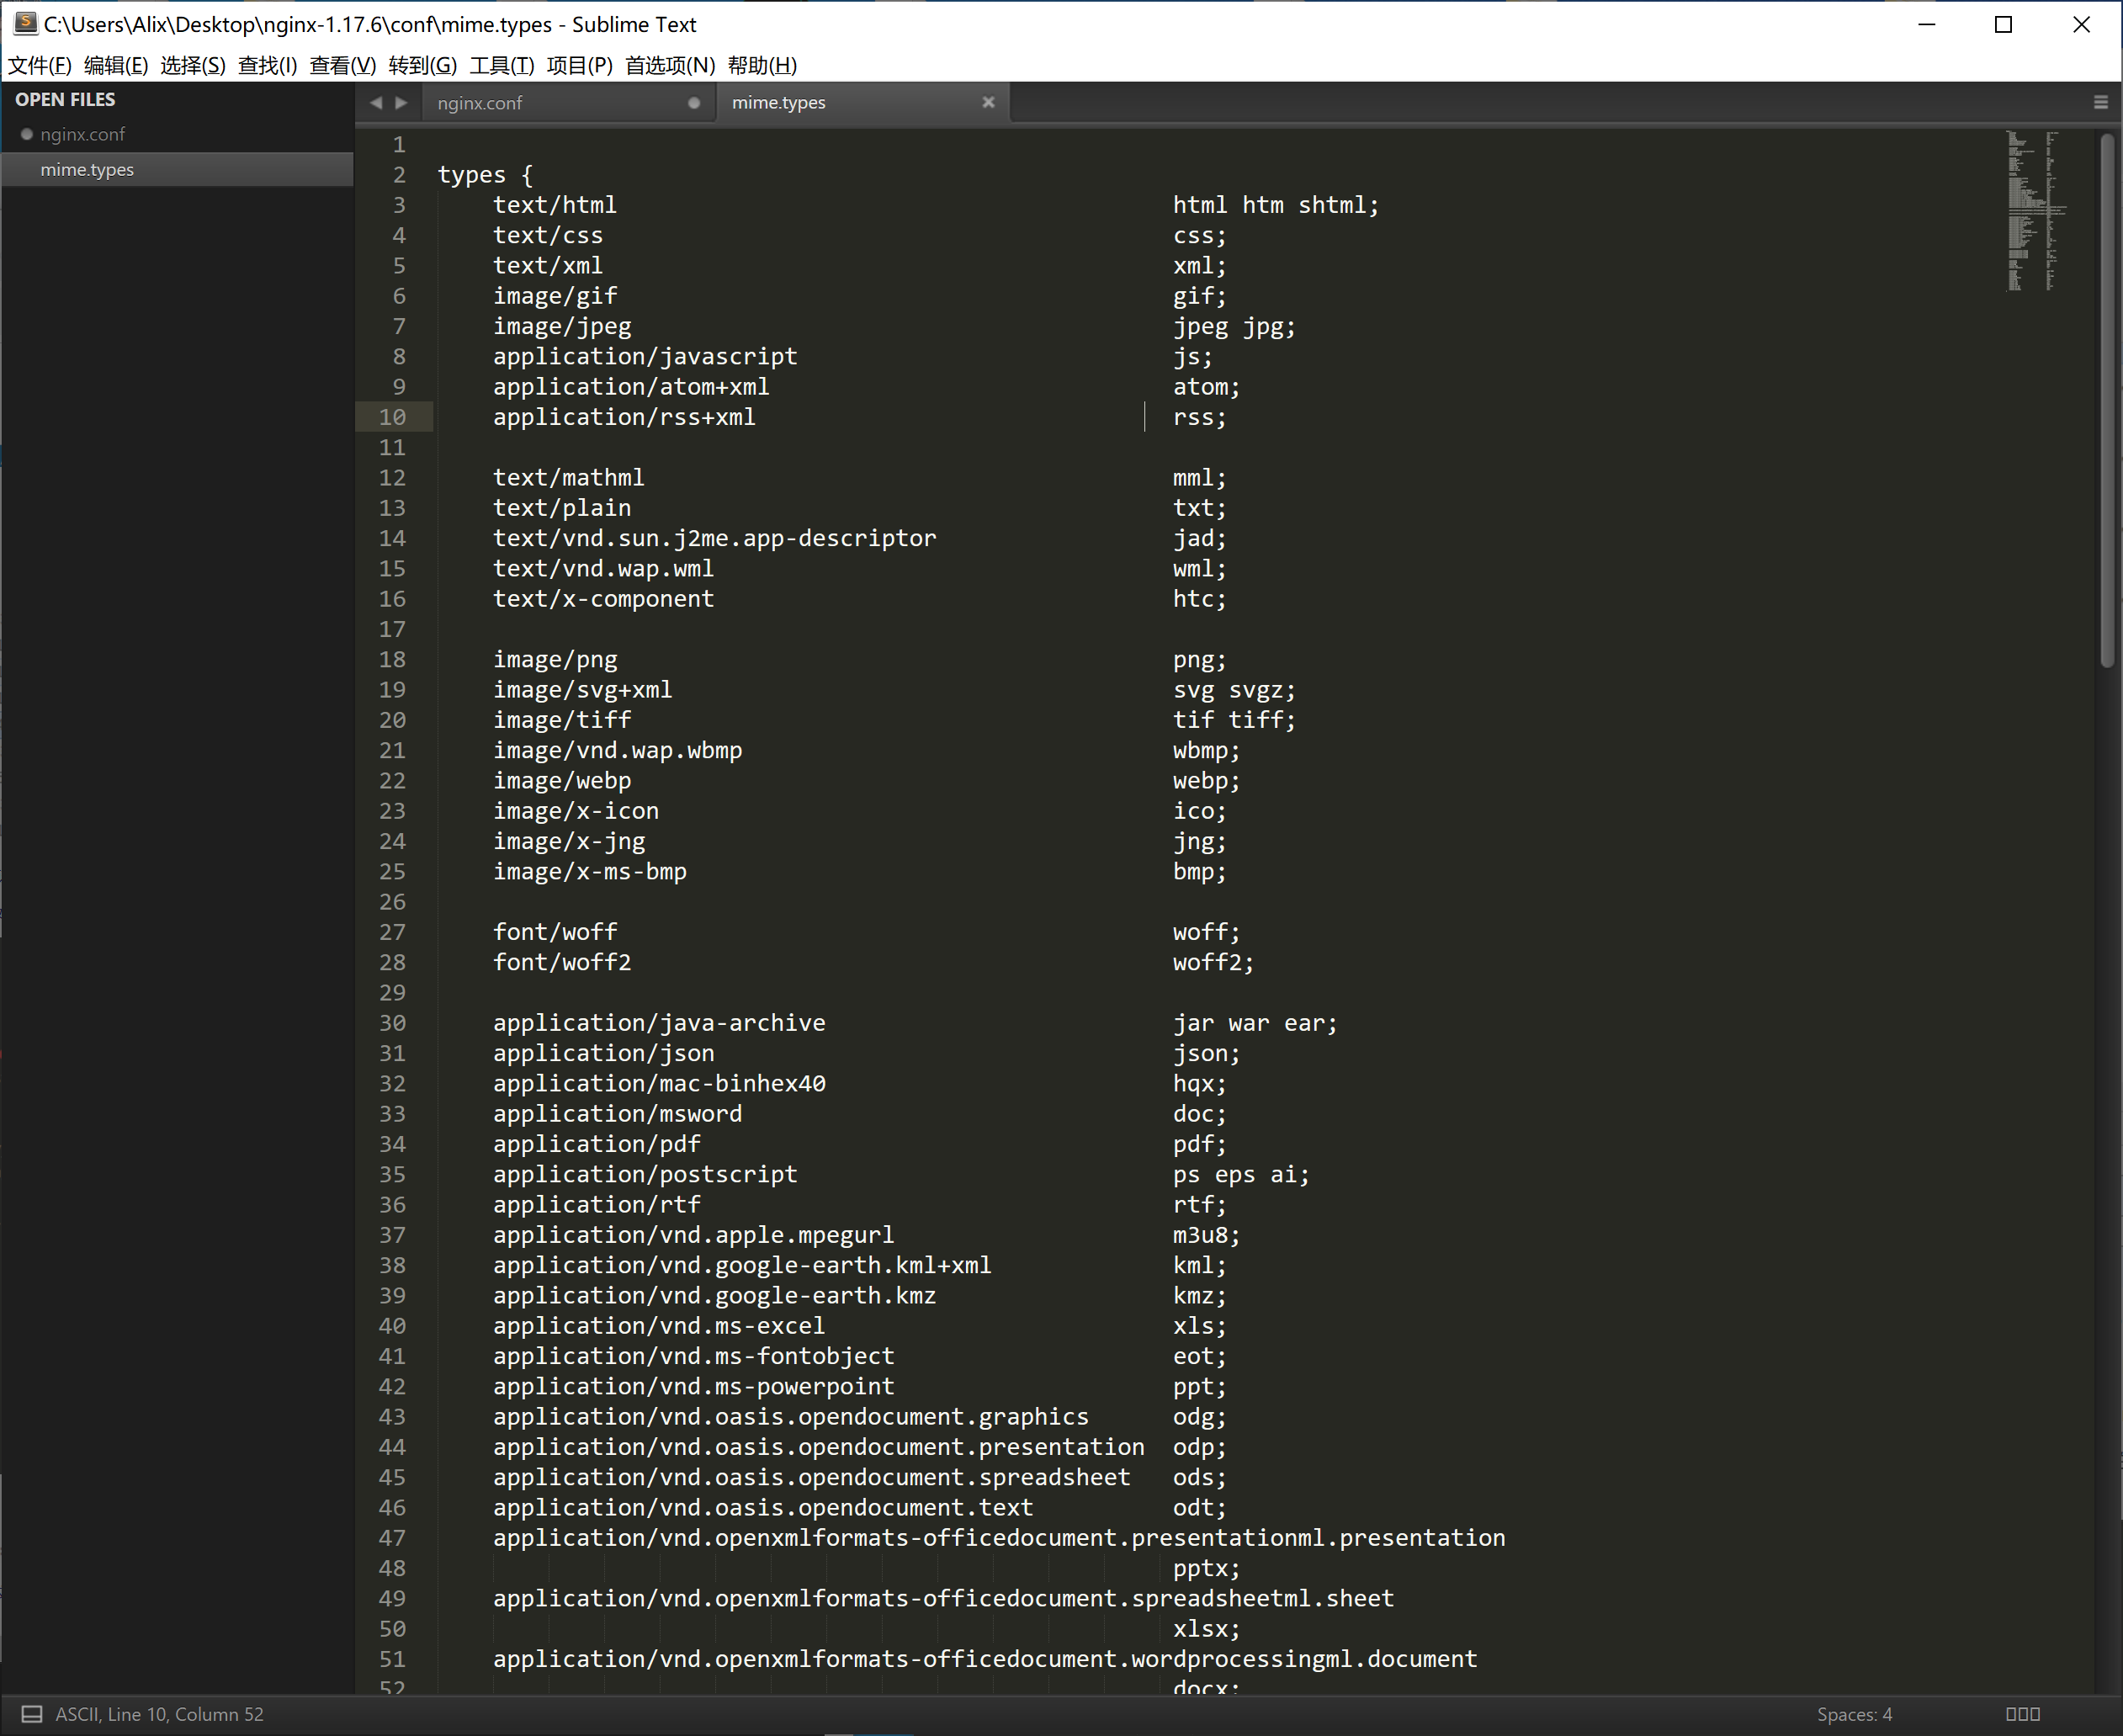
mime.types文件

包含文件类型如下:
4、多站点配置(基于域名的配置,使用不同的域名来访问)
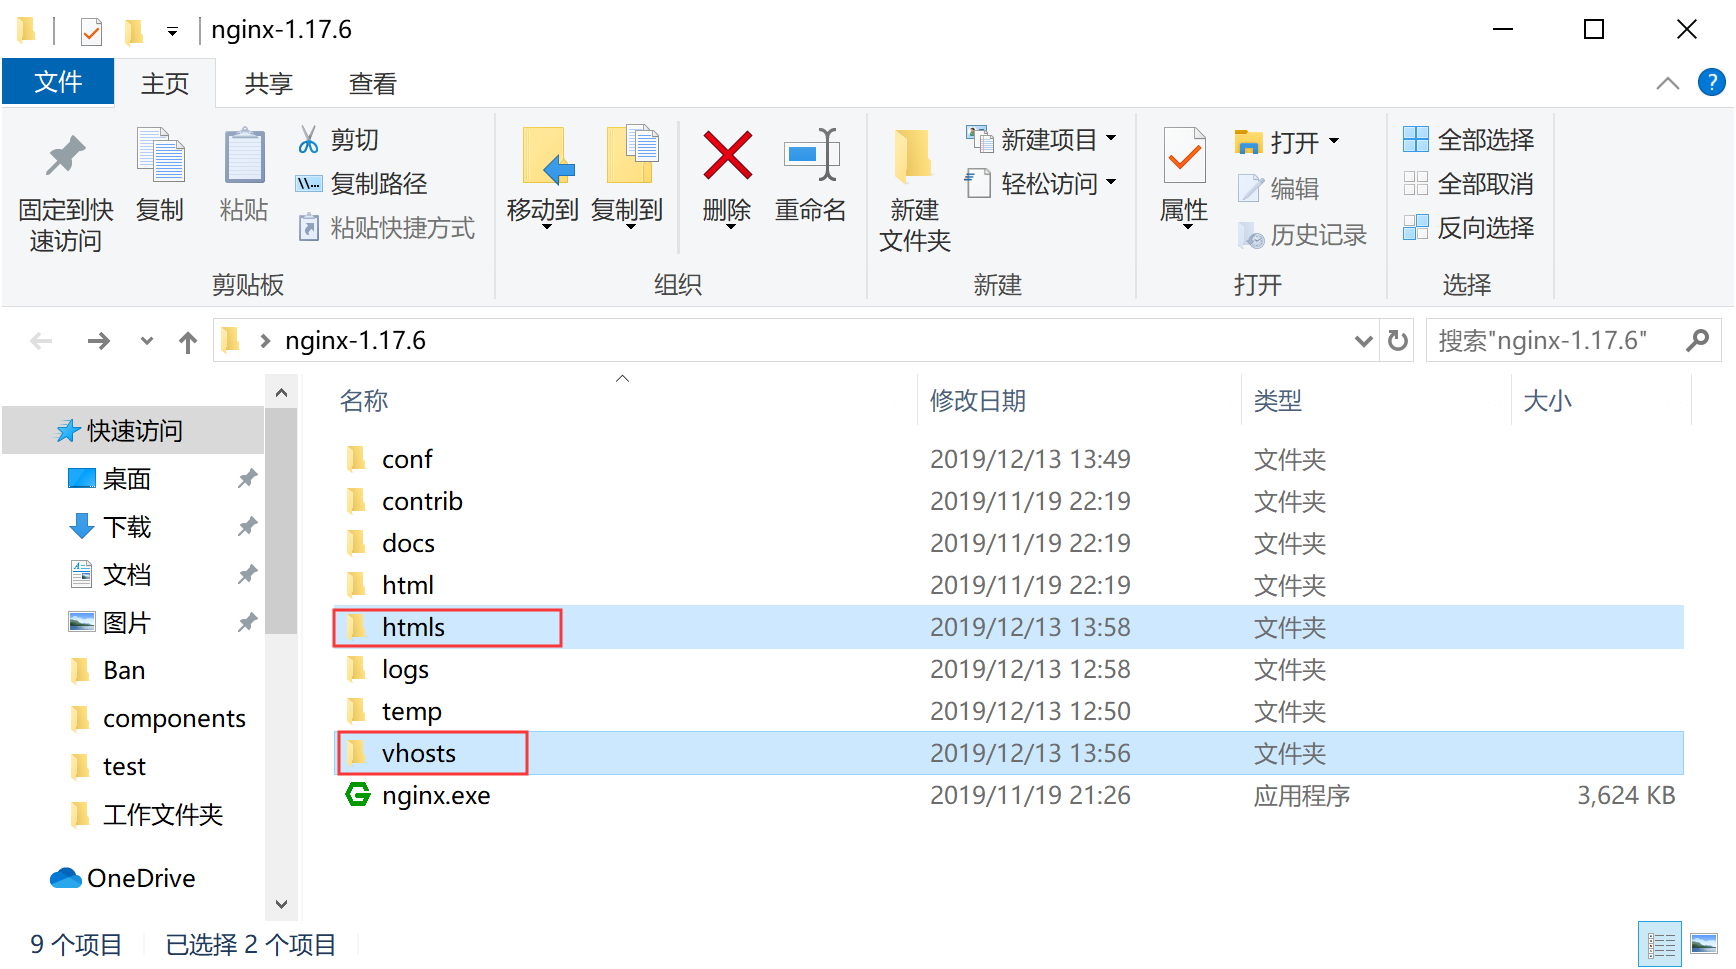
1、分别创建vhosts、和htmls文件夹
如图:
2、在创建vhosts文件夹里面创建*.conf文件(域名对应一个.conf文件)
如图:

代码如下:
server

{

    listen 80;

    server_name www.logr.cn;

    location / {

        root   C:\Users\Alix\Desktop\nginx-1.17.6\htmls; #静态文件目录

        index index.php index.html index.htm default.php default.htm default.html; //默认访问文件

    }

}
3、在创建htmls文件夹里面放入index.html文件
如图:

4、nginx.conf 在配置文件中更改引入(http下引入配置文件*.conf即等同于添加一个server服务)
worker_processes  1;

events {

    worker_connections  1024;

}

http {

    include       mime.types;

    default_type  application/octet-stream;

    sendfile        on;

    keepalive_timeout  65;

    include ../vhosts/*.conf; #包含vhosts目录的所有站点配置文件

    server {

        listen       80;

        server_name  localhost;

        location / {

            root   html;

            index  index.html index.htm;

        }

        error_page   500 502 503 504  /50x.html;

        location = /50x.html {

            root   html;

        }

    }

}
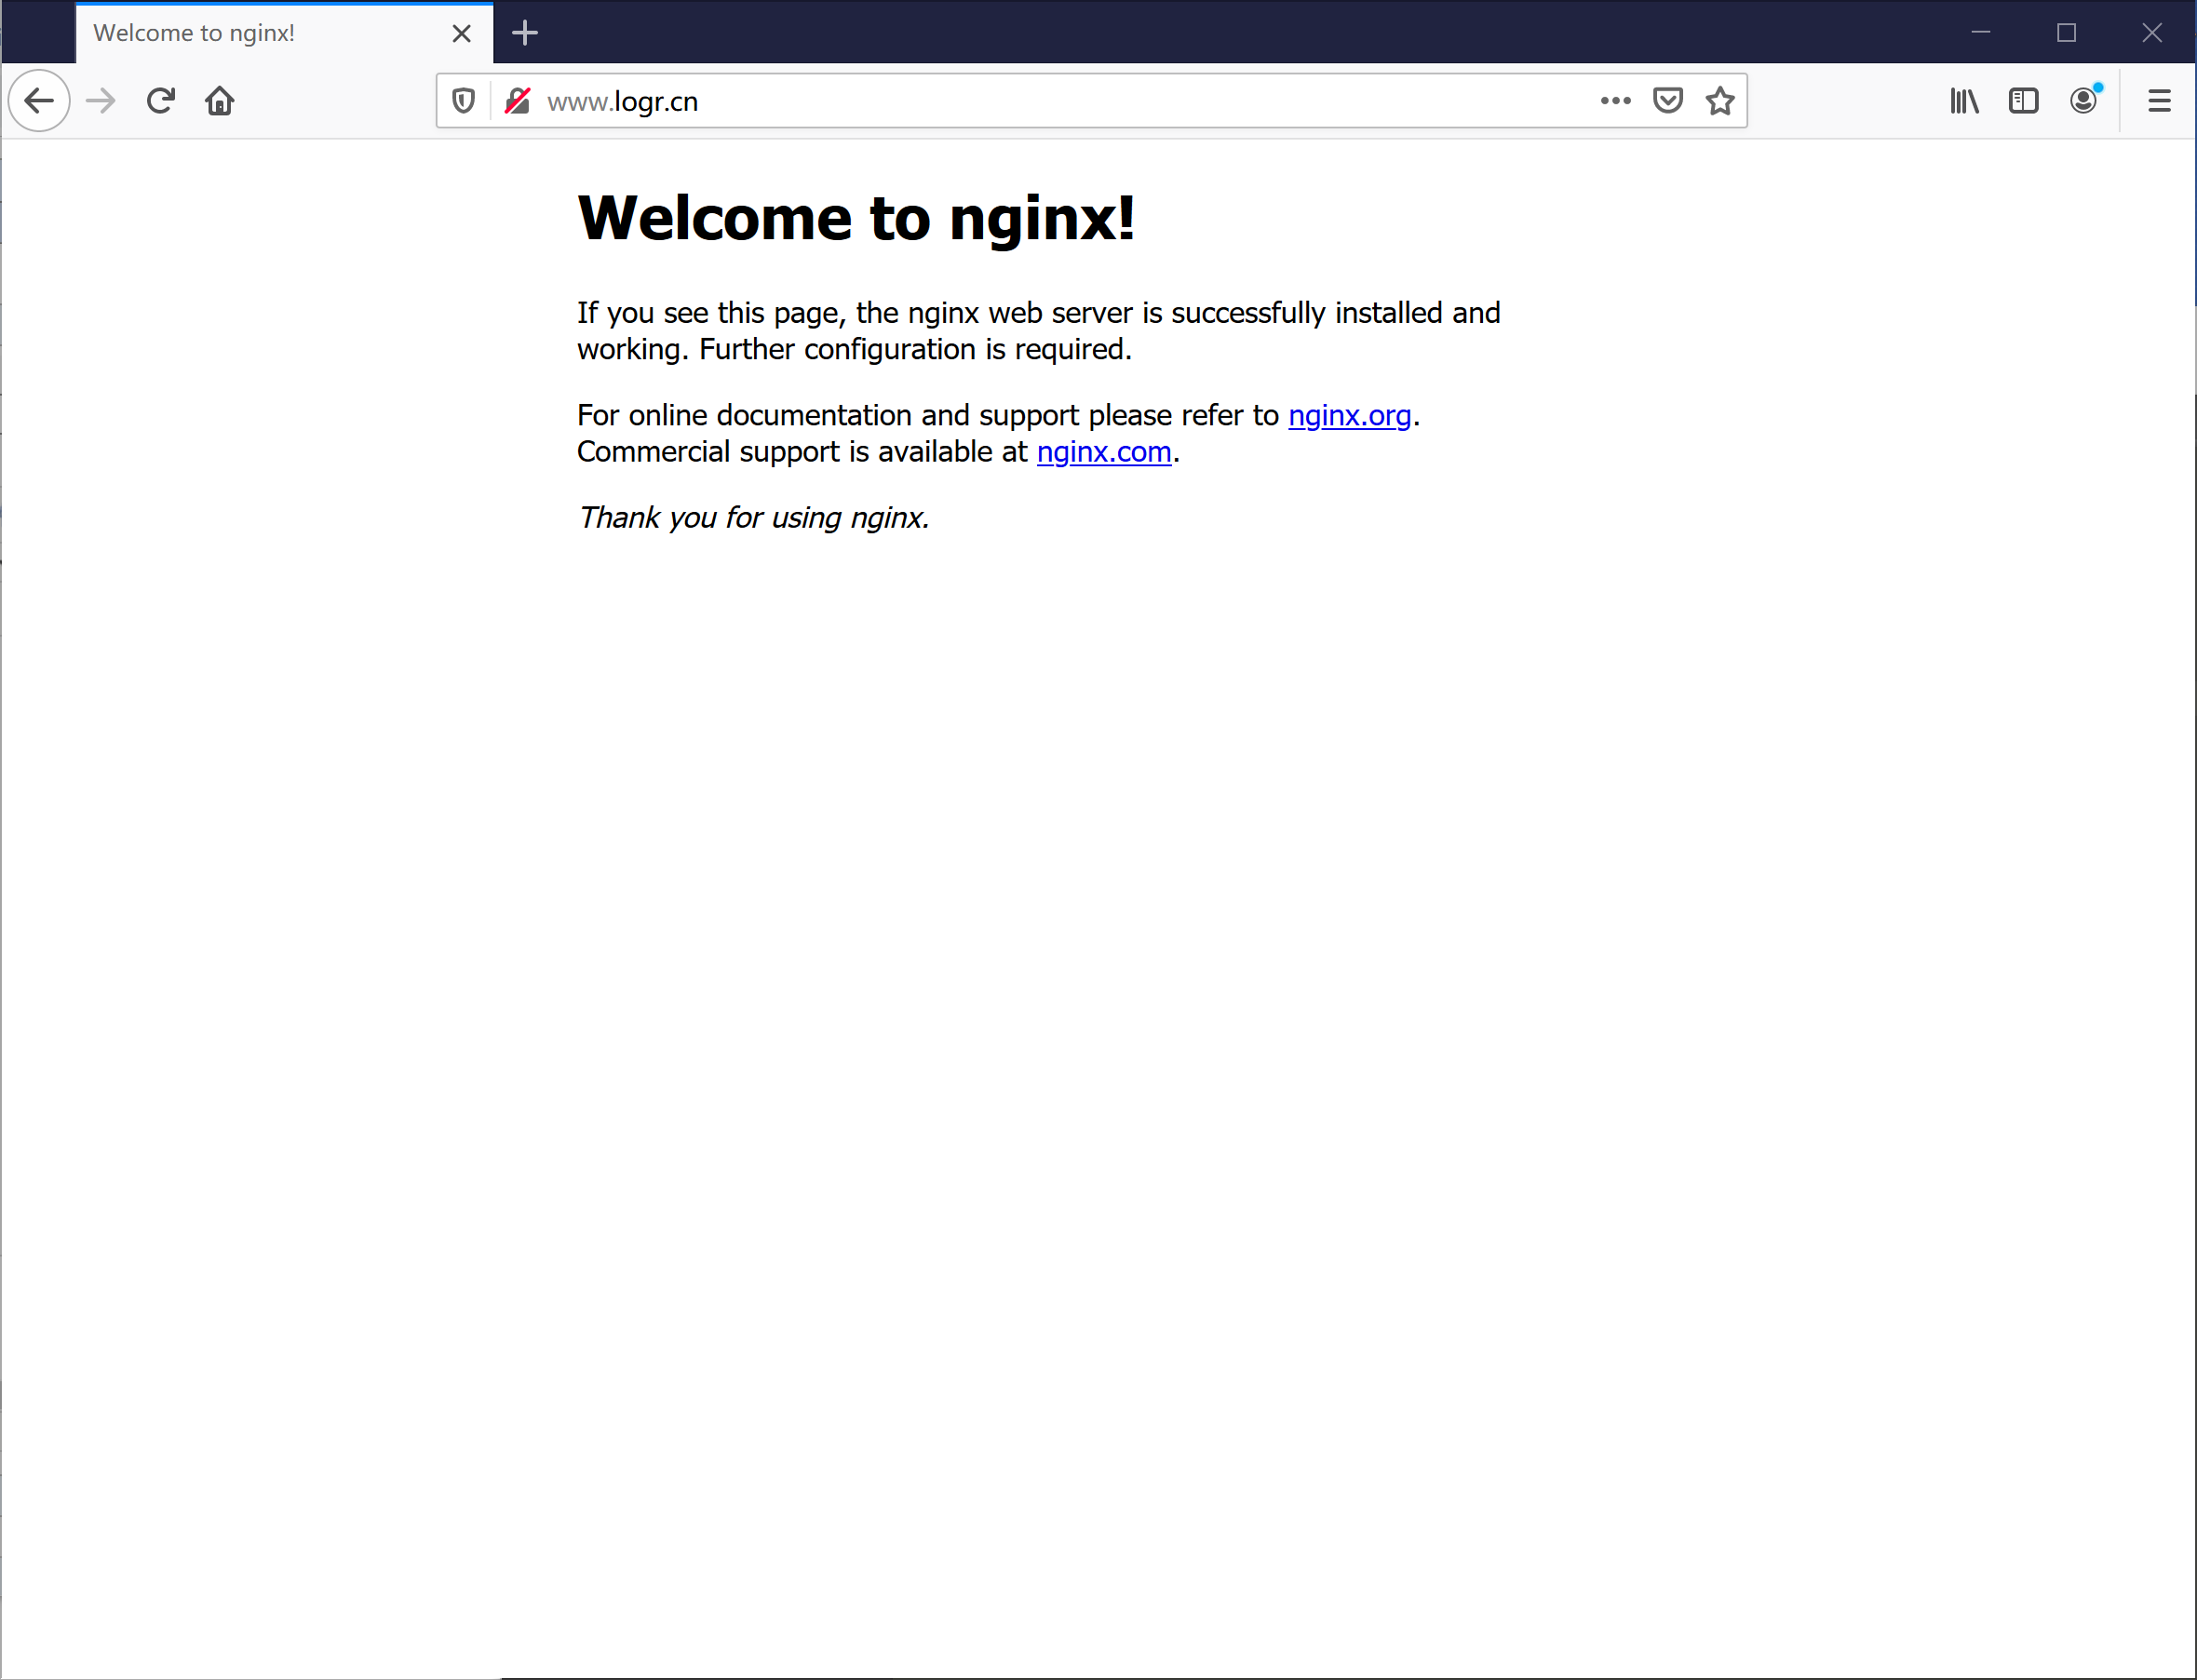
预览效果:
注意:
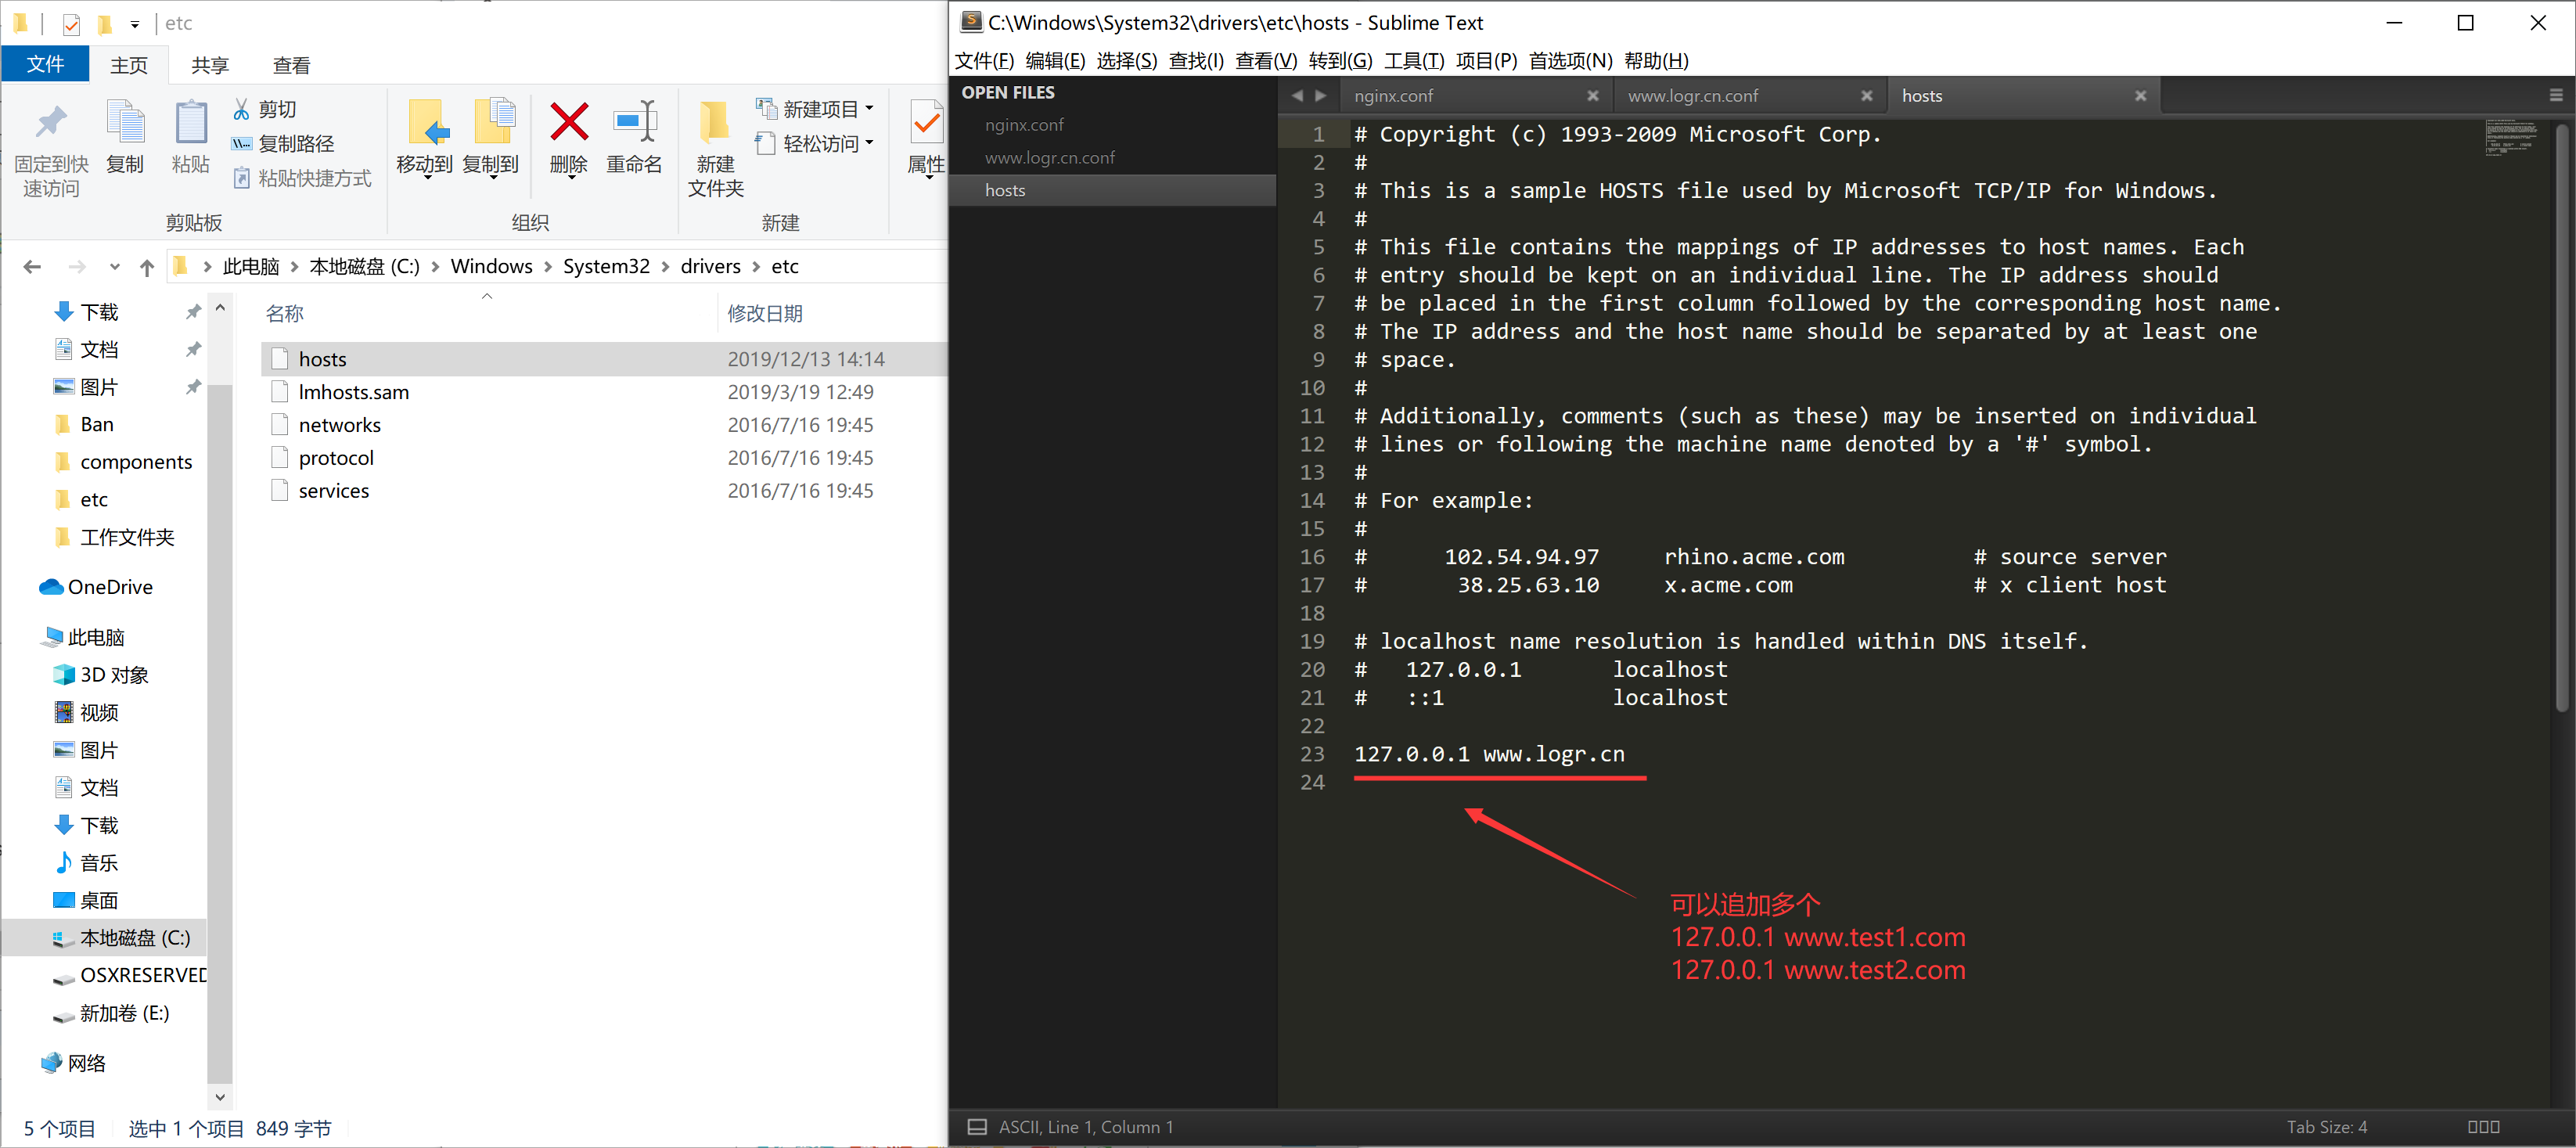
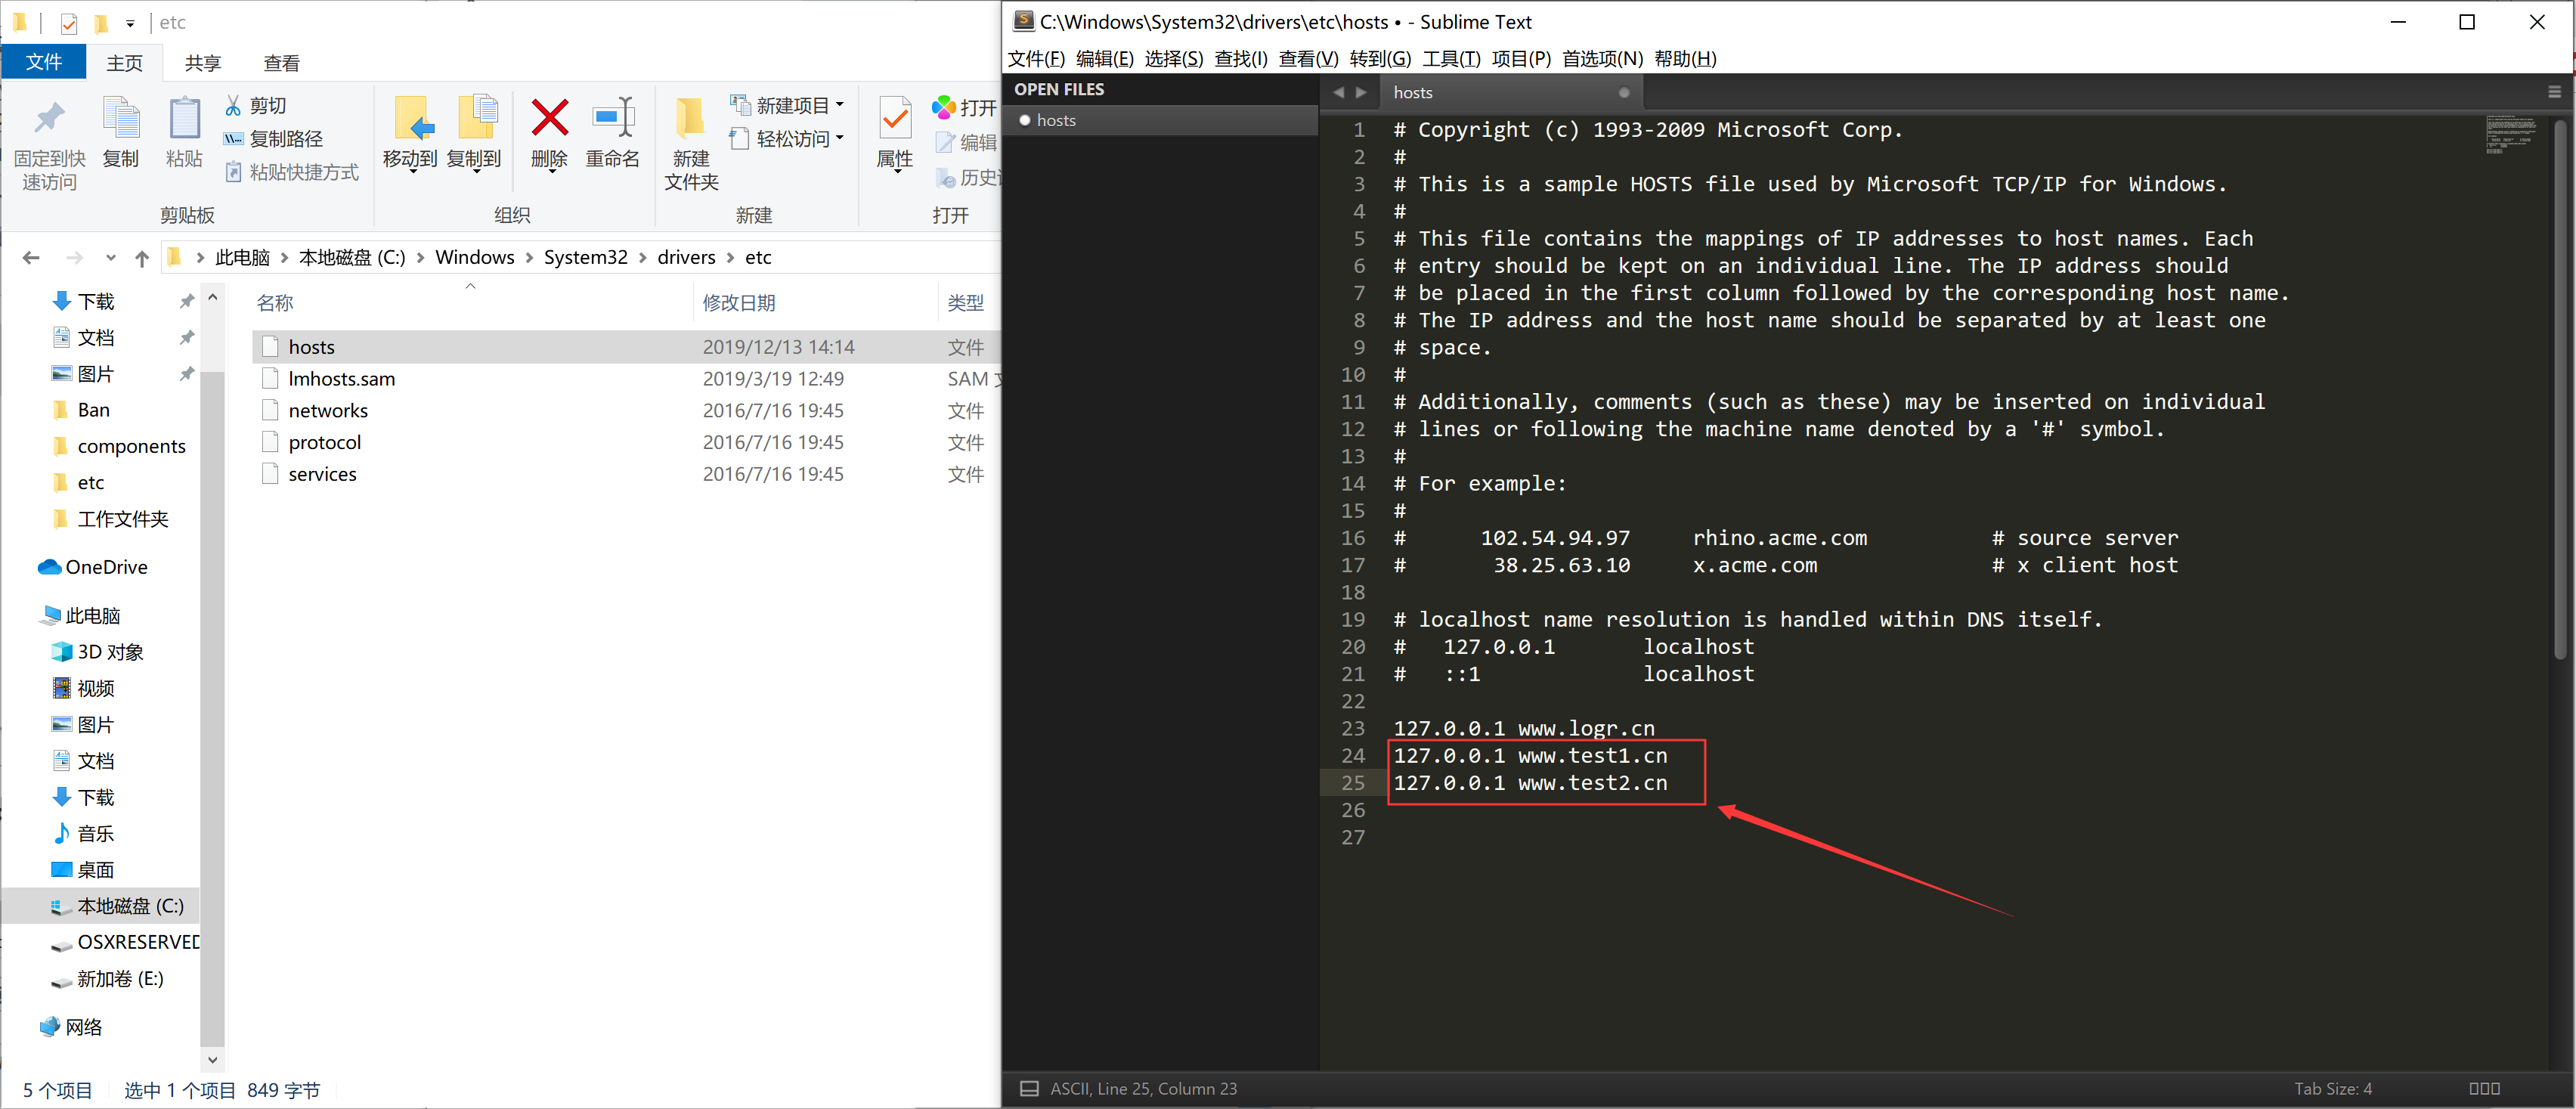
修改hosts文件
C:\Windows\System32\drivers\etc\hosts
127.0.0.1 www.logr.cn
如图:
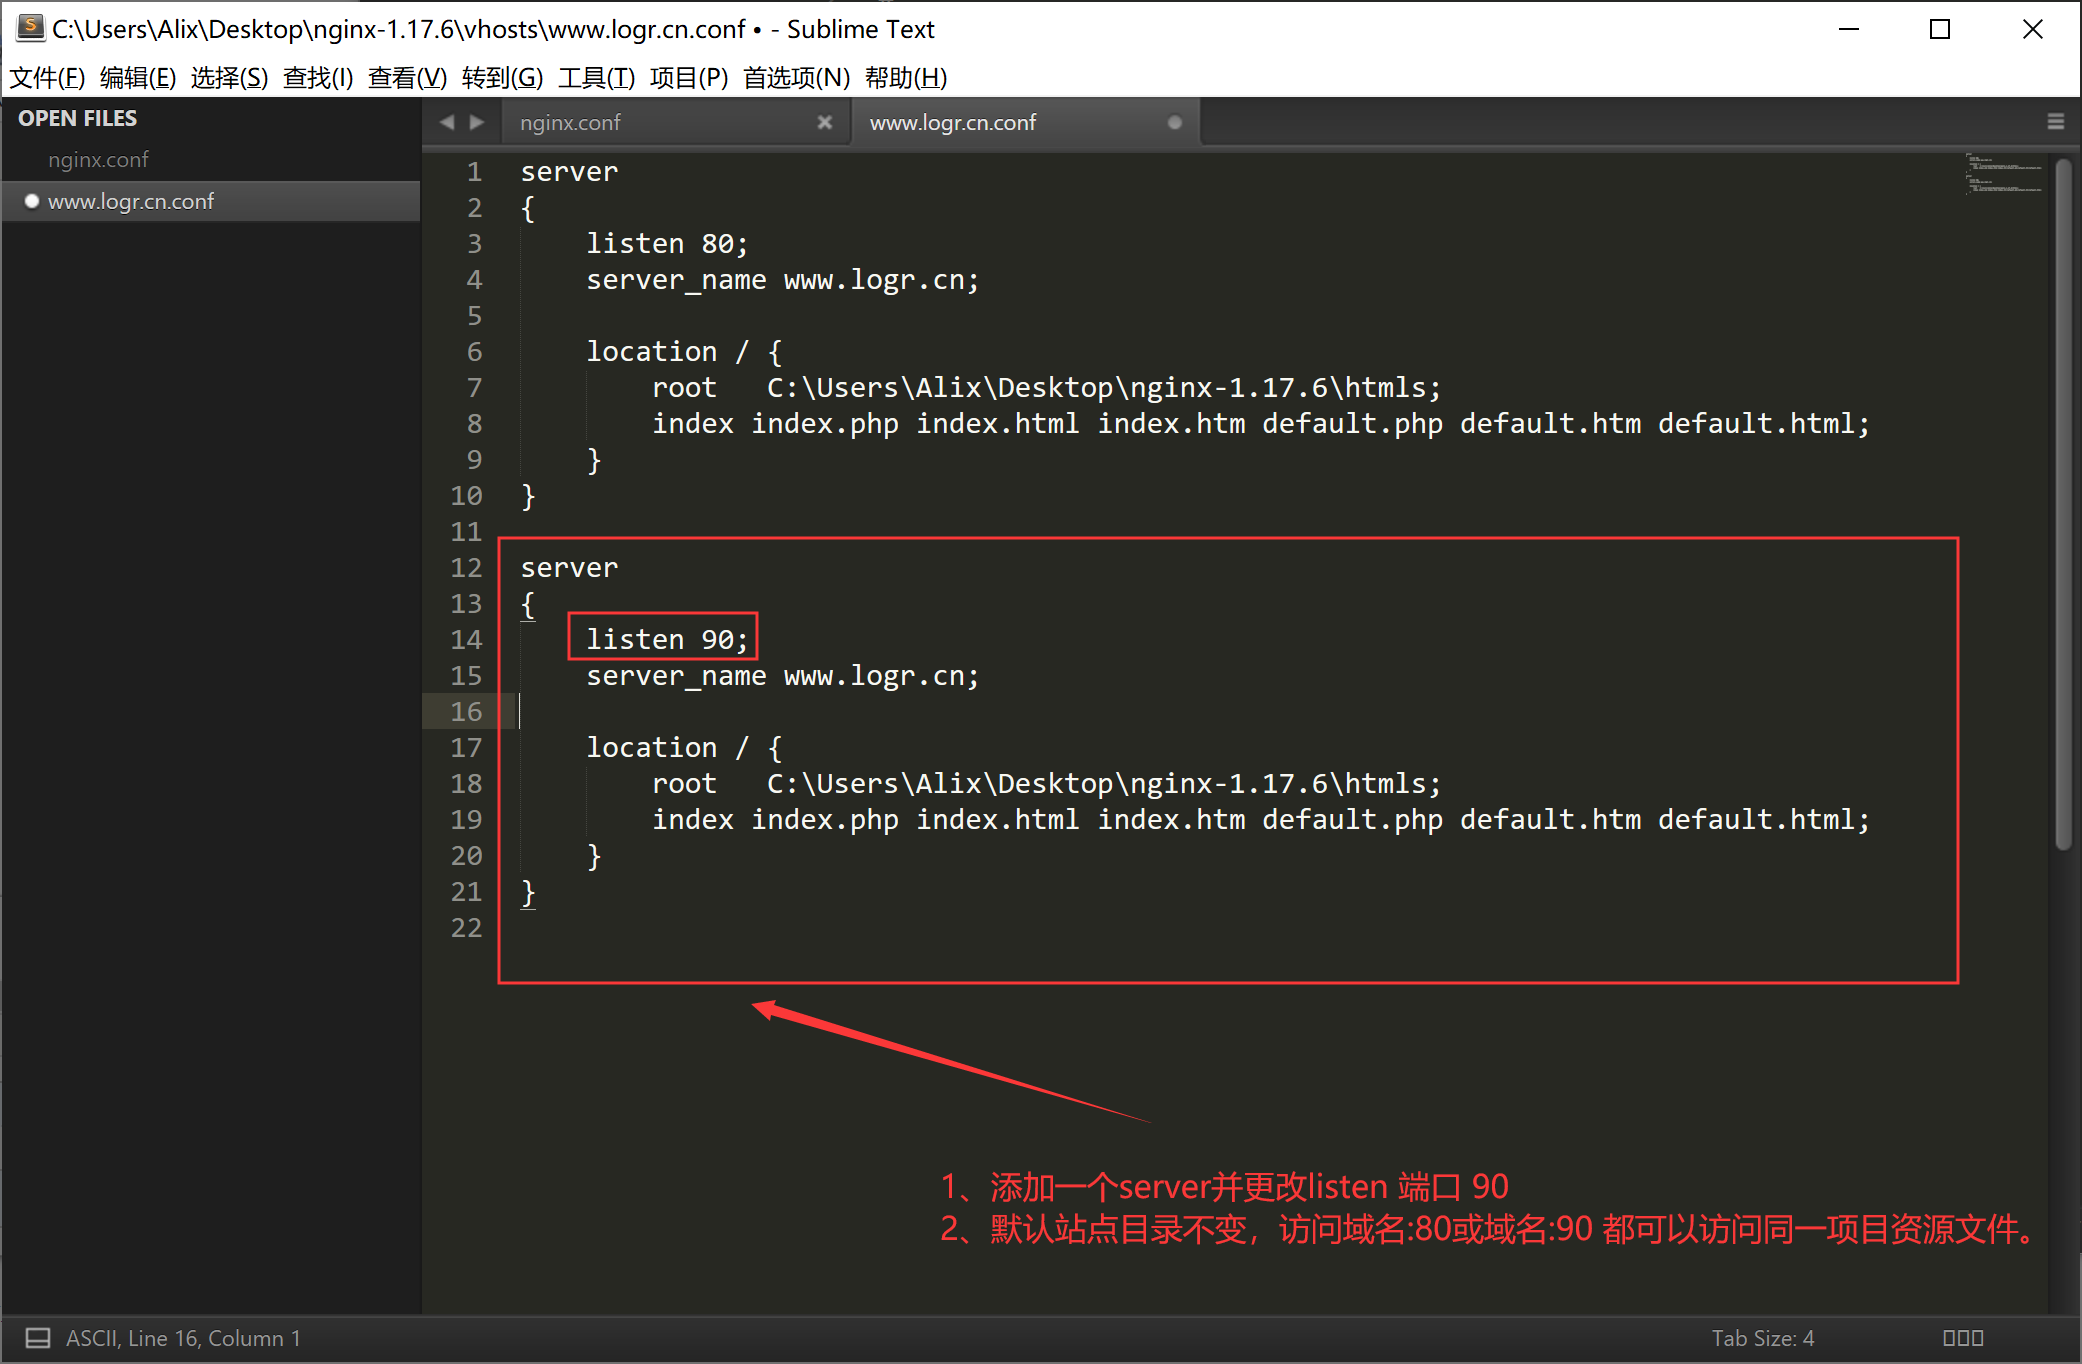
4、多站点配置(基于多端口的配置)
1、win下追加域名访问
2、更改配置文件
最新文章
- [算法]——归并排序(Merge Sort)
- HTML 学习笔记 JQuery(DOM 操作)
- LA4287--tarjan
- MySQL多配置方式的多实例的部署
- inconsistent line count calculation in projection snapshot
- YII2框架动态创建表模型
- hdu1839之二分+邻接表+Dijkstra+队列优化
- Centos6.3 配置yum 163源
- atitit.团队建设--要不要招技术储备人才的问题
- Angular中ngModel的$render的详解
- TP5框架,开源小程序商城源码,前端+后台完整版
- Window下Eclipse+Tomcat远程调试
- VScode查找替换常用正则表达式
- MYSQL ERROR 1045 (28000) Access denied for user (using password YES)问题的解决
- atom 的使用插件
- mysql时间日期操作
- P3690 【模板】Link Cut Tree (动态树)
- java异常与spring事务关系的知识点查漏补缺
- IDEA中的git更新项目
- codeforces 407D Largest Submatrix 3