Spring (五):AOP
2024-10-08 20:03:30
本文是按照狂神说的教学视频学习的笔记,强力推荐,教学深入浅出一遍就懂!b站搜索狂神说或点击下面链接
https://space.bilibili.com/95256449?spm_id_from=333.788.b_765f7570696e666f.2
AOP
定义:
AOP (Aspect Oriented Programming) :面向切面编程
个人理解其实就是spring下的动态代理模式,说白了就是不影响原代码的情况下,横向增加代码扩充功能的设计思想.
通过预编译方式和运行期动态代理实现程序功能的统一维护的一种技术。
AOP是OOP的延续,是软件开发中的一个热点,也是Spring框架中的一个重要内容。是函数式编程的一种衍生范型。利用AOP可以对业务逻辑的各个部分进行隔离,从而使得业务逻辑各部分之间的耦合度降低,提高程序的可重用性,同时提高了开发的效率。
官方文档定义个人理解说明:
横切关注点:跨越应用程序多个模块的方法或功能。
切面(ASPECT) :横切关注点被模块化的特殊对象。
我们要自定义一个类,里面写上代理对象附加要实现的内容,这个类就是切面。
通知(Advice) :切面必须要完成的工作。
代理对象附加要实现的内容
目标(Target) :被通知对象。
真实对象。
代理(Proxy) :向目标对象应用通知之后创建的对象。
代理对象,Spring AOP封装了代理对象的生成,我们不用管怎么生成的。
切入点(PointCut) :切面通知执行的“地点”的定义。
什么地方要执行代理对象的方法,比如定义某个类,那么这个类的所有方法都会执行代理方法。
连接点UointPoint) :与切入点匹配的执行点。
导入依赖
<!-- https://mvnrepository.com/artifact/org.aspectj/aspectjweaver -->

<dependency>

    <groupId>org.aspectj</groupId>

    <artifactId>aspectjweaver</artifactId>

    <version>1.9.5</version>

</dependency>
方式一:使用原生Spring API接口
需要注入aop配置
<?xml version="1.0" encoding="UTF-8"?>

<beans xmlns="http://www.springframework.org/schema/beans"

       xmlns:xsi="http://www.w3.org/2001/XMLSchema-instance"

       xmlns:aop="http://www.springframework.org/schema/aop"

       xsi:schemaLocation="http://www.springframework.org/schema/beans

        https://www.springframework.org/schema/beans/spring-beans.xsd

        http://www.springframework.org/schema/aop

        https://www.springframework.org/schema/aop/spring-aop.xsd">
真实对象接口
package com.rzp.service;
public interface UserService {
public void add();
public void delete();
public void update();
public void query();
}
真实对象
package com.rzp.service;
//真实对象
public class UserServiceImpl implements UserService {
public void add() {
System.out.println("增加用户");
}
public void delete() {
System.out.println("删除用户");
}
public void update() {
System.out.println("更新用户");
}
public void query() {
System.out.println("查询用户");
}
}
LOG类
package com.rzp.log;
import org.springframework.aop.MethodBeforeAdvice;
import java.lang.reflect.Method;
//继承MethodBeforeAdvice,重写的before方法会在真实对象方法执行前会执行
public class Log implements MethodBeforeAdvice {
//method 要执行的目标对象的方法
//Object[] 参数
//target 目标对象
public void before(Method method, Object[] objects, Object target) throws Throwable {
System.out.println(target.getClass().getName()+"的"+method.getName()+"方法被执行了");
}
}
afterLog类
package com.rzp.log;
import org.springframework.aop.AfterReturningAdvice;
import java.lang.reflect.Method;
//继承AfterReturningAdvice,重写的afterReturning会在真实对象方法执行后执行
public class AfterLog implements AfterReturningAdvice {
//returnValue 返回值
public void afterReturning(Object returnValue, Method method, Object[] args, Object target) throws Throwable {
System.out.println("执行了"+method.getName()+"返回结果为"+returnValue);
}
}
xml
<?xml version="1.0" encoding="UTF-8"?>
<beans xmlns="http://www.springframework.org/schema/beans"
xmlns:xsi="http://www.w3.org/2001/XMLSchema-instance"
xmlns:aop="http://www.springframework.org/schema/aop"
xsi:schemaLocation="http://www.springframework.org/schema/beans
https://www.springframework.org/schema/beans/spring-beans.xsd
http://www.springframework.org/schema/aop
https://www.springframework.org/schema/aop/spring-aop.xsd">
<bean id="userService" class="com.rzp.service.UserServiceImpl"/>
<bean id="log" class="com.rzp.log.Log"/>
<bean id="afterlog" class="com.rzp.log.AfterLog"/>
<!--方式一,使用原生Spring API接口-->
<!--配置aop-->
<aop:config>
<!--定义切入点,在什么地方切入 expression:表达式 executiion(要执行的位置)-->
<!--1、execution(): 表达式主体。
2、第一个*号:表示返回类型,*号表示所有的类型。
3、包名:表示需要拦截的包名,后面的两个句点表示当前包和当前包的所有子孙包下所有类的方法。
4、第二个*号:表示类名,*号表示所有的类。
5、*(..):最后这个星号表示方法名,*号表示所有的方法,后面括弧里面表示方法的参数,两个句点表示任何参数-->
<aop:pointcut id="pointc" expression="execution(* com.rzp.service.UserServiceImpl.*(..))"/>
<!--执行环绕增加-->
<aop:advisor advice-ref="log" pointcut-ref="pointc"/>
<aop:advisor advice-ref="afterlog" pointcut-ref="pointc"/>
</aop:config>
</beans>
测试
import com.rzp.service.UserService;
import org.springframework.context.ApplicationContext;
import org.springframework.context.support.ClassPathXmlApplicationContext;
public class Mytest {
public static void main(String[] args) {
ApplicationContext contest = new ClassPathXmlApplicationContext("beans.xml");
UserService user = contest.getBean("userService", UserService.class);
user.add();
}
}

方式二:使用自定义类来实现AOP
自定义类
package com.rzp.diy;
public class DiyPointCut {
public void before(){
System.out.println("方法执行前");
}
public void after(){
System.out.println("方法执行后");
}
}
xml
<?xml version="1.0" encoding="UTF-8"?>
<beans xmlns="http://www.springframework.org/schema/beans"
xmlns:xsi="http://www.w3.org/2001/XMLSchema-instance"
xmlns:aop="http://www.springframework.org/schema/aop"
xsi:schemaLocation="http://www.springframework.org/schema/beans
https://www.springframework.org/schema/beans/spring-beans.xsd
http://www.springframework.org/schema/aop
https://www.springframework.org/schema/aop/spring-aop.xsd">
<bean id="userService" class="com.rzp.service.UserServiceImpl"/>
<bean id="log" class="com.rzp.log.Log"/>
<bean id="afterlog" class="com.rzp.log.AfterLog"/>
<!--方式二,使用自定义类-->
<bean id="diy" class="com.rzp.diy.DiyPointCut"/>
<aop:config>
<!--自定义切面,ref引用的类-->
<aop:aspect ref="diy">
<aop:pointcut id="point" expression="execution(* com.rzp.service.UserServiceImpl.*(..))"/>
<!--通知-->
<aop:before method="before" pointcut-ref="point"/>
<aop:after method="after" pointcut-ref="point"/>
</aop:aspect>
</aop:config>
</beans>
测试
import com.rzp.service.UserService;
import org.springframework.context.ApplicationContext;
import org.springframework.context.support.ClassPathXmlApplicationContext;
public class Mytest {
public static void main(String[] args) {
ApplicationContext contest = new ClassPathXmlApplicationContext("beans.xml");
UserService user = contest.getBean("userService", UserService.class);
user.add();
}
}

没有方式一好,因为方式一还能通过反射获取到真实对象的信息。
方式三:使用注解实现
<?xml version="1.0" encoding="UTF-8"?>
<beans xmlns="http://www.springframework.org/schema/beans"
xmlns:xsi="http://www.w3.org/2001/XMLSchema-instance"
xmlns:context="http://www.springframework.org/schema/context"
xmlns:aop="http://www.springframework.org/schema/aop"
xsi:schemaLocation="http://www.springframework.org/schema/beans
https://www.springframework.org/schema/beans/spring-beans.xsd
http://www.springframework.org/schema/aop
https://www.springframework.org/schema/aop/spring-aop.xsd
http://www.springframework.org/schema/context
https://www.springframework.org/schema/context/spring-context.xsd">
<bean id="userService" class="com.rzp.service.UserServiceImpl"/>
<bean id="log" class="com.rzp.log.Log"/>
<bean id="afterlog" class="com.rzp.log.AfterLog"/> <!--方式三:使用注解开发-->
<context:component-scan base-package="com.rzp.*"/>
<context:annotation-config/>
<!--开启注解AOP支持,JDK5 默认proxy-target-class="false" Cglib proxy-target-class="true"-->
<aop:aspectj-autoproxy proxy-target-class="true"/>
</beans>
自定义类
package com.rzp.diy;
import org.aspectj.lang.ProceedingJoinPoint;
import org.aspectj.lang.Signature;
import org.aspectj.lang.annotation.After;
import org.aspectj.lang.annotation.Around;
import org.aspectj.lang.annotation.Aspect;
import org.aspectj.lang.annotation.Before;
import org.springframework.stereotype.Component;
@Aspect //标注这个类是一个切面
@Component
public class AnnotationPointCut {
@Before("execution(* com.rzp.service.UserServiceImpl.*(..))")
public void before(){
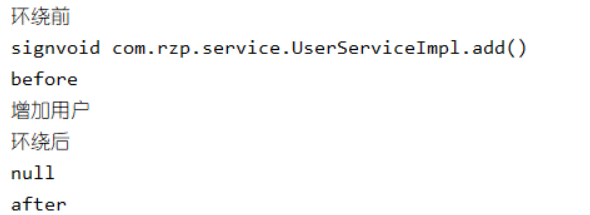
System.out.println("before");
}
@After("execution(* com.rzp.service.UserServiceImpl.*(..))")
public void after(){
System.out.println("after");
}
//在环绕增强中,我们可以给定一个参数,代表我们要获取处理切入的点
@Around("execution(* com.rzp.service.UserServiceImpl.*(..))")
public void around(ProceedingJoinPoint jp) throws Throwable {
System.out.println("环绕前");
//获得签名--其实就是执行了真实对象的什么方法
Signature signature = jp.getSignature();
System.out.println("sign"+signature);
//执行方法
Object proceed = jp.proceed();
System.out.println("环绕后");
System.out.println(proceed);
}
}
其他不变,测试结果
最新文章
- QT生成流水账号
- height与line-height
- Office 365 系列三 ------ 创建Office 365普通账号
- JAVA IO 序列化与设计模式
- 屠蛟之路_重伤的屠蛟俊_ThirdDay
- 跟我一起学WCF(8)——WCF中Session、实例管理详解
- java8新特性全面解析
- 11个Linux基础面试问题
- Storyboard的使用以及使用多个Storyboard的方法
- Applicationpoolidentity 好有趣哦
- 转:java服务器安全指南
- mdeditor
- [Jquery] 获取地址栏参数的方法 备忘
- bzDemo
- db2数据导出导入
- intelliJ IDEA创建web工程
- 每天一个JS 小demo之日历制作。主要知识点:日期函数
- ubuntu 有些软件中不能输入中文
- 游记-NOIP2018
- 2018.4.25-ml笔记(梯度下降)
热门文章
- 你知道吗,Flutter内置了10多种Button控件
- php中的进程
- 使用 Pandas 的 to_excel() 方法来将多个 csv 文件合并到一个 xlsx 的不同 sheets 内
- Uniapp使用GoEasy实现websocket实时通讯
- 全文搜索技术--Solr7.1之配置中文分析器
- webpack打包es6代码
- leetcode 签到 836. 矩形重叠
- 收藏 | 15 个你非了解不可的 Linux 特殊字符,妈妈再也不用担心我看不懂这些符号了!
- 答应我,不会这些概念,简历不要写 “熟悉” zookeeper
- Building Applications with Force.com and VisualForce(Dev401)(十):Designing Applications for Multiple Users: Building Business Processes that You Want