SpringBoot整合Elasticsearch+ik分词器+kibana
话不多说直接开整
首先是版本对应,SpringBoot和ES之间的版本必须要按照官方给的对照表进行安装,最新版本对照表如下:

(官网链接:https://docs.spring.io/spring-data/elasticsearch/docs/current/reference/html/#preface.requirements)
1、开始安装ES:
我本地的SpringBoot版本是2.3.4,所以我采用的ES版本是7.6.2版本,然后前往官网进行下载,小伙伴们也可以直接下载我所用的版本(链接:https://pan.baidu.com/s/1KoRo5h1nHY82c3B5RxfmrA 提取码:bcov):
ES官方下载链接:https://www.elastic.co/cn/downloads/past-releases#elasticsearch
将下载下来的文件上传到服务器上,我上传的目录是usr/local/es,然后开始解压:
tar -zxvf elasticsearch-7.6.2-linux-x86_64.tar.gz
解压后修改config目录下的elasticsearch.yml文件,贴一下我修改的内容:
 1 # ======================== Elasticsearch Configuration =========================

 2 #

 3 # NOTE: Elasticsearch comes with reasonable defaults for most settings.

 4 #       Before you set out to tweak and tune the configuration, make sure you

 5 #       understand what are you trying to accomplish and the consequences.

 6 #

 7 # The primary way of configuring a node is via this file. This template lists

 8 # the most important settings you may want to configure for a production cluster.

 9 #

10 # Please consult the documentation for further information on configuration options:

11 # https://www.elastic.co/guide/en/elasticsearch/reference/index.html

12 #

13 # ---------------------------------- Cluster -----------------------------------

14 #

15 # Use a descriptive name for your cluster:

16 # 这个是名字

17 cluster.name: my-application

18 #

19 # ------------------------------------ Node ------------------------------------

20 #

21 # Use a descriptive name for the node:

22 # 这个是节点名称

23 node.name: es-node-0

24 #

25 # Add custom attributes to the node:

26 #

27 #node.attr.rack: r1

28 #

29 # ----------------------------------- Paths ------------------------------------

30 #

31 # Path to directory where to store the data (separate multiple locations by comma):

32 # 这个是数据存放的路径

33 path.data: /usr/local/elasticsearch-7.6.2/data

34 #

35 # Path to log files:

36 # 这个是log存放的路径

37 path.logs: /usr/local/elasticsearch-7.6.2/logs

38 #

39 # ----------------------------------- Memory -----------------------------------

40 #

41 # Lock the memory on startup:

42 #

43 #bootstrap.memory_lock: true

44 #

45 # Make sure that the heap size is set to about half the memory available

46 # on the system and that the owner of the process is allowed to use this

47 # limit.

48 #

49

50

51 # Elasticsearch performs poorly when the system is swapping the memory.

52 #

53 # ---------------------------------- Network -----------------------------------

54 #

55 # Set the bind address to a specific IP (IPv4 or IPv6):

56 # 注:如果是云服务器的话需要填写内外地址,我这里是内网。

57 network.host: 192.168.0.4

58 http.host: 0.0.0.0

59 #

60 # Set a custom port for HTTP:

61 # 启动端口号

62 http.port: 9200

63 #

64 # For more information, consult the network module documentation.

65 #

66 # --------------------------------- Discovery ----------------------------------

67 #

68 # Pass an initial list of hosts to perform discovery when this node is started:

69 # The default list of hosts is ["127.0.0.1", "[::1]"]

70 #

71 #discovery.seed_hosts: ["host1", "host2"]

72 #

73 # Bootstrap the cluster using an initial set of master-eligible nodes:

74 # 初始化节点,可以有多个

75 cluster.initial_master_nodes: ["es-node-0"]

76 #

77 # For more information, consult the discovery and cluster formation module documentation.

78 #

79 # ---------------------------------- Gateway -----------------------------------

80 #

81 # Block initial recovery after a full cluster restart until N nodes are started:

82 #

83 #gateway.recover_after_nodes: 3

84 #

85 # For more information, consult the gateway module documentation.

86 #

87 # ---------------------------------- Various -----------------------------------

88 #

89 # Require explicit names when deleting indices:

90 #

91 #action.destructive_requires_name: true
  # 开启账号验证

92 xpack.security.enabled: true

93 xpack.license.self_generated.type: basic

94 xpack.security.transport.ssl.enabled: true

95 # 跨域的配置,可配可不配

96 http.cors.enabled: true

97 http.cors.allow-origin: "*"
因为安全问题elasticsearch 不让用root用户直接运行,所以要创建新用户:
useradd es

passwd es
然后输入密码,最小8位数,为用户赋权限:
chown -R es:es /usr/local/es/
切换成es用户,cd 到bin目录下启动,第一种是前台启动,第二种是后台启动:
./elasticsearch
./elasticsearch -d

如果启动提示了这个错误需要在/etc/sysctl.conf文件最后添加一行
vm.max_map_count=262144
执行/sbin/sysctl -p 立即生效,之后再重新启动就好了;
在上面ES的yml配置中,我们配置了账号验证,所以我们需要重置一下ES账号的密码(确保es已经成功启动才能重置;在es的bin目录下执行):
./elasticsearch-setup-passwords interactive
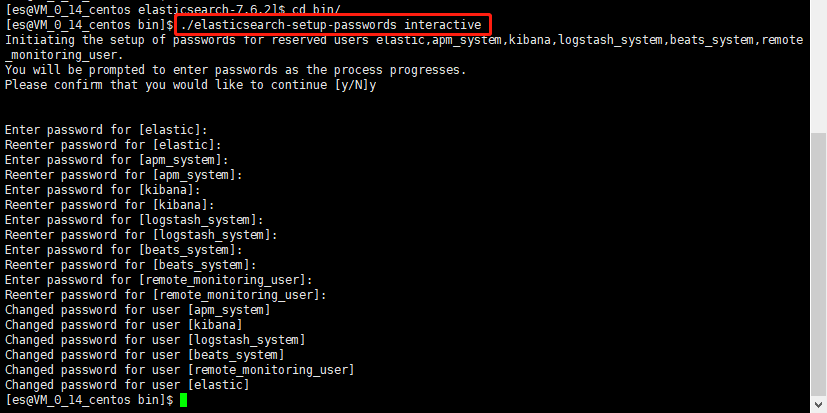
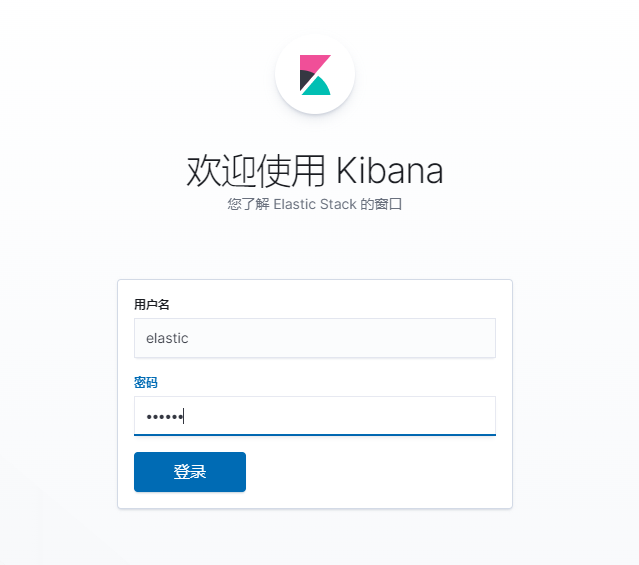
建议设置成相同的密码,方便记忆,设置成功后就可以直接打开网页去访问了,访问地址是ip:9200,然后输入账号:“elastic”,密码:“123456”
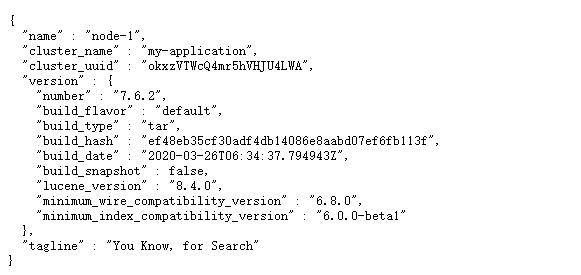
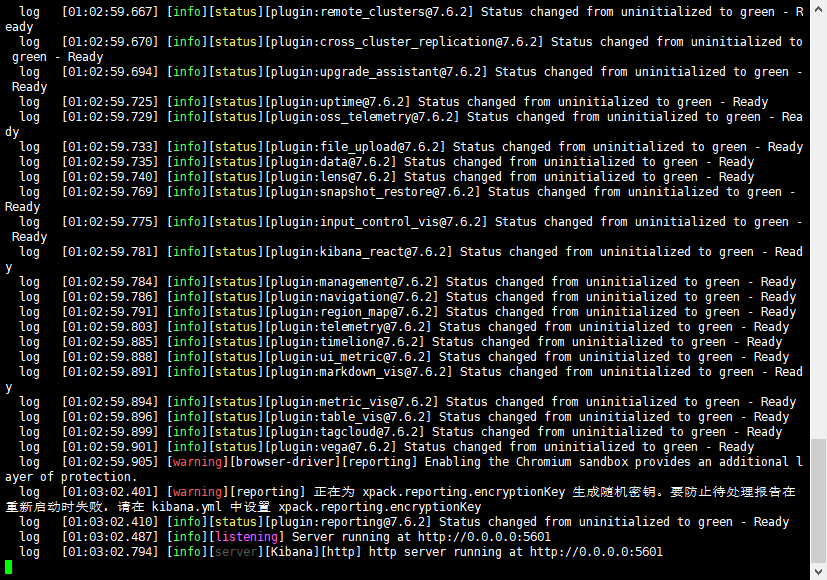
能看到这些就代表ES已经成功启动了!!!
(注:如果小伙伴们是云服务器的话要注意开放服务器的安全组,不然访问不到,开放9200和9300端口,下面的Kibana也需要开放5601的端口!!!)
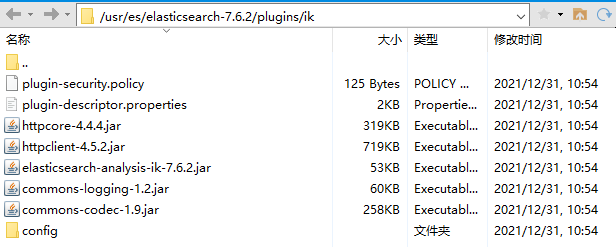
然后我们现在配置一下ik分词器(中文分词):
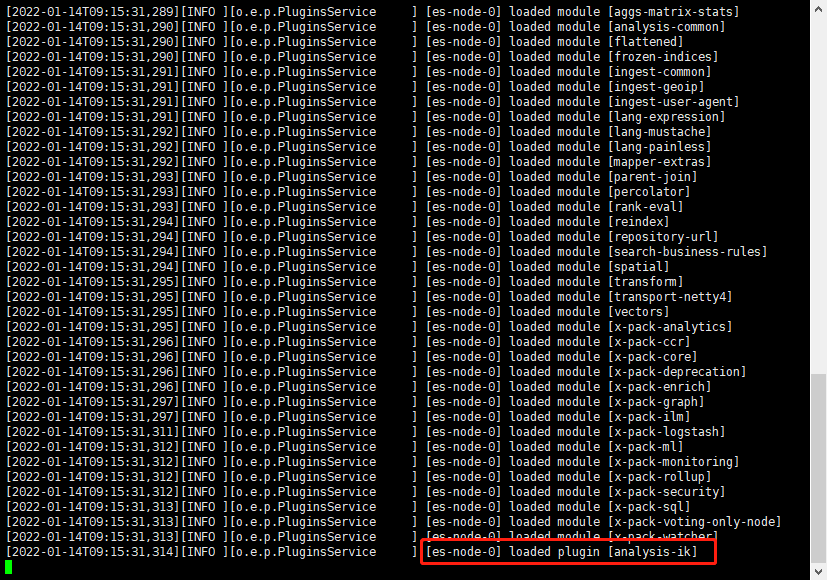
ik分词器也是同理,版本必须一致!!!然后把文件上传到ES的plugins目录下,创建ik目录,解压到ik目录下即可。
启动的时候出现这个就代表配置成功了。
2、接下来我们开始配置Kibana:
Kibana的版本也需要和ES对应才行(官方地址:https://www.elastic.co/cn/support/matrix#matrix_compatibility):


下载好的Kibana上传后进行解压缩(官方下载地址:https://www.elastic.co/cn/downloads/kibana#ga-release):
tar -zxvf kibana-7.6.2-linux-x86_64.tar.gz
修改config目录下的kibana.yml文件:
# Kibana is served by a back end server. This setting specifies the port to use.

server.port: 5601

# Specifies the address to which the Kibana server will bind. IP addresses and host names are both valid values.

# The default is 'localhost', which usually means remote machines will not be able to connect.

# To allow connections from remote users, set this parameter to a non-loopback address.

#server.host: "localhost"
# 代表都能访问

server.host: "0.0.0.0"

# Enables you to specify a path to mount Kibana at if you are running behind a proxy.

# Use the `server.rewriteBasePath` setting to tell Kibana if it should remove the basePath

# from requests it receives, and to prevent a deprecation warning at startup.

# This setting cannot end in a slash.

#server.basePath: ""

# Specifies whether Kibana should rewrite requests that are prefixed with

# `server.basePath` or require that they are rewritten by your reverse proxy.

# This setting was effectively always `false` before Kibana 6.3 and will

# default to `true` starting in Kibana 7.0.

#server.rewriteBasePath: false

# The maximum payload size in bytes for incoming server requests.

#server.maxPayloadBytes: 1048576

# The Kibana server's name.  This is used for display purposes.

#server.name: "your-hostname"

# The URLs of the Elasticsearch instances to use for all your queries.
# 配置ES的地址

elasticsearch.hosts: ["http://192.168.0.4:9200"]

# When this setting's value is true Kibana uses the hostname specified in the server.host

# setting. When the value of this setting is false, Kibana uses the hostname of the host

# that connects to this Kibana instance.

#elasticsearch.preserveHost: true

# Kibana uses an index in Elasticsearch to store saved searches, visualizations and

# dashboards. Kibana creates a new index if the index doesn't already exist.

#kibana.index: ".kibana"

# The default application to load.

#kibana.defaultAppId: "home"

# If your Elasticsearch is protected with basic authentication, these settings provide

# the username and password that the Kibana server uses to perform maintenance on the Kibana

# index at startup. Your Kibana users still need to authenticate with Elasticsearch, which

# is proxied through the Kibana server.
# ES的账号密码

elasticsearch.username: "elastic"

elasticsearch.password: "123456"

# Enables SSL and paths to the PEM-format SSL certificate and SSL key files, respectively.

# These settings enable SSL for outgoing requests from the Kibana server to the browser.

#server.ssl.enabled: false

#server.ssl.certificate: /path/to/your/server.crt

#server.ssl.key: /path/to/your/server.key

# Optional settings that provide the paths to the PEM-format SSL certificate and key files.

# These files are used to verify the identity of Kibana to Elasticsearch and are required when

# xpack.security.http.ssl.client_authentication in Elasticsearch is set to required.

#elasticsearch.ssl.certificate: /path/to/your/client.crt

#elasticsearch.ssl.key: /path/to/your/client.key

# Optional setting that enables you to specify a path to the PEM file for the certificate

# authority for your Elasticsearch instance.

#elasticsearch.ssl.certificateAuthorities: [ "/path/to/your/CA.pem" ]

# To disregard the validity of SSL certificates, change this setting's value to 'none'.

#elasticsearch.ssl.verificationMode: full

# Time in milliseconds to wait for Elasticsearch to respond to pings. Defaults to the value of

# the elasticsearch.requestTimeout setting.

#elasticsearch.pingTimeout: 1500

# Time in milliseconds to wait for responses from the back end or Elasticsearch. This value

# must be a positive integer.

#elasticsearch.requestTimeout: 30000

# List of Kibana client-side headers to send to Elasticsearch. To send *no* client-side

# headers, set this value to [] (an empty list).

#elasticsearch.requestHeadersWhitelist: [ authorization ]

# Header names and values that are sent to Elasticsearch. Any custom headers cannot be overwritten

# by client-side headers, regardless of the elasticsearch.requestHeadersWhitelist configuration.

#elasticsearch.customHeaders: {}

# Time in milliseconds for Elasticsearch to wait for responses from shards. Set to 0 to disable.

#elasticsearch.shardTimeout: 30000

# Time in milliseconds to wait for Elasticsearch at Kibana startup before retrying.

#elasticsearch.startupTimeout: 5000

# Logs queries sent to Elasticsearch. Requires logging.verbose set to true.

#elasticsearch.logQueries: false

# Specifies the path where Kibana creates the process ID file.

#pid.file: /var/run/kibana.pid

# Enables you specify a file where Kibana stores log output.

#logging.dest: stdout

# Set the value of this setting to true to suppress all logging output.

#logging.silent: false

# Set the value of this setting to true to suppress all logging output other than error messages.

#logging.quiet: false

# Set the value of this setting to true to log all events, including system usage information

# and all requests.

#logging.verbose: false

# Set the interval in milliseconds to sample system and process performance

# metrics. Minimum is 100ms. Defaults to 5000.

#ops.interval: 5000

# Specifies locale to be used for all localizable strings, dates and number formats.

# Supported languages are the following: English - en , by default , Chinese - zh-CN .
# 配置中文

i18n.locale: "zh-CN"
配置完成后启动ES,再输入命令启动kibana(在bin目录下输入该命令) :
nohup ./kibana &
如果不想后台启动的直接输入:
./kibana
没有出现error就可以直接ip:5601去访问了,然后输入之前ES设置的账号:elastic 密码:123456,然后大功告成!!!
kibana的操作后面集成了spring boot后再做简单的介绍。
3、最后开始集成到我们的spring boot项目中去,我本地的spring boot版本是2.3.4版本
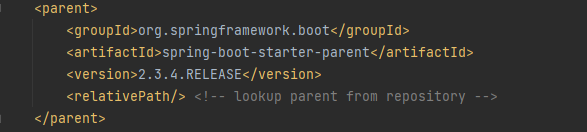
下面是需要引用的jar包,在pom文件中添加以下依赖:
<dependency>

            <groupId>org.springframework.boot</groupId>

            <artifactId>spring-boot-starter-data-elasticsearch</artifactId>

</dependency>
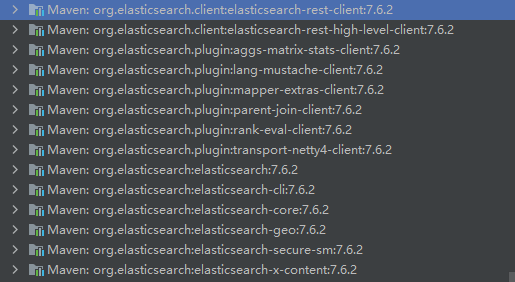
一般情况下spring boot会自动对应相应的ES版本,下载好jar包后可以看项目下的jar包的版本,确认一下,版本是否正确,我这边是7.6.2的版本。
如果版本不正确的话可以手动修改一下版本,在pom.xml文件中的<properties>添加如下代码:
<properties>
  <elasticsearch.version>7.6.2</elasticsearch.version>
</properties>
配置ES连接bean:
package com.zsi.geek_insight.config;

import com.zsi.geek_insight.util.EsUtils;

import org.apache.http.HttpHost;

import org.apache.http.auth.AuthScope;

import org.apache.http.auth.UsernamePasswordCredentials;

import org.apache.http.client.CredentialsProvider;

import org.apache.http.impl.client.BasicCredentialsProvider;

import org.elasticsearch.client.RestClient;

import org.elasticsearch.client.RestClientBuilder;

import org.elasticsearch.client.RestHighLevelClient;

import org.springframework.beans.factory.annotation.Value;

import org.springframework.context.annotation.Bean;

import org.springframework.context.annotation.Configuration;

@Configuration

public class ElasticsearchConfiguration {

    @Value("${elasticsearch.host}")

    private String host;

    @Value("${elasticsearch.port}")

    private int port;

    @Value("${elasticsearch.username}")

    private String USERNAME;

    @Value("${elasticsearch.password}")

    private String PASSWORD;

    @Bean(destroyMethod = "close", name = "client")

    public RestHighLevelClient restHighLevelClient() {

        //如果没配置密码就可以不用下面这两部

        final CredentialsProvider credentialsProvider = new BasicCredentialsProvider();

        credentialsProvider.setCredentials(AuthScope.ANY, new UsernamePasswordCredentials(USERNAME, PASSWORD));

        RestClientBuilder builder = RestClient.builder(new HttpHost(host, port, "http"))

                .setHttpClientConfigCallback(httpClientBuilder -> {

                    httpClientBuilder.disableAuthCaching();

                    return httpClientBuilder.setDefaultCredentialsProvider(credentialsProvider);

                });

        RestHighLevelClient restHighLevelClient = new RestHighLevelClient(builder);
     //  这里我写了一个静态的工具类,所以笨笨的写了一个ES的初始化,
     //  有大佬可以麻烦帮忙指点一下看有什么更好的方案让静态的工具类能拿到注入到spring中的bean

        new EsUtils().init(restHighLevelClient);

        return restHighLevelClient;

    }

}
ES操作工具类:
package com.zsi.geek_insight.util;

import com.alibaba.fastjson.JSON;

import com.alibaba.fastjson.JSONObject;

import lombok.extern.slf4j.Slf4j;

import org.elasticsearch.action.ActionListener;

import org.elasticsearch.action.admin.indices.delete.DeleteIndexRequest;

import org.elasticsearch.action.bulk.BackoffPolicy;

import org.elasticsearch.action.bulk.BulkProcessor;

import org.elasticsearch.action.bulk.BulkRequest;

import org.elasticsearch.action.bulk.BulkResponse;

import org.elasticsearch.action.delete.DeleteRequest;

import org.elasticsearch.action.delete.DeleteResponse;

import org.elasticsearch.action.get.GetRequest;

import org.elasticsearch.action.get.GetResponse;

import org.elasticsearch.action.index.IndexRequest;

import org.elasticsearch.action.index.IndexResponse;

import org.elasticsearch.action.search.SearchRequest;

import org.elasticsearch.action.search.SearchResponse;

import org.elasticsearch.action.support.master.AcknowledgedResponse;

import org.elasticsearch.action.update.UpdateRequest;

import org.elasticsearch.action.update.UpdateResponse;

import org.elasticsearch.client.RequestOptions;

import org.elasticsearch.client.RestHighLevelClient;

import org.elasticsearch.client.indices.CreateIndexRequest;

import org.elasticsearch.client.indices.CreateIndexResponse;

import org.elasticsearch.client.indices.GetIndexRequest;

import org.elasticsearch.common.unit.ByteSizeUnit;

import org.elasticsearch.common.unit.ByteSizeValue;

import org.elasticsearch.common.unit.Fuzziness;

import org.elasticsearch.common.unit.TimeValue;

import org.elasticsearch.common.xcontent.XContentType;

import org.elasticsearch.index.query.MatchQueryBuilder;

import org.elasticsearch.index.query.QueryBuilders;

import org.elasticsearch.index.query.TermQueryBuilder;

import org.elasticsearch.search.SearchHit;

import org.elasticsearch.search.builder.SearchSourceBuilder;

import org.elasticsearch.search.fetch.subphase.FetchSourceContext;

import java.io.IOException;

import java.util.ArrayList;

import java.util.List;

import java.util.Map;

import java.util.concurrent.TimeUnit;

import java.util.function.BiConsumer;

@Slf4j

public class EsUtils {

    private static RestHighLevelClient restHighLevelClient;

    public void init(RestHighLevelClient restHighLevelClient) {

        this.restHighLevelClient = restHighLevelClient;

    }

    /**

     * @description: 创建索引

     * @param: indexName 索引名

     * @return: boolean 返回对象*/

    public static boolean createIndex(String indexName) {

        //返回结果

        boolean exists = true;

        try {

            // 1、创建索引请求

            CreateIndexRequest request = new CreateIndexRequest(indexName);

            // 2、客户端执行请求 indexResponse, 请求后获得相应

            CreateIndexResponse createIndexResponse = restHighLevelClient.indices().create(request, RequestOptions.DEFAULT);

            //判断响应对象是否为空

            if (createIndexResponse.equals("") || createIndexResponse != null) {

                exists = false;

            }

        } catch (IOException e) {

            exists = false;

        }

        return exists;

    }

    /**

     * @description: 测试获取索引,只能判断其是否存在

     * @param: indexName  需要判断的对象

     * @return: 执行结果*/

    public static boolean isIndexExists(String indexName) {

        boolean exists = true;

        try {

            GetIndexRequest request = new GetIndexRequest(indexName);

            exists = restHighLevelClient.indices().exists(request, RequestOptions.DEFAULT);

        } catch (IOException e) {

            exists = false;

        }

        return exists;

    }

    /**

     * @description: 删除索引

     * @param: indexName 需要删除的索引对象

     * @return: 执行结果*/

    public static boolean delIndex(String indexName) {

        boolean exists = true;

        try {

            DeleteIndexRequest request = new DeleteIndexRequest(indexName);

            AcknowledgedResponse delete = restHighLevelClient.indices().delete(request, RequestOptions.DEFAULT);

            exists = delete.isAcknowledged();

        } catch (IOException e) {

            exists = false;

        }

        return exists;

    }

    /**

     * @description: 创建文档

     * @param: indexName  索引名称

     * @param: obj 文档对象

     * @param: id 文档对象id (不可重复)

     * @return: 执行结果*/

    public static boolean addDocument(String indexName, Object obj, String id) {

        boolean exists = true;

        IndexResponse indexResponse = null;

        try {

            // 创建请求

            IndexRequest request = new IndexRequest(indexName);

            // 规则 put /kuang_index/_doc/1

            request.id(id);

            request.timeout(TimeValue.timeValueDays(1));

            // 将我们的数据放入请求 json

            request.source(JSON.toJSONString(obj), XContentType.JSON);

            // 客户端发送请求,获取响应结果

            indexResponse = restHighLevelClient.index(request, RequestOptions.DEFAULT);

            if (!indexResponse.equals("CREATED")) {//判断响应结果对象是否为CREATED

                exists = false;

            }

        } catch (IOException e) {

            exists = false;

        }

        return exists;

    }

    /**

     * @description: 获取文档,判断是否存在

     * @param: indexName  索引名称

     * @param: id 文档对象id

     * @return: 执行结果*/

    public static boolean isExists(String indexName, String id) {

        boolean exists = true;

        try {

            GetRequest request = new GetRequest(indexName, id);

            // 不获取返回的 _source 的上下文了

            request.fetchSourceContext(new FetchSourceContext(false));

            request.storedFields("_none_");

            exists = restHighLevelClient.exists(request, RequestOptions.DEFAULT);

        } catch (IOException e) {

            e.printStackTrace();

        }

        return exists;

    }

    /**

     * @description: 根据id获取文档信息

     * @param: indexName  索引名称

     * @param: id 文档对象id

     * @return: 执行结果*/

    public static Map getDocument(String indexName, String id) {

        Map strToMap = null;

        try {

            GetRequest request = new GetRequest("testspringboot", "1");

            GetResponse getResponse = restHighLevelClient.get(request, RequestOptions.DEFAULT);

            strToMap = JSONObject.parseObject(getResponse.getSourceAsString());

        } catch (IOException e) {

            e.printStackTrace();

        }

        return strToMap;

    }

    /**

     * @description: 更新文档的信息

     * @param: indexName  索引名称

     * @param: obj 文档对象

     * @param: id 文档对象id (不可重复)

     * @return: 执行结果*/

    public static boolean updateDocument(String indexName, Object obj, String id) {

        boolean exists = true;

        try {

            UpdateRequest updateRequest = new UpdateRequest(indexName, id);

            updateRequest.timeout("1s");

            updateRequest.doc(JSON.toJSONString(obj), XContentType.JSON);

            UpdateResponse updateResponse = restHighLevelClient.update(updateRequest, RequestOptions.DEFAULT);

            if (!updateResponse.status().equals("OK")) {

                exists = false;

            }

        } catch (IOException e) {

            e.printStackTrace();

        }

        return exists;

    }

    /**

     * @description: 删除文档记录

     * @param: indexName  索引名称

     * @param: id 文档对象id (不可重复)

     * @return: 执行结果*/

    public static boolean deleteRequest(String indexName, String id) {

        boolean exists = true;

        try {

            DeleteRequest request = new DeleteRequest(indexName, id);

            request.timeout("1s");

            DeleteResponse delete = restHighLevelClient.delete(request, RequestOptions.DEFAULT);

            if (!delete.status().equals("OK")) {

                exists = false;

            }

        } catch (IOException e) {

            e.printStackTrace();

        }

        return exists;

    }

    /**

     * @description: 批量插入

     * @param: indexName  索引名称

     * @param: objectArrayList 需要添加的数据

     * @return:*/

    public static boolean bulkRequest(ArrayList<Map<String, Object>> objectArrayList, String indexName, String value) {

        boolean exists = true;

        BulkProcessor bulkProcessor = getBulkProcessor(restHighLevelClient);

        try {

            for (int i = 0; i < objectArrayList.size(); i++) {

                bulkProcessor.add(new IndexRequest(indexName)

                        .id(objectArrayList.get(i).get(value).toString())

                        .source(JSON.toJSONString(objectArrayList.get(i)), XContentType.JSON));

            }

            // 将数据刷新到es, 注意这一步执行后并不会立即生效,取决于bulkProcessor设置的刷新时间

            bulkProcessor.flush();

        } catch (Exception e) {

            log.error(e.getMessage());

        } finally {

            try {

                boolean terminatedFlag = bulkProcessor.awaitClose(150L, TimeUnit.SECONDS);

                log.info(String.valueOf(terminatedFlag));

            } catch (Exception e) {

                log.error(e.getMessage());

            }

        }

        return exists;

    }

    /**

     * 创建bulkProcessor并初始化

     *

     * @param client

     * @return

     */

    private static BulkProcessor getBulkProcessor(RestHighLevelClient client) {

        BulkProcessor bulkProcessor = null;

        try {

            BulkProcessor.Listener listener = new BulkProcessor.Listener() {

                @Override

                public void beforeBulk(long executionId, BulkRequest request) {

                    log.info("Try to insert data number : " + request.numberOfActions());

                }

                @Override

                public void afterBulk(long executionId, BulkRequest request, BulkResponse response) {

                    log.info("************** Success insert data number : " + request.numberOfActions() + " , id: "

                            + executionId);

                }

                @Override

                public void afterBulk(long executionId, BulkRequest request, Throwable failure) {

                    log.error("Bulk is unsuccess : " + failure + ", executionId: " + executionId);

                }

            };

            BiConsumer<BulkRequest, ActionListener<BulkResponse>> bulkConsumer = (request, bulkListener) -> client

                    .bulkAsync(request, RequestOptions.DEFAULT, bulkListener);

            BulkProcessor.Builder builder = BulkProcessor.builder(bulkConsumer, listener);

            // 设置最大的上传数量

            builder.setBulkActions(1000);

            builder.setBulkSize(new ByteSizeValue(100L, ByteSizeUnit.MB));

            // 设置最多的线程并发数

            builder.setConcurrentRequests(2);

            builder.setFlushInterval(TimeValue.timeValueSeconds(100L));

            builder.setBackoffPolicy(BackoffPolicy.constantBackoff(TimeValue.timeValueSeconds(1L), 3));

            // 注意点:在这里感觉有点坑,官网样例并没有这一步,而笔者因一时粗心也没注意,在调试时注意看才发现,上面对builder设置的属性没有生效

            bulkProcessor = builder.build();

        } catch (Exception e) {

            e.printStackTrace();

            try {

                bulkProcessor.awaitClose(100L, TimeUnit.SECONDS);

                client.close();

            } catch (Exception e1) {

                log.error(e1.getMessage());

            }

        }

        return bulkProcessor;

    }

    /**

     * @description: 模糊查询

     * @param: indexName 索引名

     * @param: key 字段名

     * @param: value 查询值

     * @return:*/

    public static List<Map<String, Object>> searchMatch(String indexName, String key, String value) throws IOException {

        List<Map<String, Object>> map = new ArrayList<>();

        SearchRequest searchRequest = new SearchRequest(indexName);

        // 构建搜索条件

        SearchSourceBuilder sourceBuilder = new SearchSourceBuilder();

        MatchQueryBuilder termQueryBuilder = new MatchQueryBuilder(key, value);

        termQueryBuilder.fuzziness(Fuzziness.AUTO);

        sourceBuilder.query(termQueryBuilder);

        sourceBuilder.timeout(new TimeValue(60, TimeUnit.SECONDS));

        searchRequest.source(sourceBuilder);

        SearchResponse searchResponse = restHighLevelClient.search(searchRequest, RequestOptions.DEFAULT);

        for (SearchHit documentFields : searchResponse.getHits().getHits()) {

            map.add(documentFields.getSourceAsMap());

        }

        return map;

    }

    /**

     * @description: 精确查询

     * @param: indexName 索引名

     * @param: key 字段名

     * @param: value 查询值

     * @return:*/

    public static List<Map<String, Object>> searchQuery(String indexName, String key, String value) throws IOException {

        List<Map<String, Object>> map = new ArrayList<>();

        SearchRequest searchRequest = new SearchRequest(indexName);

        // 构建搜索条件

        SearchSourceBuilder sourceBuilder = new SearchSourceBuilder();

        TermQueryBuilder termQueryBuilder = QueryBuilders.termQuery(key, value);

        sourceBuilder.query(termQueryBuilder);

        sourceBuilder.timeout(new TimeValue(60, TimeUnit.SECONDS));

        searchRequest.source(sourceBuilder);

        SearchResponse searchResponse = restHighLevelClient.search(searchRequest, RequestOptions.DEFAULT);

        for (SearchHit documentFields : searchResponse.getHits().getHits()) {

            map.add(documentFields.getSourceAsMap());

        }

        return map;

    }

}
准备查询的Entity:
package com.zsi.geek_insight.model.FinancialRegulations;

import lombok.AllArgsConstructor;

import lombok.Data;

import lombok.NoArgsConstructor;

import org.springframework.data.annotation.Id;

import org.springframework.data.elasticsearch.annotations.Document;

import org.springframework.data.elasticsearch.annotations.Field;

import org.springframework.data.elasticsearch.annotations.FieldType;

@Data

@AllArgsConstructor

@NoArgsConstructor
// 参数依次数:索引名称,主分片区个数,拷贝分区个数

@Document(indexName = "financialregulations", shards = 1, replicas = 0)

public class FinancialRegulationsES {

    @Id

    private String regulationsId;


   // 需要分词、查询的字段需要加上这个注解
   // 字符串类型(text:支持分词,全文检索,支持模糊、精确查询,不支持聚合,排序操作;text类型的最大支持的字符长度无限制,适合大字段存储;),
   // 存储时的分词器、搜索时用的分词器(这里用的都是ik分词器,IK提供了两个分词算法: (ik_smart和ik_max_word ),其中ik_smart为最少切分,ik_max_word为最细粒度划分!)

    @Field(type = FieldType.Text, analyzer = "ik_max_word", searchAnalyzer = "ik_max_word")

    private String regulationsName;

    private String timeliness;

    private String IssuedNumber;

    private String releaseDate;

    @Field(type = FieldType.Text ,analyzer = "ik_max_word", searchAnalyzer = "ik_max_word")

    private String textContent;

    private String implementationDate;

    private String file;

}
准备调用的Controller:
package com.zsi.geek_insight.controller;

import com.zsi.geek_insight.model.FinancialRegulations.FinancialRegulationsES;

import com.zsi.geek_insight.util.EsUtils;

import org.elasticsearch.index.query.BoolQueryBuilder;

import org.elasticsearch.index.query.QueryBuilders;

import org.elasticsearch.search.fetch.subphase.highlight.HighlightBuilder;

import org.springframework.beans.factory.annotation.Autowired;

import org.springframework.data.domain.PageRequest;

import org.springframework.data.elasticsearch.core.ElasticsearchRestTemplate;

import org.springframework.data.elasticsearch.core.IndexOperations;

import org.springframework.data.elasticsearch.core.SearchHit;

import org.springframework.data.elasticsearch.core.SearchHits;

import org.springframework.data.elasticsearch.core.query.NativeSearchQuery;

import org.springframework.data.elasticsearch.core.query.NativeSearchQueryBuilder;

import org.springframework.stereotype.Controller;

import org.springframework.web.bind.annotation.RequestMapping;

import org.springframework.web.bind.annotation.RequestMethod;

import org.springframework.web.bind.annotation.RequestParam;

import org.springframework.web.bind.annotation.ResponseBody;

import java.io.IOException;

import java.util.ArrayList;

import java.util.HashMap;

import java.util.List;

import java.util.Map;

@Controller

@RequestMapping(value = "/financialRegulationsData")

public class FinancialRegulationsDataController {

    @Autowired

    private ElasticsearchRestTemplate elasticsearchTemplate;

    /**

     * 根据名称进行查询

     */

    @RequestMapping(value = "/getByName", method = RequestMethod.GET)

    @ResponseBody

    public List<FinancialRegulationsES> getByName(@RequestParam String name) throws IOException {

        //根据一个值查询多个字段  并高亮显示  这里的查询是取并集,即多个字段只需要有一个字段满足即可

        //需要查询的字段

        BoolQueryBuilder boolQueryBuilder = QueryBuilders.boolQuery()

                .should(QueryBuilders.matchQuery("regulationsName", name));

        //构建高亮查询

        NativeSearchQuery searchQuery = new NativeSearchQueryBuilder()

                .withQuery(boolQueryBuilder)

                //设置查询条件

                .withHighlightFields(new HighlightBuilder.Field("regulationsName"))

                .withHighlightBuilder(new HighlightBuilder().preTags("<span style='color:red'>").postTags("</span>"))

                //设置分页查询

                .withPageable(PageRequest.of(0, 10))

                .build();

        SearchHits<FinancialRegulationsES> search = elasticsearchTemplate.search(searchQuery, FinancialRegulationsES.class);

        //得到查询返回的内容

        List<SearchHit<FinancialRegulationsES>> searchHits = search.getSearchHits();

        //设置一个最后需要返回的实体类集合

        List<FinancialRegulationsES> users = new ArrayList<>();

        //遍历返回的内容进行处理

        for (SearchHit<FinancialRegulationsES> searchHit : searchHits) {

            //高亮的内容

            Map<String, List<String>> highlightFields = searchHit.getHighlightFields();

            //将高亮的内容填充到content中

            searchHit.getContent().setTextContent(highlightFields.get("regulationsName") == null ? searchHit.getContent().getRegulationsName() : highlightFields.get("regulationsName").get(0));

            //放到实体类中

            users.add(searchHit.getContent());

        }

        return users;

    }

    /**

     * 添加数据

     */

    @RequestMapping(value = "/addAll", method = RequestMethod.GET)

    @ResponseBody

    public String addAll() {

        List<Map<String, Object>> content = new ArrayList<>();

        Map<String, Object> map = new HashMap<>();

        map.put("regulationsId","1");

        map.put("regulationsName","中国银保监会消费者权益保护局关于安心财险、轻松保经纪、津投经纪、保多多经纪侵害消费者权益案例的通报");

        map.put("timeliness","现行有效");

        map.put("IssuedNumber","银保监消保发〔2020〕14号");

        map.put("releaseDate","2020-12-02");

        map.put("textContent","中国银保监会消费者权益保护局关于安心财险、轻松保经纪、津投经纪、保多多经纪侵害消费者权益案例的通报\n" +

                "\n" +

                "\n" +

                "中国银保监会消费者权益保护局关于安心财险、轻松保经纪、津投经纪、保多多经纪侵害消费者权益案例的通报\n" +

                "银保监消保发〔2020〕14号\n" +

                "各银保监局,各政策性银行、大型银行、股份制银行,外资银行,各保险集团(控股)公司、保险公司,各会管单位:\n" +

                "为践行以人民为中心的发展思想,落实依法监管理念,切实维护银行保险消费者合法权益,我会对安心财产保险有限责任公司(以下简称安心财险)开展了专项检查,并根据检查线索,对广东轻松保保险经纪有限公司(原名广东宏广安保险经纪有限公司,以下简称轻松保经纪)、天津津投保险经纪有限公司(以下简称津投经纪)、保多多保险经纪有限公司(以下简称保多多经纪)开展了延伸检查。\n" +

                "检查发现,上述机构在宣传销售短期健康险产品中,存在“首月0元”“首月0.1元”等不实宣传(实际是将首月保费均摊至后期保费),或首月多收保费等问题。上述行为涉嫌违反《保险法》中“未按照规定使用经批准或者备案的保险条款、保险费率”“欺骗投保人”等相关规定。现将有关问题通报如下: \n" +

                "一、欺骗投保人问题\n" +

                "(一)安心财险\n" +

                "经查,2019年1月至6月,安心财险通过轻松保经纪微信平台公众号“轻松保官方”销售“安享一生尊享版”产品时,宣传页面显示“首月0元”“限时特惠 首月立减**元”等内容,实际是首月不收取保费,将全年应交保费均摊至后11个月,消费者并未得到保费优惠。涉及保单16879笔,保费收入396.34万元。\n" +

                "(二)轻松保经纪(第三方网络平台为轻松保)\n" +

                "经查,2019年4月至10月,轻松保经纪在微信平台公众号“轻松保官方”销售众惠财产相互保险社“年轻保·600万医疗保障”产品时,销售页面显示“首月0.1元”“首月3元”“会员日补贴”等内容,实际是将全年应交保费扣除首月0.1元或3元的保费后,将剩余保费均摊至后11个月,消费者并未得到保费优惠。涉及保单377489笔,保费收入5188.97万元。\n" +

                "上述通过“限时特惠”“会员日补贴”等宣传,以“零首付”等方式,给投保人优惠(豁免或减少)应交保费错觉、诱导投保人购买保险的行为,属于虚假宣传、欺骗投保人。\n" +

                "二、未按照规定使用经批准或者备案的保险条款、保险费率问题\n" +

                "(一)津投经纪(第三方网络平台为京东)\n" +

                "经查,2018年10月至2019年6月,津投经纪在京东金融APP销售华泰财产保险有限公司“京英百万医疗险(福利版)”产品时,宣传页面显示“首月1元”等内容,实际是将首月应交的其余保费均摊到剩余的11期保费中收取,涉及保单16874笔,保费收入417.72万元。\n" +

                "2019年1月至2019年6月,津投经纪在京东金融APP销售华泰财产保险有限公司“京享重疾轻症险(福利版)”时,宣传页面显示“首月1元”等内容,实际是将首月应交的其余保费均摊到剩余11期保费中收取,涉及保单3601笔,保费收入30.74万元。\n" +

                "(二)保多多经纪(第三方网络平台为水滴)\n" +

                "经查,2019年3月至2019年6月,保多多经纪在微信平台公众号及“水滴保险商城”APP销售太平财产保险有限公司“太平综合医疗保险”产品时,首期保费按“首月3元”活动收取,但该产品在银保监会报备的条款费率表中仅有“按月缴费(首月投保0元,其余分11期支付)”描述。该行为涉及保单1547267笔,保费12682.91万元。\n" +

                "安心财险、轻松保经纪、津投经纪、保多多经纪等保险机构的上述行为,严重侵害了消费者的知情权、公平交易权等基本权利,损害了消费者的合法权益。我局将严格依法依规进行处理。各银行保险机构要引起警示,围绕营销宣传、产品销售等方面侵害消费者权益乱象开展自查自纠,严格按照相关法律法规和监管规定,依法、合规开展经营活动,切实保护消费者合法权益。\n" +

                "中国银保监会消费者权益保护局\n" +

                "2020年12月2日\n" +

                "\n");

        map.put("implementationDate","2020-12-02");

        content.add(map);

        map = new HashMap<>();

        map.put("regulationsId","2");

        map.put("regulationsName","全国人民代表大会常务委员会关于修改《中华人民共和国个人所得税法》的决定(2011)");

        map.put("timeliness","现行有效");

        map.put("IssuedNumber","中华人民共和国主席令第48号");

        map.put("releaseDate","2011-06-30");

        map.put("textContent","全国人民代表大会常务委员会关于修改《中华人民共和国个人所得税法》的决定(2011)\n" +

                "中华人民共和国主席令\n" +

                "(第四十八号) \n" +

                "  《全国人民代表大会常务委员会关于修改<中华人民共和国个人所得税法>的决定》已由中华人民共和国第十一届全国人民代表大会常务委员会第二十一次会议于2011年6月30日通过,现予公布,自2011年9月1日起施行。 \n" +

                "  中华人民共和国主席 ***\n" +

                "2011年6月30日\n" +

                "全国人民代表大会常务委员会关于修改《中华人民共和国个人所得税法》的决定\n" +

                "(2011年6月30日第十一届全国人民代表大会常务委员会第二十一次会议通过)\n" +

                "\n" +

                "  第十一届全国人民代表大会常务委员会第二十一次会议决定对《中华人民共和国个人所得税法》作如下修改:\n" +

                "  \n" +

                "  一、第三条第一项修改为:“工资、薪金所得,适用超额累进税率,税率为百分之三至百分之四十五(税率表附后)。”\n" +

                "  二、第六条第一款第一项修改为:“工资、薪金所得,以每月收入额减除费用三千五百元后的余额,为应纳税所得额。”\n" +

                "  三、第九条中的“七日内”修改为“十五日内”。\n" +

                "  四、个人所得税税率表一(工资、薪金所得适用)修改为:\n" +

                "  级数 全月应纳税所得额   税率(%)\n" +

                "\n" +

                "  1 不超过1500元的       3\n" +

                "\n" +

                "  2 超过1500元至4500元的部分  10\n" +

                "\n" +

                "  3 超过4500元至9000元的部分  20\n" +

                "\n" +

                "  4 超过9000元至35000元的部分 25\n" +

                "\n" +

                "  5 超过35000元至55000元的部分 30\n" +

                "\n" +

                "  6 超过55000元至80000元的部分 35\n" +

                "\n" +

                "  7 超过80000元的部分     45\n" +

                "  (注:本表所称全月应纳税所得额是指依照本法第六条的规定,以每月收入额减除费用三千五百元以及附加减除费用后的余额。)\n" +

                "  五、个人所得税税率表二(个体工商户的生产、经营所得和对企事业单位的承包经营、承租经营所得适用)修改为:\n" +

                "  级数 全年应纳税所得额   税率(%)\n" +

                "\n" +

                "  1 不超过15000元的       5\n" +

                "\n" +

                "  2 超过15000元至30000元的部分 10\n" +

                "\n" +

                "  3 超过30000元至60000元的部分 20\n" +

                "\n" +

                "  4 超过60000元至100000元的部分 30\n" +

                "\n" +

                "  5 超过100000元的部分     35\n" +

                "  (注:本表所称全年应纳税所得额是指依照本法第六条的规定,以每一纳税年度的收入总额减除成本、费用以及损失后的余额。)\n" +

                "  本决定自2011年9月1日起施行。\n" +

                "  《中华人民共和国个人所得税法》根据本决定作相应修改,重新公布。\n");

        map.put("implementationDate","2011-09-01");
     content.add(map);

        EsUtils.bulkRequest(new ArrayList<>(content), "financialregulations","regulationsId");

        return "ok";

    }

    /**

     * 添加索引

     */

    @RequestMapping(value = "/addIndex", method = RequestMethod.GET)

    @ResponseBody

    public String addIndex() throws IOException {

        IndexOperations ops = elasticsearchTemplate.indexOps(FinancialRegulationsES.class);

        if (!ops.exists()){

            ops.create();

            ops.refresh();

            ops.putMapping(ops.createMapping());

        }

        return "ok";

    }

}
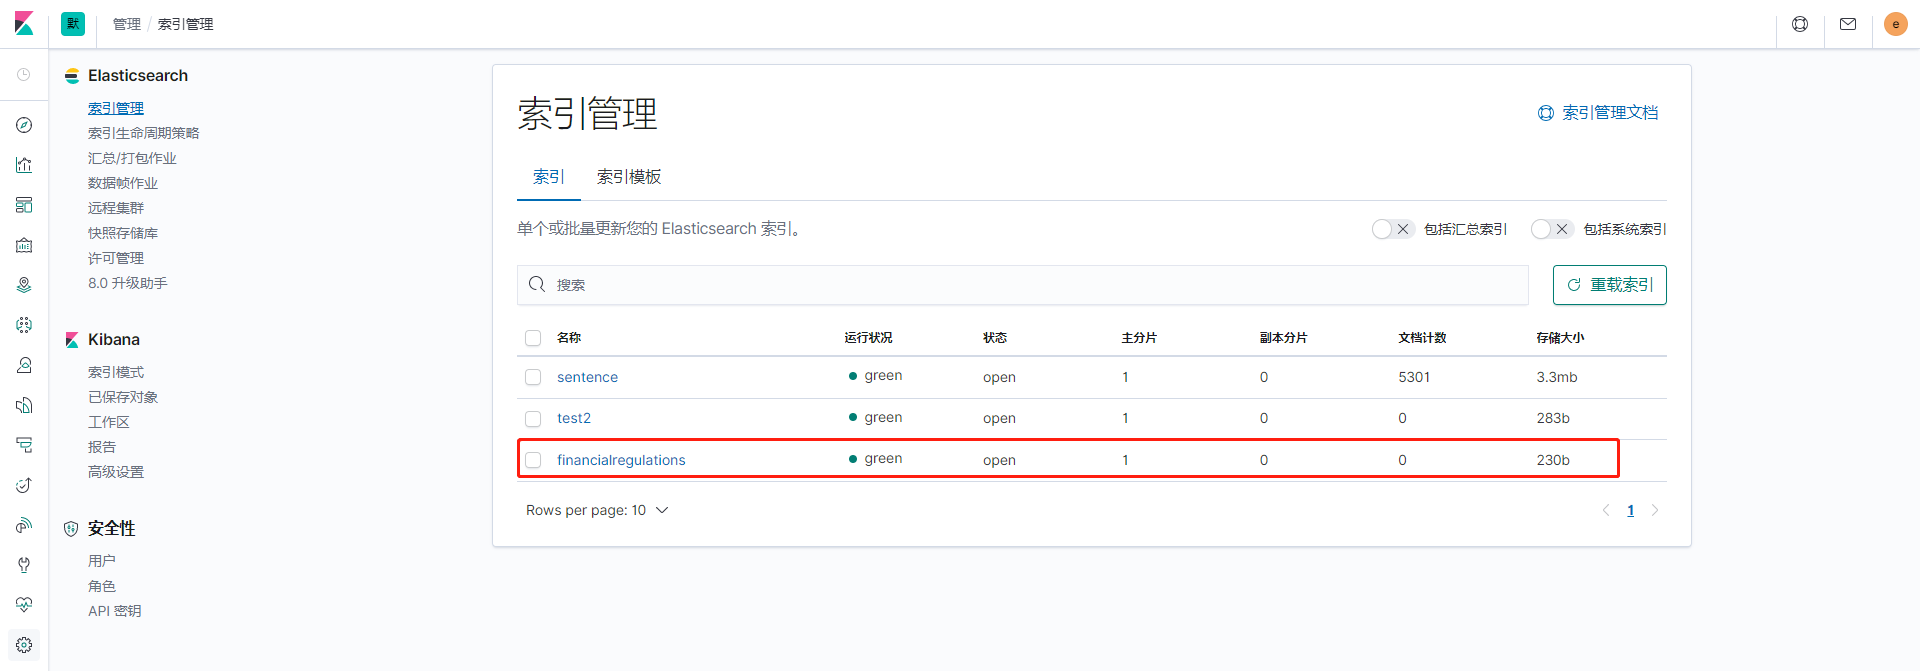
准备好后启动服务开始调用接口,先调用添加索引的接口"/financialRegulationsData/addIndex",成功后前往“http://ip:5601/”查看索引是否添加成功:
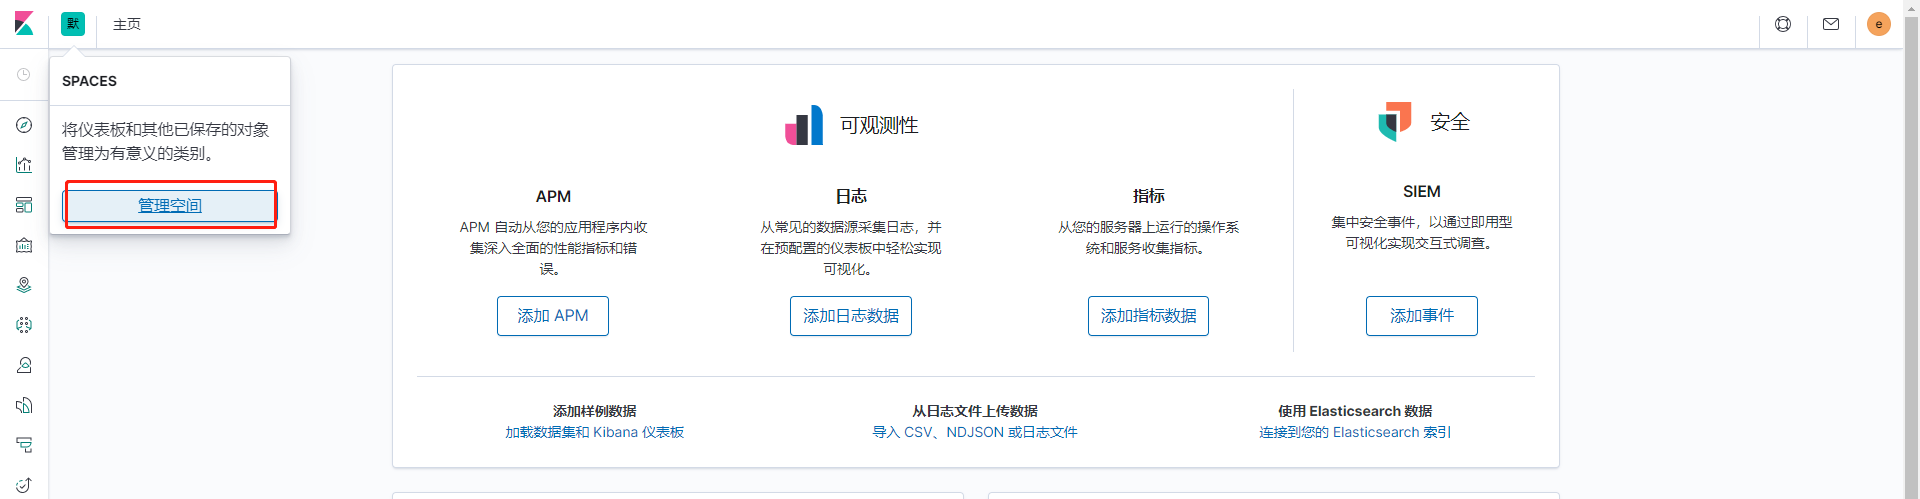
点击左上角的默认图片,点击管理空间,然后点索引管理就能看到所创建好的索引了:
这个就是我们刚刚创建好的索引:
创建好索引后我们添加数据,调用/financialRegulationsData/addAll:
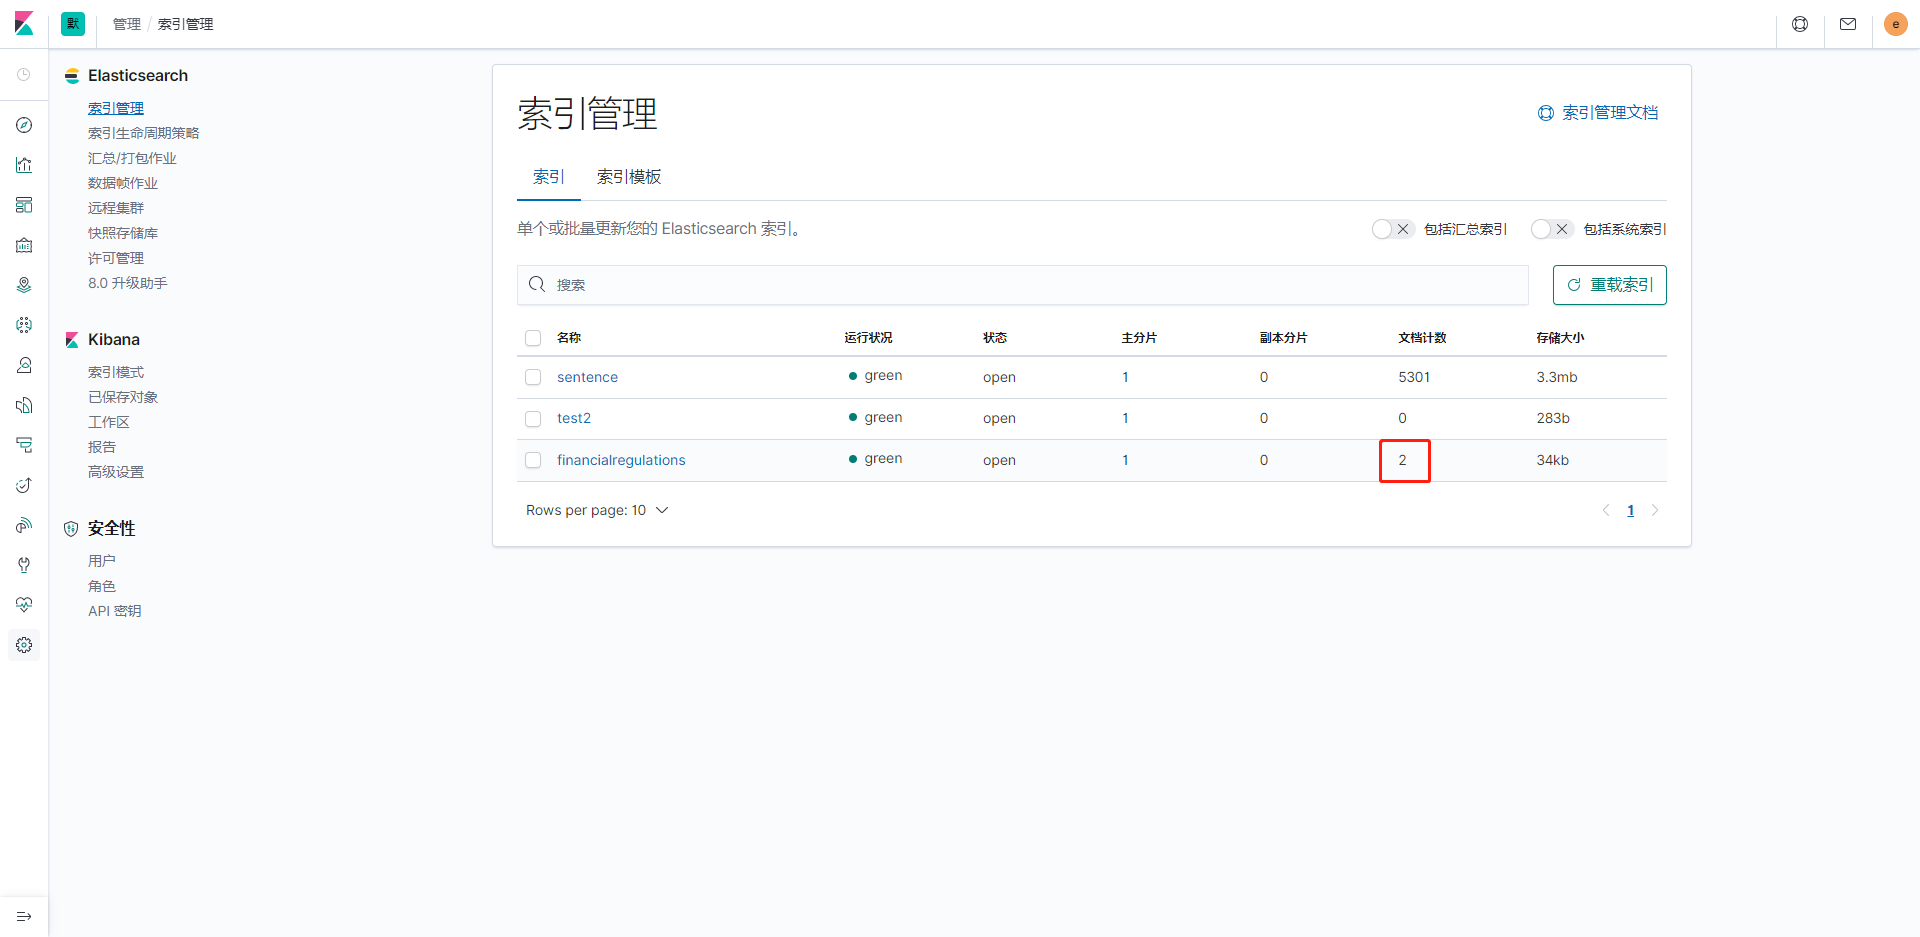
可以发现成功添加了两条,然后我们现在可以看一下数据是否都添加进去了,点击索引模式,点击创建索引模式,根据索引名称创建一个查询界面:
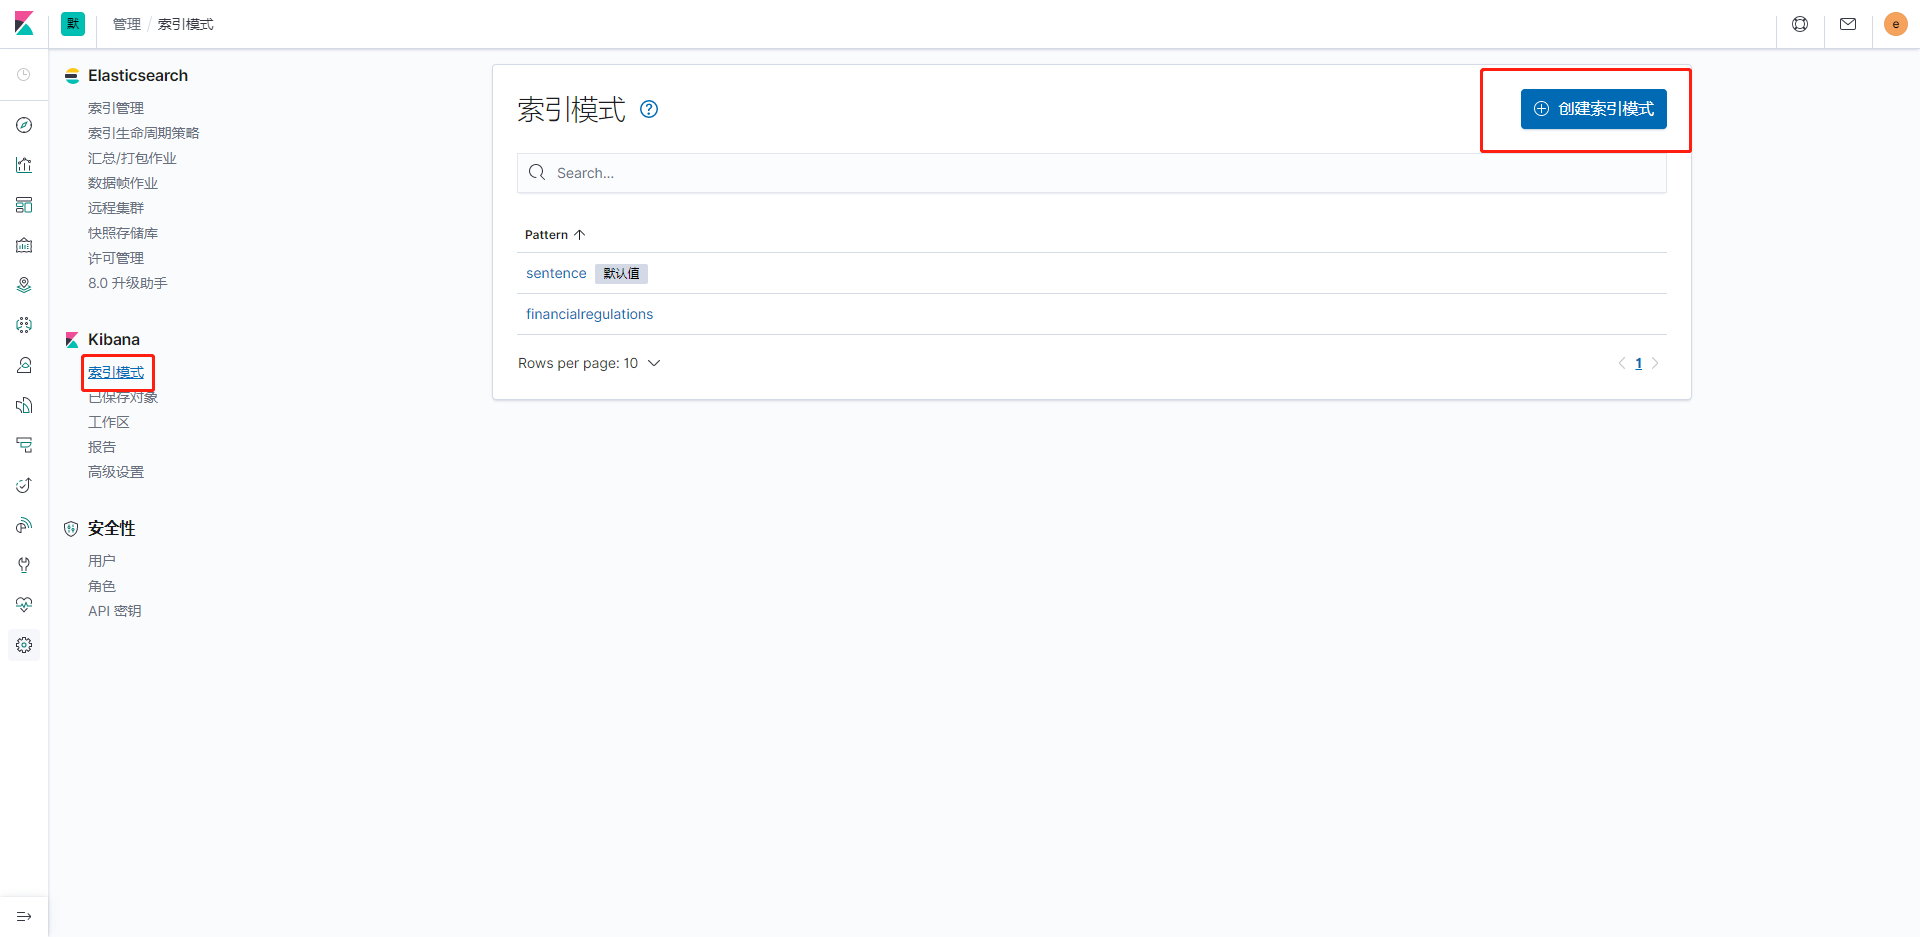
创建成功后点击左菜单栏的指南针图标Discover进去页面查看:
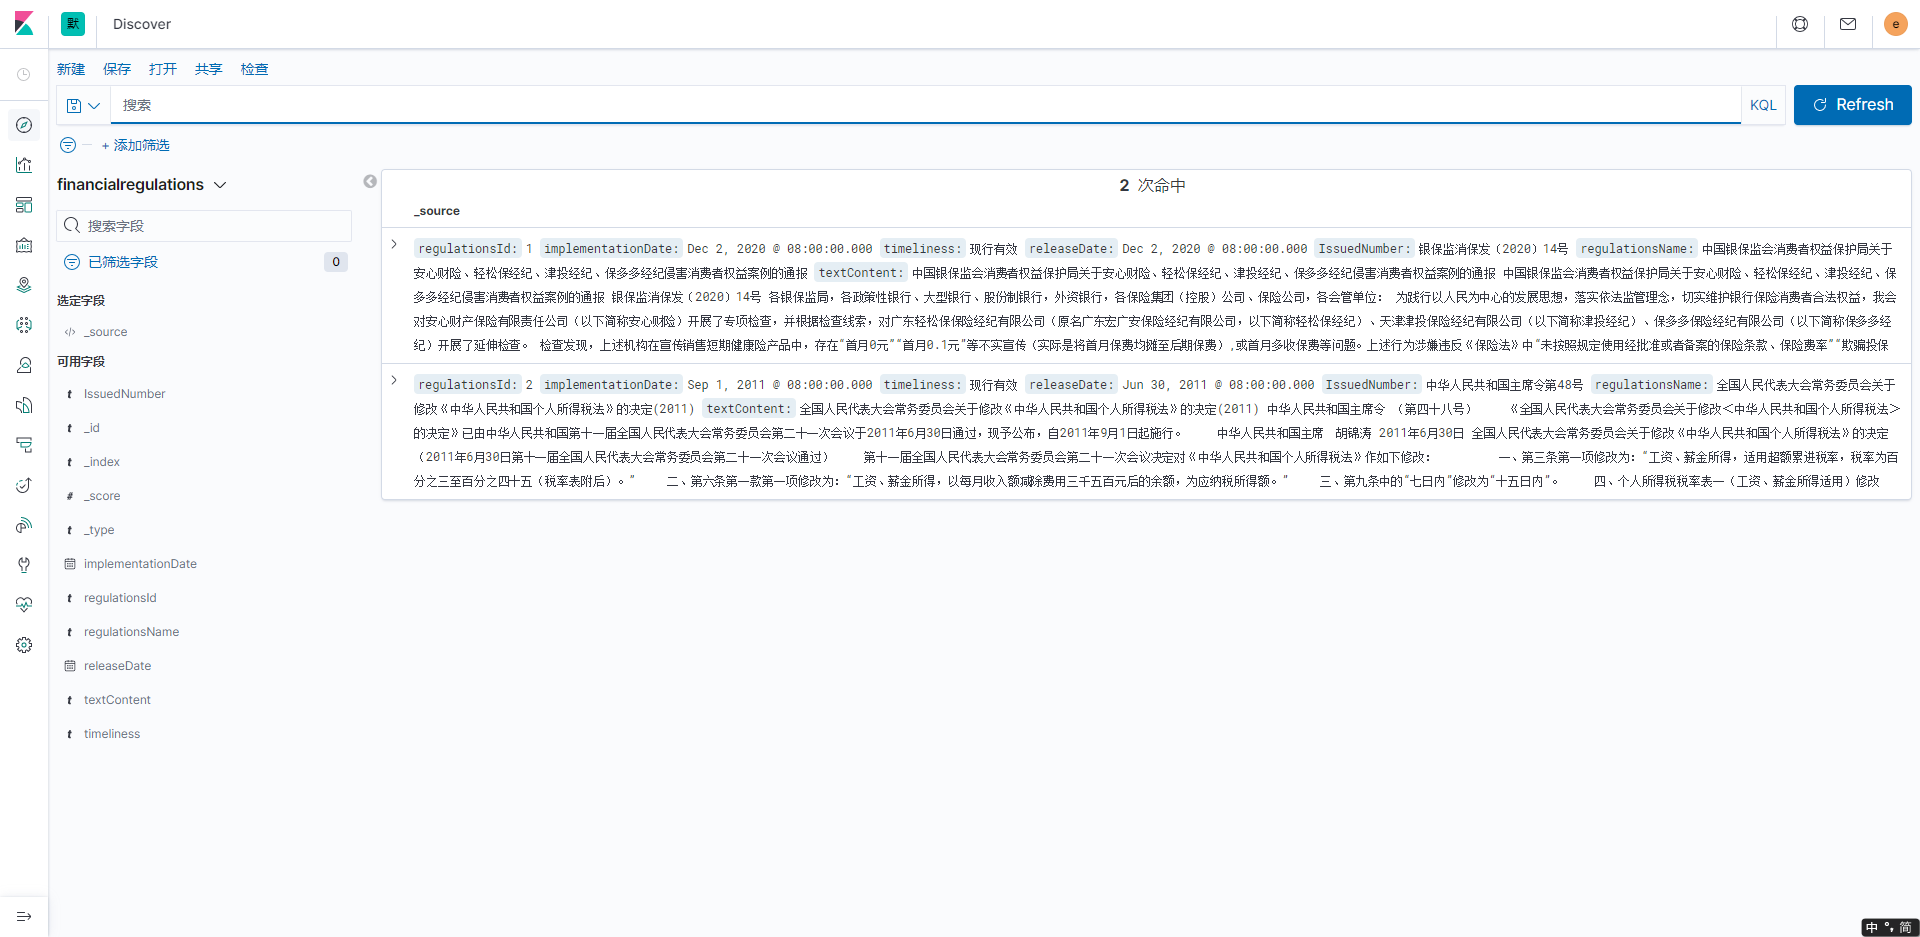
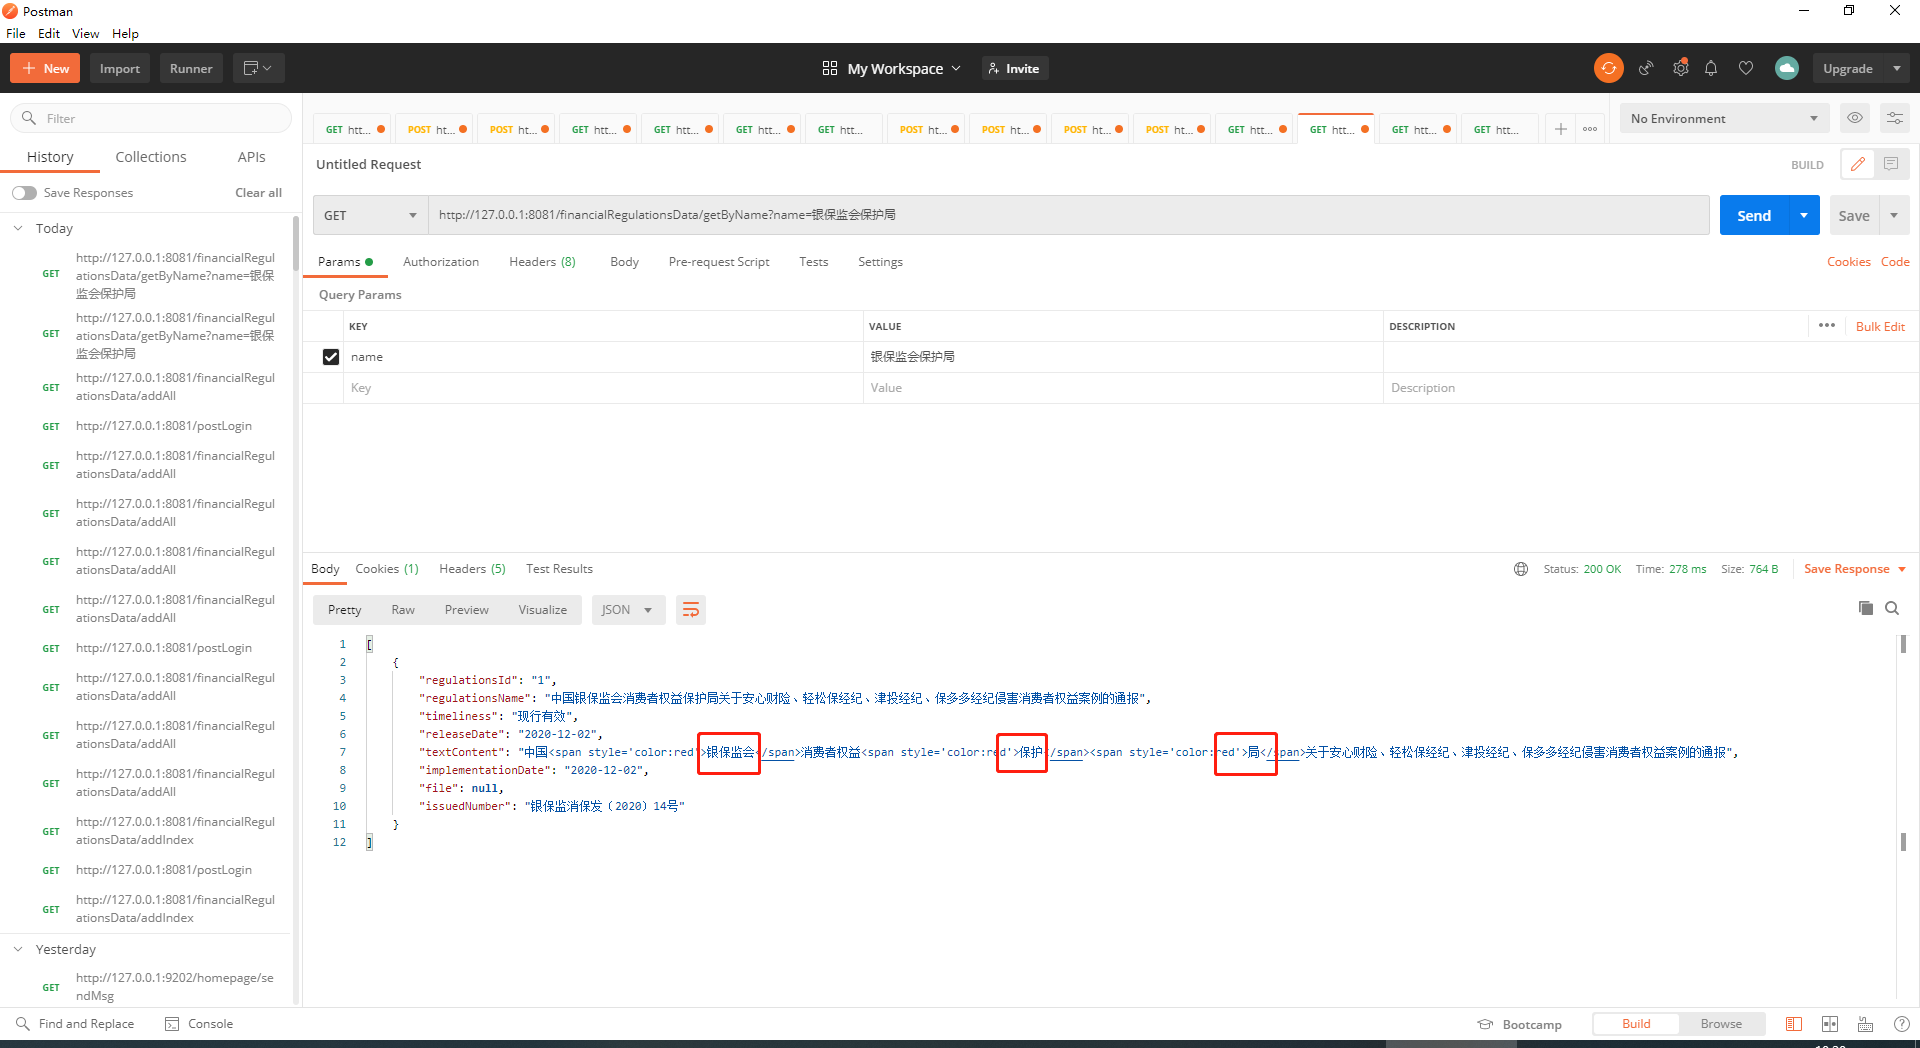
在这里我们就能看到2条数据已经成功插入到了ES中,最后我们做查询,输入“银保监会保护局”,查询出来的数据也做了高亮的处理:
至此SpringBoot集成ES就暂时搞定了,最后提一点,ES的查询默认不会超过1W条数据,如果需要超过1W条需要在kibana中输入命令设置一下:
设置ES中最大的返回行数

PUT 索引名称/_settings

{

  "max_result_window":200000

}

设置成功后就可以查询超过1w条数据了,其中的数字大家酌情设置。
最后再和大家说一个小秘密,如果数据量较多的话,搜出来的内容越到后面越不准确,这个时候就需要增加一个设置了,需要在这句代码后面加上一下内容,建议填写百分比,这样会稍微准确一点,如果填写数字的话个人感觉效果不太好。
QueryBuilders.matchQuery("regulationsName", name).minimumShouldMatch("70%")
到这里以上就是所有内容了,如有问题欢迎指正!
修改、删除由于篇幅问题如果大家有需要的话我再更新一波。
最新文章
- jquery点击隐藏和显示
- JavaScript 运动框架
- C-Lodop 非典型应用
- OC4_NSString操作
- java集合框架02
- 主机windwo7+虚拟机centos如何配置虚拟机可以上网,且与主机互ping通
- vertx的NetServer模块
- vscode中iview的</Col>标签报错问题
- [转]debian9 安装任意版本mysql
- eclipse index 不工作 F3 不能找到头文件
- react-无状态组件
- 在caffe-ssd安装编译环境运行make all时候报错:Makefile:572: recipe for target '.build_release/src/caffe/util/hdf5.o' failed make: *** [.build_release/src/caffe/util/hdf5.o] Error 1
- 【shell编程】之基础知识-输入/输出和重定向
- Informatica 常用组件Aggregator之三 使用排序输入
- Linux hwclock 命令
- 对C语言进行调试的最好方法是什么?
- 返回一个可用的名称如1_4.txt
- PM2部署资料
- maven学习(十四)——Eclipse中使用Maven插件
- ios 自定义URL Scheme 设计
热门文章
- 转:Android JNI
- Table.ReplaceValue替换…Replace…(Power Query 之 M 语言)
- GDAL重投影重采样像元配准对齐
- C++ happens-before 关系是不可传递的
- 8-1yum私有云仓库
- AcWing03. 完全背包问题
- JAVA使用多线程进行数据处理
- 【LeetCode】107. Binary Tree Level Order Traversal II 解题报告 (Python&C++)
- 【LeetCode】1170. Compare Strings by Frequency of the Smallest Character 解题报告(C++)
- 【LeetCode】990. Satisfiability of Equality Equations 解题报告(C++ & python)