Spring Cloud03: Eureka Client 服务提供者
2024-09-02 00:35:47
一、创建一个子工程并引入配置如下:
    <dependency>

    	<groupId>org.springframework.cloud</groupId>

    	<artifactId>spring-cloud-starter-netflix-eureka-client</artifactId>

    	<version>2.0.2.RELEASE</version>

    </dependency>
二、创建application.yml,添加相关配置如下:
server:

  port: 8010

spring:

  application:

    name: provider

eureka:

  client:

    service-url:

      defaultZone: http://localhost:8761/eureka/

  instance:

    prefer-ip-address:  true
属性说明
* spring.application.name : 当前服务注册在 Eureka Server 上的名称。
* eureka.client.service-url.defaultZone : 注册中⼼的访问地址。
* eureka.instance.prefer-ip-address : 是否将当前服务的 IP 注册到 Eureka Server。
三、创建启动类,代码如下
package com.frr;

import org.springframework.boot.SpringApplication;

import org.springframework.boot.autoconfigure.SpringBootApplication;

@SpringBootApplication

public class EurekaClientApplication {

	public static void main(String[] args) throws Exception {

		SpringApplication.run(EurekaClientApplication.class, args);

	}

}
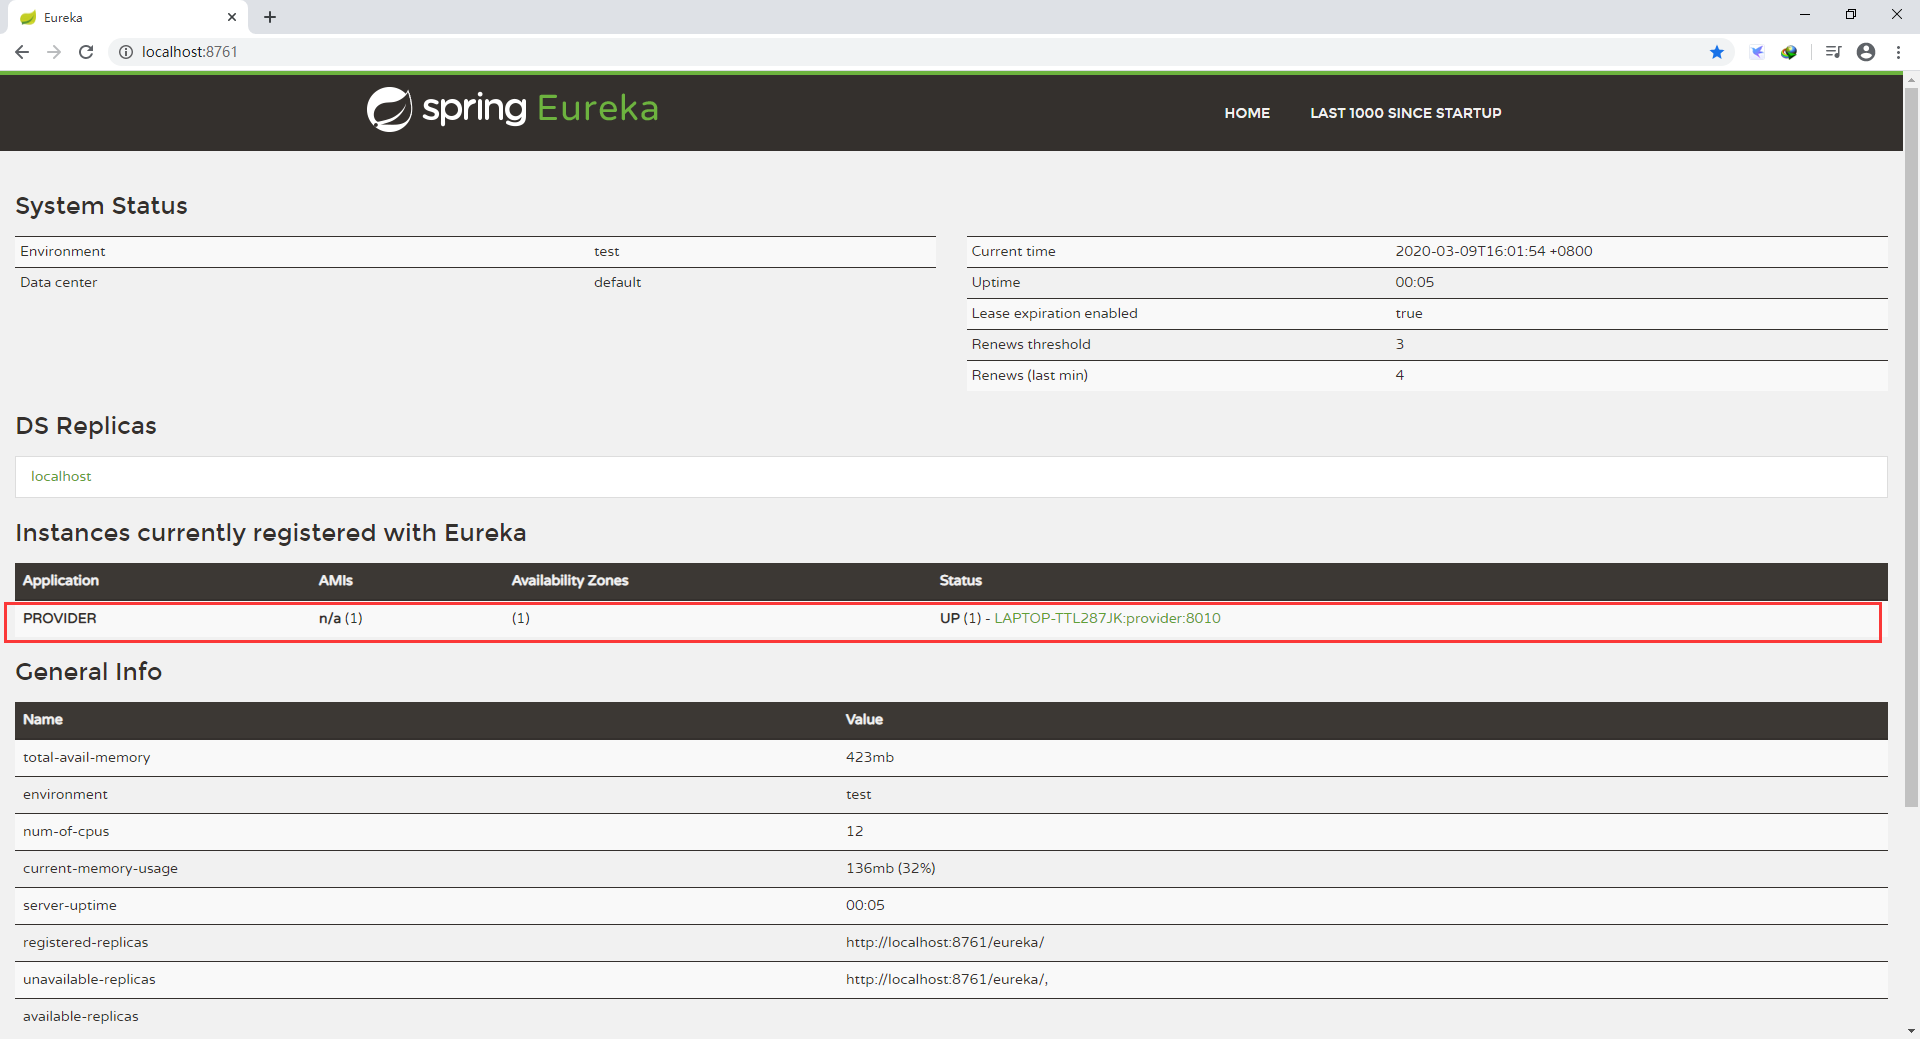
四、启动注册中心,然后再启动刚刚写的服务提供者,访问注册中心的地址可看到以下界面,多出了刚刚注册成功的provider服务
五、实战!模拟学生的增删改查
1.创建student实体类如下:
package com.frr.entity;

import lombok.AllArgsConstructor;

import lombok.Data;

import lombok.NoArgsConstructor;

@Data //生成Getter,Setter,equals,canEqual,hasCode,toString等方法

@AllArgsConstructor //添加一个构造函数,该构造函数含有所有已声明字段属性参数

@NoArgsConstructor //创建一个无参构造函数

public class Student {

	private long id;

	private String name;

	private int age;

}
注解说明
*@Data 生成Getter,Setter,equals,canEqual,hasCode,toString等方法
*@AllArgsConstructor 添加一个构造函数,该构造函数含有所有已声明字段属性参数
*@NoArgsConstructor 创建一个无参构造函数
2.创建接口,代码如下:
package com.frr.repository;

import java.util.Collection;

import com.frr.entity.Student;

public interface StudentRepository {

	public Collection<Student> findAll();

	public Student findById(long id);

	public void saveOrUpdate(Student s);

	public void deleteById(long id);

}
3.创建实现类,采用静态代码块实现数据初始化,代码如下:
package com.frr.repository.impl;

import java.util.Collection;

import java.util.HashMap;

import java.util.Map;

import org.springframework.stereotype.Repository;

import com.frr.entity.Student;

import com.frr.repository.StudentRepository;

@Repository

public class StudentRepositoryImpl implements StudentRepository{

	private static Map<Long,Student> studentMap;

	static {

		studentMap = new HashMap<>();

		studentMap.put(1L, new Student(1L, "张三", 11));

		studentMap.put(2L, new Student(1L, "李四", 11));

		studentMap.put(3L, new Student(1L, "王五", 11));

	}

	@Override

	public Collection<Student> findAll() {

		return studentMap.values();

	}

	@Override

	public Student findById(long id) {

		return studentMap.get(id);

	}

	@Override

	public void saveOrUpdate(Student s) {

		studentMap.put(s.getId(), s);

	}

	@Override

	public void deleteById(long id) {

		studentMap.remove(id);

	}

}
4.创建controller,代码如下:
package com.frr.controller;

import java.util.Collection;

import org.springframework.beans.factory.annotation.Autowired;

import org.springframework.web.bind.annotation.DeleteMapping;

import org.springframework.web.bind.annotation.GetMapping;

import org.springframework.web.bind.annotation.PathVariable;

import org.springframework.web.bind.annotation.PostMapping;

import org.springframework.web.bind.annotation.PutMapping;

import org.springframework.web.bind.annotation.RequestBody;

import org.springframework.web.bind.annotation.RequestMapping;

import org.springframework.web.bind.annotation.RestController;

import com.frr.entity.Student;

import com.frr.repository.StudentRepository;

@RestController //在Spring中@RestController的作用等同于@Controller + @ResponseBody。

@RequestMapping("/student")

public class StudentHandler {

	@Autowired

	private StudentRepository studentRepository;

	@GetMapping("/findAll")

	public Collection<Student> findAll(){

		return studentRepository.findAll();

	}

	@GetMapping("/findById/{id}")

	public Student findById(@PathVariable("id") long id) {

		return studentRepository.findById(id);

	}

	@PostMapping("/save")

	public void save(@RequestBody Student s) {

		studentRepository.saveOrUpdate(s);

	}

	@PutMapping("/Update")

	public void Update(@RequestBody Student s) {

		studentRepository.saveOrUpdate(s);

	}

	@DeleteMapping("/deleteById/{id}")

	public void deleteById(@PathVariable("id") long id) {

		studentRepository.deleteById(id);

	}

}
5.重新启动上文创建的启动类
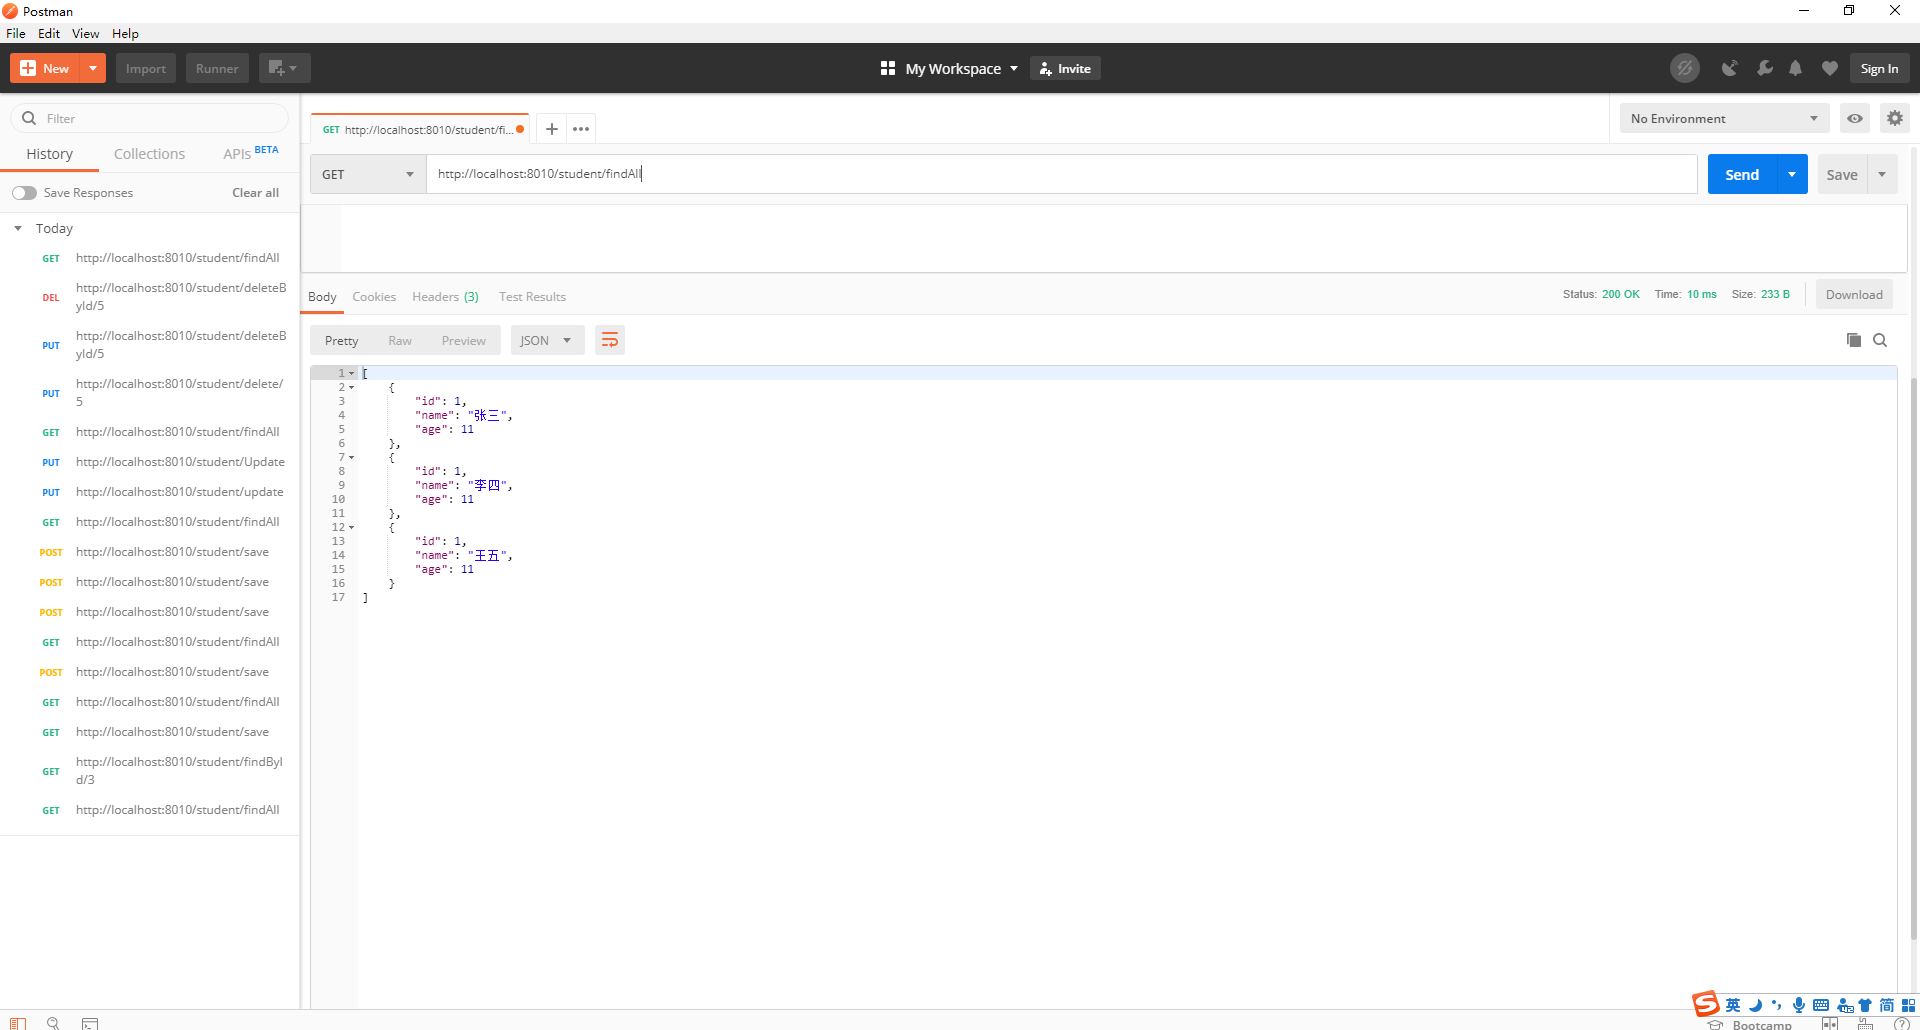
6.使用Postman工具测试各个方法,数据一致表示成功!
最新文章
- Glacierskating测试记录
- C# Socket编程笔记
- 添加JSON Data到已经存在的JSON文件中
- C语言 数组做函数参数不传数组个数的遍历方法
- codevs 2235 机票打折
- Android开源项目第一篇——个性化控件(View)篇
- android 动画NineOldAndroid
- 【转】Android开发之旅:环境搭建及HelloWorld
- android进程间通信:使用AIDL
- JUnit【1】断言用法之assertEquals/True/False/ArrayEquals
- easyui 时间段校验,开始时间小于结束时间,并且时间间隔不能超过30天
- SQL基础巩固
- c#监测电脑状态
- DAY14(PYTHONS)生成器进阶
- 地图标绘系统V1.0测试版【申明:来源于网络】
- 20145203盖泽双 《网络对抗技术》实践八:Web基础
- libgdx学习记录26——Polygon多边形碰撞检测
- Percona MySQL5.7内存OOM案例导致重启的memory和thread分析
- [算法整理]树上求LCA算法合集
- 资源 | 源自斯坦福CS229,机器学习备忘录在集结