UWP开发入门(二十四)—— Win10风格的打印对话框
虽然经常看到阿迪王发“看那个开发UWP的又上吊了”的图……还是忍不住重启一下这个系列。最近有用到UWP的print API,特地来写一篇给某软的这个伟大构想续一秒。
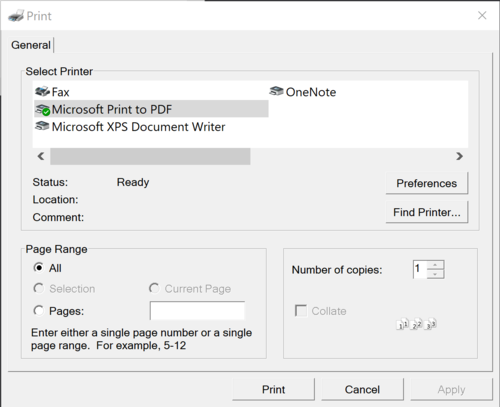
之前的打印对话框差不多长成这样:
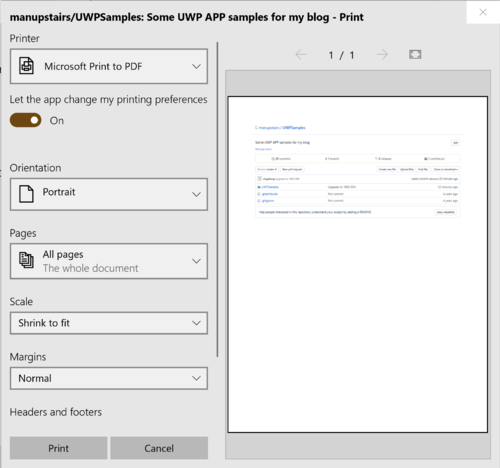
而新的Win10风格打印对话框是下图的样子,包括预览图非常的直观。
首先让我们构建一个极简的UWP程序,太久没写的话说不定手都生了……
    <Grid>

        <Button Width="160" Height="80" Click="Button_Click" Background="Red">Print</Button>

    </Grid>
我们试图在点击这个button时,通过PrintHelper类来显示打印对话框。
        private async void Button_Click(object sender, RoutedEventArgs e)

        {

            var printHelper = new PrintHelper();

            printHelper.PreparePrintContent(this);

            await printHelper.ShowPrintUIAsync();

        }
到这里就是MainPage的所有内容了。然后让我们去看PrintHelper的实现。
在构造函数中,我们需要创建Printdocument和PrintManger的实例,用来注册打印相关的事件。
        public PrintHelper()

        {

            printDocument = new PrintDocument();

            printDocumentSource = printDocument.DocumentSource;

            //printDocument.Paginate += PrintDocument_Paginate;

            printDocument.GetPreviewPage += PrintDocument_GetPreviewPage;

            printDocument.AddPages += PrintDocument_AddPages;

            PrintManager printMan = PrintManager.GetForCurrentView();

            printMan.PrintTaskRequested += PrintMan_PrintTaskRequested;

        }
PrintDocument是对即将打印文档的映射,我们接下来会通过它来构建预览试图等相关信息。
printDocument.Paginate事件主要用于准备所有的预览页,该事件会在打印对话框显示时,被执行一次。如果是单页的打印该事件不处理也可以。
printDocument.GetPreviewPage事件会在显示具体的预览页时,被执行。例如供两页内容,用户前后翻页预览时,每个预览页就是由这里设置。
Sample代码里因为只有一页,所以就直接将PrintContent赋值过去了。
        private void PrintDocument_GetPreviewPage(object sender, GetPreviewPageEventArgs e)

        {

            PrintDocument printDoc = (PrintDocument)sender;

            printDoc.SetPreviewPage(e.PageNumber, PrintContent);

        }
printDocument.AddPages事件在实际打印操作发生时被触发,printDocument会通过AddPage和AddPageComplete方法来通完成文档的准备,然后进行打印操作。
        private void PrintDocument_AddPages(object sender, AddPagesEventArgs e)

        {

            PrintDocument printDoc = (PrintDocument)sender;

            printDoc.AddPage(PrintContent);

            printDoc.AddPagesComplete();

        }
完成以上事件注册以后,我们来看PrintManger,这个可以理解为之前WPF中PrintDialog的UWP版本。我们最终通过它来启动UI打印对话框。根据文档,首先我们必须调用PrintManager.GetForCurrentView()方法,该方法将返回当前活动UWP Window关联的PrintManager,然后我们需要注册事件printMan.PrintTaskRequested,这个事件会在打印操作发生时被触发。
        private void PrintMan_PrintTaskRequested(PrintManager sender, PrintTaskRequestedEventArgs args)

        {

            PrintTask printTask = null;

            printTask = args.Request.CreatePrintTask("", sourceRequested =>

            {

                sourceRequested.SetSource(printDocumentSource);

            });

        }
在这个事件里,一般会CreatePrintTask,然后做一些打印的配置,最后指定printDocumentSource。
PrintHelper里其余部分的代码,仅仅时简单的封装和参数传递:
        public async Task ShowPrintUIAsync()

        {

            if (PrintManager.IsSupported())

            {

                await PrintManager.ShowPrintUIAsync();

            }

        }

        public virtual void PreparePrintContent(UIElement printContent)

        {

            PrintContent = printContent;

        }
具体大家可以参考Github上的Sample code:
https://github.com/manupstairs/UWPSamples/tree/master/UWPSamples/PrintingSample
最新文章
- 用Spire.doc来合并邮件
- 利用css3制作的几个loading图
- Handler的总结
- 在linux上使用交换文件扩展交换空间
- Windows-008-VirtualBox 安装 Win7 前沿配置详解
- CSS 3的display:盒类型详解
- 问题-[Delphi]断点后怎么设置条件
- C++中用rand()和srand()产生随机数方法介绍
- 一步一步写算法(之prim算法 下)
- Sparse Filtering
- Changing a remote's URL
- Java之IO流学习总结【下】
- Python 获取车票信息
- Linux命令归纳
- async函数
- python基础之 异常处理和logging模块
- css 两端对其
- VEMap.DeleteAllShapeLayers 方法
- window.open()打开页面
- (原创)c++11改进我们的模式之改进观察者模式