ActiveMQ使用Zookeeper+LevelDb配置Master/Slave集群
前言:
本文介绍的AMQ集群是Master-Slave模式的,官网介绍三种方案:
(1)基于共享文件系统的,(2)基于JDBC,(3)基于可复制的LevelDB。
关于三种方式的对比网上已经有很多,本文不再介绍,本文采用第三种,基于可复制的LevelDB。

原理图如上,很简单:
(1)使用Zookeeper从配置的AMQ集群中,选举一个Master,其余自动为Slave。
(2)只有Master和Client之间建立Connections,然后Master将持久化的操作复制到Slave上。
(3)All messaging operations which require a sync to disk will wait for the update to be replicated to a quorum of the nodes before completing. So if you configure the store with replicas="3" then the quorum size is (3/2+1)=2. The master will store the update locally and wait for 1 other slave to store the update before reporting success. Another way to think about it is that store will do synchronous replication to a quorum of the replication nodes and asynchronous replication replication to any additional nodes.
大概意思是,Master接收到客户端的消息后,先更新本地的LevelDB,之后再等待这个更新被复制到“法定”数目的AMQ节点,才能够返回成功标志。所谓“法定”数目节点,下文会讲到一个配置 replicas=3,表示有3个Node,则"法定"数目=3/2+1=2,也就有3个Node中有两个Node(包括Master)更新收到的消息,就可以返回成功了。
(4)When a new master is elected, you also need at least a quorum of nodes online to be able to find a node with the lastest updates. The node with the lastest updates will become the new master. Therefore, it's recommend that you run with at least 3 replica nodes so that you can take one down without suffering a service outage.
官网推荐的时最少3个的节点。Master挂掉后,剩下两个Slave中拥有最新副本的成为Master。如果节点数据不足3个,Master挂掉后,会报错:不够节点以选出新的Master。
一、配置方法
我用的windows操作系统。
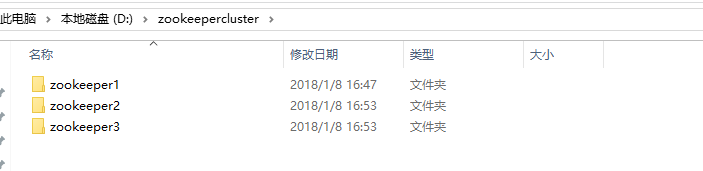
1、配置Zookeeper集群
修改每个zk节点的zoo.cfg:
clientPort=2182 #客户端的端口,我配置的分别为2181,2182,2183
server.1=127.0.0.1:2886:3886 #第一个端口用来集群成员的信息交换,表示这个服务器与集群中的 Leader 服务器交换信息的端口;第二端口是在leader挂掉时专门用来进行选举 leader 所用的端口。
server.2=127.0.0.1:2887:3887
server.3=127.0.0.1:2888:3888
然后,在每个文件节点的data目录下创建myid文件,里边写上该节点编号:1,2,3
2、配置ActiveMQ集群:

同样也是三个节点,首先配置每个AMQ的通信端口以及控制台端口,分别位于Activemq.xml:

以及Jetty.xml:

第二,在activemq.xml中配置持久化策略:
         <persistenceAdapter>

            <replicatedLevelDB  directory="${activemq.data}/leveldb"

            replicas="3"

            bind="tcp://0.0.0.0:0"

            zkAddress="127.0.0.1:2181,127.0.0.1:2182,127.0.0.1:2183"

            hostname="127.0.0.1"

            sync="local_disk"

            zkPath="/activemq/leveldb-stores"

            />

        </persistenceAdapter>
使用可复制的leveldb,官方推荐的策略,主要用于分布式集群。zkAddress配置zk集群的三个客户端端口。
3、启动所有的zk以及AMQ节点。
二、测试
我写的active-demo上传在github:https://github.com/zackzhuzi/activemq-demo
比较简单,producer和consumer都在一个工程里,使用SPRING的JMSTemplate,集群部分使用failover协议连接集群:
<!-- 配置JMS连接工厂 -->

    <bean id="defaultConnectionFactory" class="org.apache.activemq.spring.ActiveMQConnectionFactory">

        <property name="brokerURL"

            value="failover:(tcp://localhost:61616,tcp://localhost:61617,tcp://localhost:61618)?initialReconnectDelay=1000" />

        <!-- <property name="brokerURL" value="tcp://localhost:61616" /> -->

        <property name="redeliveryPolicy" ref="activeMQRedeliveryPolicy" />

    </bean>
详细代码看我的demo。
(1)比如我的master是M1(端口分别为61616,8161),则M2,M3不与客户端相连,所以只有localhost:8161可以访问。localhost:8162/8163都不可访问。
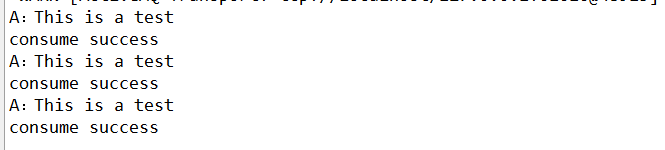
Producer通过Junit启动后,发送消息,Consumer能正常打印出消息。
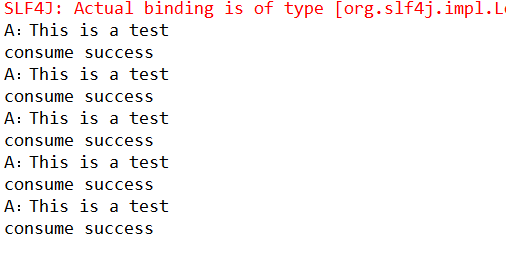
(2)将M1关闭后,这时候M2自动成为Master,集群仍然可以提供服务。localhost:8162可以访问。
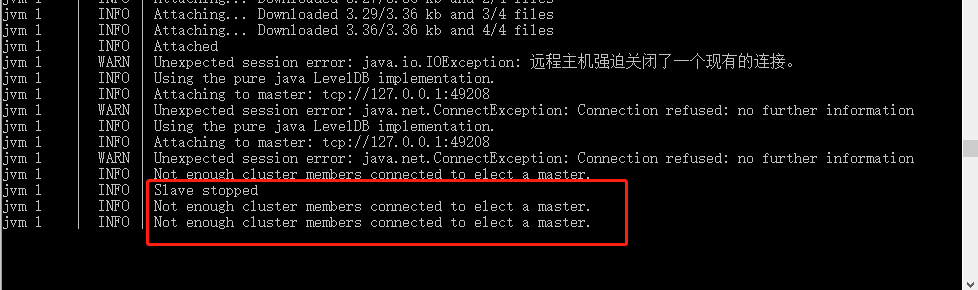
(3)将M2关闭,这时只有M3开启。但是集群不再提供服务,localhost:8163也不可访问。M3的日志如下:
(4)开启M1,这时集群有两台AMQ服务,超过半数,M3选为Master。集群正常提供服务。localhost:8163可以访问。
(5)最后再开启M2,也自动加入集群中。
三、其他
1、注意:三个AMQ的brokerName必须一样,才能加入一个集群。
最新文章
- java 自带md5加密
- CG基础教程-陈惟老师十二讲笔记
- Web前端面试常识
- Android 抽屉效果
- HDU 1045 Fire Net(图匹配)
- linux下U盘的读取
- 如何使用sql语句使你的数据库减肥,下面以网狐6603数据库减肥脚本举例!
- python 笔记2--函数
- (10)Xamarin.Android - 储存数据于Windows Azure
- 详解iOS开发之自定义View
- VS2010-使用“预先生成事件命令行”和“后期生成事件命令行”功能
- 项目工程中的WebRoot与WebContent有什么区别?
- HTTP协议中GET和POST的区别(详细描述)
- 理解Liang-Barsky裁剪算法的算法原理
- mysql数据库优化(二)
- 关于An internal error occurred during: "Launching MVC on Tomcat 6.x". java.lang.NullPointerException异常处理
- StringUtils.isEmpty和StringUtils.isBlank用法和区别
- Trailing Zeroes (III) (二分)题解
- qt5.7 安装
- vs2010下设置release版本调试设置