【spring源码分析】IOC容器初始化——查漏补缺(三)
前言:本文分析InitializingBean和init-method方法,其实该知识点在AbstractAutowireCapableBeanFactory#initializeBean方法中有所提及,这里对其进行详细分析。
InitializingBean
InitializingBean是一个接口,它只包含一个afterPropertiesSet方法:
 public interface InitializingBean {

     /**

      * 该方法在BeanFactory设置完了所有的属性之后被调用<br/>

      * 该方法允许bean实例设置了所有bean属性时执行初始化工作,如果该过程出现了错误,则需要抛出异常<br/>

      * Invoked by the containing {@code BeanFactory} after it has set all bean properties

      * and satisfied {@link BeanFactoryAware}, {@code ApplicationContextAware} etc.

      * <p>This method allows the bean instance to perform validation of its overall

      * configuration and final initialization when all bean properties have been set.

      *

      * @throws Exception in the event of misconfiguration (such as failure to set an

      *                   essential property) or if initialization fails for any other reason

      */

     void afterPropertiesSet() throws Exception;

 }
分析:
Spring在完成实例化后,设置完所有属性,进行"Aware"接口和"BeanPostProcessor"前置处理后,会接着检测当前bean对象是否实现了InitializingBean接口,如果是,则会调用其afterPropertiesSet方法进一步调整bean实例对象的状态。
InitializingBean示例
 public class UserDefinedInitializingBean implements InitializingBean {

     private String msg;

     public String getMsg() {

         return msg;

     }

     public void setMsg(String msg) {

         this.msg = msg;

     }

     @Override

     public void afterPropertiesSet() throws Exception {

         System.out.println("InitializingBean afterPropertiesSet......");

         this.msg = "修改了msg,msg=hello initializingBean!!!!!!";

     }

 }
进行如下配置:
 <bean id="userDefinedInitializingBean" class="com.dev.basebean.initializingbean.UserDefinedInitializingBean"

           p:msg="i am msg!!!"/>
测试:
 @Test

     public void initializingBeanTest() {

         ApplicationContext context = new ClassPathXmlApplicationContext("classpath*:com/dev/config/initializingbean/initializingbean.xml");

         UserDefinedInitializingBean initializingBean = context.getBean(UserDefinedInitializingBean.class);

         System.out.println(initializingBean.getMsg());

     }
运行结果如下:

从运行结果来看,msg属性被我们修改了,在afterPropertiesSet方法中,这相当于Spring又提供给我们一种可以改变bean实例对象的方法。
invokeInitMethods
InitializingBean的afterPropertiesSet方法就是在invokeInitMethods方法中被执行的。
AbstractAutowireCapableBeanFactory#invokeInitMethods:
 protected void invokeInitMethods(String beanName, final Object bean, @Nullable RootBeanDefinition mbd)

             throws Throwable {

         // 首先先检查是否是InitializingBean,如果是,则需要调用afterPropertiesSet()

         boolean isInitializingBean = (bean instanceof InitializingBean);

         if (isInitializingBean && (mbd == null || !mbd.isExternallyManagedInitMethod("afterPropertiesSet"))) {

             if (logger.isDebugEnabled()) {

                 logger.debug("Invoking afterPropertiesSet() on bean with name '" + beanName + "'");

             }

             // 安全模式

             if (System.getSecurityManager() != null) {

                 try {

                     AccessController.doPrivileged((PrivilegedExceptionAction<Object>) () -> {

                         ((InitializingBean) bean).afterPropertiesSet();

                         return null;

                     }, getAccessControlContext());

                 } catch (PrivilegedActionException pae) {

                     throw pae.getException();

                 }

             } else {

                 // 属性初始化处理

                 ((InitializingBean) bean).afterPropertiesSet();

             }

         }

         if (mbd != null && bean.getClass() != NullBean.class) {

             String initMethodName = mbd.getInitMethodName();

             if (StringUtils.hasLength(initMethodName) &&

                     !(isInitializingBean && "afterPropertiesSet".equals(initMethodName)) &&

                     !mbd.isExternallyManagedInitMethod(initMethodName)) {

                 // 激活用户自定义的初始化方法

                 invokeCustomInitMethod(beanName, bean, mbd);

             }

         }

     }
分析:
- 首先检查当前bean是否实现了InitializingBean接口,如果实现了,则调用其afterPropertiesSet方法。
- 然后再检查是否指定了init-method,如果指定了init-method方法,则通过反射进行调用。
init-method
对init-method进行示例,只需根据上面示例进行一点调整即可。
 <bean id="userDefinedInitializingBean" class="com.dev.basebean.initializingbean.UserDefinedInitializingBean"

           p:msg="i am msg!!!" init-method="initMethod"/>
在UserDefinedInitializingBean中增加如下代码:
 public void initMethod() {

         System.out.println("通过init-method方法对msg属性进行修改");

         this.msg = "修改了msg,msg=hello init-method!!!!!!";

     }
运行结果如下:
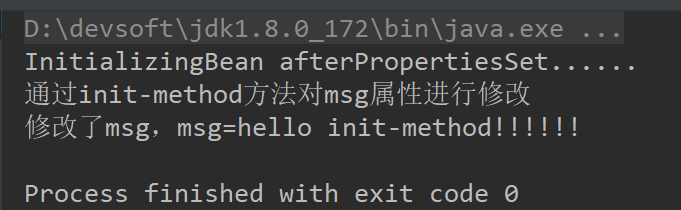
从结果上可以看到init-method方法是在afterPropertiesSet方法之后,并且达到了同样的效果,对代码无侵入性。
分析到这里其实已经把bean的生命周期都总结出来,下篇文章进行具体总结,这里想来看本篇小结。
总结
从invokeInitMethods方法中,我们知道init-method指定的方法会在afterPropertiesSet方法后执行,如果afterPropertiesSet方法执行过程中出现异常,init-method方法是不会执行的。使用init-method使其对业务代码的侵入降低,虽然init-method是基于xml配置文件的,但我们也可以通过@PostConstruct注解的形式来进行替换。
至此InitializingBean和init-method已分析完毕,对于DisposableBean和destroy-method与init相似,这里不再进行赘述。
by Shawn Chen,2019.05.05,下午。
最新文章
- 微信支付开发demo
- 【Qt学习笔记】窗口部件整理
- MySQL配置文件mysql.ini参数详解、MySQL性能优化
- Sqli-LABS通关笔录-13
- [3D跑酷] MissionManager
- Block编程值得注意的那些事儿
- Ubuntu 14.04 64位安装Android Studio 和 genymotion (上)
- C# 获取配置文件节点值
- 使用sqlcmd执行连接的时候一直报有语法错误
- maintenance ShellScripts
- 关于php数组是否要声明
- 【Alpha阶段】第四次 Scrum Meeting
- 【转】JAVA处理线程超时
- sips 命令(iMac 下系统自带)
- python -----一个简单的小程序(监控电脑内存,cpu,硬盘)
- 给AFNetworking添加请求缓存功能实现在没有网络的情况下返回缓存数据
- Nginx:承受3万并发连接数,胜过Apache 10倍
- Kotlin 语言作为Android新的官方语言
- UVM中的driver组件
- javascript进行遍历