es6基本语法,vue基本语法
一.es6基本语法
0.es6参考网站
http://es6.ruanyifeng.com/#README
1.let 和 const
(1)const特点:
只在局部作用域起作用
不存在变量提升
不能重复声明
Var声明变量提升问题:
 <script>

         //相当于在开头var a,所以第一次打印是undefined而不是报错

         console.log(a);  //undefined

         {

             var a=1;

             console.log(a)    //1

         }

         console.log(a)    //1

  </script>
变量重复声明问题:
 <script>

         {

             var a=1;

             var a=2;

             console.log(a)    //2 var可以重复声明,下一次会把上一次的覆盖

             let b=1;

             let b=2;

             console.log(b)   //Identifier 'b' has already been declared

                              //let不可以重复声明变量

         }

     </script>
(2)Let特点:
局部作用域
不能重复声明
只声明常量,不可变的量
2.模板字符串:用$和{}实现字符串的拼接
 <script>

     let name="shy";

     let a=`我的名字叫${name}`;

     console.log(a);  //我的名字叫shy

 </script>
3.箭头函数
语法:
 <script>

     let add1 = function add(x) {

         return x

     };

     ret1=add1(10);//10

     console.log(ret1);//以上为普通函数

     let add2 = (x) => {

         return x

     };

     ret2=add2(20);//20

     console.log(ret2)//箭头函数的语法

 </script>
简便写法:
 <script>

     let add3 =x =>x;

     ret3=add3(30);

     console.log(ret3)

 </script>
4.es6的类
(1)使用匿名函数做方法的类
 <script>

     let person={

         name:"shy",

         age:13,

         favorite:function(){

             console.log(this.name)

         }

     };

     person.favorite()//shy

 </script>
(2)使用箭头函数做方法的类
 <script>

     let person={

         name:"shy",

         age:13,

         favorite: () => {

             console.log(111)

         }

     };

     person.favorite()//11

 </script>
(3)this的指向问题
 <script>

 //正常函数

     let person1={

         name:"shy",

         age:13,

         favorite:function (){

             console.log(this)//{name: "shy", age: 13, favorite: ƒ}

         }

     };

     person1.favorite();

 //箭头函数

     let person2={

         name:"shy",

         age:13,

         favorite: () => {

             console.log(this)//Window {postMessage: ƒ, close: ƒ, frames: Window, …}

         }

     };

     person2.favorite()

 </script>
总结:在普通的函数中,this是指向调用者,在箭头函数中this指向调用者的父类,即上下文
5.对象的单体模式
 <script>

     let person={

         name:"shy",

         fav(){

             console.log(this)

         }

         //相当于以下写法

         // fav:function(){

         //     console.log(this)

         // }

     }

 </script>
相当于正常的函数,所以this的指向是调用者
6.基于原型给函数声明方法(函数的原型)
 <script>

     function Person (name,age){

         this.name=name;

         this.age=age;

     }

     Person.prototype.showname=function(){

         console.log(this.name)

     };

     let person=new Person("shy",13);

     person.showname()

 </script>
注:给Person的原型添加一个 方法,以后其他地方也可以调用该方法,可以将prototype理解成Person的父类
7.类
 <script>

     class Person{

         constructor(name,age){//放置参数

             this.name=name;//这里的this与python中的self类似

             this.age=age;

         }

         showname(){

             console.log(this.name)

         }

     }

     let person=new Person("shy",15);

     person.showname()//shy

 </script>
二. vue基本用法
1.介绍
Vue是一套用于构建用户界面的渐进式框架。创始人:尤雨溪
前端三大框架:
vue,
angular:谷歌公司
react:Facebook
2.下载,引用
(1)下载
在官网中;https://cn.vuejs.org/v2/guide/连接cdn的资源或下载使用均可
(2)引用,实例化
 <body>

 //模板语法

 <div class="box">{{ message }}</div>

 //引包

 <script src="vue.js"></script>

 <script>

 //实例化对象

     var box = new Vue({

     //绑定元素

         el: '.box',

         //数据

         data: {

             message: 'Hello Vue!'

         }

     })

 </script>

 </body>
注:模板语法中可以放很多种类型的数据
    <h2>{{ msg }}</h2>    //字符串

    <h3>{{ 'hhahda' }}</h3>    //直接渲染字符串

    <h3>{{ 1+1 }}</h3>      //运算

    <h4>{{ {'name':'alex'} }}</h4>   //字典

    <h5>{{ person.name }}</h5>    //字典的使用

    <h2>{{ 1>2? '真的': '假的' }}</h2>   //三元运算符

    <p>{{ msg2.split('').reverse().join('') }}</p>

    <div>{{ <h2>日天</h2> }}</div>  //标签
3.v-text,v-html
v-text相当于innertext,v-html相当于innerHTML
 <body>

 <div class="box">

     <div v-text="msg"></div>  //<h2>shy</h2>

     <div v-html="msg"></div>  //shy

 </div>

 <script src="vue.js"></script>

 <script>

     new Vue({

         el:".box",

         data(){

             return{

                 msg:"<h2>shy</h2>"

                 //******

                 //data中必须是一个函数,函数中要return一个对象,可以是空对象

                 //******

             }

         }

     })

 </script>

 </body>
4.v-if,v-show
 <head>

     <meta charset="UTF-8">

     <title>Title</title>

     <style>

         .show_or_hide1{

             height: 200px;

             width: 200px;

             background-color: #ce8483;

         }

         .show_or_hide2{

             height: 200px;

             width: 200px;

             background-color: #ce412f;

         }

     </style>

 </head>

 <body>

 <div class="box">

     <button v-on:click="handlerclick">显示隐藏</button>

     <div  class="show_or_hide1" v-show="show_or_hide"></div>//v-show语法

     <div class="show_or_hide2"  v-if="show_or_hide"></div>//v-if语法

 </div>

 <script src="vue.js"></script>

 <script>

     new Vue({

         el:".box",

         data(){

             return{

                 show_or_hide:true

             }

         },

         methods:{

             handlerclick(){

                 this.show_or_hide=!this.show_or_hide;

             }

         }

     })

 </script>

 </body>
当show_or_hide为真时,盒子显示,show_or_hide为false时,盒子隐藏,V-show:相当于style.display,v-if相当于删掉盒子(渲染开销大),盒子消失时会用<!---->占位
v-show与v-if的区别
v-if vs v-show

v-if 是“真正”的条件渲染,因为它会确保在切换过程中条件块内的事件监听器和子组件适当地被销毁和重建。

v-if 也是惰性的:如果在初始渲染时条件为假,则什么也不做——直到条件第一次变为真时,才会开始渲染条件块。

相比之下,v-show 就简单得多——不管初始条件是什么,元素总是会被渲染,并且只是简单地基于 CSS 进行切换。

一般来说,v-if 有更高的切换开销,而 v-show 有更高的初始渲染开销。因此,如果需要非常频繁地切换,则使用 v-show 较好;如果在运行时条件很少改变,则使用 v-if 较好。
v-if可以与v-else一起使用
 <body>

 <div class="box">

     <div  v-if="Math.random() > 0.5">大于0.5</div>

     <div v-else>小于0.5</div>

 </div>

 <script src="vue.js"></script>

 <script>

     new Vue({

         el:".box",

         data(){

             return{

             }

         }

     })

 </script>

 </body>
注:自定义属性和vue定义的属性在前端显示时,vue定 义的属性前会加一个$
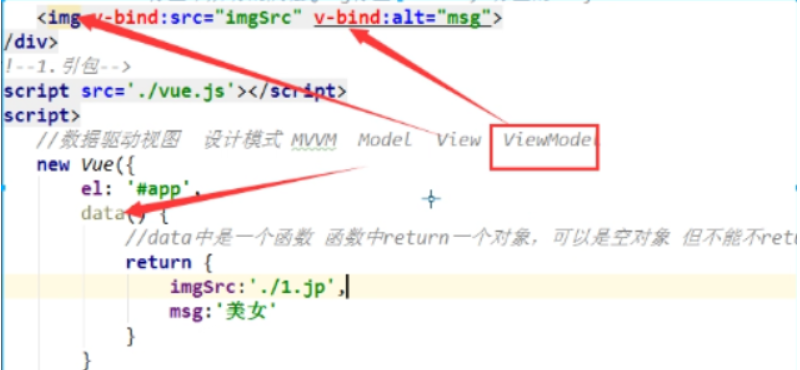
5.v-bind和v-on
(1)v-bind
作用:用来绑定属性,如img标签的src,alt,a标签的href,id,class
语法:
 <body>

 <div id="app">

 //绑定语法

     <img v-bind:src="img_src" v-bind:alt="img_alt">

 </div>

 <script src="vue.js"></script>

 <script>

     new Vue({

         el:"#app",

         data(){

             return{

                 img_src:"./11.JPG",

                 img_alt:"美女",

             }

         },

     })

 </script>

 </body>
数据驱动视图,设计模式mvvm model view viewmodel

(2)v-on
作用:v-on可以监听所有的事件
例:动态添加active类名
 <head>

     <meta charset="UTF-8">

     <title>Title</title>

     <style>

         .box{

             width: 200px;

             height: 200px;

             background-color: #ce8483;

         }

         .active{

             width: 200px;

             height: 200px;

             background-color: #637ece;

         }

     </style>

 </head>

 <body>

 <div id="app">

 //v-on的语法

     <button v-on:click="changecolor">切换颜色</button>

     //v-bind的另一种用法

     <div class="box" v-bind:class="{active:is_show}"></div>

 </div>

 <script src="vue.js"></script>

 <script>

     new Vue({

         el:"#app",

         data(){

             return{

                 is_show:true,

             }

         },

         //v-on声明的函数都在methods里

         methods:{

             changecolor(){

                 this.is_show=!this.is_show

             }

         }

     })

 </script>

 </body>
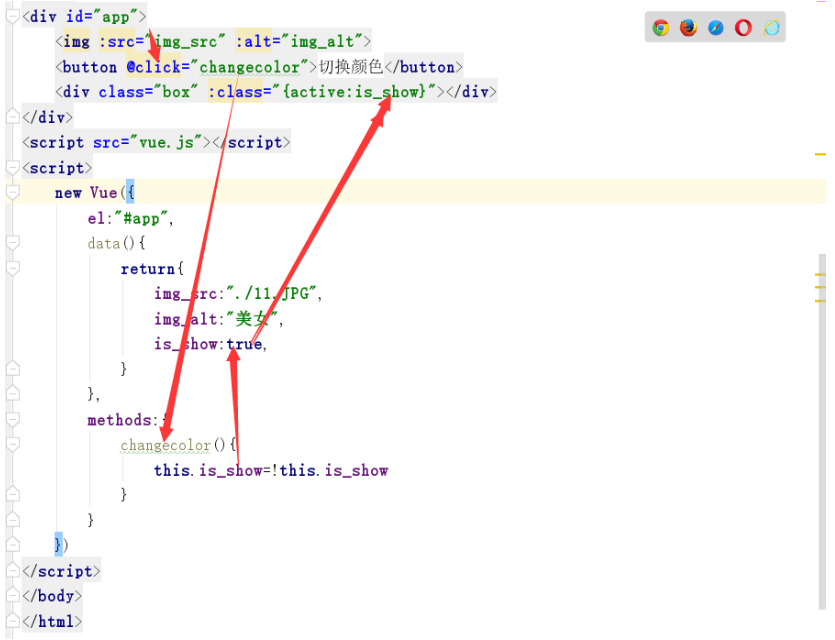
(3)v-bind和v-on的简便写法
v-bind可以使用":"来代替
v-on可以使用"@"来代替
 <head>

     <meta charset="UTF-8">

     <title>Title</title>

     <style>

         .box{

             width: 200px;

             height: 200px;

             background-color: #ce8483;

         }

         .active{

             width: 200px;

             height: 200px;

             background-color: #637ece;

         }

     </style>

 </head>

 <body>

 <div id="app">

     //v-bind可以使用":"来代替

     <img :src="img_src" :alt="img_alt">

 //v-on可以使用"@"来代替

     <button @click="changecolor">切换颜色</button>

     <div class="box" :class="{active:is_show}"></div>

 </div>

 <script src="vue.js"></script>

 <script>

     new Vue({

         el:"#app",

         data(){

             return{

                 img_src:"./11.JPG",

                 img_alt:"美女",

                 is_show:true,

             }

         },

         methods:{

             changecolor(){

                 this.is_show=!this.is_show

             }

         }

     })

 </script>

 </body>
数据驱动视图
声明式和命令式的区别
命令式编程:命令“机器”如何去做事情(how),这样不管你想要的是什么(what),它都会按照你的命令实
声明式编程:告诉“机器”你想要的是什么(what),让机器想出如何去做(how)。
5.v-for
 <body >

 <div id="app">

     //只有在确认状态正常时,才显示该列表

     <ul v-if="data.static=='ok'">

         <li>id---姓名---年龄</li>

         //v-for语法

         //循环元素和索引,顺序是(元素,索引)

         <li v-for="(item,index) in data.users  " :key='item.id'>

             //一定要绑定key,可以节省性能的消耗,有id绑定id,没有id绑定,不用Vue来计算dom,使用key表示来计算,以节省性能

             {{ item.id }}---{{ item.name }}---{{ item.age }}

         </li>

     </ul>

 </div>

 <script src="vue.js"></script>

 <script>

     new Vue({

         //不能直接用body标签

         el:"#app",

         data(){

             return{

                 //模拟后端返回数据

                 data:{

                     static:"ok",

                     users:[

                         {id:1,name:"shy",age:""},

                         {id:2,name:"jwb",age:""},

                         {id:3,name:"jwo",age:""},

                     ]

                 }

             }

         },

     })

 </script>

 </body>
v-for也可以便利对象
 <body >

 <div id="app">

     <ul>

         //此处的顺序一定是先value,后key

         <li v-for="(value,key) in person">{{ key }}--{{ value }}</li>

     </ul>

 </div>

 <script src="vue.js"></script>

 <script>

     new Vue({

         el:"#app",

         data(){

             return{

                 person:{

                     name:"shy",

                     hobby:"sking"

                 },

             }

         },

     })

 </script>

 </body>
三.实例
1.轮播图的实现
 <body>

 <div id="app">

     <img :src="data:images[currentindex].imgsrc" alt="aaa"> <br>

     <button @click="preHandler">上一张</button>

     <button @click="nextHandler">下一张</button>

 </div>

 <script src="vue.js"></script>

 <script>

     let vm=new Vue({

         el:"#app",

         data(){

             return{

                 images:[

                     {id:1,imgsrc:"./assets/1.png"},

                     {id:2,imgsrc:"./assets/2.png"},

                     {id:3,imgsrc:"./assets/3.png"},

                     {id:4,imgsrc:"./assets/4.png"},

                 ],

                 currentindex:0

             }

         },

         methods:{

             preHandler(){

                 this.currentindex-=1;

                 if(this.currentindex==0){

                     this.currentindex=3

                 }

             },

             nextHandler(){

                 this.currentindex+=1;

                 if(this.currentindex==4){

                     this.currentindex=0

                 }

             }

         }

     })

 </script>

 </body>
加定时器自动轮播的轮播图
 <body>

 <div id="app">

     <img :src="data:images[currentindex].imgsrc" alt="aaa"> <br>

     <button @click="preHandler">上一张</button>

     <button @click="nextHandler">下一张</button>

 </div>

 <script src="vue.js"></script>

 <script>

     let vm=new Vue({

         el:"#app",

         data(){

             return{

                 images:[

                     {id:1,imgsrc:"./assets/1.png"},

                     {id:2,imgsrc:"./assets/2.png"},

                     {id:3,imgsrc:"./assets/3.png"},

                     {id:4,imgsrc:"./assets/4.png"},

                 ],

                 currentindex:0

             }

         },

         methods:{

             preHandler(){

                 this.currentindex-=1;

                 if(this.currentindex==0){

                     this.currentindex=3

                 }

             },

             nextHandler(){

                 this.currentindex+=1;

                 if(this.currentindex==4){

                     this.currentindex=0

                 }

             },

         },

         //created方法DOM创建完成时执行的方法

         created(){

             //定时器

                 setInterval(() => {

                     //使用箭头函数,使this指向vue,如果不用箭头函数,则指向window对象

                     console.log(this);

                     this.currentindex+=1;

                     if (this.currentindex == 4) {

                         this.currentindex = 0;

                 }

             }, 2500);

         }

     })

 </script>

 </body>
2.vue中使用ajax
(1)从后端接口获取数据
 <body>

 <div id="app">

         <span v-for="a in names" :key="a.id">{{ a.name }} </span>

 </div>

 <script src="vue.js"></script>

 <script>

     new Vue({

         el:"#app",

         data(){

             return{names:[]}

         },

         created(){

             $.ajax({

                 url:"https://www.luffycity.com/api/v1/course_sub/category/list/",

                 type:"get",

                 success:(response) => {

                     console.log(response);

                     //push是往数组的最后添加一项,unshift是向数组的开头添加一项,shift是从数组的开头删除一项

                     response.data.unshift({"id":0,"name":"全部","category":10})

                     this.names=response.data;

                     //如果不用箭头函数,this指向ajax

                     console.log(this);

                     console.log(response.data);

                 }

             })

         }

     })

 </script>

 </body>

(2)点击颜色渲染
 <head>

     <meta charset="UTF-8">

     <title>Title</title>

     <script src="./js/jquery.js/"></script>

     <style>

         .active{

             color: #1cb7fd;

         }

     </style>

 </head>

 <body>

 <div id="app">

     //v-on监听事件时,可以对事件传参数

         <span @click="change_color(index)" :class="{active:index==currentindex}" v-for="(a,index) in names" :key="a.id">{{ a.name }} </span>

 </div>

 <script src="vue.js"></script>

 <script>

     new Vue({

         el:"#app",

         data(){

             return{names:[],currentindex:0}

         },

         created(){

             $.ajax({

                 url:"https://www.luffycity.com/api/v1/course_sub/category/list/",

                 type:"get",

                 success:(response) => {

                     console.log(response);

                     //push是往数组的最后添加一项,unshift是向数组的开头添加一项,shift是从数组的开头删除一项

                     response.data.unshift({"id":0,"name":"全部","category":10})

                     this.names=response.data;

                     //如果不用箭头函数,this指向ajax

                     console.log(this);

                     console.log(response.data);

                 }

             })

         },

         methods:{

             change_color(index){

                 this.currentindex=index

             }

         }

     })

 </script>

 </body>

3.音乐播放器
 <head>

     <meta charset="UTF-8">

     <title>Title</title>

     <style>

     //正在播放的音乐背景颜色加深类名

         .active{

             background-color: #ce8483;

         }

     </style>

 </head>

 <body>

 <div id="music">

     <!--//controls autoplay显示播放按钮等-->

     //ended方法:当前歌曲执行完毕后执行

     <audio :src="musicData[currentIndex].songSrc" controls autoplay @ended="next"></audio>

     <ul>

         <li @click="songHandler(index)" v-for="(item,index) in musicData" :key="item.id" :class="{active:index==currentIndex}">

             <h2>歌名:{{ item.name }}</h2>

             <h3>歌手:{{ item.author }}</h3> <br>

         </li>

     </ul>

 </div>

 <script src="vue.js"></script>

 <script>

         var musicData = [{

         id: 1,

         name: '于荣光 - 少林英雄',

         author: '于荣光',

         songSrc: './static/于荣光 - 少林英雄.mp3'

     },

         {

             id: 2,

             name: 'Joel Adams - Please Dont Go',

             author: 'Joel Adams',

             songSrc: './static/Joel Adams - Please Dont Go.mp3'

         },

         {

             id: 3,

             name: 'MKJ - Time',

             author: 'MKJ',

             songSrc: './static/MKJ - Time.mp3'

         },

         {

             id: 4,

             name: 'Russ - Psycho (Pt. 2)',

             author: 'Russ',

             songSrc: './static/Russ - Psycho (Pt. 2).mp3'

         }

     ];

     new Vue({

         el:"#music",

         data(){

             return{

                 musicData:[],

                 currentIndex:0

             }

         },

         created(){

             this.musicData=musicData

         },

         methods:{

         //点击li标签播放歌曲

             songHandler(index){

                 console.log(111);

                 this.currentIndex=index

             },

             next(){

                 this.currentIndex++

             }

         }

     })

 </script>

 </body>
4.计算属性和侦听器
(1)侦听器watch
 <body>

 <div id="app">

     <p>{{ message }}</p>

     <button @click="message='dsz'">更换</button>

 </div>

 <script src="vue.js"></script>

 <script>

     new Vue({

         el:"#app",

         data(){

             return{

                 message:"shy",

                 aaa:"aaa"

             }

         },

         //watch监听器可以监听多个属性

         watch:{

             "message":function(a){

                 //此时的a是改变后的message

                 console.log(a);

                 //此处可以对message的值进行操作

                 this.message="shy"

             },

             "aaa":function(a){

                 console.log(a);

             }

         }

     })

 </script>

 </body>
(2)计算属性computed
 <body>

 <div id="app">

     <p>{{ msg }}</p>

     <button @click="name='dsz'">更换</button>

 </div>

 <script src="vue.js"></script>

 <script>

     new Vue({

         el:"#app",

         data(){

             return{

                 name:"shy",

                 age:18

             }

         },

         //计算属性语法

         //计算属性可以监听多个"多个属性"或'单个属性'

         computed:{

             //计算属性默认值有getter方法

             msg:function(){

                 return `我是${ this.name },今年${ this.age }`

             }

         }

     })

 </script>

 </body>
最新文章
- [LeetCode] Concatenated Words 连接的单词
- Wpf之Xaml属性值和特性值(一)
- AX2012自定义注释脚本开发
- Diy页面服务端渲染解决方案
- python怎么装模块
- uva 10652
- c#多选下拉框(ComboBox)
- delphi 中COPY()函数的意思
- open in browser
- ListView的使用(二)长按弹出上下文菜单
- ubuntu字符界面怎么设置中文显示和中文输入
- Unity3D各平台Application.xxxPath的路径
- Python学习之路——装饰器
- es6数值
- backbond整体架构
- 推荐几本FPGA书籍(更新中)
- [简记] github 上的 GraphQL v4 API
- Excel函数详解:[127]ROWS函数用法
- Path expected for join!错误处理
- python操作rabbitMQ小结