Docker私有仓库Harbor部署与使用
2024-08-29 21:07:07
一、harbor介绍
Harbor是一个用于存储和分发Docker镜像的企业级Registry服务器。
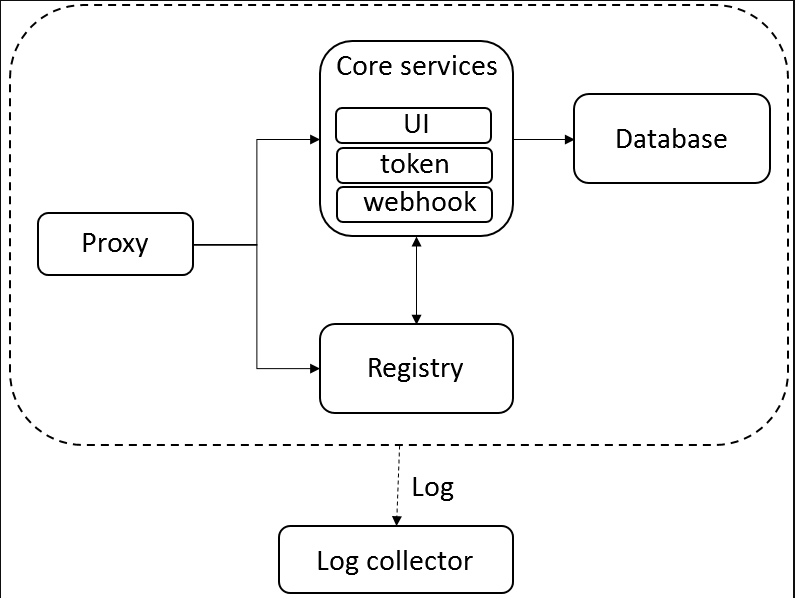
由下面几个组件组成:
- proxy:nginx前端代理,主要是分发前端页面ui访问和镜像上传和下载流量
- registry:镜像仓库,负责存储镜像文件
- 核心服务:提供web ui,数据库,token认证,webhook等功能
- 日志服务
- database:用来存储核心服务的一些数据
因为是vmware出品的,所以支持下面几种部署方式
- 在线安装
- 离线安装
- ova安装,这个直接在vcenter上导入就可以了
官方最小配置
- 2个cpu
- 4g内存
- 40g硬盘,因为是存储镜像的所以推荐硬盘大点
二、搭建过程
Install Docker CE
root@localhost:~# apt-get update

root@localhost:~# apt-get install apt-transport-https ca-certificates software-properties-common curl

root@localhost:~# curl -fsSL https://download.docker.com/linux/ubuntu/gpg |sudo apt-key add -

root@localhost:~# apt-key fingerprint 0EBFCD88

root@localhost:~# add-apt-repository "deb [arch=amd64] https://download.docker.com/linux/ubuntu $(lsb_release -cs) stable"

root@localhost:~# apt-get update

root@localhost:~# apt-get install docker-ce
Install Docker-compose
root@localhost:~# curl -L "https://github.com/docker/compose/releases/download/1.22.0/docker-compose-$(uname -s)-$(uname -m)" -o /usr/local/bin/docker-compose

root@localhost:~# chmod +x /usr/local/bin/docker-compose

#查看版本

root@localhost:~# docker --version

Docker version 18.09., build 4d60db4

root@localhost:~# docker-compose --version

docker-compose version 1.22., build f46880fe
Install harbor
root@localhost:~# wget https://storage.googleapis.com/harbor-releases/release-1.6.0/harbor-offline-installer-v1.6.0.tgz

root@localhost:~# tar -zxvf harbor-offline-installer-v1.6.0.tgz

#编辑配置文件

root@localhost:~# cd harbor/

root@localhost:~/harbor# vim harbor.cfg

hostname = 114.112.34.27

project_creation_restriction = adminonly

#Python环境

root@localhost:~/harbor# apt-get install python

root@localhost:~/harbor# export LC_ALL=C

root@localhost:~/harbor# ln -s /usr/bin/python3 /usr/bin/python

#安装服务

root@localhost:~/harbor# ./install.sh
看到以下内容,说明安装成功:

启动服务:
root@localhost:~/harbor# docker-compose start

Starting log         ... done

Starting registry    ... done

Starting postgresql  ... done

Starting adminserver ... done

Starting ui          ... done

Starting redis       ... done

Starting jobservice  ... done

Starting proxy       ... done

root@localhost:~/harbor# docker-compose ps

       Name                     Command                  State                                    Ports

-------------------------------------------------------------------------------------------------------------------------------------

harbor-adminserver   /harbor/start.sh                 Up (healthy)

harbor-db            /entrypoint.sh postgres          Up (healthy)   /tcp

harbor-jobservice    /harbor/start.sh                 Up

harbor-log           /bin/sh -c /usr/local/bin/ ...   Up (healthy)   127.0.0.1:->/tcp

harbor-ui            /harbor/start.sh                 Up (healthy)

nginx                nginx -g daemon off;             Up (healthy)   0.0.0.0:->/tcp, 0.0.0.0:->/tcp, 0.0.0.0:->/tcp

redis                docker-entrypoint.sh redis ...   Up             /tcp

registry             /entrypoint.sh /etc/regist ...   Up (healthy)   /t
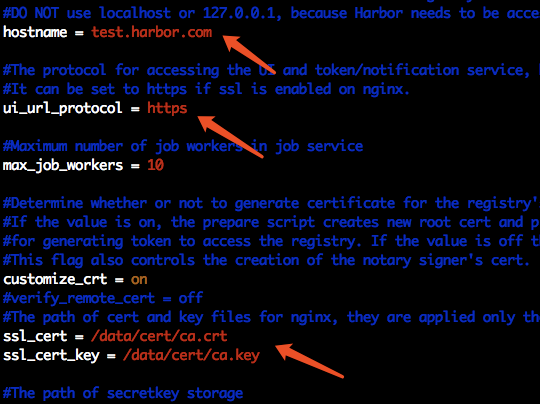
配置HTTPS
##如果不做HTTPS,只需将hostname设置为IP,protocol改为HTTP即可,也不必生成CA

root@localhost:~/harbor# vi harbor.cfg
#创建目录

root@localhost:~/harbor# mkdir -p /data/cert/

#生成ca证书和签名

root@localhost:~/harbor# openssl genrsa -out /data/cert/ca.key

root@localhost:~/harbor# openssl req -x509 -new -nodes -key /data/cert/ca.key -subj "/CN=test.harbor.com" -days  -out /data/cert/ca.crt

#启动服务

root@localhost:~/harbor# ./prepare

root@localhost:~/harbor# docker-compose down

root@localhost:~/harbor# docker-compose up -d
测试
修改本地host,添加一行内容

114.112.34.27   test.harbor.com

在浏览器中访问

http://test.harbor.com/

默认用户名/密码:admin/Harbor12345

登录成功后会看到如下页面:
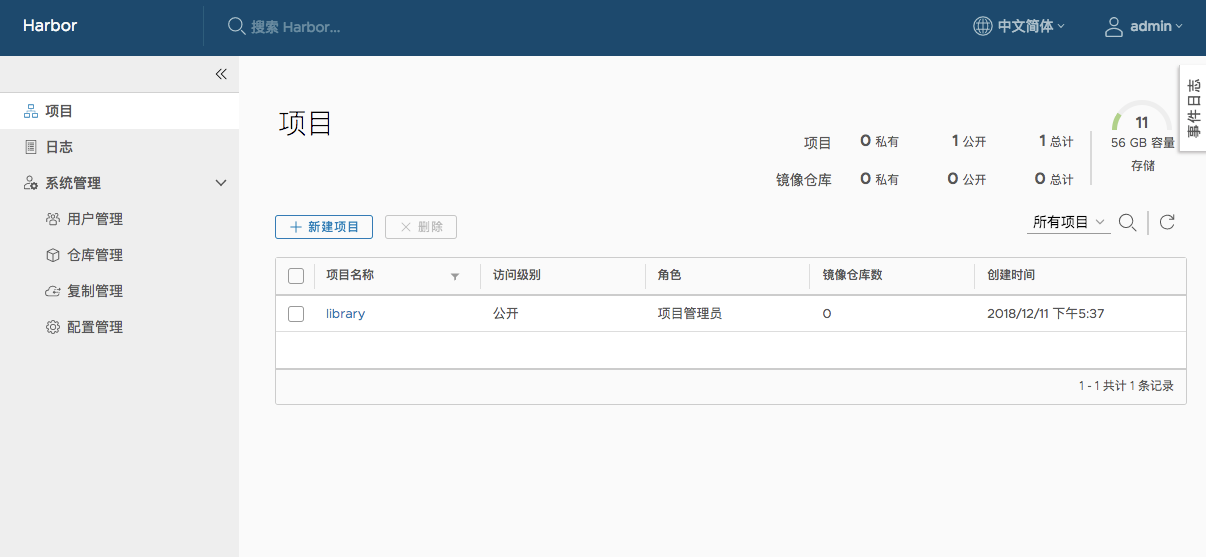
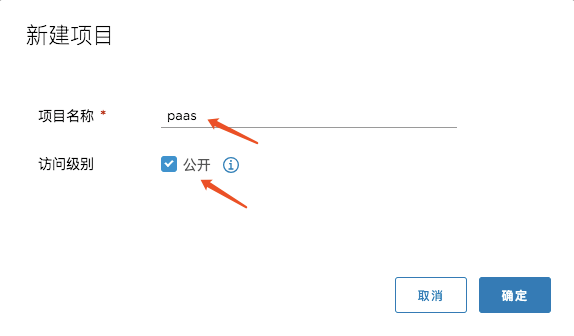
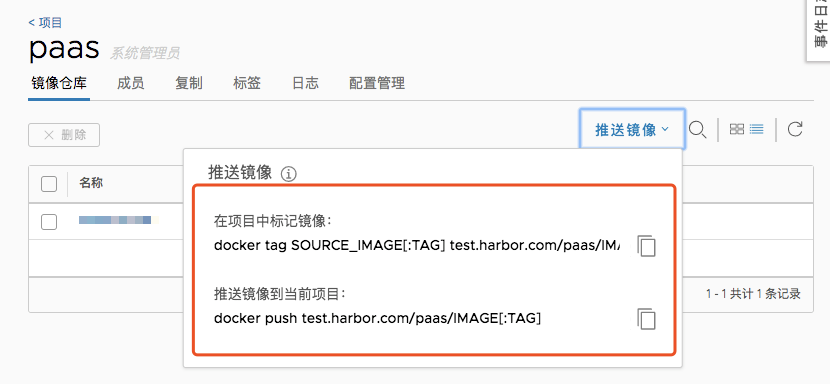
添加项目:
进入此项目,可以看到推送镜像的命令:
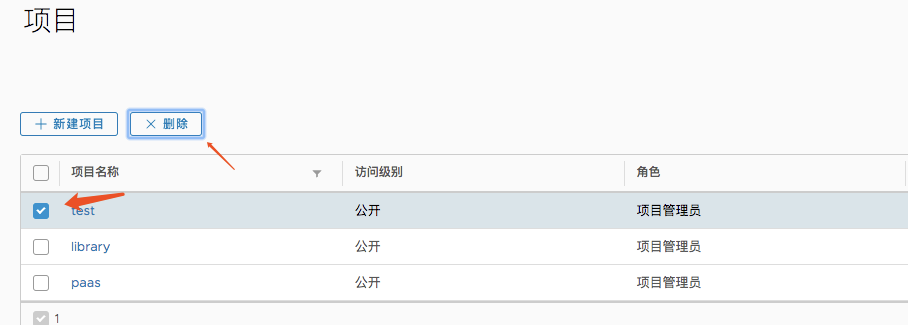
删除项目:
确认项目不再使用时,选中项目,点击删除
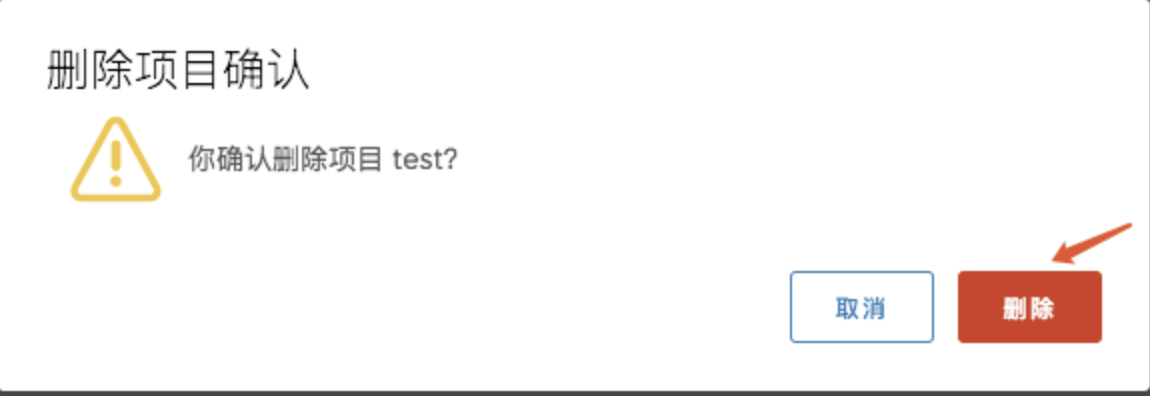
点击删除:
在服务器进行测试
修改本地Docker默认仓库,指向Harbor
root@localhost:/data/cert# cp ca.crt /usr/local/share/ca-certificates/

root@localhost:/data/cert# update-ca-certificates

#修改docker配置文件,指向Harbor

root@localhost:~/harbor# vi /etc/default/docker

#添加一行内容

DOCKER_OPTS="--insecure-registry=test.harbor.com"

#重启docker服务

root@localhost:~# service docker restart
将本地Ubuntu镜像上传至Harbor
#将本地镜像打一个tag

root@localhost:~# docker tag ubuntu:16.04 test.harbor.com/paas/ubuntu:v1.

#推送到Harbor上

root@localhost:~/harbor# docker push test.harbor.com/paas/ubuntu:v1.
下载Harbor镜像至本地
root@localhost:~/harbor# docker pull test.harbor.com/paas/ubuntu:v1.

v1.: Pulling from paas/ubuntu

Digest: sha256:078d30763ae6697b7d55e49f4cb9e61407abd2137cafb5625f131aa47c1a47af

Status: Downloaded newer image for test.harbor.com/paas/ubuntu:v1.
最新文章
- Nginx-默认不压缩HTTP/1.0与长连接的关系
- JAVA格物致知基础篇:用JAX-RS和Jersey打造RESTful Service
- Windows下如何枚举所有进程
- K3Cloud开放数据模型
- ADF_ADF Faces系列1_使用JSF开发基于Ajax的用户界面:ADF Faces 富客户端组件简介(Part1)
- Java 数据类型转换
- sysstat的基本用法
- string和stringBuilder的区别
- preg_match_all, preg_match
- YouTube CEO关于工作和生活平衡的完美回答
- css3学习系列之选择器(一)
- TOMCAT启动到一半停止如何解决
- JVM之GC算法、垃圾收集算法——标记-清除算法、复制算法、标记-整理算法、分代收集算法
- [Swift]LeetCode159.具有最多两个不同字符的最长子串 $ Longest Substring with At Most Two Distinct Characters
- [NOIP2018]普及组初赛题解
- SSM搭建一个后台管理系统
- Oracle使用par文件进行全库导入导出
- node 慕课笔记
- GIT+ Coding使用方法
- Ubuntu18.04 英文系统下安装中文输入法