ubuntu12.04安装Opencv2.4.9
之前在Linux下装过几次opencv,但几乎每次都要查一下怎么安装,这次索性记录一下安装过程,不用每次都看其他人的教程了。
至于安装过程,可以直接参考官方文档。在解压后的文件夹下opencv\build\doc的opencv_tutorials.pdf文件开头就讲怎样在Linux下安装opencv.
以下就是官方文档的原文:
1.1 Installation in Linux
These steps have been tested for Ubuntu 10.04 but should work with other distros as well.
Required Packages
• GCC 4.4.x or later. This can be installed with:
sudo apt-get install build-essential
• CMake 2.6 or higher;
• Git;
• GTK+2.x or higher, including headers (libgtk2.0-dev);
• pkg-config;
• Python 2.6 or later and Numpy 1.5 or later with developer packages (python-dev, python-numpy);
• ffmpeg or libav development packages: libavcodec-dev, libavformat-dev, libswscale-dev;
• [optional] libdc1394 2.x;
• [optional] libjpeg-dev, libpng-dev, libtiff-dev, libjasper-dev.
All the libraries above can be installed via Terminal or by using Synaptic Manager
Building OpenCV from Source Using CMake, Using the Command Line
1. Create a temporary directory, which we denote as <cmake_binary_dir>, where you want to put the generated
Makefiles, project files as well the object files and output binaries.
2. Enter the <cmake_binary_dir> and type
cmake [<some optional parameters>] <path to the OpenCV source directory>
For example
cd ~/opencv
mkdir release
cd release
cmake -D CMAKE_BUILD_TYPE=RELEASE -D CMAKE_INSTALL_PREFIX=/usr/local ..
3. Enter the created temporary directory (<cmake_binary_dir>) and proceed with:
make
sudo make install
因为是在虚拟机上操作,虚拟机网速有限,所以我的opencv2.4.9是从本地下载好后通过共享文件夹拷贝到虚拟机上的。
操作一 拷贝OPENCV源文件到虚拟机
先从虚拟机Terminal进入的共享文件夹,假设opencv-2.4.9.zip在共性文件夹内,使用命令复制到Documents文件夹下(其中xxxxxxxxx就是你设置的linux虚拟机的用户名):
cp opencv-2.4.9.zip /home/xxxxxxxxx/Documents/
这样就将 opencv-2.4.9.zip拷贝至虚拟机Documents文件夹下。
下一步就是解压opencv-2.4.9.zip文件:
unzip opencv-2.4.9.zip
操作二 安装Cmake
由于要安装opencv,按照上面官网教程的说明:
在我安装的ubuntu12.04上面测试过。自带的gcc版本:

嗯,4.6.3,比官网上说的4.4大,没问题。
然后按照下一步教程sudo apt-get install build-essential:

接着安装cmake,直接使用sudo apt-get install cmake安装的cmake一般都是ubuntu自带的支持的版本,不是最新的,但是使用该方法安装方便,我就暂且一试,毕竟下载源码自己编译很费事。

所以为图简便,就直接这样安装了,然后查一下版本号:

喔,相对于前面教程里面说的CMake 2.6 or higher,这个版本已经够用了。
操作三 安装必要库
由于Git是用来下载opencv源码用的,因为开始我们已经从本地拷贝过源码了,所以此处可以跳过。
下面是安装一些库和依赖文件:
sudo apt-get install libgtk2.0-dev libavcodec-dev libavformat-dev libtiff4-dev libswscale-dev libjasper-dev

安装pkg-config,它是一个提供从源代码中编译软件时查询已安装的库时使用的统一接口的计算机软件。(下面这个在我这里是默认安装好的)
sudo apt-get install pkg-config
操作三 编译安装opencv
没有gui的cmake我用不惯,所以先安装cmake-gui:
sudo apt-get install cmake-qt-gui

安装完成后,就可以使用cmake-gui了,在终端输入cmake-gui就可以打开GUI界面:

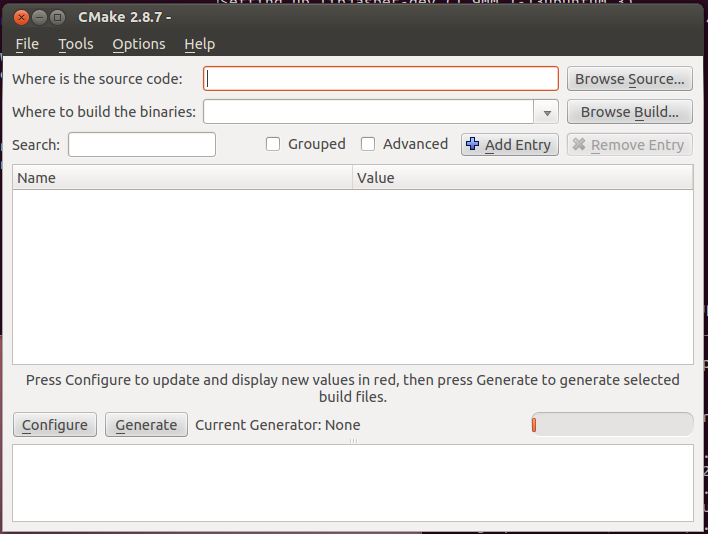
然后就是配置了。
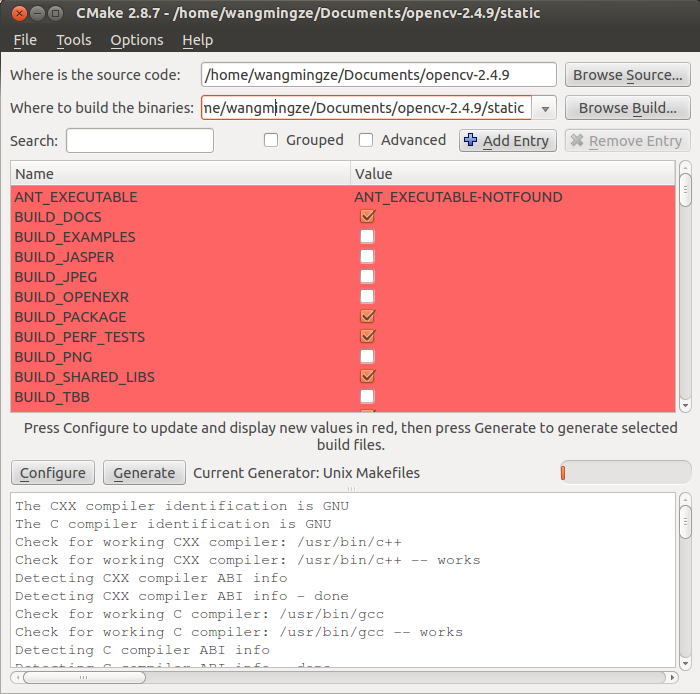
选完原文件路径和生成路径,然后点Configure就可以完成配置。注意在生成路径下的static文件夹是我新建的,因为我要生成一份静态库。
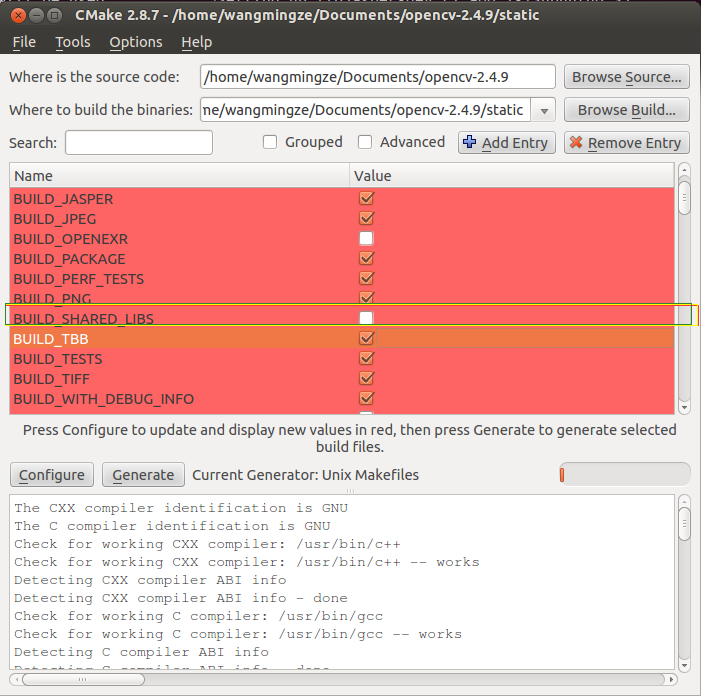
注意我用黄色框框起来的部分,因为要生成静态库,所以把右侧的复选框的“√”去掉,然后重新点Configure按钮。
下一步点Generate,Cmake会根据CmakeList.txt生成make文件,接着就需要编译了。
关掉cmake-gui。由终端进入自己新建的那个static文件夹
使用make编译,其中-j4表示4核编译:
make -j4

嗯,大概这次是被我要写笔记吓到了,一次顺利通过,内心喜悦!
使用make install 安装

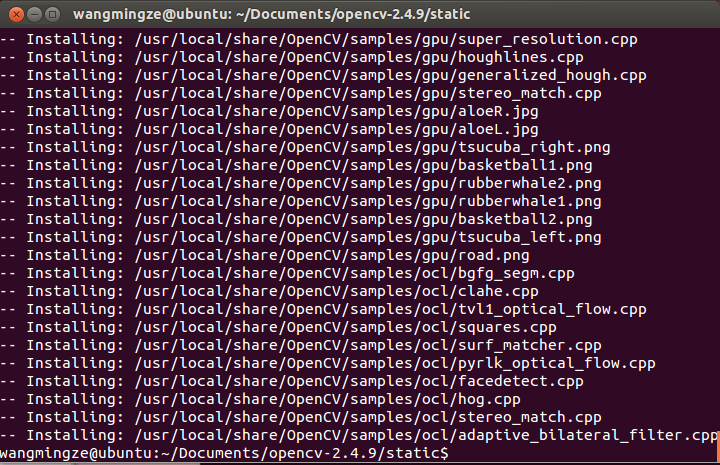
嗯,又顺利通过!
操作三 测试opencv
1.2 Using OpenCV with gcc and CMake
Note: We assume that you have successfully installed OpenCV in your workstation.
• The easiest way of using OpenCV in your code is to use CMake. A few advantages (taken from the Wiki):
1. No need to change anything when porting between Linux and Windows
2. Can easily be combined with other tools by CMake( i.e. Qt, ITK and VTK )
• If you are not familiar with CMake, checkout the tutorial on its website.
Steps
Create a program using OpenCV
Let’s use a simple program such as DisplayImage.cpp shown below.
 #include <stdio.h>

 #include <opencv2/opencv.hpp>

 using namespace cv;

 int main(int argc, char** argv )

 {

 if ( argc !=  )

 {

 printf("usage: DisplayImage.out <Image_Path>\n");

 return -;

 }

 Mat image;

 image = imread( argv[],  );

 if ( !image.data )

 {

 printf("No image data \n");

 return -;

 }

 namedWindow("Display Image", CV_WINDOW_AUTOSIZE );

 imshow("Display Image", image);

 waitKey();

 return ;

 }
Create a CMake file
Now you have to create your CMakeLists.txt file. It should look like this:
Generate the executable
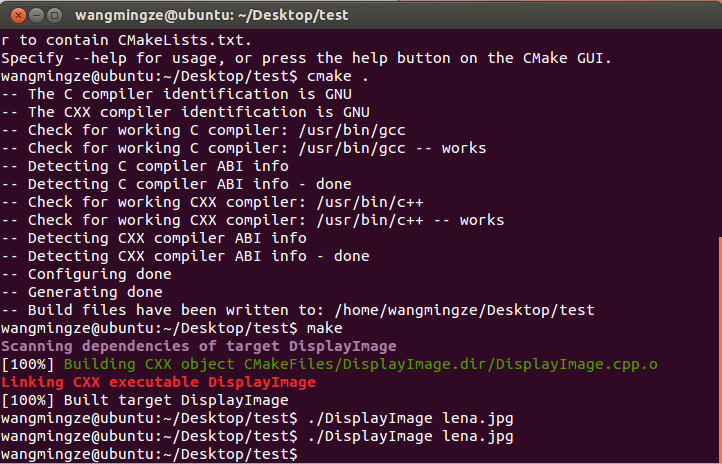
This part is easy, just proceed as with any other project using CMake:
cd <DisplayImage_directory>
cmake .
make
Result
By now you should have an executable (called DisplayImage in this case). You just have to run it giving an image
location as an argument, i.e.:
./DisplayImage lena.jpg
You should get a nice window as the one shown below:

嗯,就这样吧。
最新文章
- iOS UIPageViewController缺陷
- 深入理解JavaScript系列(1):编写高质量JavaScript代码的基本要点
- Mac下利用(xcode)安装git
- Cent OS 6.6 下安装mysql(5.5.20)和 PHP(5.3.10)
- QTabWidget 实现类似QQ聊天窗口(拖动分离出新的窗口)
- javaweb面试题
- BZOJ_2693_jzptab_莫比乌斯反演
- ajax导致Echarts不显示饼图数据、柱状图数据只显示气泡的问题。
- Node之安装篇
- CemtOS7更改yum网易 阿里云的yum源。
- java实现控件的移动及使用鼠标改变控件大小
- 19.C# 泛型
- SHELL脚本--数学运算和bc命令
- Qt5标准文件对话框类
- 2018.11.09 bzoj4773: 负环(倍增+floyd)
- 解决局域网IP冲突
- Springboot分模块开发详解(2):建立子工程
- Scrum6.0
- ThinkPHP3.2 新bug ReadHtmlCache 支持不区分大写和小写的函数
- 【转】java图形界面设计(AWT)