从 Numpy+Pytorch 到 TensorFlow JS:总结和常用平替整理
2024-09-03 10:36:52
demo展示
这是一个剪刀石头布预测模型,会根据最近20局的历史数据训练模型,神经网络输入为最近2局的历史数据。
如何拥有较为平滑的移植体验?
- 保持两种语言,和两个框架的API文档处于打开状态,并随时查阅:Python,JavaScript;Pytorch,TensorFlow JS(用浏览器 F3 搜索关键词)。
- 可选阅读,《动手学深度学习》,掌握解决常见学习问题时,Pytorch 和 TensorFlow 的实现方法。
- 精读 TensorFlow JS 的官方教程,和指南。
- 精读 TensorFlow JS 的官方文档:与 Python tf.keras 的区别。
- 深入了解 JavaScript 特色对象:生成器 Generator,Promise,async await。
- 多用谷歌。
一些碎碎念
- JavaScript 不存在像 numpy 之于 python 一样著名且好用的数据处理库,所以请放弃对 JavaScript 原生类型 Array 进行操作的尝试,转而寻找基于 TensorFlow JS API 的解决方法。
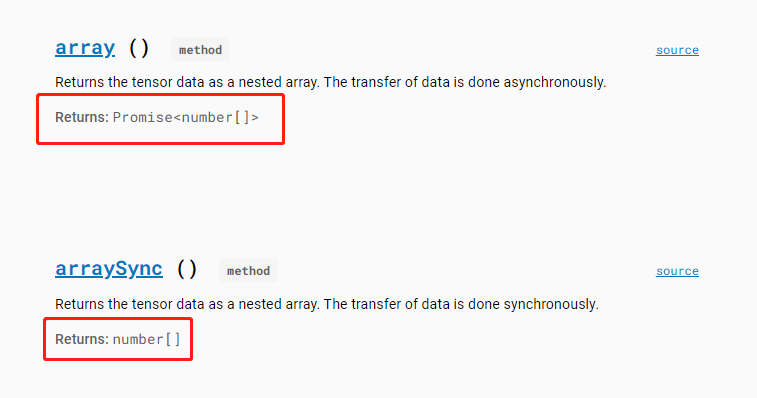
- JavaScript 作为一门前端语言,一大特色是包含了大量异步编程(即代码不是顺序执行的,浏览器自有一套标准去调整代码的执行顺序),这是为了保证前端页面不被卡死,所必备的性质。也因此,TensorFlow JS的函数中,许多输入输出传递的都不是数据,而是Promise对象。很多功能支持异步,但如果没有完全搞懂异步编程,不妨多用同步的思路:用 tf.Tensor.arraySync() 把 Tensor 的值取出,具体来说是将 Tensor 对象以同步的方式(即立即执行)拷贝生成出一个新的 array 对象。
- Promise 对象是ES6新增的对象,一般与then一起使用,但掌握 async & await 就够了,这是更简洁的写法。
- 多关注 API 文档中对象方法的返回类型,返回 Promise 对象则与异步编程相关,如果要获取Promise对象储存的值,需要在有 async function 包裹的代码中前置 await 关键字。
- Pytorch 中的张量可以通过索引访问其元素,而 TensorFlow JS 则不能,需要转换为 array 进行访问。
常用平替整理
将张量转换为数组
- Python, Pytorch:
tensor = torch.tensor([1,2,3])

np_array = tensor.numpy()
- JS, tfjs:
// 方式一:arraySync()

let tensor = tf.tensor1d([1,2,3]);

let array = tensor.arraySync();

console.log(array); // [1,2,3]

// 方式二:在async函数体内操作

async function fun() {

    let tensor = tf.tensor1d([1,2,3]);

    let array = await tensor.array();

    console.log(array); // [1,2,3]

}

fun();

// 注意,下面的写法是不行的,因为async函数的返回值是Promise对象

array = async function (){

    return await tensor.array();

}();

console.log(array); // Promise object

// 方式三:用then取出async函数返回Promise对象中的值

let a

(async function() {

    let array = await tensor.array();

    return array

})().then(data => {a = data;})

console.log(a); // [1,2,3]
访问张量中的元素
- Python,Pytorch:
tensor = torch.tensor([1,2,3])

print(tensor[0])

print(tensor[-1])
- JS,tfjs(不能直接通过访问tensor,需要转换成array):
const tensor = tf.tensor1d([1,2,3]);

const array = tensor.arraySync();

console.log(array[0]);
console.log(array[array.length - 1]);
获取字典/对象的关键字
- Python:
actions = {'up':[1,0,0,0], 'down':[0,1,0,0], 'left':[0,0,1,0], 'right':[0,0,0,1]}

actions_keys_list = list(actions.keys())
- JS:
const actions = {'up':[1,0,0,0], 'down':[0,1,0,0], 'left':[0,0,1,0], 'right':[0,0,0,1]};

const actionsKeysArray = Object.keys(actions);
“先进先出”栈
- Python:
memory = [1,2,3]

memory.append(4) # 入栈

memory.pop(0) # 出栈
- JS:
let memory = [1,2,3];

memory.push(4); // 入栈

memory.splice(0,1); // 出栈
“后进先出”栈
- Python:
memory = [1,2,3]

memory.append(4) # 入栈

memory.pop() # 出栈
- JS:
let memory = [1,2,3];

memory.push(4); // 入栈

memory.pop(); // 出栈
根据概率分布采样元素
- Python,Numpy:
actions = ['up','down','left','right']

prob = [0.1, 0.4, 0.4, 0.1]

sample_action = np.random.choice(actions, p=prob))
- JS,tfjs:
const actions = ['up', 'down', 'left', 'right'];

const prob = [0.1, 0.4, 0.4, 0.1];

sampleActionIndex = tf.multinomial(prob, 1, null, true).arraySync(); // tf.Tensor 不能作为索引,需要用 arraySync() 同步地传输为 array

sampleAction = actions[sampleActionIndex];
找到数组中最大值的索引(Argmax)
- Python,Numpy,Pyorch:
actions = ['up', 'down', 'left', 'right']

prob = [0.1, 0.3, 0.5, 0.1]

prob_tensor = torch.tensor(prob)

action_max_prob = actions[np.array(prob).argmax()] # np.array 可以作为索引

action_max_prob = actions[prob_tensor.argmax().numpy()] # torch.tensor 不能作为索引,需要转换为 np.array
- JS, tfjs:
const actions = ['up', 'down', 'left', 'right'];

const prob = [0.1, 0.3, 0.5, 0.1];

const probTensor = tf.tensor1d(prob);

const actionsMaxProb = actions[probTensor.argmax().arraySync()]; // tf.Tensor 不能作为索引,需要用 arraySync()同步地传输为 array
生成等差数列数组
- Python:
range_list = list(range(1,10,1))
- JS, tfjs:
const rangeArray = tf.range(1, 10, 1).arraySync();
打乱数组
- Python:
actions = ['up', 'down', 'left', 'right']

print(random.shuffle(actions))
- JS:How to randomize (shuffle) a JavaScript array? 关于原生JS解决方案的大讨论。
- tfjs:(1)用 tf.util 类操作,处理常规的需求。
const actions = ['up', 'down', 'left', 'right'];
tf.util.shuffle(actions);
console.log(actions);
(2)用 tf.data.shuffle 操作,不建议,该类及其方法一般仅与 神经网络模型更新 绑定使用。
极简逻辑回归
- Python,Numpy,Pytorch:
import numpy as np

import torch

from torch import nn

import random

class Memory(object):

    # 向Memory输送的数据可以是list,也可以是np.array

    def __init__(self, size=100, batch_size=32):

        self.memory_size = size

        self.batch_size = batch_size

        self.main = []

    def save(self, data):

        if len(self.main) == self.memory_size:

            self.main.pop(0)

        self.main.append(data)

    def sample(self):

        samples = random.sample(self.main, self.batch_size)

        return map(np.array, zip(*samples))

class Model(object):

    # Model中所有方法的输入和返回都是np.array

    def __init__(self, lr=0.01, device=None):

        self.LR = lr

        self.device = torch.device("cuda:0" if torch.cuda.is_available() else "cpu") # 调用GPU 若无则CPU

        self.network = nn.Sequential(nn.Flatten(),

                                     nn.Linear(10, 32),

                                     nn.ReLU(),

                                     nn.Linear(32, 5),

                                     nn.Softmax(dim=1)).to(self.device)

        self.loss = nn.CrossEntropyLoss(reduction='mean')

        self.optimizer =  torch.optim.Adam(self.network.parameters(), lr=self.LR)

    def predict_nograd(self, _input):

        with torch.no_grad():

            _input = np.expand_dims(_input, axis=0)

            _input = torch.from_numpy(_input).float().to(self.device)

            _output = self.network(_input).cpu().numpy()

            _output = np.squeeze(_output)

        return _output

    def update(self, input_batch, target_batch):

        # 设置为训练模式

        self.network.train()

        _input_batch = torch.from_numpy(input_batch).float().to(self.device)

        _target_batch = torch.from_numpy(target_batch).float().to(self.device)

        self.optimizer.zero_grad()

        _evaluate_batch = self.network(_input_batch)

        batch_loss = self.loss(_evaluate_batch, _target_batch)

        batch_loss.backward()

        self.optimizer.step()

        batch_loss = batch_loss.item()

        # 设置为预测模式

        self.network.eval()

if __name__ == '__main__':

    memory = Memory()

    model = Model()

    # 产生数据并输送到内存中

    # 假设一个5分类问题

    for i in range(memory.memory_size):

        example = np.random.randint(0,2,size=10)

        label = np.eye(5)[np.random.randint(0,5)]

        data = [example, label]

        memory.save(data)

    # 训练100次,每次从内存中随机抽取一个batch的数据

    for i in range(100):

        input_batch, target_batch = memory.sample()

        model.update(input_batch, target_batch)

    # 预测

    prediction = model.predict_nograd(np.random.randint(0,2,size=10))

    print(prediction)
- JS,tfjs(网页应用一般不使用GPU):
const Memory = {

    memorySize : 100,

    main : [],

    saveData : function (data) {

        // data = [input:array, label:array]

        if (this.main.length == this.memorySize) {

            this.main.splice(0,1);

        }

        this.main.push(data);

    },

    getMemoryTensor: function () {

        let inputArray = [],

        labelArray = [];

        for (let i = 0; i < this.main.length; i++) {

            inputArray.push(this.main[i][0])

            labelArray.push(this.main[i][1])

        }

        return {

            inputBatch: tf.tensor2d(inputArray),

            labelBatch: tf.tensor2d(labelArray)

        }

    }

}

const Model = {

    batchSize: 32,

    epoch: 200,

    network: tf.sequential({

        layers: [

            tf.layers.dense({inputShape: [10], units: 16, activation: 'relu'}),

            tf.layers.dense({units: 5, activation: 'softmax'}),

        ]

    }),

    compile: function () {

        this.network.compile({

            optimizer: tf.train.sgd(0.1),

            shuffle: true,

            loss: 'categoricalCrossentropy',

            metrics: ['accuracy']

        });

    },

    predict: function (input) {

        // input = array

        // Return tensor1d

        return this.network.predict(tf.tensor2d([input])).squeeze();

    },

    update: async function (inputBatch, labelBatch) {

        // inputBatch = tf.tensor2d(memorySize × 10)

        // labelBatch = tf.tensor2d(memorySize × 5)

        this.compile();

        await this.network.fit(inputBatch, labelBatch, {

            epochs: this.epoch,

            batchSize: this.batchSize

        }).then(info => {

            console.log('Final accuracy', info.history.acc);

        });

    }

}

// 假设一个5分类问题

// 随机生成样例和标签,并填满内存

let example, label, rnd, data;

for (let i = 0; i < Memory.memorySize; i++) {

    example = tf.multinomial(tf.tensor1d([.5, .5]), 10).arraySync();

    rnd = Math.floor(Math.random()*5);

    label = tf.oneHot(tf.tensor1d([rnd], 'int32'), 5).squeeze().arraySync();

    data = [example, label];

    Memory.saveData(data);

}

// 将内存中储存的数据导出为tensor,并训练模型

let {inputBatch, labelBatch} = Memory.getMemoryTensor();

Model.update(inputBatch, labelBatch);
最新文章
- coreseek安装过程
- DB Connection String
- ivy,ivyde插件-eclipse
- c++模板类
- Java Web(转)
- iOS - Notification 通知
- Nginx+uWSGI或fastcgi部署Django项目
- php 接收 Content-Type 是 application/json的请求数据
- HTML5 中的一些新特性
- android屏幕适配详解
- Android多媒体开发-- android中OpenMax的实现整体框架
- [多线程同步练习]PV操作
- javascript单元测试(转)
- hibernate简单的增删改查
- android使用support的ActionBar时遇到的问题
- BZOJ1237: [SCOI2008]配对
- MongoDB基础之九 replication复制集
- ASP.NET Core 2.0 : 七.一张图看透启动背后的秘密
- 使用jdbc拼接条件查询语句时如何防止sql注入
- shell cut 应用实战