python3.7+flask+alipay 支付宝付款功能
2024-09-01 16:29:23
文档参考github:https://github.com/fzlee/alipay/blob/master/docs/init.md
沙箱环境配置:https://opendocs.alipay.com/open/200/105311
1、进入沙箱环境进行配置,有对应的APPID和支付宝网关
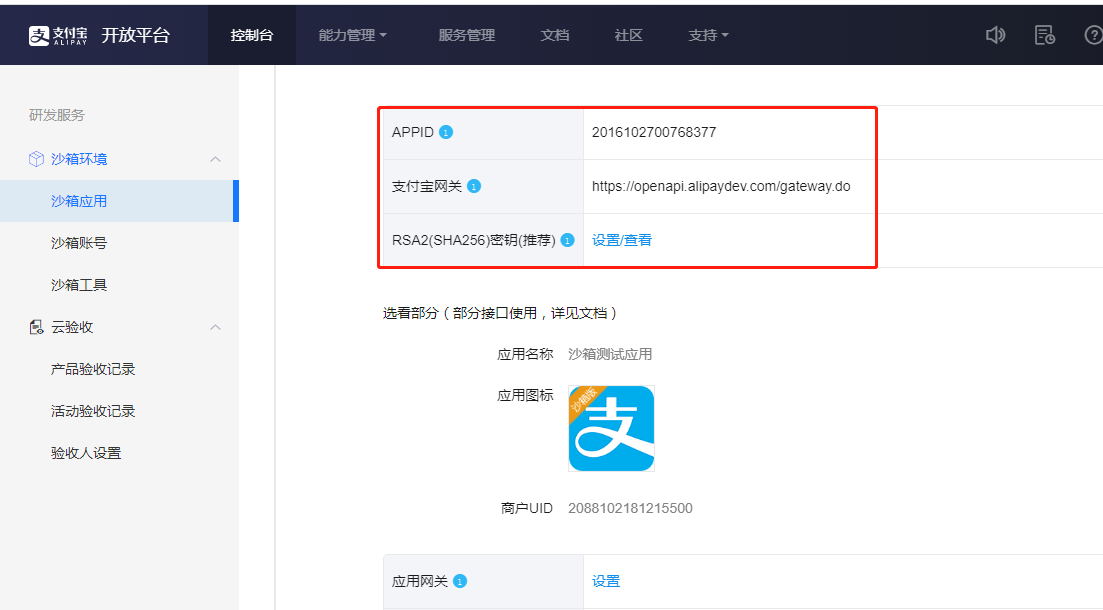
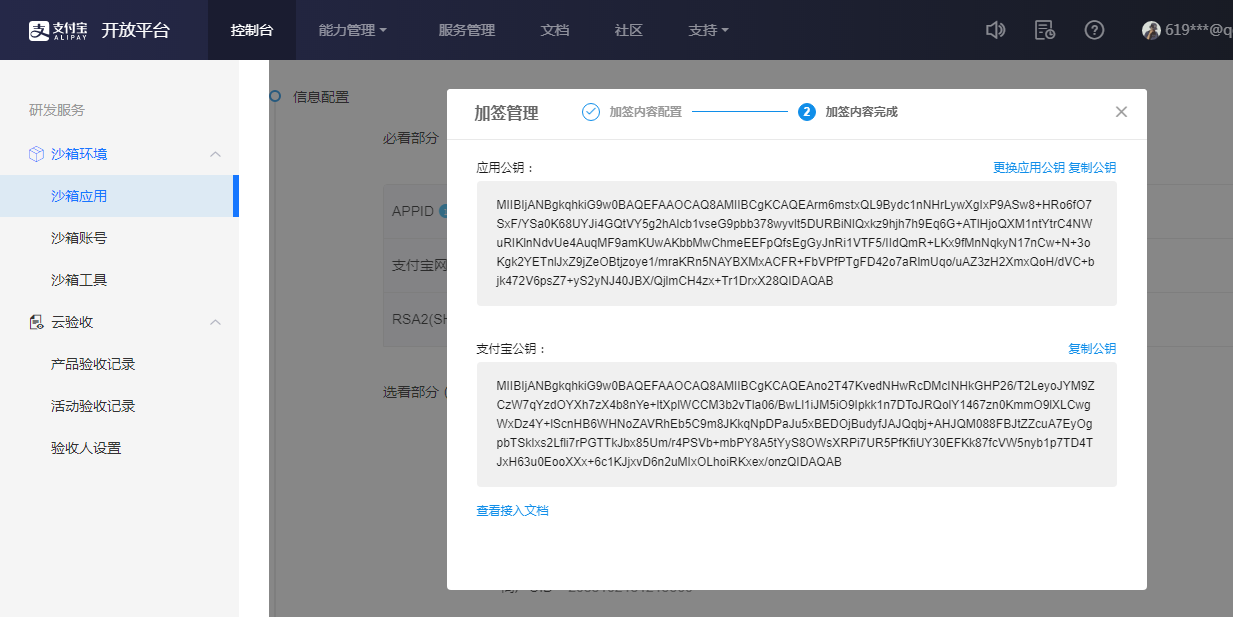
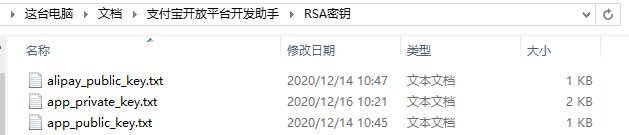
2、然后设置RSA2密钥,可下载支付宝开放平台开发助手进行生成,可查看 文档 ,然后记录好密钥的存放位置
回调地址是在支付过程中,后台会默认去调用的接口,以此接口去确认支付是否成功。所以回调地址根据自己本地接口进行填写,可参考后续的完整代码;

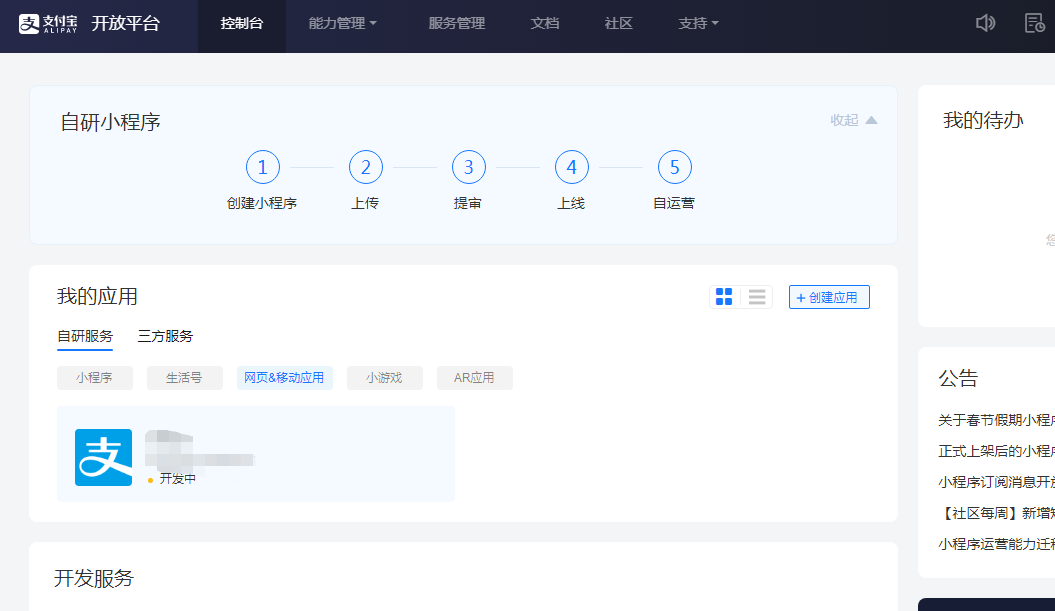
线上真实配置也与沙箱类似,需要开通自己的支付宝账号为商家才能进行配置。
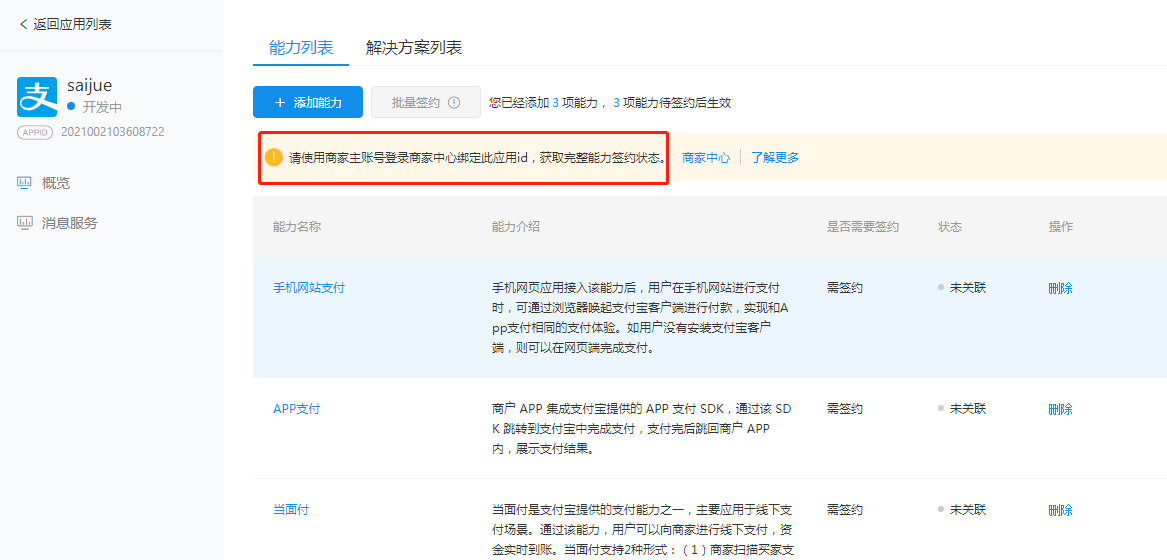
进入非沙箱环境 ,然后选择你所需要开发的应用,创建应用后填写所需的信息以及需要开通的功能,然后提交审核即可。
比如选择开发网页付款,创建后进入配置信息,而相应的服务会提醒需要商家账号才能开通使用。审核通过即可正常使用
本地代码配置文件及完整代码:
APP_PRIVATE_KEY_PATH:存放 app_private_key.txt 的文件路径
ALIPAY_PUBLIC_KEY_PATH:存放alipay_public_key.txt的文件路径
比如本地路径: d:/keys/app_private_key.txt
或 服务器路径: /mnt/keys/app_private_key.txt
项目中安装: pip install python-alipay-sdk

file_system.py 文件


 1 # file_system.py

 2 import os

 3

 4

 5 env = "production"

 6 # env = ""

 7 if env == 'production':

 8     APP_PRIVATE_KEY_PATH = '/mnt/alipay_keys/app_private_key.txt'

 9     ALIPAY_PUBLIC_KEY_PATH = '/mnt/alipay_keys/alipay_public_key.txt'

10 else:

11     APP_PRIVATE_KEY_PATH = os.getcwd() + '/ipay/keys/app_private_key.txt'

12     ALIPAY_PUBLIC_KEY_PATH = os.getcwd() + '/ipay/keys/alipay_public_key.txt'
alipay_setting.py文件
 1 # alipay_setting.py

 2 from alipay import AliPay

 3 from config import APP_PRIVATE_KEY_PATH, ALIPAY_PUBLIC_KEY_PATH

 4

 5

 6 env == "production"

 7 if env == "production":

 8     # 支付宝应用APPID

 9     APP_ID = '20210021******'

10     # 支付连接(支付宝网关)

11     PAY_URL = 'https://openapi.alipay.com/gateway.do?'

12 else:

13     # 沙箱

14     APP_ID = '2016102******'

15     PAY_URL = 'https://openapi.alipaydev.com/gateway.do?'

16

17 # 应用私钥文件路径

18 APP_PRIVATE_KEY = open(APP_PRIVATE_KEY_PATH).read()

19

20 # 支付宝公钥文件路径

21 ALIPAY_PUBLIC_KEY = open(ALIPAY_PUBLIC_KEY_PATH).read()

22 # 签名方式

23 SIGN_TYPE = 'RSA2'

24 # 是否是测试环境 - 是否是支付宝沙箱,默认为 False

25 DEBUG = False

26

27

28 def alipay_trade_page_pay(pay_id, paid_price, item_name, return_url, notify_url):

29     alipay = AliPay(

30         appid=APP_ID,

31         app_notify_url=notify_url,

32         app_private_key_string=APP_PRIVATE_KEY,

33         alipay_public_key_string=ALIPAY_PUBLIC_KEY,

34         sign_type=SIGN_TYPE,

35         debug=DEBUG

36     )

37

38     # 生成支付链接

39     order_string = alipay.api_alipay_trade_page_pay(

40         out_trade_no=pay_id,

41         total_amount=paid_price,

42         subject=item_name,

43         return_url=return_url,        # 支付成功后同步回调的项目前台页面

44         notify_url=notify_url   # 支付成功后异步回调的项目后台接口

45     )

46

47     # 支付链接 = 支付宝网关 +  order_string

48     order_url = PAY_URL + order_string

49     return order_url

50

51

52 # 验证支付结果

53 def verify_payment_result(data, signature):

54     alipay = AliPay(

55         appid=APP_ID,

56         app_notify_url=None,

57         app_private_key_string=APP_PRIVATE_KEY,

58         alipay_public_key_string=ALIPAY_PUBLIC_KEY,

59         sign_type=SIGN_TYPE,

60         debug=DEBUG

61     )

62     success = alipay.verify(data, signature)

63     return success
数据库模版文件,主要清楚接口是如何去调用支付宝付款功能,以及会生成怎样的数据内容
resource:了解上面支付宝配置文件 alipay_setting.py 中的接口是如何被调用,这里是结合了数据库模版 AlipayModel 的代码
  1 import json

  2 from config import FILE_DOMAIN_PREFIX

  3 from model import AlipayOrderModel, UserModel

  4 from flask_cors import cross_origin

  5 from flask_restful import Resource

  6 from util import id_generator

  7 from flask_jwt_extended import jwt_required, get_jwt_identity

  8 from flask import request, jsonify

  9 import time

 10 from ipay.alipay_setting import alipay_trade_page_pay, verify_payment_result

 11 from wrapper import universal_resource_wrapper, root_role_required

 12 # 参考路径:https://github.com/fzlee/alipay

 13

 14

 15 # 创建支付宝订单接口

 16 class CreateAlipayOrder(Resource):

 17     """

 18     itemName,paidPrice,paymentMethod,itemDeadline,setMeal

 19     """

 20     @universal_resource_wrapper(required=['paymentMethod', 'itemName', 'paidPrice','itemDeadline', 'setMeal'])

 21     @jwt_required

 22     @cross_origin(allow_headers=['Content-Type'])

 23     def post(self):

 24         data = request.get_json()

 25         uid = get_jwt_identity()

 26         item_name = data['itemName']

 27         paid_price = data['paidPrice']

 28         payment_method = data['paymentMethod']

 29         pay_id = id_generator(template='uuid')

 30         notify_url = FILE_DOMAIN_PREFIX + '/api/check_payment_success'

 31         return_url = FILE_DOMAIN_PREFIX + '/chooseProductking/cpkRenewalInstructions'

 32         # 生成支付宝付款链接

 33         order_url = alipay_trade_page_pay(pay_id=pay_id, paid_price=paid_price, item_name=item_name,

 34                                           return_url=return_url, notify_url=notify_url)

 35         # 保存到数据库中;

 36         ao = AlipayOrderModel(

 37             alipayId=pay_id,     # 订单编号

 38             itemName=item_name,     # 项目名称

 39             paymentMethod=payment_method,

 40             paidPrice=paid_price,   # 付费价格

 41             paymentStatus=False,

 42             paidAt=time.time(),

 43             paymentUrl=order_url,

 44             uid=uid,

 45             setMeal=data['setMeal'],

 46             itemDeadline=data['itemDeadline']   # 项目截止日期

 47         )

 48         ao.save()

 49         resp = jsonify({

 50             'msg': '成功创建订单数据,返回支付宝订单ID',

 51             'status': True,

 52             'alipayId': pay_id

 53         })

 54         return resp

 55

 56

 57 class GetAlipayPaymentUrl(Resource):

 58     """alipayId"""

 59     @universal_resource_wrapper(required=['alipayId'])

 60     @cross_origin(allow_headers=['Content-Type'])

 61     def post(self):

 62         """

 63         alipayId

 64         :return:

 65         """

 66         data = request.get_json()

 67         url = AlipayOrderModel.get_payment_url(data['alipayId'])

 68         resp = jsonify({

 69             'msg': '获取支付宝付款链接',

 70             'status': True,

 71             'data': {

 72                 'url': url

 73             }

 74         })

 75         return resp

 76

 77

 78 # 验证是否支付成功,作为回调接口notify_url使用

 79 class CheckPaymentSuccess(Resource):

 80     @universal_resource_wrapper(required=[])

 81     @cross_origin(allow_headers=['Content-Type'])

 82     def post(self):

 83         data = request.form.to_dict()

 84         # sign must be poped out

 85         signature = data.pop("sign")

 86         print(json.dumps(data))

 87         print(signature)

 88         # verify

 89         success = verify_payment_result(data, signature)

 90         # 交易结果判断

 91         if success and data["trade_status"] in ("TRADE_SUCCESS", "TRADE_FINISHED"):

 92             ao = AlipayOrderModel.find_by_alipay_id(data['out_trade_no'])

 93             ao.paymentStatus = True

 94             ao.save()

 95             usr = UserModel.find_by_uid(ao.uid)

 96             usr.update_expire_time(ao.setMeal, ao.itemDeadline)

 97             print("trade succeed")

 98             resp = jsonify({

 99                 'msg': '支付成功',

100                 'status': True

101             })

102         else:

103             resp = jsonify({

104                 'msg': '支付失败',

105                 'status': False

106             })

107         return resp

108

109

110 class CheckPaymentStatus(Resource):

111     """

112     alipayId

113     """

114     @universal_resource_wrapper(required=['alipayId'])

115     @jwt_required

116     @cross_origin(allow_headers=['Content-Type'])

117     def post(self):

118         uid = get_jwt_identity()

119         data = request.get_json()

120         ao = AlipayOrderModel.get_payment_status(uid=uid, pay_id=data['alipayId'])

121         if ao is None:

122             resp = jsonify({

123                 'msg': '支付失败,无法找到已付款订单',

124                 'status': False

125             })

126         else:

127             resp = jsonify({

128                 'msg': '支付成功',

129                 'status': True,

130                 'data': ao

131             })

132         return resp

133

134

135 class UpdatePaymentStatusForLocal(Resource):

136     """alipayId"""

137     @universal_resource_wrapper(required=['alipayId'])

138     @jwt_required

139     @root_role_required

140     @cross_origin(allow_headers=['Content-Type'])

141     def post(self):

142         data = request.get_json()

143         ao = AlipayOrderModel.find_by_alipay_id(data['alipayId'])

144         ao.paymentStatus = True

145         ao.save()

146         usr = UserModel.find_by_uid(ao.uid)

147         usr.update_expire_time(ao.setMeal, ao.itemDeadline)

148         print("trade succeed")

149         resp = jsonify({

150             'msg': '支付成功',

151             'status': True

152         })

153         return resp
model:根据自己的需求自定义的数据库模版,只为跟上面的接口代码结合使用而已。
 1 from model import Collection

 2 import custom_field as cf

 3

 4

 5 MODIFIABLE = [

 6     'paymentMethod',

 7     'itemName',

 8     'paidPrice',

 9     'paymentStatus',

10     'paidAt',

11     'paymentUrl',

12     'uid',

13     'itemDeadline',

14     'setMeal'

15 ]

16 UNMODIFIABLE = []

17

18 ID_KEY = 'alipayId'

19 ID_KEY_TEMPLATE = 'uuid'

20

21

22 class AlipayOrderModel(Collection):

23     alipayId = cf.Uuid()

24     paymentMethod = cf.String(default='alipay')

25     itemName = cf.String()

26     paidPrice = cf.Float()

27     paymentStatus = cf.Bool()

28     paidAt = cf.Time(required=False)

29     paymentUrl = cf.String()

30     uid = cf.Uuid()

31     setMeal = cf.String(required='free', choices=['lowLevel', 'highLevel'])

32     itemDeadline = cf.String(required=False, choices=['oneMonth', 'halfYear', 'oneYear'])

33

34     meta = {"db_alias": "MAILDB", "collection": "alipay_order"}

35

36     @classmethod

37     def create_new(cls, data_, created_by):

38         return super()._create_new(data_, id_key=ID_KEY,

39                                    id_template=ID_KEY_TEMPLATE,

40                                    created_by=created_by,

41                                    strict_fields=MODIFIABLE + UNMODIFIABLE

42                                    )

43

44     def do_update(self, keys_values, update_by):

45         return super()._do_update(keys_values, update_by,

46                                   MODIFIABLE)

47

48     @classmethod

49     def find_by_alipay_id(cls, obj_id):

50         return cls._find_by({'alipayId': obj_id})

51

52     @classmethod

53     def get_payment_url(cls, pay_id):

54         obj = AlipayOrderModel._find_by(query={'alipayId': pay_id, 'paymentStatus': False})

55         return obj.paymentUrl

56

57     @classmethod

58     def get_payment_status(cls, uid, pay_id):

59         obj = AlipayOrderModel._find_by(query={'alipayId': pay_id, 'paymentStatus': True, 'uid': uid})

60         return obj
最新文章
- grep-2.26 sed-4.2.2 awk-4.1.4 wget-1.18 pcregrep-8.39 pcre2grep-10.22 for windows 最新版本静态编译
- List、Map、Set三个接口,存取元素时,各有什么特点?
- Java和eclipse常用操作
- centos中安装mysql数据库
- 静态关键字static
- Python学习(二) 运行Python,编译Python
- Nyoj Fire Station
- 【总结】AngularJs学习总结
- JS-监听文本回车事件写入数据表单
- 剑指Offer——知识点储备--Linux基本命令+Makefile
- sqlplus命令行登录oracle数据库的N种方法盘点
- nginx的location配置详解
- .Net基础——程序集与CIL
- 第一周CTF (合天CTF)
- Kerberos协议
- Ajax与CORS通信
- Systick时钟定时
- Install latest git on CentOS 6/7
- [py]js前端求和与flask后端求和
- 利用python中的gensim模块训练和测试word2vec