Selenium&PhantomJS 完成爬取网络代理
2024-10-11 03:07:42
Selenium模块是一套完整的Web应用程序测试系统,它包含了测试的录制(SeleniumIDE)、编写及运行(Selenium Remote Control)和测试的并行处理(Selenimu Grid);
那么我们在编写网络爬虫时主要用来了Selenium 的Webdriver 模块 ;

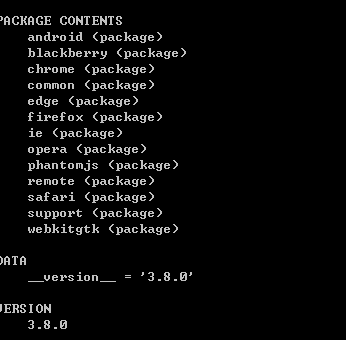
在以上的列表中android 和blackberry 是移动端的浏览器,可以先去掉,common support 也可以先去掉,剩下的除去Phantomjs 则都是常见的浏览器,PhantomJS 是一个基于WebKit 的服务端的JS API,它全面支持web 而不需要浏览器支持,其快速、原生支持各种web 标准;没有界面,则意味着开销小,同时速度也快,那么我们在爬取JS才能返回数据的网站时,没有比selenium和phantomjs 更适合的组合 了;
下载PhantomJS :http://phantomjs.org/
我使用的是windows 环境,那么下载完压缩包后,直接解压,将PhantomJS.exe 放到python 的目录中就可以 了
交互式的小例子我就写了,直接上一个实例代码,也可以将实例中的解析网页源码部分在交互式环境中敲一遍,体验一下;
#!/usr/bin/env python

#coding:utf-8

"""用selenium&PhantomJS 完成的网络爬虫,最适合使用的情形是爬取有JS的网站,但是用来爬取其他网站同样给力"""

from selenium import webdriver

from myLog import MyLog as mylog

import sys

reload(sys)

sys.setdefaultencoding('utf-8')

class Item(object):           #用于存储代理的属性

    ip = None

    port = None

    anonymouns = None

    type = None

    support = None

    local = None

    speed = None

class GetProxy(object):

    def __init__(self):

        self.starturl = "http://www.kuaidaili.com/free/inha/"  #目标网址

        self.log = mylog()                                       #二次封装的日志模块

        self.urls = self.getUrls()

        self.proxyList = self.getProxyList(self.urls)

        self.fileName = 'proxy.txt'

        self.saveFile(self.fileName,self.proxyList)

    def getUrls(self):                      ##生成目标页面代理的网页页面URL

        urls = []

        for i in xrange(1,3):

            url = self.starturl + str(i)

            urls.append(url)

            self.log.info('get URL %s to urls' %url)

        return urls

    def getProxyList(self,urls):           ##分析网页源代码

        browser = webdriver.PhantomJS()     ## 使用selenium&PhantomJS

        proxyList = []

        for url in urls:

            browser.get(url)                #打开网页

            browser.implicitly_wait(5)      #智能等待加载JS模块

            elements = browser.find_elements_by_xpath('//tbody/tr')    #使用xpath来解析网页源码

            for element in elements:

                item = Item()

                item.ip = element.find_element_by_xpath('./td[1]').text

                item.port = element.find_element_by_xpath('./td[2]').text

                item.anonymouns = element.find_element_by_xpath('./td[3]').text

                item.type = element.find_element_by_xpath('./td[4]').text

                item.support = element.find_element_by_xpath('./td[5]').text

                item.local = element.find_element_by_xpath('./td[6]').text

                item.speed = element.find_element_by_xpath('./td[7]').text

                proxyList.append(item)

                self.log.info('add proxy %s: %s to list'%(item.ip,item.port))

        browser.quit()                                #浏览器的退出

        return proxyList

    def saveFile(self,fileName,proxyList):            #生成文件

        self.log.info('add all proxy to %s'%self.fileName)

        with open(fileName,'w') as fp:

            for item in proxyList:

                # print item.ip

                fp.write(item.ip+'\t')

                fp.write(item.port + '\t')

                fp.write(item.anonymouns + '\t')

                fp.write(item.type + '\t')

                fp.write(item.support + '\t')

                fp.write(item.local + '\t')

                fp.write(item.speed + '\n')

                self.log.info('write %s:%s to file successfuly......'%(item.ip,item.port))

if __name__ == "__main__":

    USE = GetProxy()
由于这几次在使用自己二次封装的myLog模块并未加注释,此次补上,将内置logging模块再次封装,增加了获取用户名,多路径日志输出;
#!/usr/bin/env python

#coding:utf-8

#date 2017_11_30

#author chenjisheng

import logging

import getpass

class MyLog(object):

    '''此类用来封装已有logging类,方便自己使用'''

    def __init__(self):

        self.user = getpass.getuser()                       #获取使用的用户

        self.logger = logging.getLogger(self.user)          #初始化一个logger 对象

        self.logger.setLevel(logging.DEBUG)                 #设置logger 的日志级别

        self.logfile = "progress_log.log"                 #设置日志保存的文件

        self.formates = logging.Formatter(

            "[%(asctime)s] - USERNAME:[%(name)s] - [%(levelname)s] - %(message)s"

        )                                                   #设置日志的格式

        self.Hand = logging.FileHandler(self.logfile)       #设置日志的输出为文件

        self.Hand.setFormatter(self.formates)               #使用日志的格式

        self.Hand.setLevel(logging.ERROR)                   #设置输出为文件的日志级别

        self.HandStream = logging.StreamHandler()           #设置日志的输出格式为console

        self.HandStream.setFormatter(self.formates)         #使用日志的格式

        self.HandStream.setLevel(logging.DEBUG)             #设置输出为窗口的日志级别

        self.logger.addHandler(self.HandStream)             #增加日志的输出对象给logger(负责发送消息)

        self.logger.addHandler(self.Hand)                   #增加日志的输出对象给logger

    def debug(self,messages):

        self.logger.debug(messages)

    def info(self,messages):

        self.logger.info(messages)

    def warning(self,messages):

        self.logger.warning(messages)

    def error(self,messages):

        self.logger.error(messages)

    def critical(self,messages):

        self.logger.critical(messages)

if __name__ == "__main__":

    mylog = MyLog()

    mylog.debug("I'm debug")

    mylog.info("I'm info")

    mylog.warning("I'm warning")

    mylog.error("I'm error ")

    mylog.critical("I'm critical")
代码学习都是在不断练习中成长,下一篇将上传一个简易的爬虫架构。
最新文章
- netezza 数据库 取 季初 季末 时间
- linux基础学习2
- IntelliJ IDEA 常用设置讲解2
- Android权限安全(1)自定义,检查,使用权限
- Http中Cookie和Session介绍
- HDU 4712 Hamming Distance(随机算法)
- -_-#gb2312解码
- bzoj1650 [Usaco2006 Dec]River Hopscotch 跳石子
- A Byte of Python 笔记(9) 面向对象编程
- iOS https plist
- flex中创建弹出窗口,并传值
- linux安装vmware tools 步骤
- Python学习之--socket续集
- bzoj 5251: [2018多省省队联测]劈配
- centos 7安装mysql 执行./scripts/mysql_install_db --user=mysql 报错 FATAL ERROR: please install the following Perl modules before executing ./scripts/mysql_install_db: Data::Dumper
- Spring Boot 中使用 @Transactional 注解配置事务管理
- CH0802 占卜DIY
- thymeleaf 的内置对象
- Yii2 Apache + Nginx 路由重写
- Numpy学习1
热门文章
- 【LeetCode】846. Hand of Straights 解题报告(Python & C+)
- 1119 机器人走方格 V2
- A. Watchmen(Codeforces 650A)
- vue安装使用v-chart时报错解决方案
- 台湾旺玖MA8601|USB HUB方案|MA8601测试版
- <数据结构>拓扑排序
- Android物联网应用程序开发(智慧园区)—— 园区监控系统界面
- 编写Java程序,使用 Java 的 I/O 流将 H:\eclipse.zip 文件拷贝至 E 盘下,重新命名为 eclipse 安装 .zip。
- Java中List与数组互相转换
- 【java多线程】synchronized和volatile