Elasticsearch官方安装
Installationedit
Elasticsearch requires at least Java 8. Specifically as of this writing, it is recommended that you use the Oracle JDK version 1.8.0_131. Java installation varies from platform to platform so we won’t go into those details here. Oracle’s recommended installation documentation can be found on Oracle’s website. Suffice to say, before you install Elasticsearch, please check your Java version first by running (and then install/upgrade accordingly if needed):
java -version

echo $JAVA_HOME
Once we have Java set up, we can then download and run Elasticsearch. The binaries are available from www.elastic.co/downloads along with all the releases that have been made in the past. For each release, you have a choice among a zip or tar archive, a DEB or RPM package, or a Windows MSI installation package.
Installation example with taredit
For simplicity, let’s use the tar file.
Let’s download the Elasticsearch 5.6.4 tar as follows:
curl -L -O https://artifacts.elastic.co/downloads/elasticsearch/elasticsearch-5.6.4.tar.gz
Then extract it as follows:
tar -xvf elasticsearch-5.6.4.tar.gz
It will then create a bunch of files and folders in your current directory. We then go into the bin directory as follows:
cd elasticsearch-5.6.4/bin
And now we are ready to start our node and single cluster:
./elasticsearch
Installation with Homebrewedit
On macOS, Elasticsearch can also be installed via Homebrew:
brew install elasticsearch
Installation example with MSI Windows Installeredit
For Windows users, we recommend using the MSI Installer package. The package contains a graphical user interface (GUI) that guides you through the installation process.
First, download the Elasticsearch 5.6.4 MSI fromhttps://artifacts.elastic.co/downloads/elasticsearch/elasticsearch-5.6.4.msi.
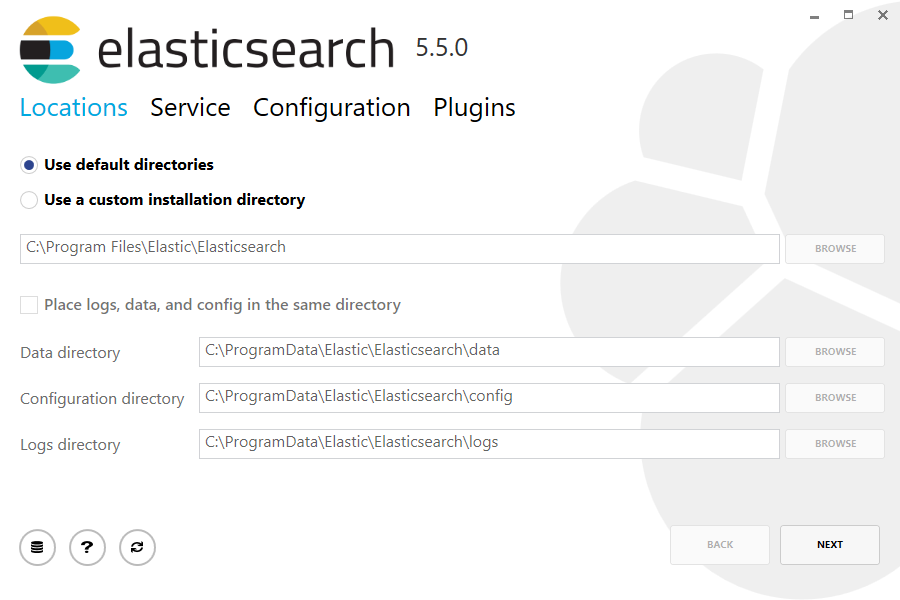
Then double-click the downloaded file to launch the GUI. Within the first screen, select the deployment directories:
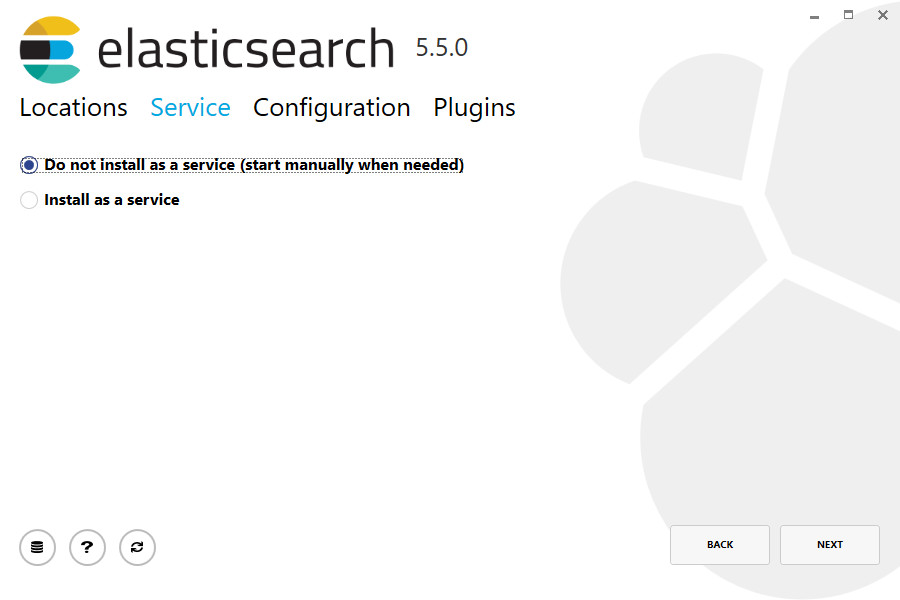
Then select whether to install as a service or start Elasticsearch manually as needed. To align with the tar example, choose not to install as a service:
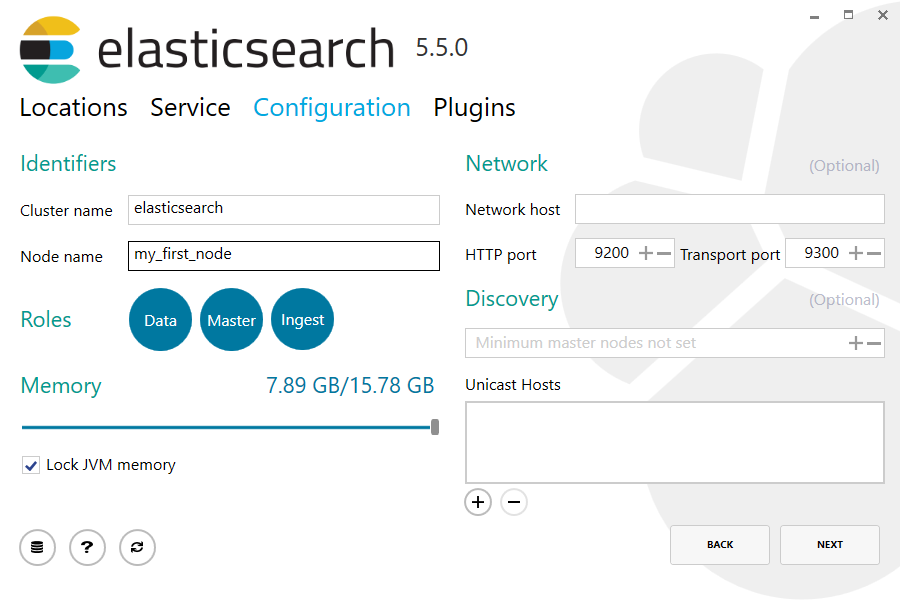
For configuration, simply leave the default values:
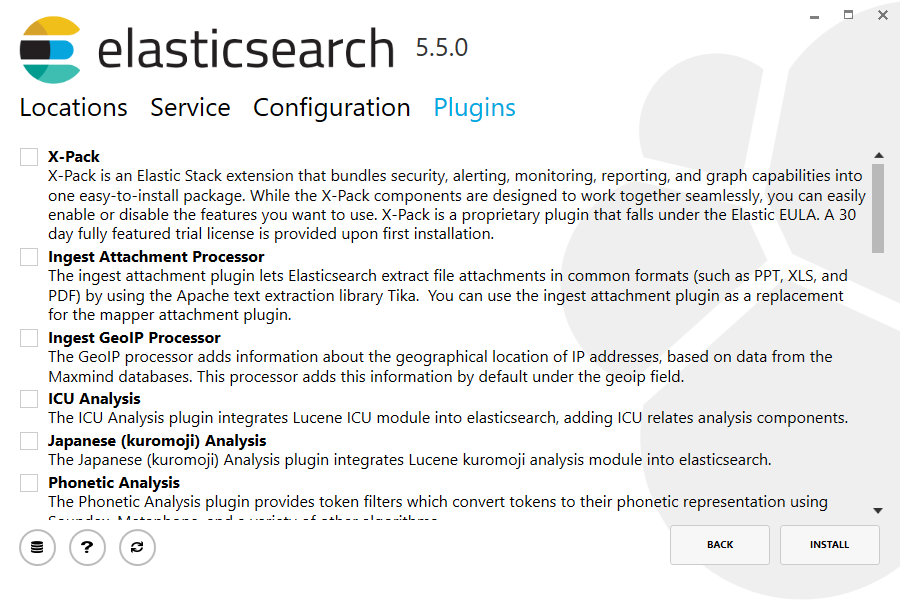
Again, to align with the tar example, uncheck all plugins to not install any plugins:
After clicking the install button, Elasticsearch will be installed:

By default, Elasticsearch will be installed at %PROGRAMFILES%\Elastic\Elasticsearch. Navigate here and go into the bin directory as follows:
with Command Prompt:
cd %PROGRAMFILES%\Elastic\Elasticsearch\bin
with PowerShell:
cd $env:PROGRAMFILES\Elastic\Elasticsearch\bin
And now we are ready to start our node and single cluster:
.\elasticsearch.exe
Successfully running nodeedit
If everything goes well with installation, you should see a bunch of messages that look like below:
[2016-09-16T14:17:51,251][INFO ][o.e.n.Node               ] [] initializing ...

[2016-09-16T14:17:51,329][INFO ][o.e.e.NodeEnvironment    ] [6-bjhwl] using [1] data paths, mounts [[/ (/dev/sda1)]], net usable_space [317.7gb], net total_space [453.6gb], spins? [no], types [ext4]

[2016-09-16T14:17:51,330][INFO ][o.e.e.NodeEnvironment    ] [6-bjhwl] heap size [1.9gb], compressed ordinary object pointers [true]

[2016-09-16T14:17:51,333][INFO ][o.e.n.Node               ] [6-bjhwl] node name [6-bjhwl] derived from node ID; set [node.name] to override

[2016-09-16T14:17:51,334][INFO ][o.e.n.Node               ] [6-bjhwl] version[5.6.4], pid[21261], build[f5daa16/2016-09-16T09:12:24.346Z], OS[Linux/4.4.0-36-generic/amd64], JVM[Oracle Corporation/Java HotSpot(TM) 64-Bit Server VM/1.8.0_60/25.60-b23]

[2016-09-16T14:17:51,967][INFO ][o.e.p.PluginsService     ] [6-bjhwl] loaded module [aggs-matrix-stats]

[2016-09-16T14:17:51,967][INFO ][o.e.p.PluginsService     ] [6-bjhwl] loaded module [ingest-common]

[2016-09-16T14:17:51,967][INFO ][o.e.p.PluginsService     ] [6-bjhwl] loaded module [lang-expression]

[2016-09-16T14:17:51,967][INFO ][o.e.p.PluginsService     ] [6-bjhwl] loaded module [lang-groovy]

[2016-09-16T14:17:51,967][INFO ][o.e.p.PluginsService     ] [6-bjhwl] loaded module [lang-mustache]

[2016-09-16T14:17:51,967][INFO ][o.e.p.PluginsService     ] [6-bjhwl] loaded module [lang-painless]

[2016-09-16T14:17:51,967][INFO ][o.e.p.PluginsService     ] [6-bjhwl] loaded module [percolator]

[2016-09-16T14:17:51,968][INFO ][o.e.p.PluginsService     ] [6-bjhwl] loaded module [reindex]

[2016-09-16T14:17:51,968][INFO ][o.e.p.PluginsService     ] [6-bjhwl] loaded module [transport-netty3]

[2016-09-16T14:17:51,968][INFO ][o.e.p.PluginsService     ] [6-bjhwl] loaded module [transport-netty4]

[2016-09-16T14:17:51,968][INFO ][o.e.p.PluginsService     ] [6-bjhwl] loaded plugin [mapper-murmur3]

[2016-09-16T14:17:53,521][INFO ][o.e.n.Node               ] [6-bjhwl] initialized

[2016-09-16T14:17:53,521][INFO ][o.e.n.Node               ] [6-bjhwl] starting ...

[2016-09-16T14:17:53,671][INFO ][o.e.t.TransportService   ] [6-bjhwl] publish_address {192.168.8.112:9300}, bound_addresses {{192.168.8.112:9300}

[2016-09-16T14:17:53,676][WARN ][o.e.b.BootstrapCheck     ] [6-bjhwl] max virtual memory areas vm.max_map_count [65530] likely too low, increase to at least [262144]

[2016-09-16T14:17:56,731][INFO ][o.e.h.HttpServer         ] [6-bjhwl] publish_address {192.168.8.112:9200}, bound_addresses {[::1]:9200}, {192.168.8.112:9200}

[2016-09-16T14:17:56,732][INFO ][o.e.g.GatewayService     ] [6-bjhwl] recovered [0] indices into cluster_state

[2016-09-16T14:17:56,748][INFO ][o.e.n.Node               ] [6-bjhwl] started
Without going too much into detail, we can see that our node named "6-bjhwl" (which will be a different set of characters in your case) has started and elected itself as a master in a single cluster. Don’t worry yet at the moment what master means. The main thing that is important here is that we have started one node within one cluster.
As mentioned previously, we can override either the cluster or node name. This can be done from the command line when starting Elasticsearch as follows:
./elasticsearch -Ecluster.name=my_cluster_name -Enode.name=my_node_name
Also note the line marked http with information about the HTTP address (192.168.8.112) and port (9200) that our node is reachable from. By default, Elasticsearch uses port 9200 to provide access to its REST API. This port is configurable if necessary.
最新文章
- winform采集网站美女图片程序---多线程篇
- wow经典台词
- 34-php基础:cookie
- C#中out和ref之间的区别
- NOI 银河英雄传说
- c语言数组应用--统计随机数并打印直方图
- Lua学习笔记4. coroutine协同程序和文件I/O、错误处理
- RFID射频卡超市购物结算系统问题记录--写入卡片时,后台php无法操作数据库
- visual studio中如何将string类型值转为BYTE(unsigned char)类型
- 洛谷 P1879 玉米田(状压DP入门题)
- Python编程语言基础
- mysql中数据类型后面的数字到底是什么?
- A1001. A+B Format
- 《DSP using MATLAB》Problem5.16
- day 46 html 学习 列 表格,
- 解决eclipse中mybatis的xml配置文件无代码提示问题
- C++ map & set
- 【Java】HashTable和HashMap区别
- ProGuard代码混淆详细攻略
- SqlServer快速获得表总记录数(大数据量)
热门文章
- php正则表达式匹配img中任意属性的方法
- vs2013数据库连接对应的dll
- 【WPF学习笔记】之如何通过后台C#代码添加(增/删/改按钮)实现对SQLServer数据库数据的更改
- The Gray World Assumption
- eclipse maven 刷新报错
- iOS判断为空或者只为空格
- 利用.dSYM跟.app文件准确定位Crash位置
- error LNK2022: metadata operation failed (801311D6) : Differing number of methods in duplicated types
- TCP/IP协议之ARP寻址
- 剑指Offer:栈的压入、弹出序列【31】