WP8 MVVM设计模式
2024-08-26 14:33:01
类似了Android里边的MVC模式, Windows Phone 有自己的Model-View-ViewModel模式,这种模式的作用就是为了Data和UI分离开来。
如果你英文较好的话,你可以不再阅读以下内容,直接访问 WindowsPhone Dev Center学习阅读,因为以下内容是对其的一个中文复述。
这次演练,将执行以下的任务:
- 创建一个Model、一个ModelView和两个View;
- 使用XAML文件绑定数据;
- 创建一个定制数据的转换器;
- 保留页面的数据;
- 在isolated storage保存数据;
- 使用App Bar暴露保存的功能。
创建一个Model、一个ModelView和两个View
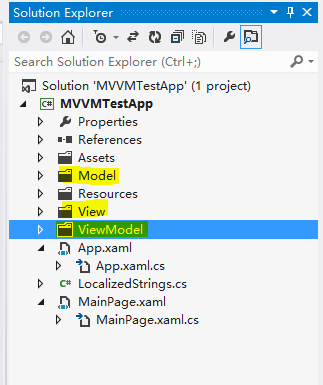
- 右击MVVMTestApp->Add->New folder 添加Model、ModelView和View文件夹如下:
- 右击Model->Add->class 新建数据Model,命名为Accomplishment.cs, 添加内容如下:
using System;

using System.ComponentModel;

namespace MVVMTestApp.Model

{

    public class Accomplishment : INotifyPropertyChanged

    {

        // The name of the accomplishment.

        public string Name { get; set; }

        // The type of the accomplishment, Item or Level.

        public string Type { get; set; }

        // The number of each item that has been collected.

        private int _count;

        public int Count

        {

            get

            {

                return _count;

            }

            set

            {

                _count = value;

                RaisePropertyChanged("Count");

            }

        }

        // Whether a level has been completed or not

        private bool _completed;

        public bool Completed

        {

            get

            {

                return _completed;

            }

            set

            {

                _completed = value;

                RaisePropertyChanged("Completed");

            }

        }

        public event PropertyChangedEventHandler PropertyChanged;

        private void RaisePropertyChanged(string propertyName)

        {

            if (this.PropertyChanged != null)

            {

                this.PropertyChanged(this, new PropertyChangedEventArgs(propertyName));

            }

        }

        // Create a copy of an accomplishment to save.

        // If your object is databound, this copy is not databound.

        public Accomplishment GetCopy()

        {

            Accomplishment copy = (Accomplishment)this.MemberwiseClone();

            return copy;

        }

    }

}
当某个属性改变的时候,这个类通过执行INotifyPropertyChanged接口,使用PropertyChanged事件通知绑定了(OneWay或者TwoWay绑定)这个属性的View更新数据。
- 右击Model->Add->class 新建数据ViewModel,命名为ViewModel.cs,它是连接View和Model的一个中枢。 现添加内容如下:
using System;

using System.Windows;

using System.Collections.ObjectModel;

using System.IO.IsolatedStorage;

using MVVMTestApp.Model;

namespace MVVMTestApp.ViewModelNamespace

{

    public class ViewModel

    {

        public ObservableCollection<Accomplishment> Accomplishments { get; set; }

        public void GetAccomplishments()

        {

            if (IsolatedStorageSettings.ApplicationSettings.Count > )

            {

                GetSavedAccomplishments();

            }

            else

            {

                GetDefaultAccomplishments();

            }

        }

        public void GetDefaultAccomplishments()

        {

            ObservableCollection<Accomplishment> a = new ObservableCollection<Accomplishment>();

            // Items to collect

            a.Add(new Accomplishment() { Name = "Potions", Type = "Item" });

            a.Add(new Accomplishment() { Name = "Coins", Type = "Item" });

            a.Add(new Accomplishment() { Name = "Hearts", Type = "Item" });

            a.Add(new Accomplishment() { Name = "Swords", Type = "Item" });

            a.Add(new Accomplishment() { Name = "Shields", Type = "Item" });

            // Levels to complete

            a.Add(new Accomplishment() { Name = "Level 1", Type = "Level" });

            a.Add(new Accomplishment() { Name = "Level 2", Type = "Level" });

            a.Add(new Accomplishment() { Name = "Level 3", Type = "Level" });

            Accomplishments = a;

            //MessageBox.Show("Got accomplishments from default");

        }

        public void GetSavedAccomplishments()

        {

            ObservableCollection<Accomplishment> a = new ObservableCollection<Accomplishment>();

            foreach (Object o in IsolatedStorageSettings.ApplicationSettings.Values)

            {

                a.Add((Accomplishment)o);

            }

            Accomplishments = a;

            //MessageBox.Show("Got accomplishments from storage");

        }

    }

}
- 右击View->New Item->Windows Phone User Control新建第一个View,命名为ItemView.xaml,在GRID布局里边添加如下内容:
<ListBox ItemsSource="{Binding}">

    <ListBox.ItemTemplate>

        <DataTemplate>

            <Grid>

                <Grid.ColumnDefinitions>

                    <ColumnDefinition Width="200"/>

                    <ColumnDefinition Width="80"/>

                    <ColumnDefinition Width="100"/>

                </Grid.ColumnDefinitions>

                <TextBlock x:Name="Item" Text="{Binding Path=Name, Mode=OneWay}" Grid.Column="0" HorizontalAlignment="Left" VerticalAlignment="Center" />

                <TextBox x:Name="Count" Text="{Binding Path=Count, Mode=TwoWay}" Grid.Column="1" TextAlignment="Center" InputScope="Number"/>

                <TextBlock x:Name="Check" Text="{Binding Path=Count, Mode=OneWay}" Grid.Column="2" HorizontalAlignment="Center" VerticalAlignment="Center" />

            </Grid>

        </DataTemplate>

    </ListBox.ItemTemplate>

</ListBox>
- 右击View->New Item->Windows Phone User Control新建第二个View,命名为LevelView.xaml,右击xaml->,替换一下内容:
using System;

using System.Windows.Controls;

using System.Globalization;

namespace MVVMTestApp.View

{

    public partial class LevelView : UserControl

    {

        public LevelView()

        {

            InitializeComponent();

        }

    }

    public class BoolOpposite : System.Windows.Data.IValueConverter

    {

        public object Convert(object value, Type targetType, object parameter, CultureInfo culture)

        {

            bool b = (bool)value;

            return !b;

        }

        public object ConvertBack(object value, Type targetType, object parameter, CultureInfo culture)

        {

            string s = value as string;

            bool b;

            if (bool.TryParse(s, out b))

            {

                return !b;

            }

            return false;

        }

    }

}
- 在LevelView.xaml文件,<UserControl>标签中,加入本地的命名空间:
xmlns:src="clr-namespace:MVVMTestApp.View"
- 在GRID布局前,将转换器类(src:BoolOpposite)的实例作为唯一标识(BoolOpposite)的资源, 在第二个LevelView 的CheckBox IsEnabled中,数据在绑定的View和data Model中传递时,调用该引用修改数据。
<UserControl.Resources>

    <src:BoolOpposite x:Key="BoolOpposite"/>

</UserControl.Resources>
- 在LevelView的GRID布局中加入如下内容:
<ListBox ItemsSource="{Binding}">

    <ListBox.ItemTemplate>

        <DataTemplate>

            <Grid>

                <Grid.ColumnDefinitions>

                    <ColumnDefinition Width="200"/>

                    <ColumnDefinition Width="80"/>

                    <ColumnDefinition Width="100"/>

                </Grid.ColumnDefinitions>

                <TextBlock x:Name="Level" Text="{Binding Path=Name, Mode=OneWay}" Grid.Column="0" HorizontalAlignment="Left" VerticalAlignment="Center"/>

                <CheckBox x:Name="Completed" IsChecked="{Binding Path=Completed, Mode=TwoWay}" Grid.Column="1" HorizontalAlignment="Center" IsEnabled="{Binding Path=Completed, Converter={StaticResource BoolOpposite}}"/>

                <TextBlock x:Name="Check" Text="{Binding Path=Completed, Mode=OneWay}" Grid.Column="2" HorizontalAlignment="Center" VerticalAlignment="Center"/>

            </Grid>

        </DataTemplate>

    </ListBox.ItemTemplate>

</ListBox>
构建主页面
- 在MainPage.xaml文件,<Phone>标签中,增加View的命名空间
xmlns:views="clr-namespace:MVVMTestApp.View"
- 替换ContentPanel GRID内容如下:
<!--ContentPanel - place additional content here-->

<Grid x:Name="ContentPanel" Grid.Row="1" Margin="12,0,12,0">

    <StackPanel>

        <TextBlock Text="Items Collected" Foreground="{StaticResource PhoneAccentBrush}" Style="{StaticResource PhoneTextLargeStyle}" />

        <views:ItemView x:Name="ItemViewOnPage" Height="200"/>

        <TextBlock Text="Levels Completed" Foreground="{StaticResource PhoneAccentBrush}" Style="{StaticResource PhoneTextLargeStyle}" />

        <views:LevelView x:Name="LevelViewOnPage" Height="200"/>

    </StackPanel>

</Grid>
这样就把ItemView和LevelView两个视图跟应用的页面关联起来了。
- 视图有了,接下来就是要给视图填充数据了, 把MainPage.xaml.cs修改如下:
using System;

using System.Linq;

using System.Windows;

using Microsoft.Phone.Controls;

using MVVMTestApp.ViewModelNamespace;

namespace MVVMTestApp

{

    public partial class MainPage : PhoneApplicationPage

    {

        private ViewModel vm;

        // Constructor

        public MainPage()

        {

            InitializeComponent();

            vm = new ViewModel();

        }

        protected override void OnNavigatedTo(System.Windows.Navigation.NavigationEventArgs e)

        {

            base.OnNavigatedTo(e);

            // Later, you will replace this next line with something better.

            vm.GetAccomplishments();

            // There are two different views, but only one view model.

            // So, use LINQ queries to populate the views.

            // Set the data context for the Item view.

            ItemViewOnPage.DataContext = from Accomplishment in vm.Accomplishments where Accomplishment.Type == "Item" select Accomplishment;

            // Set the data context for the Level view.

            LevelViewOnPage.DataContext = from Accomplishment in vm.Accomplishments where Accomplishment.Type == "Level" select Accomplishment;

            // If there is only one view, you could use the following code

            // to populate the view.

            //AccomplishmentViewOnPage.DataContext = vm.Accomplishments;

        }

    }

}
至此运行一下效果,内容已经填充到了主页面了
To be continue...
最新文章
- [LeetCode] Number of Islands II 岛屿的数量之二
- Adressing
- Win7系统.net framework 4.0没有注册导致部署在IIS的站点跑不起来怎么办
- JavaScript学习(3):函数式编程
- [BZOJ 3530][Sdoi 2014]数数
- mamp pro
- VTK三维重建(1)-使用VTK读取DICOM,并动态输出
- [转]Vim 复制粘贴探秘
- 转: 静态模式makefile中$(cobjs): $(obj)/%.o: $(src)/%.c
- 如何更好辨认House of hello恶搞包的真假
- quartz 定时任务的实现
- LINUX下DNS的查看和配置
- 实例:SSH结合Easyui实现Datagrid的批量删除功能
- ubuntux下apk反编译工具安装
- java初学者(新手)应该如何选择学习教材与网站
- LeetCode - 654. Maximum Binary Tree
- 使用IDEA运行Spark程序
- VS注释快捷键
- Nacos系列:Nacos的Java SDK使用
- centos7安装gitlab并汉化