前端JavaScript之DOM使用案例
2024-09-04 15:58:35
1.弹出框点击关闭
(这个例子关键自己创建标签以及属性,不是太好想啊,而且作用相对来数也不是太大)
<!DOCTYPE html>

<html>

    <head>

        <meta charset="UTF-8">

        <title></title>

        <style type="text/css">

            *{

                padding: 0;

                margin: 0;

            }

            html,body{

                height: 100%;

            }

            #box{

                width: 100%;

                height: 100%;

                background: rgba(0,0,0,.3);

            }

            #content{

                position: relative;

                top: 150px;

                width: 400px;

                height: 200px;

                line-height: 200px;

                text-align: center;

                color: red;

                background-color: #fff;

                margin: auto;

            }

            #span1{

                position: absolute;

                background-color: red;

                top: 0;

                right: 0;

                width: 30px;

                height: 30px;

                line-height: 30px;

                text-align: center;

                color: #fff;

            }

        </style>

    </head>

    <body>

        <button id="btn">弹出</button>

    </body>

    <script type="text/javascript">

        //获取dom元素 1.获取事件源

        var oBtn = document.getElementById('btn');

        //创建弹出模态框的相关DOM对象

        var oDiv = document.createElement('div');

        var oP = document.createElement('p');

        var oSpan = document.createElement('span');

        // 设置属性

        oDiv.id = 'box';

        oP.id = 'content'

        oP.innerHTML = '模态框成功弹出'

        oSpan.innerHTML = 'X';

        oSpan.id = 'span1'

        // 追加元素

        oDiv.appendChild(oP);

        oP.appendChild(oSpan);

        // 点击弹出按钮 弹出模态框

        oBtn.onclick = function(){

            //动态的添加到body中一个div

            this.parentNode.insertBefore(oDiv,btn)

        }

        // 点击X 关闭模态框

        oSpan.onclick = function(){

            // 移除oDiv元素

            oDiv.parentNode.removeChild(oDiv)

        }

        // 1.购物车

        // 2.模态框

    </script>

</html>
现在来看看反向从现有的进行操作,这个顺着看比上一个好理解一点
<!DOCTYPE html>

<html lang="en">

<head>

    <meta charset="UTF-8">

    <title>Document</title>

    <style type="text/css">

        *{

            padding: 0;

            margin: 0;

        }

        html,body{

            height: 100%;

        }

        .box{

            width: 100%;

            height: 100%;

            background: rgba(0,0,0,.3);

        }

        .content{

            position: relative;

            top: 150px;

            width: 400px;

            height: 200px;

            line-height: 200px;

            text-align: center;

            color: red;

            background-color: #fff;

            margin: auto;

        }

        .span1{

            position: absolute;

            background-color: red;

            top: 0;

            right: 0;

            width: 30px;

            height: 30px;

            line-height: 30px;

            text-align: center;

            color: #fff;

        }

        div{

             display: none;

        }

        p{

             display: none;

        }

        span{

             display: none;

        }

    </style>

</head>

<body>

     <button id="btn">弹出</button>

    <div class="box" id="div">

        <p class="content" id="p">模拟态弹出

            <span class="span1" id="x">x</span>

        </p>

    </div>

    <script type="text/javascript">

        var oClose = document.getElementById('x');

        var oBtn = document.getElementById('btn');

        var oDiv = document.getElementById('div');

        var oP = document.getElementById('p');

        oBtn.onclick = function(){

            oBtn.style.display = "none";

            oDiv.style.display = "block";

            oP.style.display = "block";

            oClose.style.display = "block";

        }

        oClose.onclick = function(){

            oBtn.style.display = "block";

            oDiv.style.display = "none";

            oP.style.display = "none";

            oClose.style.display = "none";

        }

    </script>

</body>

</html>
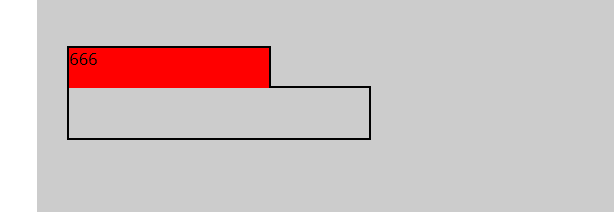
2.鼠标放到输入框里面,自动弹出框下内容
(这里其实重点在于两个盒子紧靠后,如何让重合部位的线条被背景遮盖住,只要这个实现了,后面使用css就方便了)
<!DOCTYPE html>

<html lang="en">

<head>

    <meta charset="UTF-8">

    <title>Document</title>

    <style type="text/css">

        *{

            margin: 0;

            padding: 0;

        }

        .box{

            background-color: rgba(0,0,0,0.2);

            position: relative;

            margin: 0 auto;

            height:400px;

            width: 600px;

        }

        .border{

            width: 200px;

            height: 40px;

            background-color: red;

            position: absolute;

            top: 60px;

            left: 30px;

            z-index: 10;

            border:2px solid black;

        }

        .bottom{

            width: 300px;

            height:50px;

            position: absolute;

            top: 100px;

            left: 30px;

            border:2px solid black;

            z-index: 0;

            display: none;

        }

        div.c{

            border-bottom-width: 0px;

        }

    </style>

</head>

<body >

    <div class="box">

        <div class="border" id="myBorder">666</div>

        <div class="bottom" id="myBottom"></div>

    </div>

    <script type="text/javascript">

        var oBorder = document.getElementById("myBorder");

        var oBottom = document.getElementById("myBottom");

        oBorder.onmouseenter = function(){

            oBottom.style.display = "block";

            oBorder.className += " c";

        }

        oBorder.onmouseleave = function(){

             oBottom.style.display = "none";

             oBorder.className = "border";

        }

    </script>

</body>

</html>
效果:
鼠标放到事件上面,随着左右移动,事件发生改变,出现轮播效果
    <!DOCTYPE html>

<html>

    <head>

        <meta charset="UTF-8">

        <title></title>

        <style type="text/css">

            *{

                padding: 0;

                margin: 0;

            }

            ul{

                list-style: none;

            }

            #tab{

                width: 480px;

                margin: 20px auto;

                border: 1px solid red;

            }

            ul{

                width: 100%;

                overflow: hidden;

            }

            ul li{

                float: left;

                width: 160px;

                height: 60px;

                line-height: 60px;

                text-align: center;

                background-color: #cccccc;

            }

            ul li a{

                text-decoration: none;

                color:black;

            }

            li.active{

                background-color: red;

            }

            p{

                display: none;

                height: 200px;

                text-align: center;

                line-height: 200px;

                background-color: red;

            }

            p.active{

                display: block;

            }

        </style>

    </head>

    <body>

        <div id="tab">

            <ul>

                <li class="active">

                    <a href="#">首页</a>

                </li>

                <li>

                    <a href="#">新闻</a>

                </li>

                <li>

                    <a href="#">图片</a>

                </li>

            </ul>

            <p class="active">首页内容</p>

            <p>新闻内容</p>

            <p>图片内容</p>

        </div>

    </body>

    <script type="text/javascript">

        window.onload = function(){

            // //需求:鼠标放到上面的li上,li本身变色(添加类),对应的p也显示出来(添加类);

                    //思路:1.点亮上面的盒子。   2.利用索引值显示下面的盒子。

            var tabli = document.getElementsByTagName('li');

            var tabContent = document.getElementsByTagName('p')

            // js的一个坑

            for(let i = 0; i < tabli.length; i++){

                // 绑定索引值(新增一个自定义属性:index属性)

                // tabli[i].index  = i;

                tabli[i].onclick = function(){

                    // 1.点亮上面的盒子。   2.利用索引值显示下面的盒子。(排他思想)

                    for(var j = 0; j < tabli.length; j++){

                        tabli[j].className = '';

                        tabContent[j].className = '';

                    }

                    this.className = 'active';

                    console.log(i);

                    tabContent[i].className = 'active';//【重要代码】

                }

        }

        }

    </script>

</html>
和上面类似的案例,京东轮播图,鼠标放上去,li本身变色,对应上p显示出来
<!DOCTYPE html>

<html lang="en">

<head>

    <meta charset="UTF-8">

    <title>Document</title>

    <style type="text/css">

        *{

            padding: 0;

            margin: 0;

        }

        ul{

            list-style: none;

        }

        /*一个480的大盒子*/

        #tab{

            width: 480px;

            /*距顶部10px,居中*/

            margin:10px auto;

            border: 1px solid red;

        }

        ul{

            width: 100%;

            overflow: hidden;

        }

        ul li{

            float: left;

            width: 160px;

            height: 60px;

            line-height: 60px;

            text-align: center;

            background-color: #ccc;

        }

        /*字体设置*/

        ul li a{

            text-decoration: none;

            color: blue;

        }

        li.active{

            background-color: red;

        }

        p{

            /*对于下部进行隐藏,否则就同时显现了*/

            display: none;

            height: 200px;

            text-align: center;

            line-height: 200px;

            background-color: red;

        }

        /*这里对下部在进行活动打开*/

        p.active{

            display: block;

        }

    </style>

</head>

<body>

    <div id="tab">

        <ul>

            <!-- 首页显示 -->

            <li class="active">

                <a href="#">首页</a>

            </li>

            <li>

                <a href="#">新闻</a>

            </li>

            <li>

                <a href="#">图片</a>

            </li>

        </ul>

        <p class="active">首页内容</p>

        <p>新闻内容</p>

        <p>图片内容</p>

    </div>

    <script type="text/javascript">

        window.onload = function(){

            var tabli = document.getElementsByTagName('li');

            var tabContent = document.getElementsByTagName('p');

            for(let i = 0; i< tabli.length; i++){

                // 绑定索引值

                tabli[i].onclick = function(){

                    // 点亮盒子

                    for(var j = 0; j<tabli.length; j++){

                        tabli[j].className = " ";

                        tabContent[j].className = " ";

                    }

                    this.className = 'active';

                    tabContent[i].className = 'active';

                }

            }

            }

    </script>

</body>

</html>
定时器的使用
js中定时器分为setTimeout()和setInterval()两种
setTimeOut():只在指定时间后执行一次
setInterval():在指定时间周期循环执行
clearInterval(timer):将计时器停止,但是timer变量本身还存在
timer=null后,timer变量会被当做垃圾被系统回收,无法再次启动原来的timer
例:
做一个点击会向右移动的盒子
(整了老半天,没研究出来咋让它再移回去)
<!DOCTYPE html>

<html lang="en">

<head>

    <meta charset="UTF-8">

    <title></title>

</head>

<body>

    <div id="app" style="width: 100px;height: 100px;border: 1px solid red;">框子</div>

    <button id="move">移动</button>

    <script type="text/javascript">

        var oApp = document.getElementById('app');

        var moveBtn = document.getElementById('move');

        var count = 0;

        var timer = null;

        moveBtn.onclick = function(){

            timer = setInterval(function(){

            count+=3;

            oApp.style.marginLeft = count + 'px';

        },50);

            }

    </script>

</body>

</html>
最新文章
- widows和Linux java加密注意事项
- LeetCode 344. Reverse String
- linux系统安装软件方法大全
- Jenkins+svn+maven
- linux修改密码的几种方法
- MySQL主机127.0.0.1与localhost区别总结
- javascript中 的 + RegExp['\x241'] 怎么理解
- 支付宝修改回调地址后 issign=false
- 第二百七十四、五、六天 how can I 坚持
- Java中的包
- iOS将产品进行多语言发布,开发
- Win2003 Server磁盘配额揭密之启用篇
- 通过Windows常见性能计数器分析服务器性能瓶颈
- SQL中游标的使用--遍历数据逐行更新或删除:相当于for循环
- mysql 修改默认字符集为utf8
- DSAPI中TCP、UDP、HTTP的选择
- Android之友盟多渠道打包与数据统计
- Linux学习历程——Centos 7 mkdir命令
- Shiro笔记(一)基本概念
- [administrative][CentOS][NetworkManager] 万恶的NetworkManager到底怎么用