openstack安装newton版本dashboard+cinder(六)
2024-08-30 03:55:21
一、dashboard
1、安装dashboard及配置
[root@linux-node1 ~]# yum install openstack-dashboard -y   #可以装任何地方只要能连接

[root@linux-node1 ~]#  grep -n "^[a-Z]"   /etc/openstack-dashboard/local_settings

:import os

:from django.utils.translation import ugettext_lazy as _

:from openstack_dashboard import exceptions

:from openstack_dashboard.settings import HORIZON_CONFIG

:DEBUG = False

:WEBROOT = '/dashboard/'

:ALLOWED_HOSTS = ['*', 'localhost']

:OPENSTACK_API_VERSIONS = {

:OPENSTACK_KEYSTONE_DEFAULT_DOMAIN = 'default'

:LOCAL_PATH = '/tmp'

:SECRET_KEY='751890c0cef51ef6fbac'

:CACHES = {

:CACHES = {

:EMAIL_BACKEND = 'django.core.mail.backends.console.EmailBackend'

:OPENSTACK_HOST = "172.22.0.218"

:OPENSTACK_KEYSTONE_URL = "http://%s:5000/v2.0" % OPENSTACK_HOST

:OPENSTACK_KEYSTONE_DEFAULT_ROLE = "user"

:OPENSTACK_KEYSTONE_BACKEND = {

:OPENSTACK_HYPERVISOR_FEATURES = {

:OPENSTACK_CINDER_FEATURES = {

:OPENSTACK_NEUTRON_NETWORK = {

:OPENSTACK_HEAT_STACK = {

:IMAGE_CUSTOM_PROPERTY_TITLES = {

:IMAGE_RESERVED_CUSTOM_PROPERTIES = []

:API_RESULT_LIMIT =

:API_RESULT_PAGE_SIZE =

:SWIFT_FILE_TRANSFER_CHUNK_SIZE =  *

:INSTANCE_LOG_LENGTH =

:DROPDOWN_MAX_ITEMS =

: TIME_ZONE = "Asia/Shanghai"

:POLICY_FILES_PATH = '/etc/openstack-dashboard'

:LOGGING = {

:SECURITY_GROUP_RULES = {

:REST_API_REQUIRED_SETTINGS = ['OPENSTACK_HYPERVISOR_FEATURES',

:ALLOWED_PRIVATE_SUBNET_CIDR = {'ipv4': [], 'ipv6': []}

[root@linux-node1 ~]# systemctl restart httpd

[root@linux-node1 conf.d]# ls

autoindex.conf  openstack-dashboard.conf  README  userdir.conf  welcome.conf  wsgi-keystone.conf
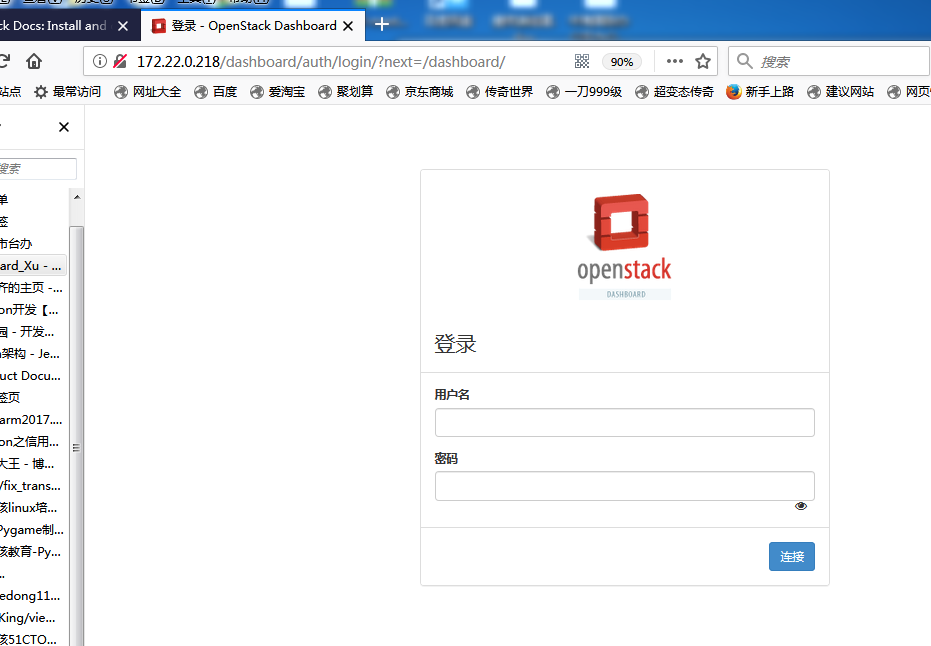
2、登录测试
二、cinder部署:
一)控制节点部署
1、安装及部署配置:
[root@linux-node1 ~]# yum install openstack-cinder

[root@linux-node1~]# vi /etc/cinder/cinder.conf

[DEFAULT]

transport_url = rabbit://openstack:RABBIT_PASS@controller

auth_strategy = keystone

my_ip = 172.22.0.218

enabled_backends = lvm

rpc_backend = rabbit

[database]

    connection = mysql+pymysql://cinder:cinder@172.22.0.218/cinder

[keystone_authtoken]

[keystone_authtoken]

auth_uri = http://172.22.0.218:5000

auth_url = http://172.22.0.218:35357

auth_plugin = password

memcached_servers = 172.22.0.218:

project_domain_id = d21d0715890447fb87f72e85dce6d4be

user_domain_id = d21d0715890447fb87f72e85dce6d4be

project_name = service

username = cinder

password = cinder

[oslo_concurrency]

lock_path = /var/lib/cinder/tmp

[oslo_messaging_rabbit]

rabbit_host = 172.22.0.218

rabbit_port =

rabbit_userid = openstack

rabbit_password = openstack

[root@linux-node1 ~]# grep -n "^[a-Z]" /etc/cinder/cinder.conf

:my_ip = 172.22.0.218

:auth_strategy = keystone

:enabled_backends = lvm

:rpc_backend = rabbit

:connection = mysql://cinder:cinder@172.22.0.218/cinder

:auth_uri = http://172.22.0.218:5000

:auth_url = http://172.22.0.218:35357

:auth_plugin = password

:memcached_servers = 172.22.0.218:

:project_domain_id = d21d0715890447fb87f72e85dce6d4be

:user_domain_id = d21d0715890447fb87f72e85dce6d4be

:project_name = service

:username = cinder

:password = cinder

:lock_path = /var/lib/cinder/tmp

:transport_url = rabbit://openstack:openstack@172.22.0.218

:rabbit_host = 172.22.0.218

:rabbit_port =

:rabbit_userid = openstack

:rabbit_password = openstack

[root@linux-node1 ~]# vi /etc/nova/nova.conf

[cinder]

os_region_name = RegionOne
2、同步数据库:
[root@linux-node1 ~]# su -s /bin/sh -c "cinder-manage db sync" cinder

检查:

[root@linux-node1 ~]# mysql -ucinder -pcinder -e "use cinder;show tables;"

+----------------------------+

| Tables_in_cinder           |

+----------------------------+

| backups                    |

| cgsnapshots                |

| clusters                   |

| consistencygroups          |

| driver_initiator_data      |

| encryption                 |

| group_snapshots            |

| group_type_projects        |

| group_type_specs           |

| group_types                |

| group_volume_type_mapping  |

| groups                     |

| image_volume_cache_entries |

| messages                   |

| migrate_version            |

| quality_of_service_specs   |

| quota_classes              |

| quota_usages               |

| quotas                     |

| reservations               |

| services                   |

| snapshot_metadata          |

| snapshots                  |

| transfers                  |

| volume_admin_metadata      |

| volume_attachment          |

| volume_glance_metadata     |

| volume_metadata            |

| volume_type_extra_specs    |

| volume_type_projects       |

| volume_types               |

| volumes                    |

| workers                    |

+----------------------------+
3、创建一个cinder用户,加入service项目,给予admin角色
[root@linux-node1 ~]# openstack user create --domain default --password-prompt cinder

Missing value auth-url required for auth plugin password

[root@linux-node1 ~]# source admin-openrc.sh

[root@linux-node1 ~]# openstack user create --domain default --password-prompt cinder

User Password:

Repeat User Password:

+---------------------+----------------------------------+

| Field               | Value                            |

+---------------------+----------------------------------+

| domain_id           | d21d0715890447fb87f72e85dce6d4be |

| enabled             | True                             |

| id                  | e86f70b51070480e877582499e946d43 |

| name                | cinder                           |

| password_expires_at | None                             |

+---------------------+----------------------------------+
4、重启nova-api服务和启动cinder服务
root@linux-node1 ~]# systemctl restart openstack-nova-api.service

[root@linux-node1 ~]# systemctl enable openstack-cinder-api.service openstack-cinder-scheduler.service

Created symlink from /etc/systemd/system/multi-user.target.wants/openstack-cinder-api.service to /usr/lib/systemd/system/openstack-cinder-api.service.

Created symlink from /etc/systemd/system/multi-user.target.wants/openstack-cinder-scheduler.service to /usr/lib/systemd/system/openstack-cinder-scheduler.service.

[root@linux-node1 ~]# systemctl start openstack-cinder-api.service openstack-cinder-scheduler.service
5、创建服务(包含V1和V2)
[root@linux-node1 ~]# openstack service create --name cinder   --description "OpenStack Block Storage" volume

+-------------+----------------------------------+

| Field       | Value                            |

+-------------+----------------------------------+

| description | OpenStack Block Storage          |

| enabled     | True                             |

| id          | b66ff1fce26541578a593ace098990ba |

| name        | cinder                           |

| type        | volume                           |

+-------------+----------------------------------+

[root@linux-node1 ~]#  openstack service create --name cinderv2   --description "OpenStack Block Storage" volumev2

+-------------+----------------------------------+

| Field       | Value                            |

+-------------+----------------------------------+

| description | OpenStack Block Storage          |

| enabled     | True                             |

| id          | 1fe87e672b714be0a278996bcce5cdf1 |

| name        | cinderv2                         |

| type        | volumev2                         |

+-------------+----------------------------------+
6、分别对V1和V2创建三个环境(admin,internal,public)的endpoint
[root@linux-node1 ~]# openstack endpoint create --region RegionOne   volume public http://172.22.0.218:8776/v1/%\(tenant_id\)s

+--------------+-------------------------------------------+

| Field        | Value                                     |

+--------------+-------------------------------------------+

| enabled      | True                                      |

| id           | 9847cc9ba7754ec0adad1539f4d00147          |

| interface    | public                                    |

| region       | RegionOne                                 |

| region_id    | RegionOne                                 |

| service_id   | b66ff1fce26541578a593ace098990ba          |

| service_name | cinder                                    |

| service_type | volume                                    |

| url          | http://172.22.0.218:8776/v1/%(tenant_id)s |

+--------------+-------------------------------------------+

[root@linux-node1 ~]# openstack endpoint create --region RegionOne   volume internal http://172.22.0.218:8776/v1/%\(tenant_id\)s

+--------------+-------------------------------------------+

| Field        | Value                                     |

+--------------+-------------------------------------------+

| enabled      | True                                      |

| id           | 889fb8a25cca4ef69f43a6555ae54e77          |

| interface    | internal                                  |

| region       | RegionOne                                 |

| region_id    | RegionOne                                 |

| service_id   | b66ff1fce26541578a593ace098990ba          |

| service_name | cinder                                    |

| service_type | volume                                    |

| url          | http://172.22.0.218:8776/v1/%(tenant_id)s |

+--------------+-------------------------------------------+

[root@linux-node1 ~]# openstack endpoint create --region RegionOne   volume admin http://172.22.0.218:8776/v1/%\(tenant_id\)s

+--------------+-------------------------------------------+

| Field        | Value                                     |

+--------------+-------------------------------------------+

| enabled      | True                                      |

| id           | 20b783947c7a4f1d949042e86c90f792          |

| interface    | admin                                     |

| region       | RegionOne                                 |

| region_id    | RegionOne                                 |

| service_id   | b66ff1fce26541578a593ace098990ba          |

| service_name | cinder                                    |

| service_type | volume                                    |

| url          | http://172.22.0.218:8776/v1/%(tenant_id)s |

+--------------+-------------------------------------------+

[root@linux-node1 ~]# openstack endpoint create --region RegionOne   volumev2 public http://172.22.0.218:8776/v2/%\(tenant_id\)s

+--------------+-------------------------------------------+

| Field        | Value                                     |

+--------------+-------------------------------------------+

| enabled      | True                                      |

| id           | df0bd47a768c4e618118c32db1dd56c0          |

| interface    | public                                    |

| region       | RegionOne                                 |

| region_id    | RegionOne                                 |

| service_id   | 1fe87e672b714be0a278996bcce5cdf1          |

| service_name | cinderv2                                  |

| service_type | volumev2                                  |

| url          | http://172.22.0.218:8776/v2/%(tenant_id)s |

+--------------+-------------------------------------------+

[root@linux-node1 ~]# openstack endpoint create --region RegionOne   volumev2 internal http://172.22.0.218:8776/v2/%\(tenant_id\)s

+--------------+-------------------------------------------+

| Field        | Value                                     |

+--------------+-------------------------------------------+

| enabled      | True                                      |

| id           | 9e3d7909a63b4c4cb2865025361330c7          |

| interface    | internal                                  |

| region       | RegionOne                                 |

| region_id    | RegionOne                                 |

| service_id   | 1fe87e672b714be0a278996bcce5cdf1          |

| service_name | cinderv2                                  |

| service_type | volumev2                                  |

| url          | http://172.22.0.218:8776/v2/%(tenant_id)s |

+--------------+-------------------------------------------+

[root@linux-node1 ~]# openstack endpoint create --region RegionOne   volumev2 admin http://172.22.0.218:8776/v2/%\(tenant_id\)s

+--------------+-------------------------------------------+

| Field        | Value                                     |

+--------------+-------------------------------------------+

| enabled      | True                                      |

| id           | 42bf5096ab4346e9b9bbd940e9cd4ad1          |

| interface    | admin                                     |

| region       | RegionOne                                 |

| region_id    | RegionOne                                 |

| service_id   | 1fe87e672b714be0a278996bcce5cdf1          |

| service_name | cinderv2                                  |

| service_type | volumev2                                  |

| url          | http://172.22.0.218:8776/v2/%(tenant_id)s |

+--------------+-------------------------------------------+
二)存储节点部署:
1、添加硬盘
[root@linux-node2 ~]# fdisk -l

Disk /dev/sda: 32.2 GB,  bytes,  sectors

Units = sectors of  *  =  bytes

Sector size (logical/physical):  bytes /  bytes

I/O size (minimum/optimal):  bytes /  bytes

Disk label type: dos

Disk identifier: 0x00066457

   Device Boot      Start         End      Blocks   Id  System

/dev/sda1   *                       Linux

/dev/sda2                    8e  Linux LVM

Disk /dev/sdb: 21.5 GB,  bytes,  sectors

Units = sectors of  *  =  bytes

Sector size (logical/physical):  bytes /  bytes

I/O size (minimum/optimal):  bytes /  bytes

Disk /dev/mapper/centos-root: 29.0 GB,  bytes,  sectors

Units = sectors of  *  =  bytes

Sector size (logical/physical):  bytes /  bytes

I/O size (minimum/optimal):  bytes /  bytes

Disk /dev/mapper/centos-swap:  MB,  bytes,  sectors

Units = sectors of  *  =  bytes

Sector size (logical/physical):  bytes /  bytes

I/O size (minimum/optimal):  bytes /  bytes

[root@linux-node2 ~]# systemctl start lvm2-lvmetad.service

创建一个pv和vg(名为cinder-volumes)

[root@linux-node2 ~]# pvcreate /dev/sdb

  Physical volume "/dev/sdb" successfully created.

[root@linux-node2 ~]# vgcreate cinder-volumes /dev/sdb

  Volume group "cinder-volumes" successfully created

修改lvm的配置文件中添加filter,只有instance可以访问

[root@linux-node2 ~]# vim /etc/lvm/lvm.conf

devices {

    filter = [ "a/sdb/", "r/.*/"]

    [root@linux-node2 ~]# systemctl enable lvm2-lvmetad.service

Created symlink from /etc/systemd/system/sysinit.target.wants/lvm2-lvmetad.service to /usr/lib/systemd/system/lvm2-lvmetad.service.

    [root@linux-node2 ~]# systemctl start lvm2-lvmetad.service
2、从控制节点拷贝配置文件修改
[root@linux-node1 ~]# scp /etc/cinder/cinder.conf 172.22.0.209:/etc/cinder/cinder.conf

[lvm]     #自己添加

volume_driver = cinder.volume.drivers.lvm.LVMVolumeDriver

volume_group = cinder-volumes

iscsi_protocol = iscsi

iscsi_helper = lioadm

[root@linux-node2 ~]# grep -n "^[a-Z]" /etc/cinder/cinder.conf

:my_ip = 172.22.0.209

:glance_api_servers = http://172.22.0.218:9292

:auth_strategy = keystone

:enabled_backends = lvm

:rpc_backend = rabbit

:connection = mysql://cinder:cinder@172.22.0.218/cinder

:auth_uri = http://172.22.0.218:5000

:auth_url = http://172.22.0.218:35357

:auth_plugin = password

:memcached_servers = 172.22.0.218:

:project_domain_id = d21d0715890447fb87f72e85dce6d4be

:user_domain_id = d21d0715890447fb87f72e85dce6d4be

:project_name = service

:username = cinder

:password = cinder

:lock_path = /var/lib/cinder/tmp

:transport_url = rabbit://openstack:openstack@172.22.0.218

:rabbit_host = 172.22.0.218

:rabbit_port =

:rabbit_userid = openstack

:rabbit_password = openstack

:volume_driver = cinder.volume.drivers.lvm.LVMVolumeDriver

:volume_group = cinder-volumes

:iscsi_protocol = iscsi

:iscsi_helper = lioadm
3、添加服务
[root@linux-node2 ~]# systemctl enable openstack-cinder-volume.service target.service

Created symlink from /etc/systemd/system/multi-user.target.wants/openstack-cinder-volume.service to /usr/lib/systemd/system/openstack-cinder-volume.service.

Created symlink from /etc/systemd/system/multi-user.target.wants/target.service to /usr/lib/systemd/system/target.service.

[root@linux-node2 ~]#

[root@linux-node2 ~]# systemctl start openstack-cinder-volume.service target.service
4、查看云硬盘服务状态(如果是虚拟机作为宿主机,时间不同步,会产生无法发现存储节点)
[root@linux-node1 ~]# source admin-openrc.sh

[root@linux-node1 ~]# openstack volume service list

[root@linux-node1 ~]# openstack volume service list

+------------------+-----------------+------+---------+-------+----------------------------+

| Binary           | Host            | Zone | Status  | State | Updated At                 |

+------------------+-----------------+------+---------+-------+----------------------------+

| cinder-scheduler | linux-node1     | nova | enabled | up    | --12T04::30.000000 |

| cinder-volume    | linux-node1     | nova | enabled | down  | --12T03::19.000000 |

| cinder-volume    | linux-node2@lvm | nova | enabled | up    | --12T04::21.000000 |

+------------------+-----------------+------+---------+-------+----------------------------+
至此可通过dashboard登录OpenStack查看云硬盘了!。
最新文章
- Sed、Awk单行脚本快速参考
- oracle函数大全(转载)
- position: fixed用在iframe里面失效了
- Linux设备驱动之中断支持及中断分层
- Mac下同时安装多个版本的JDK
- 利用android来赚钱
- javascript中的自增与自减
- [转]用Linq取CheckBoxList選取項目的值
- 图片lightbox2
- jboss服务器配置多实例
- 【蓝桥杯】PREV-5 错误票据
- (转)webservice 测试窗体只能用于来自本地计算机的请求
- jquery表格datagrid单元格显示图片及分页使用
- PHP利用数组构造JSON
- loadrunner controller:实时查看VUser的运行情况
- java的分数类
- linux安装vsftpd服务器
- Jumpserver之设置开机自启动
- 第一周pta作业1总结
- caffe训练resume