Spring Cloud Data Flow用Shell来操作,方便建立CICD
1 前言
欢迎访问南瓜慢说 www.pkslow.com获取更多精彩文章!
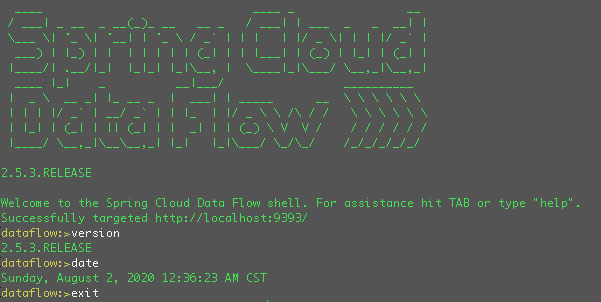
之前我们用两篇文章讲解了Spring Cloud Data Flow,例子都是用UI操作的,但我们在Linux系统上经常是无法提供界面来操作,集成在Jenkins上也无法使用UI。好在官方提供了Data Flow Shell工具,可以在命令行模式下进行操作,非常方便。
相关文章可参考:
Spring Cloud Data Flow初体验,以Local模式运行
把Spring Cloud Data Flow部署在Kubernetes上,再跑个任务试试
Spring Cloud Data Flow Server提供了可操作的REST API,所以这个Shell工具的本质还是通过调用REST API来交互的。
2 常用操作
2.1 启动
首先要确保我们已经安装有Java环境和下载了可执行的jar包:spring-cloud-dataflow-shell-2.5.3.RELEASE.jar
然后启动如下:
$ java -jar spring-cloud-dataflow-shell-2.5.3.RELEASE.jar
默认是连接了http://localhost:9393的Server,可以通过--dataflow.uri=地址来指定。如果需要认证信息,需要加上--dataflow.username=用户 --dataflow.password=密码。
比如我们连接之前安装在Kubernetes上的Server如下:
$ java -jar spring-cloud-dataflow-shell-2.5.3.RELEASE.jar --dataflow.uri=http://localhost:30093
2.2 Application操作
介绍一下Application相关操作:
列出所有目前注册的app:
dataflow:>app list

╔═══╤══════╤═════════╤════╤════════════════════╗

║app│source│processor│sink│        task        ║

╠═══╪══════╪═════════╪════╪════════════════════╣

║   │      │         │    │composed-task-runner║

║   │      │         │    │timestamp-batch     ║

║   │      │         │    │timestamp           ║

╚═══╧══════╧═════════╧════╧════════════════════╝
查看某个app的信息:
dataflow:>app info --type task timestamp
清除app注册信息:
dataflow:>app unregister --type task timestamp

Successfully unregistered application 'timestamp' with type 'task'.
清除所有app注册信息:
dataflow:>app all unregister

Successfully unregistered applications.

dataflow:>app list

No registered apps.

You can register new apps with the 'app register' and 'app import' commands.
注册一个app:
dataflow:>app register --name timestamp-pkslow --type task --uri docker:springcloudtask/timestamp-task:2.1.1.RELEASE

Successfully registered application 'task:timestamp-pkslow'

dataflow:>app list

╔═══╤══════╤═════════╤════╤════════════════╗

║app│source│processor│sink│      task      ║

╠═══╪══════╪═════════╪════╪════════════════╣

║   │      │         │    │timestamp-pkslow║

╚═══╧══════╧═════════╧════╧════════════════╝
批量导入app,可以从一个URL或一个properties文件导入:
dataflow:>app import https://dataflow.spring.io/task-docker-latest

Successfully registered 3 applications from [task.composed-task-runner, task.timestamp.metadata, task.composed-task-runner.metadata, task.timestamp-batch.metadata, task.timestamp-batch, task.timestamp]
需要注意的是,在注册或导入app时,如果重复的话,默认是无法导入的,不会覆盖。如果想要覆盖,可以加参数--force。
dataflow:>app register --name timestamp-pkslow --type task --uri docker:springcloudtask/timestamp-task:2.1.1.RELEASE

Command failed org.springframework.cloud.dataflow.rest.client.DataFlowClientException: The 'task:timestamp-pkslow' application is already registered as docker:springcloudtask/timestamp-task:2.1.1.RELEASE

The 'task:timestamp-pkslow' application is already registered as docker:springcloudtask/timestamp-task:2.1.1.RELEASE

dataflow:>app register --name timestamp-pkslow --type task --uri docker:springcloudtask/timestamp-task:2.1.1.RELEASE --force

Successfully registered application 'task:timestamp-pkslow'
2.3 Task操作
列出task:
dataflow:>task list

╔════════════════╤════════════════════════════════╤═══════════╤═══════════╗

║   Task Name    │        Task Definition         │description│Task Status║

╠════════════════╪════════════════════════════════╪═══════════╪═══════════╣

║timestamp-pkslow│timestamp                       │           │COMPLETE   ║

║timestamp-two   │<t1: timestamp || t2: timestamp>│           │ERROR      ║

║timestamp-two-t1│timestamp                       │           │COMPLETE   ║

║timestamp-two-t2│timestamp                       │           │COMPLETE   ║

╚════════════════╧════════════════════════════════╧═══════════╧═══════════╝
删除一个task,这里我们删除的是一个组合task,所以会把子task也一并删除了:
dataflow:>task destroy timestamp-two

Destroyed task 'timestamp-two'
删除所有task,会有风险提示:
dataflow:>task all destroy

Really destroy all tasks? [y, n]: y

All tasks destroyed

dataflow:>task list

╔═════════╤═══════════════╤═══════════╤═══════════╗

║Task Name│Task Definition│description│Task Status║

╚═════════╧═══════════════╧═══════════╧═══════════╝
创建一个task:
dataflow:>task create timestamp-pkslow-t1 --definition "timestamp --format=\"yyyy\"" --description "pkslow timestamp task"

Created new task 'timestamp-pkslow-t1'
启动一个task并查看状态,启动时需要记录执行ID,然后通过执行ID来查询状态:
dataflow:>task launch timestamp-pkslow-t1

Launched task 'timestamp-pkslow-t1' with execution id 8

dataflow:>task execution status 8
查看所有task执行并查看执行日志:
dataflow:>task execution list

dataflow:>task execution log 8

  .   ____          _            __ _ _

 /\\ / ___'_ __ _ _(_)_ __  __ _ \ \ \ \

( ( )\___ | '_ | '_| | '_ \/ _` | \ \ \ \

 \\/  ___)| |_)| | | | | || (_| |  ) ) ) )

  '  |____| .__|_| |_|_| |_\__, | / / / /

 =========|_|==============|___/=/_/_/_/

 :: Spring Boot ::       (v2.1.13.RELEASE)

2020-08-01 17:20:51.626  INFO 1 --- [       Thread-5] com.zaxxer.hikari.HikariDataSource       : HikariPool-1 - Shutdown initiated...

2020-08-01 17:20:51.633  INFO 1 --- [       Thread-5] com.zaxxer.hikari.HikariDataSource       : HikariPool-1 - Shutdown completed.
2.4 Http请求
可以进行http请求:
dataflow:>http get https://www.pkslow.com

dataflow:>http post --target https://www.pkslow.com --data "data"

> POST (text/plain) https://www.pkslow.com data

> 405 METHOD_NOT_ALLOWED

Error sending data 'data' to 'https://www.pkslow.com'
2.5 读取并执行文件
先准备一个脚本文件,用来放Data Flow Shell命令,文件名为pkslow.shell,内容如下:
version

date

app list
执行与结果如下:
dataflow:>script pkslow.shell

version

2.5.3.RELEASE

date

Sunday, August 2, 2020 1:59:34 AM CST

app list

╔═══╤══════╤═════════╤════╤════════════════════╗

║app│source│processor│sink│        task        ║

╠═══╪══════╪═════════╪════╪════════════════════╣

║   │      │         │    │timestamp-pkslow    ║

║   │      │         │    │composed-task-runner║

║   │      │         │    │timestamp-batch     ║

║   │      │         │    │timestamp           ║

╚═══╧══════╧═════════╧════╧════════════════════╝

Script required 0.045 seconds to execute

dataflow:>
但其实我们在CI/CD的pipeline中,并不想先启动一个shell命令行,然后再执行一个脚本。我们想一步到位,直接执行,执行完毕后退出shell命令行。这也是有办法的,可以在启动的时候通过 --spring.shell.commandFile指定文件,如果有多个文件则用逗号,分隔。如下所示:
$ java -jar spring-cloud-dataflow-shell-2.5.3.RELEASE.jar --dataflow.uri=http://localhost:30093 --spring.shell.commandFile=pkslow.shell

Successfully targeted http://localhost:30093

2020-08-02T02:03:49+0800 INFO main o.s.c.d.s.DataflowJLineShellComponent:311 - 2.5.3.RELEASE

2020-08-02T02:03:49+0800 INFO main o.s.c.d.s.DataflowJLineShellComponent:311 - Sunday, August 2, 2020 2:03:49 AM CST

2020-08-02T02:03:49+0800 INFO main o.s.c.d.s.DataflowJLineShellComponent:309 -

╔═══╤══════╤═════════╤════╤════════════════════╗

║app│source│processor│sink│        task        ║

╠═══╪══════╪═════════╪════╪════════════════════╣

║   │      │         │    │timestamp-pkslow    ║

║   │      │         │    │composed-task-runner║

║   │      │         │    │timestamp-batch     ║

║   │      │         │    │timestamp           ║

╚═══╧══════╧═════════╧════╧════════════════════╝

$
执行完毕后,不会在shell命令行模式里,而是退回linux的终端。这正是我们所需要的。
我们来准备一个注册应用——创建任务——执行任务的脚本试试:
version

date

app register --name pkslow-app-1 --type task --uri docker:springcloudtask/timestamp-task:2.1.1.RELEASE

task create pkslow-task-1 --definition "pkslow-app-1"

task launch pkslow-task-1
执行与结果如下:
$ java -jar spring-cloud-dataflow-shell-2.5.3.RELEASE.jar --dataflow.uri=http://localhost:30093 --spring.shell.commandFile=pkslow.shell

Successfully targeted http://localhost:30093

2020-08-02T02:06:41+0800 INFO main o.s.c.d.s.DataflowJLineShellComponent:311 - 2.5.3.RELEASE

2020-08-02T02:06:41+0800 INFO main o.s.c.d.s.DataflowJLineShellComponent:311 - Sunday, August 2, 2020 2:06:41 AM CST

2020-08-02T02:06:41+0800 INFO main o.s.c.d.s.DataflowJLineShellComponent:311 - Successfully registered application 'task:pkslow-app-1'

2020-08-02T02:06:42+0800 INFO main o.s.c.d.s.DataflowJLineShellComponent:311 - Created new task 'pkslow-task-1'

2020-08-02T02:06:51+0800 INFO main o.s.c.d.s.DataflowJLineShellComponent:311 - Launched task 'pkslow-task-1' with execution id 9
这样,我们就可以实现自动化打包与部署运行了。
3 一些使用技巧
强大的shell工具提供了许多命令,其实不用一一记住,可以通过help命令查看所有命令:
dataflow:>help
如果只对特定的一类命令感兴趣,可以通过help xxx的方式获取帮助:
dataflow:>help version

* version - Displays shell version

dataflow:>help app

* app all unregister - Unregister all applications

* app default - Change the default application version

* app import - Register all applications listed in a properties file

* app info - Get information about an application

* app list - List all registered applications

* app register - Register a new application

* app unregister - Unregister an application
shell还支持tab键补全命令。
4 总结
本文的命令比较多,不想造成冗长,部分执行结果就不贴出来了,原文可到官网参考。
欢迎关注微信公众号<南瓜慢说>,将持续为你更新...

多读书,多分享;多写作,多整理。
最新文章
- hihoCoder1388 Periodic Signal(2016北京网赛F:NTT)
- xml 方式更新和获取 配置文件 appSettings 节点 解决办法
- 开发问题(C#)
- 南昌PHP程序员的工资水平据说可达到8000了
- PHP 生成指定大小随机图片
- HDU 3833 YY's new problem(换种思路的模拟,防超时)
- 关于utf8 unicode gbk 编码乱码汇总
- 252. Meeting Rooms
- javascript异步执行函数导致的变量变化问题解决思路
- 第1章 网络编程基础(3)——基本Socket通信
- 使用K-means进行聚类,用calinski_harabaz_score评价聚类效果
- WebSocket异步通讯,实时返回数据相关问题论坛
- hashCode()方法和equal()方法的区别
- ubuntu16.04系统彻底卸载mysql,并源码免编译重装MySQL的步骤
- JS输入框邮箱自动提示(带有demo和源码)
- Python中“if __name__=='__main__':”理解与总结
- Linux--多网卡的7种Bond模式【转】
- 小米笔记本 air 12.5寸 支持硬盘参数
- The Front-End Checklist
- MDX常用几种查询对比
热门文章
- 邓布利多拍了拍你,并递来一份CSS魔法
- C++求树子节点权重最大的和
- python爬虫拉钩网:{'msg': '您操作太频繁,请稍后再访问', 'clientIp': '113.57.176.181', 'success': False}
- [Cordova]Cordova6.x自定义插件之Andorid
- bzoj3791作业*
- Istio安全-认证(istio 系列七)
- Python+selenium+unittest+HTMLTestReportCN单元测试框架分享
- Java开发中的eclispe常用快捷键&全部快捷键
- Eclipse默认快捷键说明
- NoSQL数据库-MongoDB 学习(一)