OpenLayers地图标注及弹窗实现
2024-10-21 05:38:28
1. 引言
地图标注是在地图中进行文字或图标的标注,从而显示对应的信息
本文基于OpenLayers实现地图上图文的标注与弹窗显示
OpenLayers官网:OpenLayers - Welcome
OpenLayers的GitHub站点:openlayers/openlayers: OpenLayers (github.com)
OpenLayers API文档:OpenLayers v6.15.1 API - Index
2. 图文标注实现
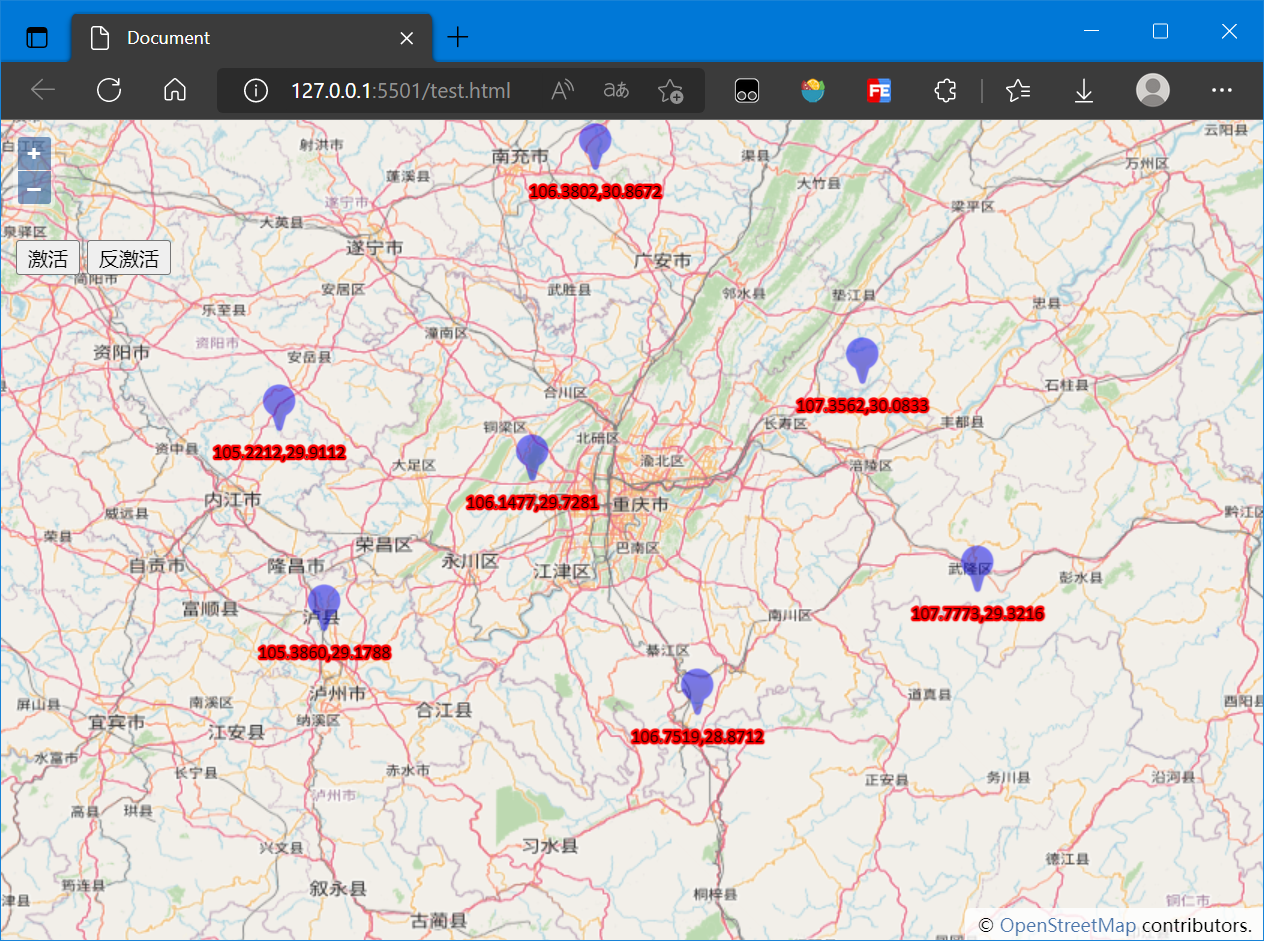
本文实现图文标注的实质就是添加点时设置点要素(Point)的Style
设置图片标注就是在Style中添加Image
设置文字标注就是在Style中添加Text
以下是实现图文标注的核心代码:
const feature = new ol.Feature({

    geometry: new ol.geom.Point(evt.coordinate)

});

feature.setStyle(new ol.style.Style({

    text: new ol.style.Text({

        text: evt.coordinate[0].toFixed(4) + ',' + evt.coordinate[1].toFixed(4),

        offsetY: 30,

        font: '12px Calibri,sans-serif',

        fill: new ol.style.Fill({

            color: '#000'

        }),

        stroke: new ol.style.Stroke({

            color: '#fff',

            width: 3

        })

    }),

    image: new ol.style.Icon({

        src: './images/blueIcon.png',

        scale: 0.5,

        anchor: [0.5, 0.5],

        rotateWithView: true,

        rotation: 0,

        opacity: 0.5,

        color: '#0000ff'

    })

}));

vectorSource.addFeature(feature);
完整代码如下:
<!DOCTYPE html>

<html lang="en">

<head>

    <meta charset="UTF-8">

    <meta http-equiv="X-UA-Compatible" content="IE=edge">

    <meta name="viewport" content="width=device-width, initial-scale=1.0">

    <title>Document</title>

    <link rel="stylesheet"

        href="https://cdn.jsdelivr.net/gh/openlayers/openlayers.github.io@master/en/v6.14.1/css/ol.css" type="text/css">

    <script src="https://cdn.jsdelivr.net/gh/openlayers/openlayers.github.io@master/en/v6.14.1/build/ol.js"></script>

    <style>

        html,

        body,

        #map {

            padding: 0;

            margin: 0;

            height: 100%;

            width: 100%;

        }

        #button {

            position: absolute;

            top: 80px;

            left: 10px;

            z-index: 100;

        }

    </style>

</head>

<body>

    <div id="map"></div>

    <div id="button">

        <button onclick="active()">激活</button>

        <button onclick="deactive()">反激活</button>

    </div>

    <script>

        function active() {

            map.on('click', onClick);

        }

        function deactive() {

            map.un('click', onClick);

        }

    </script>

    <script>

        const map = new ol.Map({

            target: 'map',

            layers: [

                new ol.layer.Tile({

                    source: new ol.source.OSM()

                })

            ],

            view: new ol.View({

                center: [128, 31.5],

                zoom: 5,

                projection: 'EPSG:4326'

            })

        });

        const vectorSource = new ol.source.Vector({

            features: []

        });

        const vectorLayer = new ol.layer.Vector({

            source: vectorSource,

            style: new ol.style.Style({

            })

        });

        map.addLayer(vectorLayer);

        function onClick(evt) {

            console.log(evt.coordinate);

            const feature = new ol.Feature({

                geometry: new ol.geom.Point(evt.coordinate)

            });

            feature.setStyle(new ol.style.Style({

                text: new ol.style.Text({

                    text: evt.coordinate[0].toFixed(4) + ',' + evt.coordinate[1].toFixed(4),

                    offsetY: 30,

                    font: '12px Calibri,sans-serif',

                    fill: new ol.style.Fill({

                        color: '#000'

                    }),

                    stroke: new ol.style.Stroke({

                        color: '#f00',

                        width: 3

                    })

                }),

                image: new ol.style.Icon({

                    src: './images/blueIcon.png',

                    scale: 0.5,

                    anchor: [0.5, 0.5],

                    rotateWithView: true,

                    rotation: 0,

                    opacity: 0.5,

                    color: '#0000ff'

                })

            }));

            vectorSource.addFeature(feature);

        }

    </script>

</body>

</html>
实现效果如下:
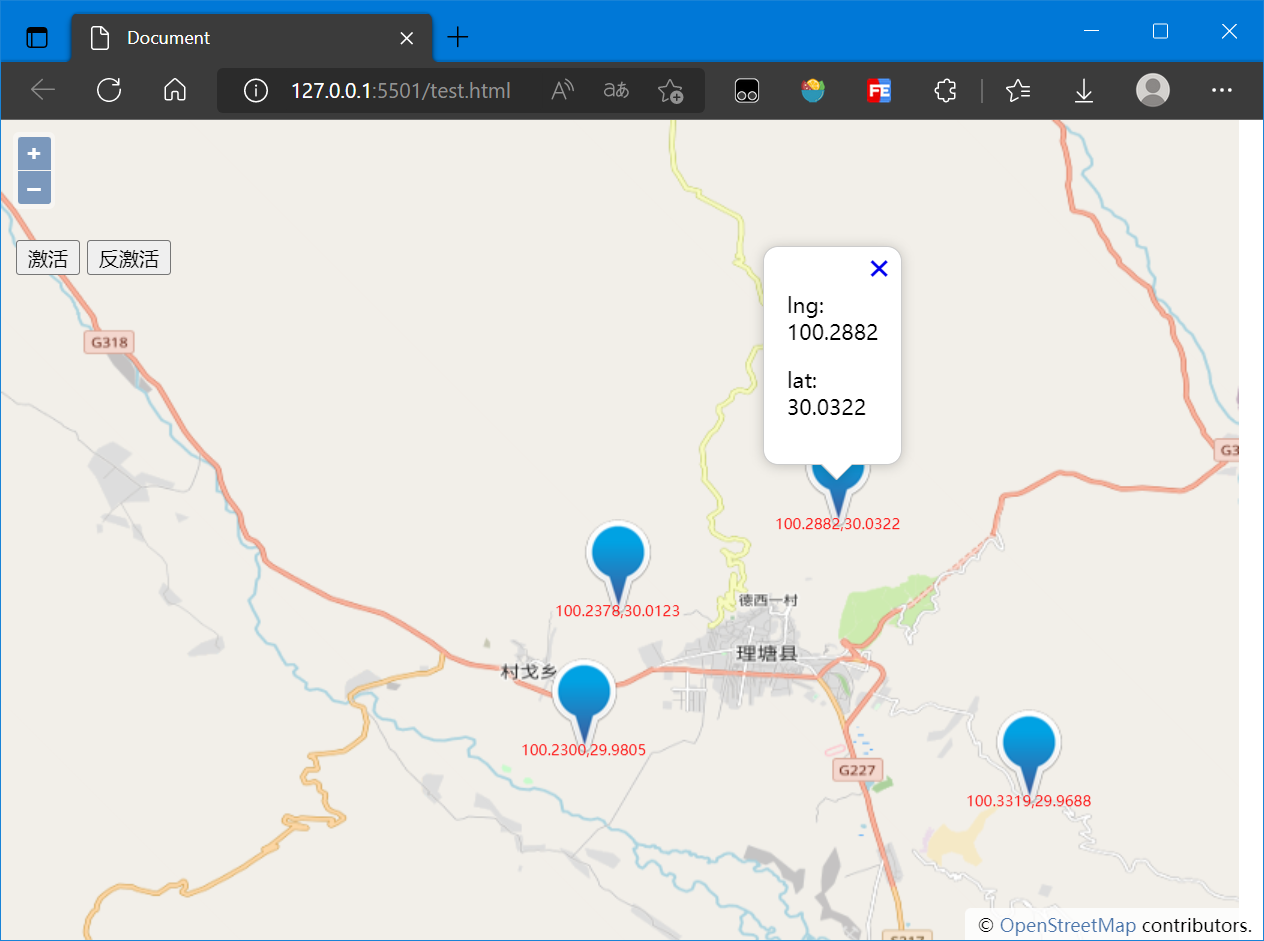
3. Popup弹窗
当我们点击某个要素时,希望在这个要素附近显示其具体信息,这个时候往往使用Popup弹出框实现
本文的Popup弹出框的实现实质就是在OpenLayers中创建一个Overlay,其实现流程为:
- 创建DOM元素(通常为div及包含的子元素)
- 创建Overlay并将DOM元素挂载
- 监听地图点击事件
- 点击地图中的要素时读取要素信息并向地图(Map)中添加Overlay
具体实现流程如下:
创建DOM元素
<div id="popup" class="ol-popup">

    <a href="#" id="popup-closer" class="ol-popup-closer"></a>

    <div id="popup-content"></div>

</div>
创建Overlay并将DOM元素挂载
const popup = new ol.Overlay({

    element: document.getElementById('popup')

});
监听事件,读取要素信息并向地图中添加Overlay
map.on('click', popupFunc)

function popupFunc(evt) {

    var feature = map.forEachFeatureAtPixel(evt.pixel, function (feature, layer) {

        return feature

    })

    if (feature) {

        console.log(evt.coordinate);

        const content = feature.getGeometry().getCoordinates();

        popup.setPosition(content);

        map.addOverlay(popup);

        document.getElementById('popup-content').innerHTML = `

            <p>lng: ${content[0].toFixed(4)}</p>

            <p>lat: ${content[1].toFixed(4)}</p>

            `;

        document.querySelector('#popup-closer').addEventListener('click', function () {

            map.removeOverlay(popup);

        });

    }

}
完整代码如下:
<!DOCTYPE html>

<html lang="en">

<head>

    <meta charset="UTF-8">

    <meta http-equiv="X-UA-Compatible" content="IE=edge">

    <meta name="viewport" content="width=device-width, initial-scale=1.0">

    <title>Document</title>

    <link rel="stylesheet"

        href="https://cdn.jsdelivr.net/gh/openlayers/openlayers.github.io@master/en/v6.14.1/css/ol.css" type="text/css">

    <script src="https://cdn.jsdelivr.net/gh/openlayers/openlayers.github.io@master/en/v6.14.1/build/ol.js"></script>

    <style>

        html,

        body,

        #map {

            padding: 0;

            margin: 0;

            height: 100%;

            width: 100%;

        }

        #button {

            position: absolute;

            top: 80px;

            left: 10px;

            z-index: 100;

        }

        .ol-popup {

            position: absolute;

            background-color: white;

            -webkit-filter: drop-shadow(0 1px 4px rgba(0, 0, 0, 0.2));

            filter: drop-shadow(0 1px 4px rgba(0, 0, 0, 0.2));

            padding: 15px;

            border-radius: 10px;

            border: 1px solid #cccccc;

            bottom: 10px;

            left: -50px;

        }

        .ol-popup:after,

        .ol-popup:before {

            top: 100%;

            border: solid transparent;

            content: ' ';

            height: 0;

            width: 0;

            position: absolute;

            pointer-events: none;

        }

        .ol-popup:after {

            border-top-color: white;

            border-width: 10px;

            left: 48px;

            margin-left: -10px;

        }

        .ol-popup:before {

            border-top-color: #cccccc;

            border-width: 11px;

            left: 48px;

            margin-left: -11px;

        }

        .ol-popup-closer {

            text-decoration: none;

            position: absolute;

            top: 2px;

            right: 8px;

        }

        .ol-popup-closer:after {

            content: '';

        }

        #popup-content {

            font-size: 14px;

            font-family: '微软雅黑';

        }

        #popup-content .markerInfo {

            font-weight: bold;

        }

    </style>

</head>

<body>

    <div id="map"></div>

    <div id="popup" class="ol-popup">

        <a href="#" id="popup-closer" class="ol-popup-closer"></a>

        <div id="popup-content"></div>

    </div>

    <div id="button">

        <button onclick="active()">激活</button>

        <button onclick="deactive()">反激活</button>

    </div>

    <script>

        function active() {

            map.addInteraction(draw);

            map.un('click', popupFunc);

        }

        function deactive() {

            map.removeInteraction(draw);

            map.on('click', popupFunc)

        }

    </script>

    <script>

        const map = new ol.Map({

            target: 'map',

            layers: [

                new ol.layer.Tile({

                    source: new ol.source.OSM()

                })

            ],

            view: new ol.View({

                center: [100.2382, 30.0207],

                zoom: 12,

                projection: 'EPSG:4326'

            })

        });

        const popup = new ol.Overlay({

            element: document.getElementById('popup')

        });

        const source = new ol.source.Vector({

            features: []

        });

        const vector = new ol.layer.Vector({

            source: source

        });

        map.addLayer(vector);

        const draw = new ol.interaction.Draw({

            source: source,

            type: 'Point'

        })

        function popupFunc(evt) {

            var feature = map.forEachFeatureAtPixel(evt.pixel, function (feature, layer) {

                return feature

            })

            if (feature) {

                console.log(evt.coordinate);

                const content = feature.getGeometry().getCoordinates();

                popup.setPosition(content);

                map.addOverlay(popup);

                document.getElementById('popup-content').innerHTML = `

            <p>lng: ${content[0].toFixed(4)}</p>

            <p>lat: ${content[1].toFixed(4)}</p>

            `;

                document.querySelector('#popup-closer').addEventListener('click', function () {

                    map.removeOverlay(popup);

                });

            }

        }

        draw.on('drawend', function (evt) {

            const feature = evt.feature;

            const coordinates = feature.getGeometry().getCoordinates();

            console.log(coordinates);

            feature.setStyle(new ol.style.Style({

                image: new ol.style.Icon({

                    src: './images/blueIcon.png'

                }),

                text: new ol.style.Text({

                    text: coordinates[0].toFixed(4) + ',' + coordinates[1].toFixed(4),

                    offsetY: 30,

                    fill: new ol.style.Fill({

                        color: '#f00'

                    })

                })

            }))

        });

    </script>

</body>

</html>
最后的结果如下图:
4. 参考资料
[1]OpenLayers v6.15.1 API - Index
最新文章
- [ZOJ 1002] Fire Net (简单地图搜索)
- mplayer 用法大全 转
- 牛顿迭代法实现平方根函数sqrt
- css多行文本垂直居中问题研究
- 【剑指offer】:Q44:直扑克
- python安装win32api pywin32 后出现 ImportError: DLL load failed
- 使用python处理excle表格
- system进程占用80端口
- ASP.NET CORE系列【六】Entity Framework Core 之数据库迁移
- Python如何将整数转化成二进制字符串
- mysql 架构 ~ 异地多活
- 网站基础html javascript jquery
- 百度UEditor粘贴或插入的表格不显示边框的解决办法
- ftp 命令全集
- mybatis 之 parameterType="String" resultType="java.util.HashMap">
- vue2 broadcast和dispatch的理解
- mysql 中sql语句关键字的书写顺序与执行顺序
- [整理]基于bootstrap的文本编辑器
- spring之IOC模拟实现
- Vue 错误:Avoid mutating a prop directly