Spring企业级程序设计 • 【第2章 Spring Bean管理进阶】
全部章节 >>>>
本章目录
2.3.5 @PostConstruct和@PreDestory注解
2.1 bean标签和import标签
<bean>标签是用来定义一个Bean对象的。
<bean>标签的属性有很多,其中常用属性有:id、name、class、factory-method、factory-bean、init-method、destory-method、scope和autowire属性,而class、factory-method和factory-bean属性在前面的章节中已经接触过,这里不再详解。
2.1.1 <bean>标签中的id属性和name属性
id属性是Bean的唯一标识,IoC容器中<bean>标签的id属性不能重复,否则会报错。在Spring4.x之前的版本id的属性值不能包含特殊字符且必须是字母或者下划线开头,在本案例中,将验证id属性的唯一性。
示例:IoC容器中<bean>标签的id属性不能重复,否则会报错
在com.mhys.pojo包下创建一个Student类,添加name属性
public class Student {

	private String name;

	// set()方法和get()方法省略

}
在applicationContext.xml文件中注入Student类,两个<bean>标签的id属性值一样
	<!-- 创建两个id属性名一样的Bean -->

	<bean id="student" class="com.mhys.pojo.Student"></bean>

	<bean id="student" class="com.mhys.pojo.Student"></bean>
在com.mhys.test包下,编写测试类,在控制台输出结果。 运行程序,在控制台中,查看输出结果
public class Test {

	public static void main(String[] args) {

		ApplicationContext context = new ClassPathXmlApplicationContext("applicationContext.xml");

		Student stu = (Student) context.getBean("student");

		System.out.println(stu);

	}

}

name属性是Bean的名称标识,IoC容器中<bean>标签的name属性可以重复,name属性的属性值可以包含特殊字符,在Spring4.x之后的版本name的属性值必须唯一。
示例:通过name属性定义Bean
在com.mhys.pojo包下创建一个Dog类
public class Dog {

	public void cry(){

		System.out.println("我是一条小狗,汪、汪、汪!");

	}

}
在applicationContext.xml文件中注册Dog类到容器
	<!-- 通过name属性定义bean,属性值带有特殊字符 -->

	<bean name="%@#dto%#" class="com.mhys.pojo.Dog"></bean>
在com.mhys.test包下,编写测试类,在控制台输出结果。 运行程序,在控制台中,查看输出结果
	public class Test {

	public static void main(String[] args) {

		ApplicationContext context = new ClassPathXmlApplicationContext("applicationContext.xml");

		Dog dog = (Dog) context.getBean("%@#dto%#");

		dog.cry();

	}

}

2.1.2 Bean的作用范围和生命周期
scope属性:Bean的作用范围是通过scope属性来控制的,常用取值有四种:
- singleton:单例对象,被标识为单例的对象在Spring容器中只会存在一个实体。
- prototype:多例原型,被标识为多例的对象,每次需要获取对象是才会创建,每次创建都是新的对象。
- request:Web环境下,对象与Request生命周期一致。
- session:Web环境下,对象与Session生命周期一致。
示例:通过scope属性来了解Bean的作用范围
在com.mhys.pojo包下创建一个Cat类
	public class Cat {

	private String name;

	private String color;

	// set()方法和get()方法省略

}
在applicationContext.xml文件中注册Cat类到容器
<bean name="cat" class="com.mhys.pojo.Cat"></bean>
在com.mhys.test包下,编写测试类,在控制台输出结果。
public class Test {
public static void main(String[] args) {
ApplicationContext context = new ClassPathXmlApplicationContext("applicationContext.xml");
Cat cat1 = (Cat) context.getBean("cat");
Cat cat2 = (Cat) context.getBean("cat");
if(cat1==cat2){
System.out.println("cat1与cat2是同一个对象!");
}else{
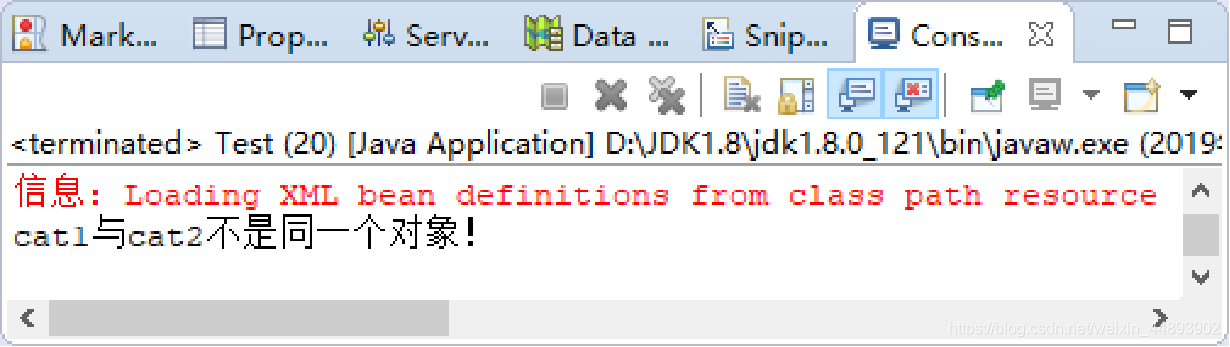
System.out.println("cat1与cat2不是同一个对象!");
}
}
}
运行程序,在控制台出结果

在applicationContext.xml文件中修改Cat类的bean标签,scope属性值为prototype
<bean name="cat" class="com.mhys.pojo.Cat" scope="prototype"></bean>
运行程序,在控制台中查看输出结果
2.1.2 Bean的生命周期
Spring Bean的完整生命周期从创建Spring容器开始,直到最终Spring容器销毁Bean。

init-method属性用于在Bean初始化时指定初始化方法
destroy-method用于在Bean销毁时指定的调用的方法
示例:使用init-method属性和destroy-method属性来指定初始化和销毁方法,最后在控制台输出结果。
在Cat类中声明init()方法和destroy()方法
public class Cat {

	private String name;

	private String color;

	// set()方法和get()方法省略

		public void init(){

			System.out.println("初始化方法被执行");

		}

		public void destory(){

			System.out.println("销毁方法被执行");

	}

}
在applicationContext.xml配置文件中修改name属性为cat的<bean>标签
<bean name="cat" class="com.mhys.pojo.Cat" init-method="init" destroy-method="destory"></bean>
在com.mhys.test包下,编写测试类,在控制台输出结果。
public class Test {

	public static void main(String[] args) {

		ClassPathXmlApplicationContext context = new ClassPathXmlApplicationContext("applicationContext.xml");

		Cat cat = (Cat) context.getBean("cat");	// 此时会执行init()方法

		context.close();		// 容器关闭,此时会执行destrory()方法

	}

}
运行程序,在控制台出结果

2.1.3 <import>标签实现分模块配置
在企业项目开发中,配置文件中的信息非常多,经常会分模块开发,Spring提供<import>标签实现分模块配置,将多个模块的配置文件分开进行配置,最后再整合。
示例:定义三个模块,用户模块、角色模块和订单模块来模拟企业中的分模块开发
- 创建com.mhys.user包,存放用户模块的相关代码,在包中创建User类
- 在com.mhys.user包中创建applicationContext-user.xml配置文件,注入User类
- 创建com.mhys.role包,存放角色模块的相关代码,在包中创建Role类。
- 在com.mhys.role包中创建applicationContext-role.xml配置文件,注入Role类
示例:定义三个模块,用户模块、角色模块和订单模块来模拟企业中的分模块开发
- 创建com.mhys.order包,存放订单模块的相关代码,在包中创建Order类
- 在com.mhys.order包中创建applicationContext-order.xml配置文件,注入Order类
- 在src目录下创建applicationContext.xml配置文件,引入3个模块的配置文件
- 在com.mhys.test包下编写测试类,在控制台输出结果
- 运行程序,在控制台中查看输出结果
2.1.4 实践练习
2.2 复杂类型注入
在Spring框架中,属性的注入有多种方式,可以通过构造方法注入、set方法注入、和p命名空间注入等方式,而对于复杂的数据类型比如数组、List集合、Map集合和Properties等,Spring也提供了相应的注入方式。
2.2.1 数组元素注入
示例:使用<list>标签注入数组元素
在com.mhys.pojo包下创建User类,添加names属性。
public class User {

	private String[] names;

	// set()方法和get()方法省略

}
在applicationContext.xml配置文件中注册User类到容器。
<bean id="user" class="com.mhys.pojo.User">

		<property name="names">

			<list>

				<value>张XX</value>

				<value>小XX</value>

				<value>LuXX</value>

			</list>

		</property>

	</bean>
在com.mhys.test包下创建测试类。
public class Test {

	public static void main(String[] args) {

		ApplicationContext context = new ClassPathXmlApplicationContext("applicationContext.xml");

		User user = (User) context.getBean("user");

		String[] names = user.getNames();

		for(String name : names){

			System.out.println(name);

		}

	}

}
在控制台中,查看输出结果

2.2.2 List集合注入
示例:在applicationContext.xml配置文件中,注入List集合
在User类中增加List集合类型属性。
public class User {

	private String[] names;

	private List<String> hobbys;

	// set()方法和get()方法省略

}
在applicationContext.xml配置文件中注入List集合属性。
<bean id="user" class="com.mhys.pojo.User">

		<property name="hobbys">

			// 省略原有代码

			<list>

				<value>跑步</value>

				<value>看书</value>

				<value>骑单车</value>

				<value>打羽毛球</value>

			</list>

		</property>

	</bean>
在com.mhys.test包下创建测试类。 在控制台中,查看输出结果
public class Test {

	public static void main(String[] args) {

		ApplicationContext context = new ClassPathXmlApplicationContext("applicationContext.xml");

		User user = (User) context.getBean("user");

		List<String> hobbys = user.getHobbys();

		for(String hobby : hobbys){

			System.out.println(hobby);

		}

	}

}

2.2.3 Map集合注入
示例:在applicationContext.xml配置文件中注入Map集合属性
在com.mhys.pojo包下创建DataSource类,添加Map集合类型属性。
public class DataSource {

	private Map<String, String> map;

		// set()方法和get()方法省略

}
在applicationContext.xml配置文件中注册DataSource类到容器并注入Map集合属性。
<bean id="dataSource" class="com.mhys.pojo.DataSource">

		<property name="map">

			<map>

				<entry key="driverClassName" value="com.mysql.jdbc.Driver"></entry>

				<entry key="url" value="jdbc:mysql://localhost:3306/mysql"></entry>

				<entry key="username" value="root"></entry>

				<entry key="password" value="rootroot"></entry>

			</map>

		</property>

</bean>
在com.mhys.test包下创建测试类。 在控制台中,查看输出结果
public class Test {

		public static void main(String[] args) {

			ApplicationContext context = new ClassPathXmlApplicationContext("applicationContext.xml");

			DataSource dataSource = (DataSource) context.getBean("dataSource");

			Map<String, String> map = dataSource.getMap();

			System.out.println(map.get("username"));

			System.out.println(map.get("password"));

			System.out.println(map.get("url"));

			System.out.println(map.get("driverClassName"));

		}

}

2.2.4 Properties集合注入
示例:在applicationContext.xml配置文件中注入Properties类型数据
在DataSource类中增加properties属性。
public class DataSource {

	private Map<String, String> map;

	private Properties properties;

		// set()方法和get()方法省略

}
在applicationContext.xml配置文件中注入Properties类型属性。
<bean id="dataSource" class="com.mhys.pojo.DataSource">

		// 省略原有代码

		<property name="properties">

			<props>

				<prop key="driverClassName">oracle.jdbc.driver.OracleDriver</prop>

				<prop key="url">jdbc:oracle:thin:@localhost::1521:myoracle</prop>

				<prop key="username">scott</prop>

				<prop key="password">1q2w3e</prop>

			</props>

		</property>

</bean>
在com.mhys.test包下创建测试类。 在控制台中,查看输出结果
public class Test {

	public static void main(String[] args) {

		ApplicationContext context = new ClassPathXmlApplicationContext("applicationContext.xml");

		DataSource dataSource = (DataSource) context.getBean("dataSource");

		Properties pro = dataSource.getProperties();

		System.out.println(pro.get("username"));

		System.out.println(pro.get("password"));

		System.out.println(pro.get("url"));

		System.out.println(pro.get("driverClassName"));

	}

}

2.2.5 实践练习
2.3 通过注解方式配置Bean
传统的Spring是使用XML配置文件来对Bean进行注入、配置AOP以及配置声明式事务,这么做有两个缺点:
- 如果所有的内容都配置在XML文件中,那么XML文件将会十分庞大。如果按模块分开XML配置文件,那么XML配置文件又会非常多。总之这将导致配置文件的可读性与可维护性变得很低。
- 开发过程中,在.java文件和.xml文件之间不断切换,是一件麻烦的事,同时这种思维上的不连贯也会降低开发的效率。
为了解决使用XML配置文件来对Bean进行注入所带来的问题,Spring引入了注解,通过“@xxx”的方式让注解与Java Bean紧密结合,这样大大减少了配置文件的体积,又增加了Java Bean的可读性与内聚性。
2.3.1 @Component将对象注册到容器
@Component注解的使用方法
引入注解开发相关jar包。
<?xml version="1.0" encoding="UTF-8"?>

<beans  xmlns:xsi="http://www.w3.org/2001/XMLSchema-instance"

		xmlns="http://www.springframework.org/schema/beans"

		xmlns:p="http://www.springframework.org/schema/p"

		xmlns:context="http://www.springframework.org/schema/context"

		xsi:schemaLocation="http://www.springframework.org/schema/beans

		http://www.springframework.org/schema/beans/spring-beans-4.2.xsd

		http://www.springframework.org/schema/context

		http://www.springframework.org/schema/context/spring-context-4.2.xsd ">

	<!—此处输入内容 -->

</beans>
在applicationContext.xml配置文件中引入context约束。
在applicationContext.xml配置文件中开启使用注解配置
<!-- 开启注解扫描功能扫描com.mhys.pojo包以及子包中的类-->

	<context:component-scan base-package="com.mhys.pojo"></context:component-scan>
在com.mhys.pojo包下创建Tiger类,添加tigerType和tigerName两个属性,并使用@Component将Tiger类注册到容器
@Component

public class Tiger {

	private String tigerType;

	private String tigerName;

	@Override

	public String toString() {

		return "Tiger [tigerType=" + tigerType + ", tigerName=" + tigerName + "]";

	}

}
在com.mhys.test包下编写测试类 在控制台中查看输出结果
public class Test {

	public static void main(String[] args) {

		ApplicationContext context = new ClassPathXmlApplicationContext("applicationContext.xml");

		Tiger tiger = (Tiger) context.getBean("tiger");

		System.out.println(tiger);

	}

}

2.3.2 @Value值类型注
使用@Value注解为Tiger类的两个属性注入属性值
在Tiger类中使用@Value注解注入属性值。
@Component

public class Tiger {

	@Value("东北虎")

	private String tigerType;

	@Value("小白")

	private String tigerName;

	@Override

	public String toString() {

		return "Tiger [tigerType=" + tigerType + ", tigerName=" + tigerName + "]";

	}

}
运行测试类程序,在控制台中查看输出结果。

2.3.3 @Autowired引用类型注入
创建Zoo类,添加Tiger类型属性,并通过注解注入到容器中,然后使用@Autowired引入Tiger类型属性值。
在com.mhys.pojo包下创建Zoo类,注册到容器中,添加Tiger类型属性,使用@AutoWired引入属性值。
@Component

public class Zoo {

	@Autowired

	private Tiger tiger;

	@Override

	public String toString() {

		return "Zoo [tiger=" + tiger + "]";

	}

}
编写测试类,并在控制台中,查看输出结果。
public class Test {

	public static void main(String[] args) {

		ApplicationContext context = new ClassPathXmlApplicationContext("applicationContext.xml");

		Zoo zoo = (Zoo) context.getBean("zoo");

		System.out.println(zoo);

	}

}

2.3.4 @Scope设置对象作用范围
首先创建User类,添加username属性和password属性;然后使用@Scope指定注入到容器中Bean的作用范围;接着加载两个User对象,比较两个User对象是否相同;最后在控制台打印输出结果。。
在com.mhys.pojo包下创建User类,使用注解注册到容器并使用@Scope指定为单例,添加username和password两个属性。
@Component

@Scope("singleton")

public class User {

	@Value("章XX)

	private String username;

	@Value("123qwe")

	private String password;

}
编写测试类,并在控制台中,查看输出结果。
public class Test {

	public static void main(String[] args) {

		ApplicationContext context =  new ClassPathXmlApplicationContext("applicationContext.xml");

		User user1 = (User) context.getBean("user");

		User user2 = (User) context.getBean("user");

		if(user1 == user2){

			System.out.println("user1与user2是同一个对象!");

		}else{

			System.out.println("user1与user2不是同一个对象!");

		}

	}

}
在User类使用@Scope指定为多例。
@Component

@Scope("prototype")

public class User {

	// 原有代码省略

	}
运行程序,在控制台中查看输出结果。

2.3.5 @PostConstruct和@PreDestory注解
示例:在User类中声明init()方法和destory()方法,然后在方法上添加注解,最后在控制台打印输出结果。
在User类中使用注解注册到容器并使用@Scope指定为单例,添加username和password两个属性。
@Component

@Scope("singleton")

public class User {

	// 原有代码省略

		@PostConstruct

		public void init(){

			System.out.println("初始化方法被调用!");

		}

		@PreDestroy

		public void detroy(){

			System.out.println("销毁方法被调用!");

	}

}
编写测试类,并在控制台中,查看输出结果。
public class Test {

	public static void main(String[] args) {

		ClassPathXmlApplicationContext context =

					new ClassPathXmlApplicationContext("applicationContext.xml");

		User user = (User) context.getBean("user");

	}

}
在测试类中关闭容器。
public class Test {

	public static void main(String[] args) {

		ClassPathXmlApplicationContext context =new ClassPathXmlApplicationContext("applicationContext.xml");

		User user = (User) context.getBean("user");

		context.close();

	}

}
运行程序,在控制台中查看输出结果。


2.3.6 实践练习
2.4 综合案例
2.4.1 需求说明
图书查询系统,能够充分发挥信息化管理的方便性和快捷性,并能够与图书管理系统中的其他模块无缝结合,让图书馆管理人员便捷地工作。综合之前学过的知识,开发一个简易的图书查询系统。要求如下:
- 查询全部图书。
- 根据书籍编号查询信息。
- 根据书名查询书籍信息。
- 根据状态查询书籍信息。

总结
- Spring容器中的Bean可以分为5个范围:singleton、prototype 、 request 、 session 、 global-session
- Spring的单例Bean是线程安全的
- 如果Bean有多种状态的话,就需要自行保证线程安全。最浅显的解决办法就是将多态Bean的作用域由“singleton”变更为“prototype”。
- 相对于XML文件,注解型的配置依赖于通过字节码元数据装配组件,而非尖括号的声明。开发者通过在相应的类,方法或属性上使用注解的方式,直接组件类中进行配置,而不是使用XML表述Bean的装配关系。
最新文章
- 浅谈Android样式开发之layer-list
- struts2中的OGNL详解
- 查看SqlAzure和SQLServer中的每个表数据行数
- How to build a GUI in ROS with Qt / C++
- jQuery的domReady
- openfire控制台登录不了的解决
- JDK7新特性之fork/join框架
- java.lang.SecurityException: Permission denied (missing INTERNET permission?) 解决
- 什么是系统,什么是算法 -- lemon OA 系统学习总结
- [IDEs]Eclipse For Mac , 常用快捷键
- 写一个程序,乞讨1+2*2+3*3+n*n值 Java
- 探究Java中Map类
- 初探JavaScript魅力(四)
- layui 的 GitHub 及 Gitee (码云) 仓库
- 如何在springcloud分布式系统中实现分布式锁?
- Android命令Monkey压力测试,详解
- Survival Analysis
- Dhaka2011
- Ajax技术(WEB无刷新提交数据)
- MVC ---- ckeditor 循环遍历并绑定blur事件