Python学习第二十八课——Django(urls)
2024-08-28 00:09:10
Django框架中的urls配置:
首先通过pycharm创建一个Django项目:
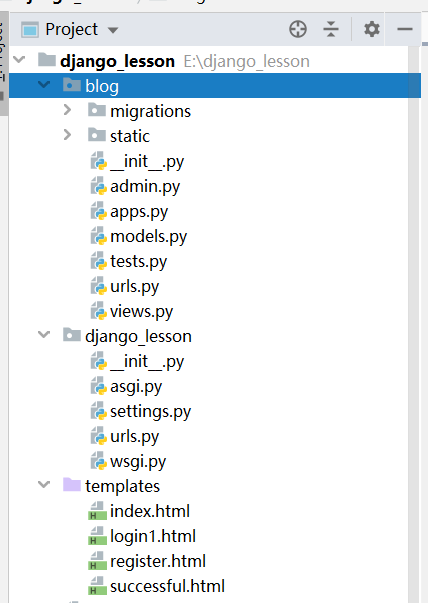
例如要写blog的功能:则在digango_lesson中的urls代码如下:
"""django_lesson URL Configuration

The `urlpatterns` list routes URLs to views. For more information please see:

    https://docs.djangoproject.com/en/3.0/topics/http/urls/

Examples:

Function views

    1. Add an import:  from my_app import views

    2. Add a URL to urlpatterns:  path('', views.home, name='home')

Class-based views

    1. Add an import:  from other_app.views import Home

    2. Add a URL to urlpatterns:  path('', Home.as_view(), name='home')

Including another URLconf

    1. Import the include() function: from django.urls import include, path

    2. Add a URL to urlpatterns:  path('blog/', include('blog.urls'))

"""

from django.conf.urls import url

from django.contrib import admin

from django.urls import path, include

from blog import views

urlpatterns = [

    path('admin/', admin.site.urls),

    path('show_time/', views.show_time),

    path('blog/', include('blog.urls')), # 将urls 进行分发  发到blog文件夹下的urls

]
blog项目功能的urls 全部写在 blog文件夹下的urls,如下:
"""django_lesson URL Configuration

The `urlpatterns` list routes URLs to views. For more information please see:

    https://docs.djangoproject.com/en/3.0/topics/http/urls/

Examples:

Function views

    1. Add an import:  from my_app import views

    2. Add a URL to urlpatterns:  path('', views.home, name='home')

Class-based views

    1. Add an import:  from other_app.views import Home

    2. Add a URL to urlpatterns:  path('', Home.as_view(), name='home')

Including another URLconf

    1. Import the include() function: from django.urls import include, path

    2. Add a URL to urlpatterns:  path('blog/', include('blog.urls'))

"""

from django.conf.urls import url

from django.contrib import admin

from django.urls import path, include

from blog import views

urlpatterns = [

    url(r'article/(\d{4})$/(\d{2})', views.article_year),

    url(r'article/(?P<year>\d{4})$/(?P<mouth>\d{2})', views.article_year_mouth), # 这种写法参数必须起尖括号里面的名字

    url(r'article/(?P<year>\d{4})/(?P<mouth>\d{2})/(?P<day>\d{2})', views.article_year_mouth_day), # 这种写法参数必须起尖括号里面的名字

    url(r'register', views.register,name="reg"),

    # url(r'login', views.login,name="log"),

]
写完url后 要在views中完成功能代码:
from django.shortcuts import render, HttpResponse

import time

# Create your views here.

def show_time(request):

    t = time.ctime()

    # return HttpResponse("Hellow")

    return render(request, "index.html", {"time": t})

def article_year(request, y, m):

    return HttpResponse("日期:%s年 %s月" % (y, m))

def article_year_mouth(request, year, mouth):

    return HttpResponse("这个日期日期:%s年 %s月" % (year, mouth))

def article_year_mouth_day(request, year, mouth, day):

    return HttpResponse("现在的日期:%s年 %s月 %s日" % (year, mouth, day))

def register(request):

    if request.method == "POST":

        print(request.POST.get("user"))  # user

        print(request.POST.get("pwd"))  #

        return HttpResponse("success!")

    return render(request, "register.html")

# def login(request):

#     username = request.GET.get("user")

#     password = request.GET.get("pwd")

#     if username == "hanhan" and password == "123":

#         return render(request, "successful.html")

#     else:

#         return render(request, "register.html")
用到html应该全部放在templates文件夹中:
<!DOCTYPE html>

<html lang="en">

<head>

    <meta charset="UTF-8">

    <title>Title</title>

</head>

<body>

<h1>学生注册</h1>

<form action="{% url 'reg'  %}" method="post">

    <!--{% url 'reg'  %} 对应的是blog下面的urls url(r'register', views.register,name="reg"),-->

    <p>用户名<input type="text" name="user"></p>

    <p>密码  <input type="text" name="pwd"></p>

    <p>爱好  <input type="checkbox" name="hobby">篮球

             <input type="checkbox" name="hobby">足球

            <input type="checkbox" name="hobby">乒乓球

    </p>

    <p><input type="submit"></p>

</form>

</body>

</html>
如果要加入JS,等文件则需要在settings中配置:
# 加在末尾即可

STATICFILES_DIRS = (

    os.path.join(BASE_DIR, "blog/static"),

)  # 逗号很重要  static相当于包的名字  固定这样写 才可以找到
HTML中用JS代码如下:
index.html:
<!DOCTYPE html>

<html lang="en">

<head>

    <meta charset="UTF-8">

{#    {% load staticfiles %}#}

    <title>Title</title>

</head>

<body>

<h1>Django,你好,现在时间为:{{time}}</h1>

{#第一种 执行Script 文件 #}

<script src="/static/jquery-3.1.1.js"></script>  <!--要放到处理代码后面  -->

{#第二种#}

{#<script src="{% static 'jquery-3.1.1.js' %}"></script>#}

<script>

    $("h1").css("color","red")

</script>

</body>

</html>
最新文章
- MongoDB服务重启及后台运行解决方法
- C++头文件为什么要加#ifndef #define #endif
- JAVA元运算符,一元运算符,二元运算符,三元运算符
- 关于C++引用的一些注意点
- STL unordered_set
- 用nginx做代理服务器上网
- Python关于eval与json在字典转换方面的性能比较
- IOS开发之IOS8.0最新UIAlertController
- 机器学习技法:06 Support Vector Regression
- python笔记十五(面向对象及其特性)
- scp和sftp常用操作
- 洗礼灵魂,修炼python(59)--爬虫篇—httplib模块
- fedora 配置使用点滴
- Java知多少(62)线程同步
- linux 下安装mysql-5.7.12-1.el6.x86_64.rpm-bundle.tar
- springboot email 中常量值 配置 mailUtils
- Devexpress VCL Build v2013 vol 13.2.5 发布
- Python之数据库模块安装 MySQLdb
- 【Web Shell】- 技术剖析中国菜刀 - Part II
- JavaScript里Math对象的ceil()、floor()、round()方法的区别