leakcanary内存泄漏:此篇有加了内存泄漏的apk demo
概括:
·用Android studio写一个demo
·配置leakcanary
·加入内存泄漏代码片段
·安装apk 验证结果
·源码地址
一、android studio创建项目demo
1.不多写这一步了,正常按指示填写即可,不需要什么配置类的东西

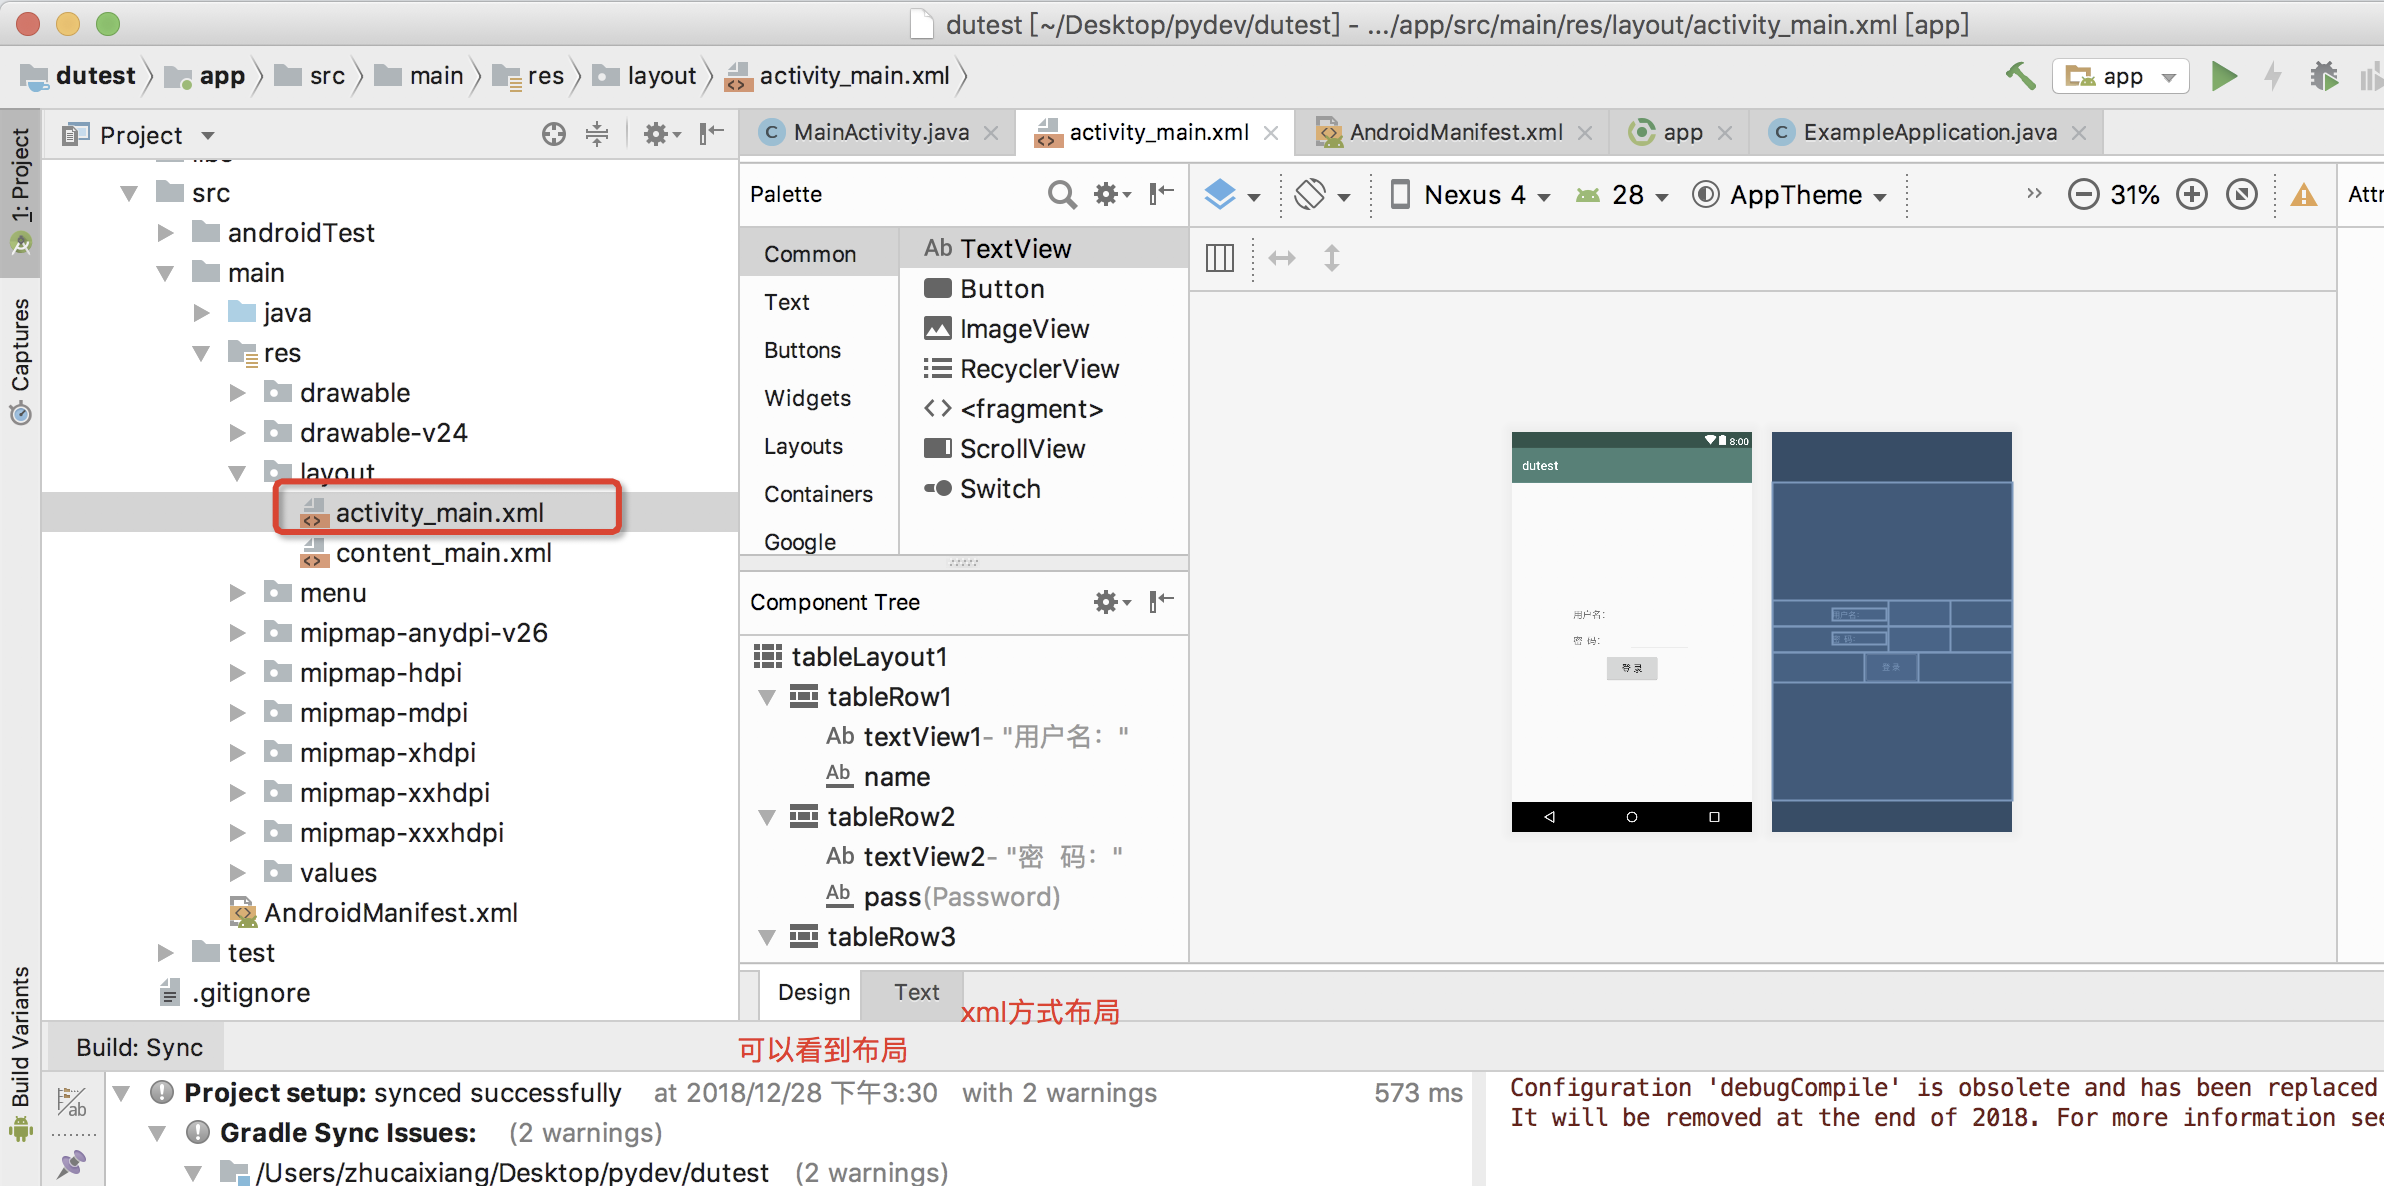
2.创建打开后,先布局一个登录页面
打开路径:app-main-res-layout 或者到java下的mainActivity文件activity_main ,ctr+右击进去也可以定位到这个页面
Desgi:直观可以看到ui
text:用xml的方式布局页面
3.xml的方式布局一个登录页面(复制粘贴进去即可)
<TableLayout xmlns:android="http://schemas.android.com/apk/res/android"

    android:id="@+id/tableLayout1"

    android:layout_height="match_parent"

    android:layout_width="match_parent"

    android:gravity="center"

    >

    //第一行

    <TableRow

        android:id="@+id/tableRow1"

        android:gravity="center"

        android:layout_width="wrap_content"

        android:layout_height="wrap_content">

        <TextView

            android:id="@+id/textView1"

            android:layout_width="wrap_content"

            android:layout_height="wrap_content"

            android:text="用户名:"

            android:textSize="30px"

            />

        <EditText

            android:id="@+id/name"

            android:layout_width="wrap_content"

            android:layout_height="wrap_content"

            android:minWidth="200px"

            android:textSize="30px"

            />

    </TableRow>

    //第二行

    <TableRow

        android:id="@+id/tableRow2"

        android:gravity="center"

        android:layout_width="wrap_content"

        android:layout_height="wrap_content">

        <TextView

            android:id="@+id/textView2"

            android:layout_width="wrap_content"

            android:layout_height="wrap_content"

            android:text="密  码:"

            android:textSize="30px"

            />

        <EditText

            android:id="@+id/pass"

            android:layout_width="wrap_content"

            android:layout_height="wrap_content"

            android:minWidth="200px"

            android:textSize="30px"

            android:inputType="textPassword"

            />

    </TableRow>

    //第三行

    <TableRow

        android:id="@+id/tableRow3"

        android:gravity="center"

        android:layout_width="wrap_content"

        android:layout_height="wrap_content">

        <Button

            android:id="@+id/Login"

            android:layout_width="wrap_content"

            android:layout_height="wrap_content"

            android:text="登 录"

            android:textSize="30px"

            android:onClick="Check"

            />

    </TableRow>

</TableLayout>
4.页面现在有了,在MainActivity文件写一个事件和加入内存泄漏的片段
MainActivity路径:app-java-包下面的java文件如下
@内存泄漏加在了onCreate下面,理论上打开app会出现泄漏,如果出现不了就多操作打开app试下
@这里有个小问题,如果你没有操作上面的步骤直接用源码apk,泄漏后会报错是因为没有开启存储权限
package com.example.dutest.dutest;

import android.os.Bundle;

import android.support.design.widget.FloatingActionButton;

import android.support.design.widget.Snackbar;

import android.support.v7.app.AppCompatActivity;

import android.support.v7.widget.Toolbar;

import android.view.View;

import android.widget.EditText;

import android.widget.Toast;

public class MainActivity extends AppCompatActivity {

    EditText name;   //用户名

    EditText pass;    //密码
    //内存泄漏

    private static TestResource mResource = null;//

    @Override

    protected void onCreate(Bundle savedInstanceState) {

        super.onCreate(savedInstanceState);

        setContentView(R.layout.activity_main);
         //内存泄漏

        if(mResource == null){

            mResource = new TestResource();

            mResource = new TestResource();

            mResource = new TestResource();

            mResource = new TestResource();

        }//

        name = (EditText) findViewById(R.id.name);  //获取用户名

        pass = (EditText) findViewById(R.id.pass);  //获取密码

    }

    public void Check(View view) {

        String mname = "du";

        String mpass = "du";

        String user = name.getText().toString().trim();

        String pwd = pass.getText().toString().trim();

        if (user.equals(mname) && pwd.equals(mpass)) {

            Toast.makeText(this,

                    "密码正确", Toast.LENGTH_SHORT).show();

            if(mResource == null){

                mResource = new TestResource();

            }

        } else {

            Toast.makeText(this,

                    "密码错误", Toast.LENGTH_SHORT).show();

        }

    }
    //内存泄漏

    class TestResource {

       //

    }//

}
这样就写好一个apk的demo了,下面需要对demo配置leakcanary
二、配置leakcanary
1.android studio打开源码app的build.gradle中加入配置如下:
    debugCompile 'com.squareup.leakcanary:leakcanary-android:1.5.4'

    releaseCompile 'com.squareup.leakcanary:leakcanary-android-no-op:1.5.4'

2.自定义Application用来安装leakcanary
在app-src-java-com.xxx.项目下新建ExampleApplication类文件
package com.example.dutest.dutest;

import android.app.Application;

import com.squareup.leakcanary.LeakCanary;

import android.support.v7.app.AppCompatActivity;

//import com.squareup.leakcanary.RefWatcher;

public class ExampleApplication extends Application {

//    private RefWatcher mRefWatcher;

    @Override

    public void onCreate() {

        super.onCreate();

        LeakCanary.install(this);

    }

}
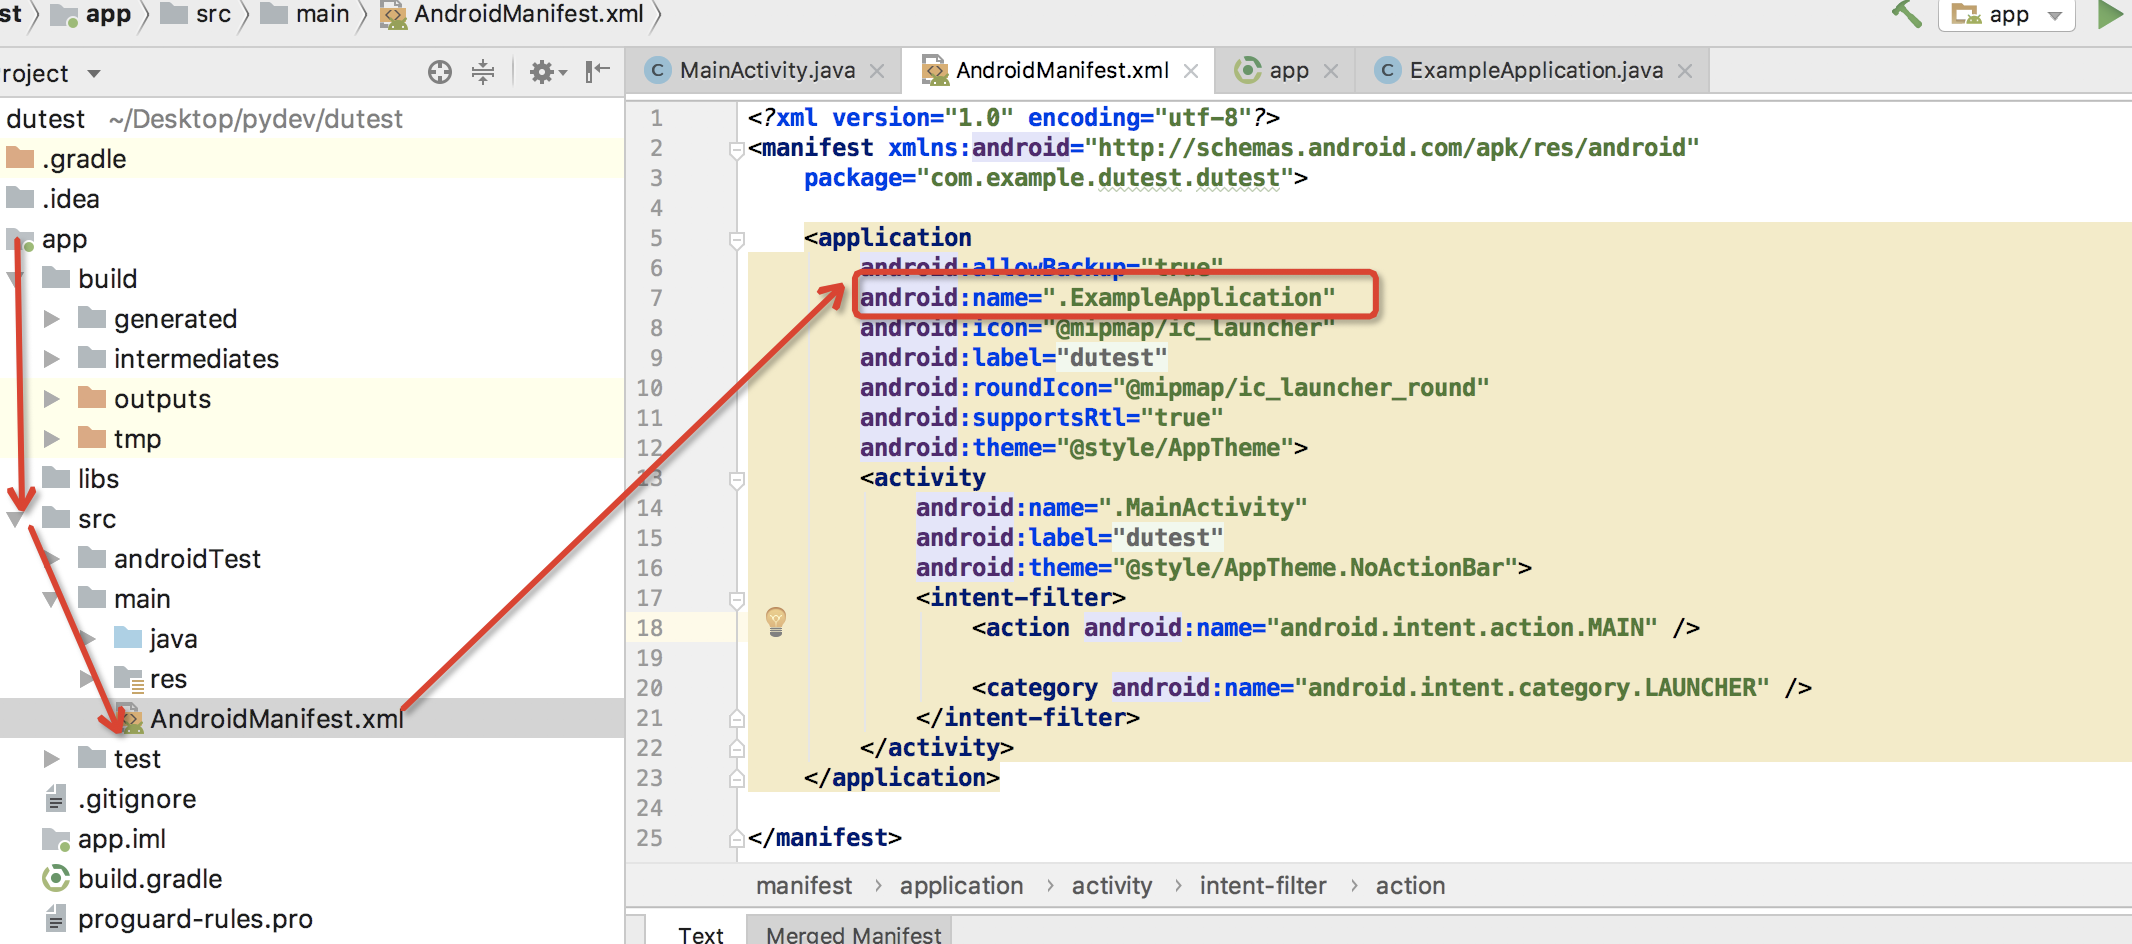
2.把自定义的ExampleApplication注册androidManifest.xml(l路径:../app-src-main同级的文件)
只要加这个android:name=".ExampleApplication"即可,如下图
3.使用android studio打开生成debug包到手机
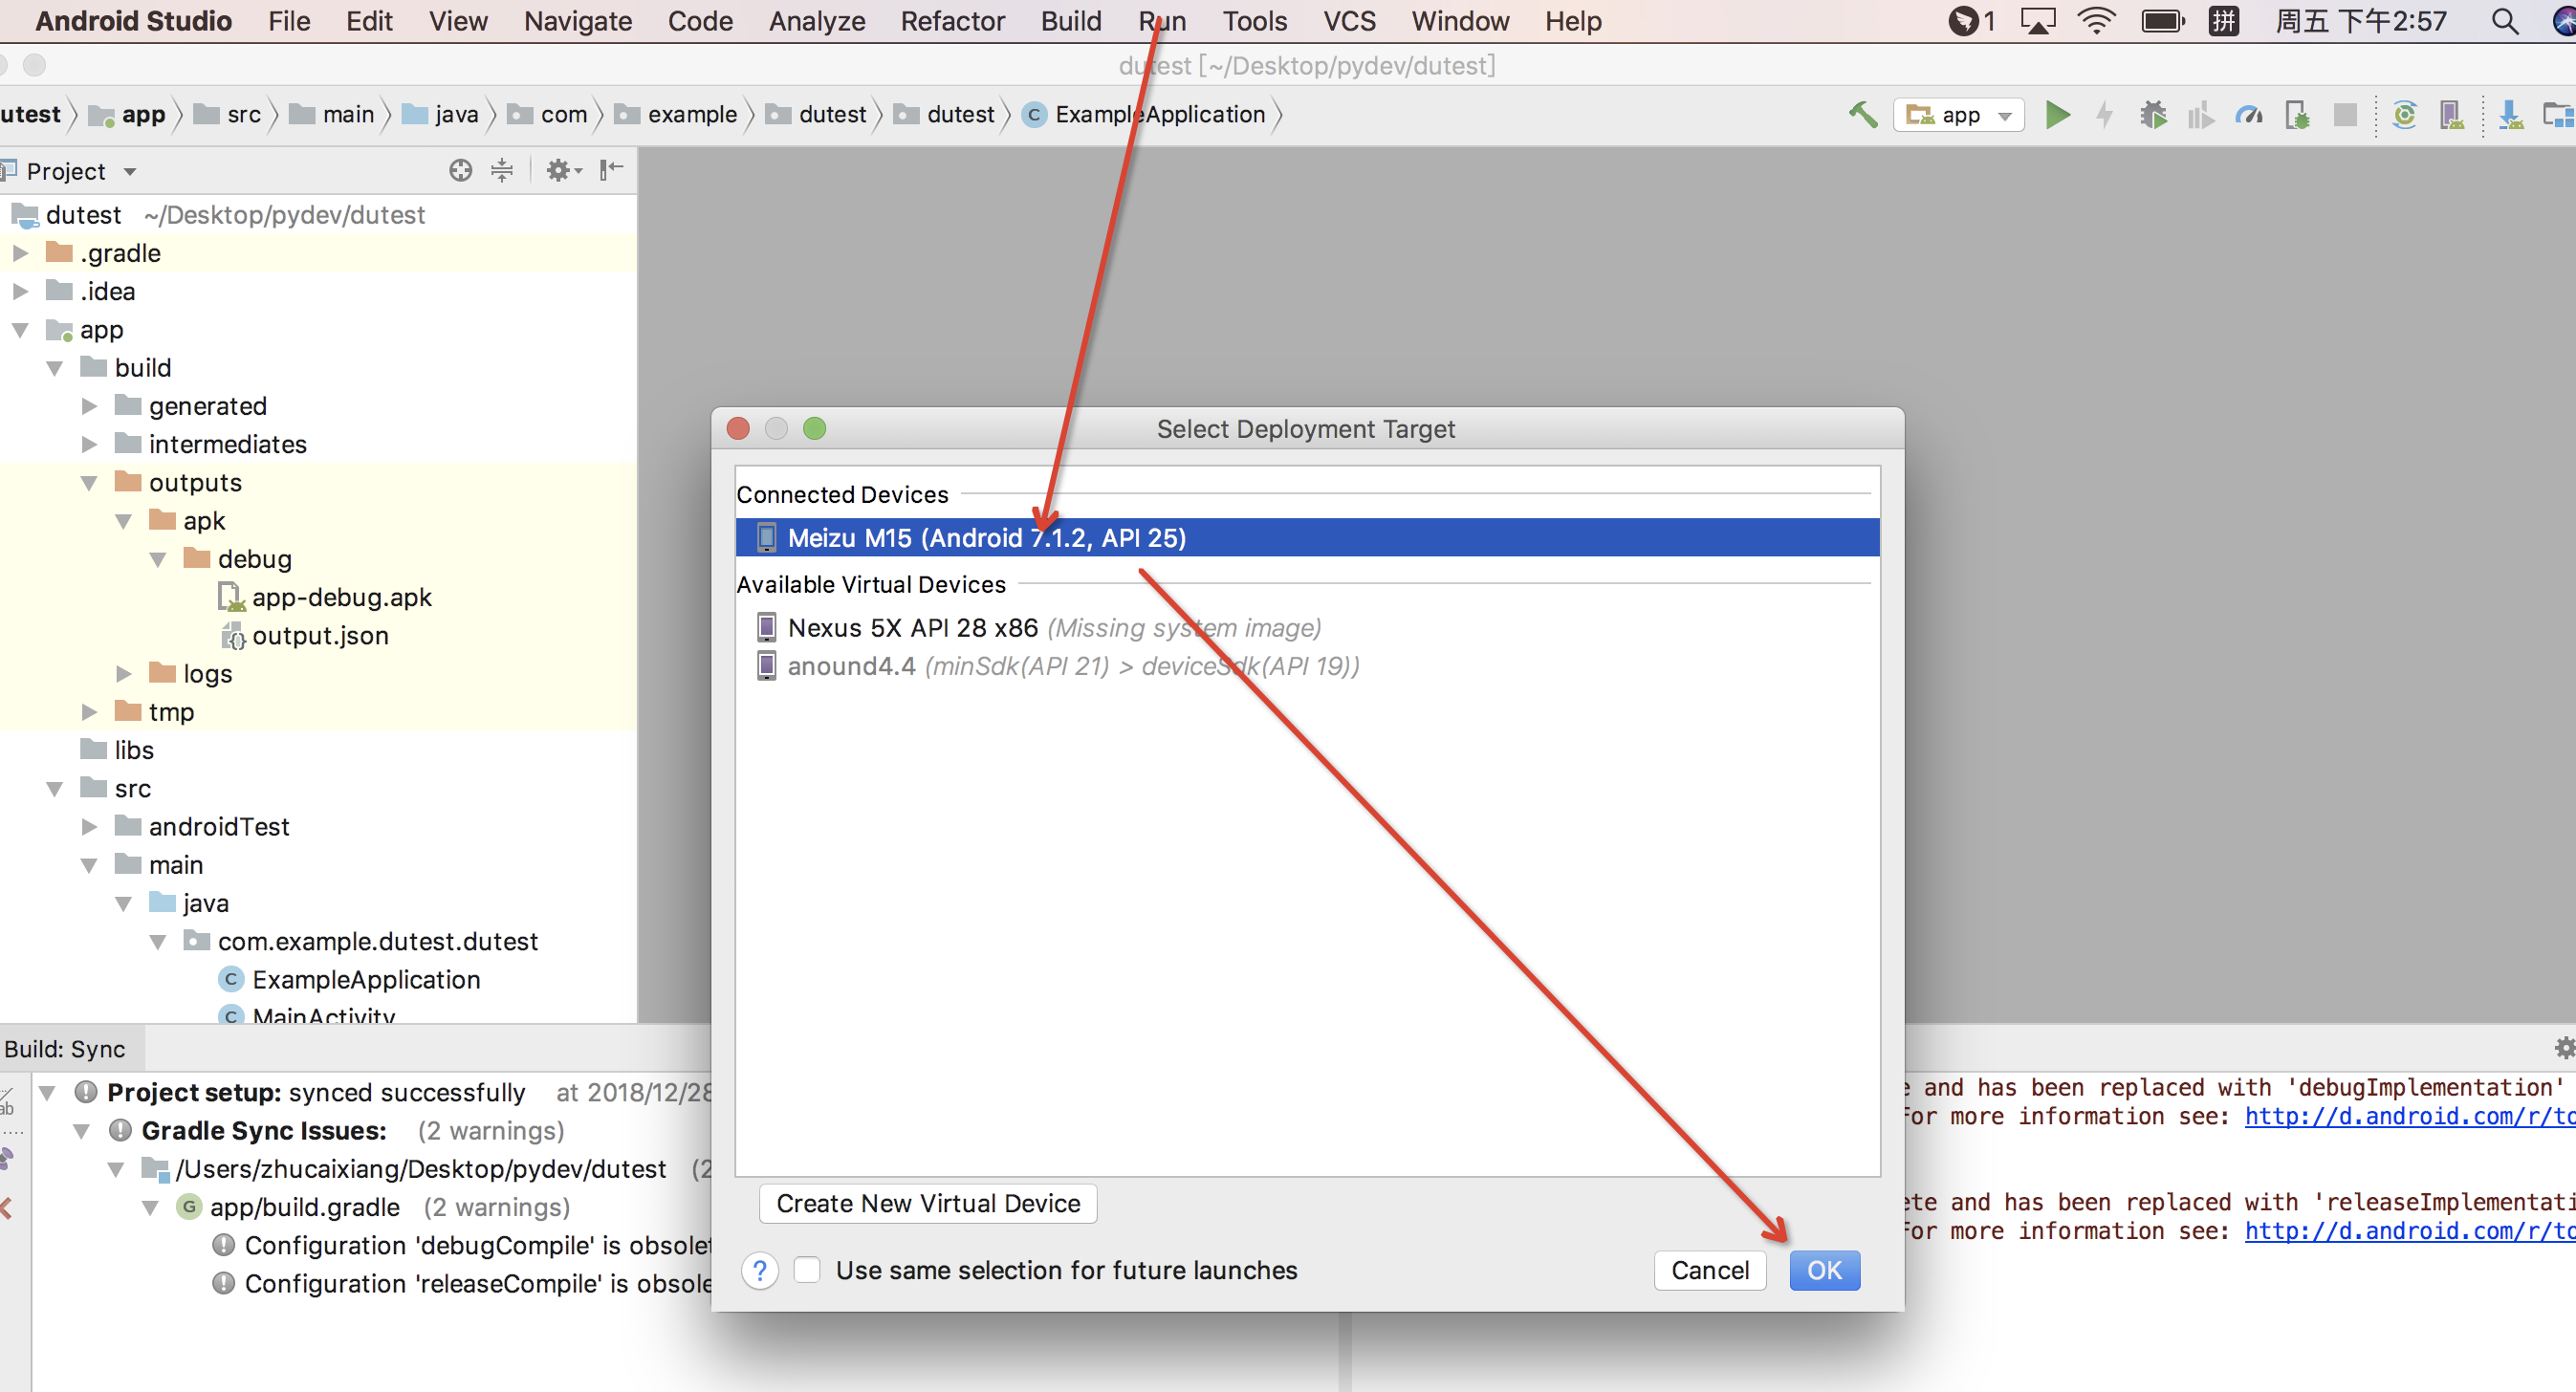
4.验证内存泄漏
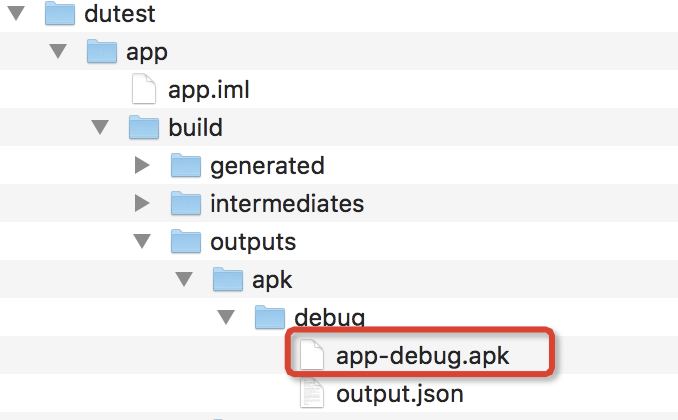
1.打包后桌面可见到:

2.打开apk(注意需要授予apk储存权限)打开apk的界面会出现内存泄漏,出现leakcanary会提示,如果没有提示尝试多次打开退出app操作

三、源码
git地址
2.用android stuido打开build debug包
3.打开包在指定路径下直接安装apk,如下图:
最新文章
- TCP三次握手的正确使用姿势
- 关于Redis中的数据类型
- 基于Qt Phonon模块实现音乐播放器
- bjui简单了解
- 2014搜狗前端面经【B事业部】
- hdu 4825 Xor Sum (建树) 2014年百度之星程序设计大赛 - 资格赛 1003
- NESPER的大体结构 z
- Excel等外部程序点击链接会带上IE信息的bug
- MySQL基础之 path环境变量的作用 (科普)
- javascript基础(二)类型转换
- PHPSTORM下安装XDEBUG
- C预处理器和C库
- Python----支持向量机SVM
- Bitmap的使用习惯——及时释放Bitmap占用的内存
- 使用spring中4.2.6版本使用@Value取值失败,结果为${xxx}的情况
- Spring Boot 定时任务使用
- C语言 基础
- 【洛谷P1059 明明的随机数】
- unable to auto-detect email address
- [LeetCode] 581. Shortest Unsorted Continuous Subarray_Easy tag: Sort, Stack
热门文章
- Windows系统中的SVN使用方法
- Python语句,表达式的区别?
- CF803G-Periodic RMQ Problem【离散化,线段树,ST表】
- 深入浅出WPF-06.Binding(绑定)03
- apiserver源码分析——启动流程
- 11.2.0.4 ORA-15025 ORA-27041 IBM AIX RISC System/6000 Error: 13: Permission denied
- Sentry 监控 - Snuba 数据中台架构(Query Processing 简介)
- Knativa 基于流量的灰度发布和自动弹性实践
- 题解 「HDU6403」卡片游戏
- 【日志技术专题】「logback入门到精通」彻彻底底带你学会logback框架的使用和原理(入门介绍篇)