CSS(2)之重新认识 CSS3 新特性
2024-08-31 16:24:43
相邻兄弟选择器:+ 选择到紧随目标元素后的第一个元素

普通兄弟选择器:~ 选择到紧随其后的所有兄弟元素
伪类选择器
:link :visited :hover :active :focus
结构伪类选择器
:first-child{}

:last-child{}

:nth-child(n){}
属性选择器
E[attr] 属性名,不确定具体属性值

E[attr=”value”] 指定属性名,并指定其对应属性值

E[attr ~=”value”] 指定属性名,找到的是具有此属性名,且与其它属性名之间用空格隔开

E[attr ^= “value”] 指定属性名,属性值以value开头

E[attr $=”value”] 指定属性名,属性值以value结束

E[attr *=”value”] 指定了属性名,属性值中包含了value

E[attr |= “value”] 指定属性名,属性值以value-开头或者值为value
目标伪类选择器
☞ 写法:

    :target { 属性: 值;...... }

 例如:

      当使用锚链接指向该标签的时候设置样式

      p:target {

             color: red;

      }

 总结:

      1. 目标伪类选择器要和锚链接配合使用。
::selection选择器
☞ 作用:实现鼠标选中段落文字时候的样式。

/*设置当鼠标选中p标签中的文字时候改变样式*/

p::selection {

    color: red;

    background-color: pink;

}

注意: 在该选择器中只能设置与颜色相关的属性。
font简写 和 @Font-face 特性
font简写
font-family(字体族): “Arial”、“Times New Roman”、“宋体”、“黑体”等;
font-style(字体样式): normal(正常)、italic(斜体)或oblique(倾斜);
font-variant (字体变化): normal(正常)或small-caps(小体大写字母);
font-weight (字体浓淡): 是normal(正常)或bold(加粗)。有些浏览器甚至支持采用100到900之间的数字(以百为单位);
font-size(字体大小): 可通过多种不同单位(比如像素或百分比等)来设置, 如:12xp,12pt,120%,1em
简写:
font: 700 italic 50px/50px "SimSun/SimHei/Microsoft YaHei";

/* 顺序: font-style | font-variant | font-weight | font-size | line-height | font-family */
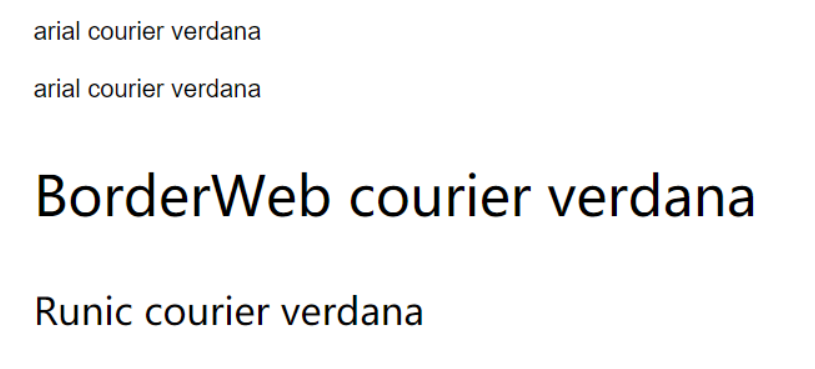
@Font-face 特性
@font-face是CSS3中的一个模块,他主要是把自己定义的Web字体嵌入到你的网页中
  <style>

    @font-face {

    font-family: BorderWeb;

    src:url(BORDERW0.eot);

    }

    @font-face {

    font-family: Runic;

    src:url(RUNICMT0.eot);

    }

    .border { FONT-SIZE: 35px; COLOR: black; FONT-FAMILY: "BorderWeb" }

    .event { FONT-SIZE: 24px; COLOR: black; FONT-FAMILY: "Runic" }

  </style>

  <p><font face="arial">arial courier verdana</font></p>

  <p><font style="font-family: arial">arial courier verdana</font></p>

  <p class="border">BorderWeb courier verdana</p>

  <p class="event">Runic courier verdana</p>
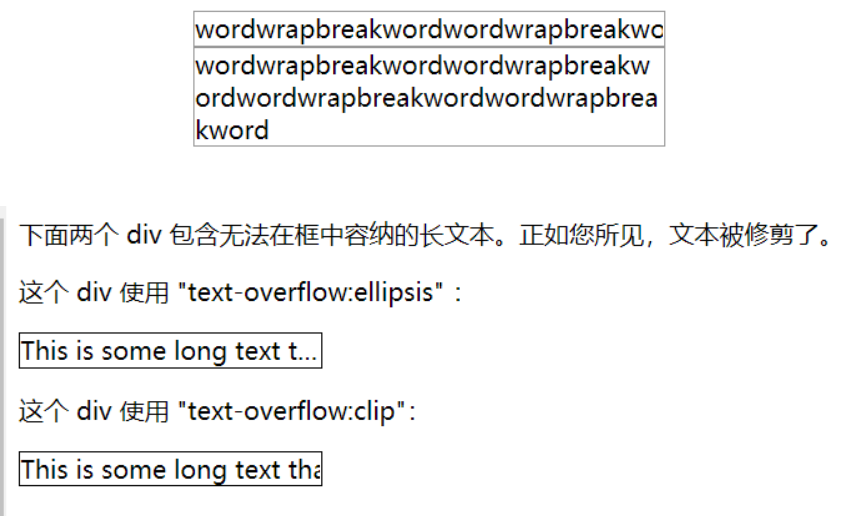
Word-wrap & Text-overflow 样式
<div style="width:300px; border:1px solid #999999; overflow: hidden">    wordwrapbreakwordwordwrapbreakwordwordwrapbreakwordwordwrapbreakword

</div>

<div style="width:300px; border:1px solid #999999; word-wrap:break-word;">   wordwrapbreakwordwordwrapbreakwordwordwrapbreakwordwordwrapbreakword

</div>

<!--加入了“word-wrap: break-word”,设置或检索当当前行超过指定容器的边界时是否断开转行,文字此时已被打散。-->
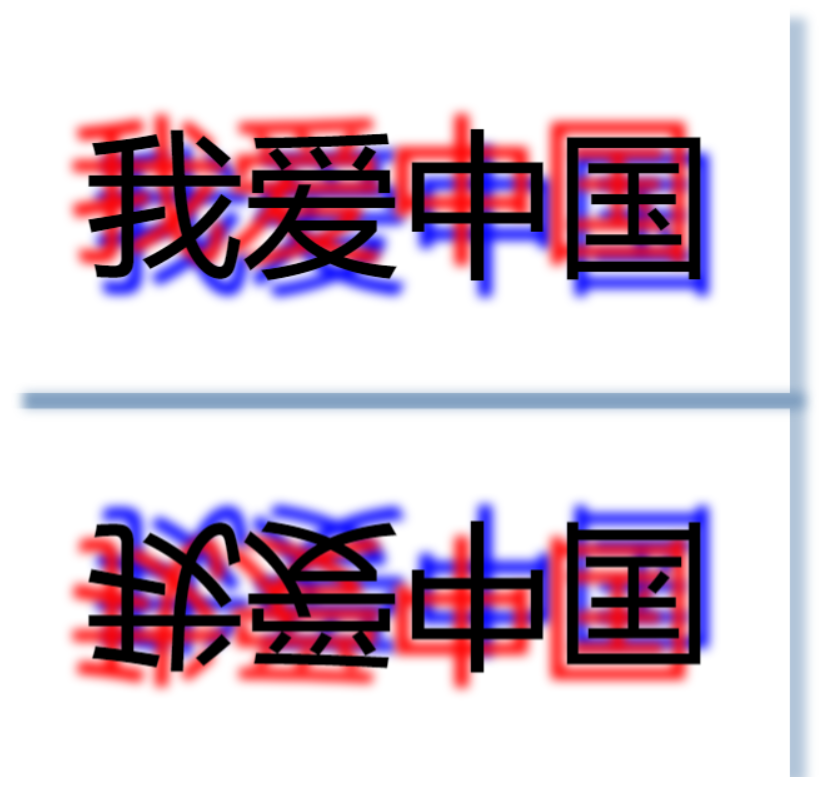
文字渲染(Text-decoration)
  <style>

    .code {

      font-size: 80px;

      -webkit-text-fill-color: red; /*  文字内部填充颜色 */

      -webkit-text-stroke-color: blue; /*  文字边界填充颜色 */

      -webkit-text-stroke-width: 3px; /*  文字边界宽度 */

      }

  </style>

  <div class="code">Text-decoration 效果图</div>

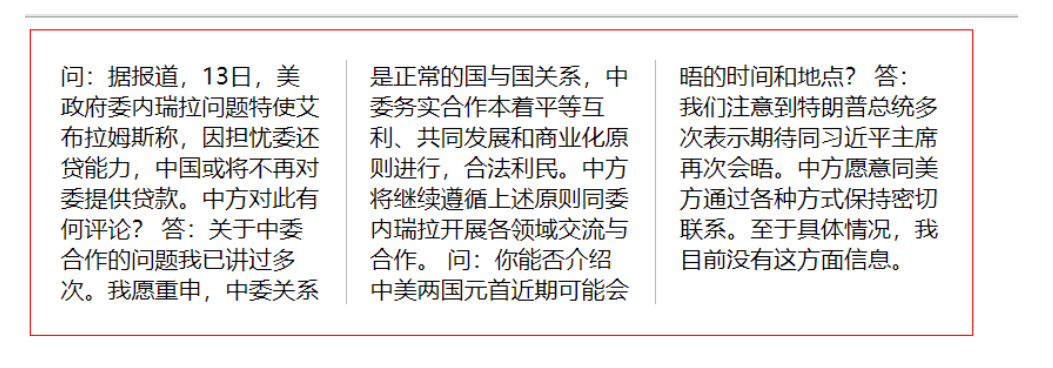
CSS3 的多列布局(multi-column layout)
Column-count:表示布局几列。
Column-rule:表示列与列之间的间隔条的样式
Column-gap:表示列于列之间的间隔
  <style>

    .multi_column_style {

      width: 600px;

      border: 1px solid red;

      padding: 20px;

      -webkit-column-count: 3;

      -webkit-column-rule: 1px solid #bbb;

      -webkit-column-gap: 2em;

    }

  </style>

  <div class="multi_column_style">

    问:据报道,13日,美政府委内瑞拉问题特使艾布拉姆斯称,因担忧委还贷能力,中国或将不再对委提供贷款。中方对此有何评论?

    答:关于中委合作的问题我已讲过多次。我愿重申,中委关系是正常的国与国关系,中委务实合作本着平等互利、共同发展和商业化原则进行,合法利民。中方将继续遵循上述原则同委内瑞拉开展各领域交流与合作。

    问:你能否介绍中美两国元首近期可能会晤的时间和地点?

    答:我们注意到特朗普总统多次表示期待同主席再次会晤。中方愿意同美方通过各种方式保持密切联系。至于具体情况,我目前没有这方面信息。

  </div>
背景background
background-color: #fff; /* 背景颜色。 */

background-position: 0 0; /* 背景图像的位置。 */

background-size: contain; /* 背景图片的尺寸。 */

background-repeat: no-repeat; /* 如何重复背景图像。 */

background-origin: padding-box; /* 背景图片的定位区域。 */

background-clip: border-box; /* 背景的绘制区域。 */

background-attachment: fixed; /* 图像不会随页面的其余部分滚动。 */

background-image: url(); /* 规定要使用的背景图像。 */

background-size属性:  通过该属性可以设置背景图片的大小。

      1. 可以设置具体值

          background-size: 400px 400px;

      2. 可以设置 cover:

         通过设置cover值后,可以让背景图片按照原来缩放比,将整个盒子沾满。

      3.  可以设置contain:

         通过设置contain值后,可以让背景图片按照原来的缩放比,将背景图片完整的显示到父容器中。

background-origin属性:调整背景图片在盒子模型中开始显示的位置

      默认值:padding-box (代表背景图片从padding区域左上角开始显示)

            content-box (代表背景图片从内容区域开始显示)

             border-box   (代表背景图片从整个盒子左上角开始显示)

background-clip属性: 设置背景图片在哪块区域中显示

     默认值: border-box (代表背景图片要在整个盒子范围内显示)

             content-box(代表背景图片只会在内容区域显示)

            padding-box(代表背景图片在内边距区域显示【包括内容区域】)
background: #ff0000 url(/i/eg_bg_03.gif) no-repeat fixed center; /* 背景合写 */
文字阴影/盒子阴影/反射/边框圆角
/* 语法 text-shadow: h-shadow v-shadow blur color;

水平阴影的位置。允许负值。

垂直阴影的位置。允许负值。

模糊的距离。

阴影的颜色。

*/

text-shadow: -10px -10px 10px red,

               5px 10px 10px blue;

box-shadow:3px 3px 3px rgba(0, 64, 128, 0.3);

/* box-shadow: 0px 0px 10px blue,

            -5px -5px 5px orange;

水平 垂直 模糊度 颜色 */

-webkit-box-reflect: below 10px;

border-radius:  水平半径/垂直半径 ;

如果垂直半径与水平半径相等,那么垂直半径可以不用设置

 border-radius:  水平半径 ;

例如:border-radius: 50%;  绘制的是一个圆
web字体
字体格式:

    1、TureType(.ttf)格式

        .ttf字体是Windows和Mac的最常见的字体,是一种RAW格式,支持这种字体的浏览器有IE9+、Firefox3.5+、Chrome4+、Safari3+、Opera10+、iOS Mobile、Safari4.2+;

    2、OpenType(.otf)格式

         .otf字体被认为是一种原始的字体格式,其内置在TureType的基础上,支持这种字体的浏览器有Firefox3.5+、Chrome4.0+、Safari3.1+、Opera10.0+、iOS Mobile、Safari4.2+;

    3、Web Open Font Format(.woff)格式

        woff字体是Web字体中最佳格式,他是一个开放的TrueType/OpenType的压缩版本,同时也支持元数据包的分离,支持这种字体的浏览器有IE9+、Firefox3.5+、Chrome6+、Safari3.6+、Opera11.1+;

    4、Embedded Open Type(.eot)格式

       .eot字体是IE专用字体,可以从TrueType创建此格式字体,支持这种字体的浏览器有IE4+;

    5、SVG(.svg)格式

    .svg字体是基于SVG字体渲染的一种格式,支持这种字体的浏览器有Chrome4+、Safari3.1+、Opera10.0+、iOS     Mobile Safari3.2+;
渐变
线性渐变(background-image)
.line {

    height: 100px;

    /*线性渐变语法*/

    background-image: linear-gradient(

        /*渐变的方向 : to + 方位名称(left| right| top| bottom)*/

        to right,

        /*设置渐变的开始颜色*/

        red,

        /*设置渐变的结束颜色*/

        blue

    );·

}

☞ 详细介绍线性渐变中的细节:

1. 渐变方向问题:

✔ to + 具体的方位名称 left| right | top | bottom

✔ 通过一个角度表示一个渐变方向   例如: 0deg   90deg

0deg 代表渐变是从下向上渐变

90deg 代表渐变从左向右渐变

其他角度按照顺时针设置即可。

background-image: linear-gradient(

    /*设置渐变的方向*/

    135deg,

    /*开始颜色*/

    red,

    /*结束颜色*/

    blue

);

2. 渐变的范围问题:

✔ 通过设置一个百分比表示一个渐变的范围

✔ 默认设置的范围百分比是相对当前元素的宽度

✔ 当设置了background-size之后,那么范围的百分比是相对background-size的值。
径向渐变(background-image)
    background-image:  radial-gradient(

            /*100px代表半径

            center 代表圆心点位置*/

            100px at center,

            red,

            blue

    );
1.  圆心位置确定可以通过

    at + 方位名称  left | right | top | bottom | center

2.  圆点位置还可以通过    at + 具体坐标值

       /*径向渐变*/

        background-image:  radial-gradient(

            /*100px代表半径

            center/120px 150px 代表圆心点位置*/

            100px at 120px 150px,

            red,

            blue

        );

3. 如果只设置一个半径值,那么代表水平半径和垂直半径的取值是一样的----正圆

        反之如果设置的两个值不一样,那么出现的效果就是椭圆效果

        background-image:  radial-gradient(

            /*100px代表半径

            center 代表圆心点位置*/

            100px  50px at 120px 150px,

            red,

            blue

        );
外边距
浮动
float: left|right;

特点:块级元素在一行上显示;脱标;模式转换

①    clear属性清除浮动。

clear:left|right|both

步骤:在浮动元素的后面直接添加一个空标签【必须是块级元素】

      选中该标签,使用clear:both;

        <div class="clearfix"></>

        .clearfix {

          clear:both;

        }

②使用伪元素清除浮动:

.clear::after {

  content:"";

  display :block;

  clear:both;

  height:0px;

  line-height:0px;

  visibility:hidden;

}

.clear {

  zoom:1;

}

让浮动元素的父元素调用;

请不要设置完浮动就清除浮动,要满足两个条件:

    如果父元素没有设置高度;

    该父元素种的所有子元素都设置了浮动

③给父元素设置overflow: hidden;----可以将超出父元素的部分进行隐藏。
定位
静态定位:
position: static;

left: 100px;

按照标准流元素默认的方式显示
绝对定位:
position: absolute;

left|top|right|bottom: 值;

绝对定位的元素是一个脱标不占位置的元素,可以实现模式转换
相对定位:
position: relative;

left|top|right|bottom: 值;

没有脱标,占位置----子绝父相
固定定位:
position: fixed;

left|top|right|bottom: 值;

始终都是以body标签左上角定位,脱标不占位元素。
粘性定位
它是相对定位(position:relative)和固定定位(position:fixed)的混合。
position: sticky;

top: 100px;
demo
<style>

    * {

      margin: 0;

      padding: 0;

    }

  .father {

    width: 200px;

    height: 1000px;

    background-color: lightgray;

  }

  .son {

    position: sticky;

    top: 100px;

    margin: 0 auto;

    width: 150px;

    height: 30px;

    background-color: #ff0000;

  }

  </style>

  <div class="father">

    <div>1</div>

    <div>2</div>

    <div>3</div>

    <div>4</div>

    <div>5</div>

    <div>6</div>

    <div>7</div>

    <div>8</div>

    <div>9</div>

    <div>0</div>

    <div>-11</div>

    <div>23</div>

    <div>45</div>

    <div>65</div>

    <div>78</div>

    <div class="son">子元素</div>

  </div>
绝对定位元素居中
margin: 0 auto;--标准流下的盒子居中

 实现绝对定位盒子居中方式:

                width: 200px;

             height: 100px;

             background-color: red;

             position: absolute;

             /*移动了父元素宽度的一半*/

             left: 50%;

             /*移动了当前元素自己宽度一半*/

             margin-left: -100px;
z-index
  ☞ z-index 属性就是用来改变元素的层级关系的。

  ☞ 只有定位(除去静态定位)的元素才有层级关系,z-index 属性只能和定位的元素配合使用。

  ☞ 总结:

      1. 如果一个元素是定位元素(除去静态定位),那么该元素的默认z-index的值是auto[认为auto=0]

      2. 如果z-index值相同,那么最后的定位元素会压着前面的定位元素【后来居上】

      3. 通过设置z-index值,改变元素之间的层级关系,z-index值越大层级越高。

      4. 如果父元素中共存在定位层级关系,那么只会看父元素中z-index值的大小。
vartical-align
  ☞ 属性介绍: vertical-align

        设置元素在垂直方向的对齐方式

     1. 在网页中所有的行内块元素都有vertical-align默认属性。

     2. vertical-align: baseline | top | bottom | middle |

  ☞ 总结vertical-align属性在网页中的使用:

      1. 可以解决网页中插入图片底部3像素空白

         ☞ vertical-align的值不是默认值baseline就可以了。

           ☞ 将图片转换为块级元素也可以

      2. 在网页中实现图片垂直居中。

         第一步: 先设置行高等于容器的高度

         第二步: 设置图片的垂直对齐方式vertical-align:middle;

只有元素属于inline或是inline-block ,vertical-align属性才会起作用。

例如图片,按钮,单复选框,单行/多行文本框等HTML控件,只有这些元素默认情况下会对vertical-align属性起作用。
页面中的元素隐藏
 ☞ 隐藏元素:

    display: none;    -----元素隐藏

    display:block;   -----显示元素

    总结:

      display: none;隐藏元素不占位置

☞ 隐藏元素visibility: hidden;

     总结:

         ☞ 可以隐藏元素

         ☞ 隐藏元素后占位置。

☞ overflow:hidden;  只能将超出父元素的部分进行隐藏。

   总结;

      overflow的默认是visible  | hidden  | scroll [给父元素设置滚动条] | auto [超出添加滚动条,不超出不添加]
meta
  metat标签实现网页优化(seo)。

  ☞ 设置网页关键字

    <meta name="keywords" content="设置与当前网页信息相关的词语">

  ☞ 设置网页描述信息

    <meta name="description" content="对当前网站的描述性文字">
字间距
 word-spacing[控制每个汉字之间的距离]: 值;

     注意:

        在使用该属性的时候,最好在字与字之间有分割符号,例如: 空格符

 letter-spacing[控制字母之间的距离]: 值;

      注意:

        该属性是控制字母与字母之间的距离,一般不需要设置分割符。
过渡
 属性介绍:transition

     1.transition-property: 设置属性以动画效果执行。  all | 具体的属性

     2.transition-duration:  设置动画执行时间        例如: 2s

     3.transition-delay:     设置动画延时执行的时间

     4.transition-timing-function: 设置动画速度类型    ease | linear | ease-in | ease-out | ease-in-out

 总结:

      1. 在动画效果中,开始状态中的属性一定要与结束状态中的属性一一对应。

      2. transition 的合写方式:

         例如: transition: all 2s linear 5s;

         或者分步执行动画效果:

          transition: width 1s linear,

                     height  1s linear 1s,

                     background-color  1s linear 2s;

     3. transition 可以放到开始状态中也可以放到结束状态中。
2D转换
transform 复合属性

属性介绍:

         1. 位移【让元素移动位置】     transform: translate(值);

         2. 缩放【放大缩小】           transform:scale(值)

         3. 旋转 【转圈】                transform: rotate(角度的单位值)

         4. 倾斜                        transform:skew(角度的单位值)

位移

      transform: translate(100px,100px);

      备注:

          1. 如果只设置一个值,那么代表在水平方向移动

          2. 如果设置两个值,那么第一个值代表水平方向,第二个值代表垂直方向

          3. 可以设置负数,负数代表相反方向

          4. 通过translate移动元素位置的时候,是相对元素自己本身,可以设置百分比。

          5. 可以通过位移的方式实现绝对定位的盒子居中:

             .box {

                 width: 500px;

                 height: 500px;

                 border:  1px solid red;

                 position: relative;

            }

            .one {

                 width: 133px;

                 height: 263px;

                 background-color: red;

                 position: absolute;

                 left: 50%;

                 top:  50%;

                 transform: translate(-50%, -50%);

            }

 ☞ 缩放:

      transform: scale(2,1);

      总结:

         1. 如果设置的是一个值,那么代表当前元素的宽度和高度同时放大或缩小对应的倍数。

         2. 如果设置两个值,第一个值代表宽度的放大或缩小,第二值代表高度的放大或缩小。

         3. 设置的值不能带任何单位,不能设置负数

          4. 设置大于0 小于1的值,代表缩小。

          5. 给父元素设置缩放的时候不会影响子元素。

☞ 旋转:

     transform: rotate(角度)

      总结:

          1. 角度的单位是deg    例如: 30deg

          2. 如果设置的是正数那么代表顺时针旋转,反之逆时针旋转。

☞ 倾斜:

     transform: skew(45deg,45deg);

     总结:

        1. 如果设置一个值,代表当前元素是沿着x轴,让y轴倾斜了

        2. 如果设置两个值,第一个值沿着x轴,让y轴倾斜,第二值代表沿着y轴,x轴发生倾斜。

 注意:

     1. transform属于复合属性。如果设置多个值的时候,要使用复合写法:

        transform: translate(length, length) rotate() scale(0, 0) skew(angle, angle);

     2. 默认元素在旋转或者倾斜的时候,是按照中心点进行旋转的。如果希望改变旋转点(旋转轴),通过

        transform-origin 设置即可。

         取值可以是具体的方位名称: left  | right | bottom  | top

         或者可以设置具体值:

         /*改变旋转点位置*/

         transform-origin: right bottom;

         transform-origin: right 200px;
demo1
    <style type="text/css">

        .box {

            width: 343px;

            height: 100px;

            background: url("paopao.png") no-repeat left top,

                       red url("paopao.png") no-repeat left bottom;

            transition:  all 1s linear;

        }

        .box:hover {

            background-position: right bottom, right top;

        }

    </style>

     <div class="box"></div>

demo2
    <style type="text/css">

        * {

            margin: 0;

            padding: 0;

            list-style: none;

        }

        body {

            background-color: #ccc;

        }

        ul {

            height: 300px;

            margin-top: 100px;

            margin-left: 200px;

        }

        li {

            width: 234px;

            height: 300px;

            float: left;

            margin-right: 10px;

            text-align: center;

            background-color: #fff;

            position: relative;

      overflow: hidden;

        }

        .one {

            transition: margin-top 1s linear,

      box-shadow 1s linear;

        }

        .one:hover {

            margin-top: -20px;

            box-shadow: 0px 0px 20px #000;

        }

        .box{

            width: 100%;

            height: 0px;

            background-color: orange;

            position: absolute;

            bottom: 0px;

            transition: height 1s linear;

        }

        .two:hover .box {

            height: 80px;

        }

    </style>

      <ul>

           <li class="one">

               <img src="1.jpg">

           </li>

           <li class="two">

               <img src="2.jpg">

               <div class="box">1234567</div>

           </li>

      </ul>

3D转换
 ☞ 位移

      transform: translateX(200px);  沿着x轴移动

      transform: translateY(200px);      沿着y轴移动

      transform: translateZ(-200px);  沿着Z轴移动  如果设置正数元素变大,如果负数元素变小。

      备注:

          1. 3D位移也是相当元素自己。

          2. 3D位移也可以设置百分比

          3. 通过3D方式实现盒子居中:

        .one {

             width: 133px;

             height: 133px;

             background-color: red;

             position: absolute;

             left: 50%;

             top: 50%;

             transform: translateX(-50%) translateY(-50%);

        }

      透视:

          1. 要给父元素设置perspective;

          2. perspective的取值可以影响我们视觉上的效果差。【600-1000推荐设置的值】

 ☞ 位移

     1. transfrom: translateX(值);   正数代表向右移动,负数代表向左移动

     2. transform:translateY(值);   正数代表向下移动,负数代表向上移动

     3. transform:transalteZ(值);   正数代表朝向我们自己移动,负数代表背向移动

 ☞ 旋转

     1. transform: rotateX(值deg);

     2. transform: rotateY(值deg);

     3. transform: rotateZ(值deg);

     左手法则,坐标轴也跟着旋转

 ☞ 缩放

      1. transform: scaleX(2)

      2. transform: scaleY(2)

 ☞ 转换为立体效果:

     transform-style: preserve-3d;
动画(animation)
☞ 与过度的区别:

     1. 过度动画行为需要有用户的操作过程(鼠标悬停,点击按钮动作【js】。。。。)

     2. 今天的动画animation不需要用户的操作

☞ 语法:

1. @keyframes  自定义动画名称 {

        from {

        }

        to {

        }

    }

2. 通过动画名称调用动画集

    animation-name: 动画集名称。

3. 属性介绍:

     /* 1. 通过动画集名称调用动画 */

        animation-name: box_move;

     /* 2.设置动画执行时间 */

         animation-duration: 1s;

      /* 3. 动画默认执行次数是1次, infinite: 无限次 */

        animation-iteration-count: infinite;

     /* 4. 设置动画的速度类型:  ease ; */

       animation-timing-function: linear;

     /* 5. 设置延时执行时间 */

       animation-delay: 2s;

      /* 6. 设置动画逆播【动画怎么正着播放,倒着播放的时候也是一样的效果】 normal*/

      animation-direction: alternate;

     /* 7. 设置动画执行完后的一个状态: 让动画停在结束时候的状态 */

       animation-fill-mode: forwards;

     /* 8。 动画播放状态设置: running | paused暂停 */

       animation-play-state: paused;

4. animation复合写法:

    例如: animation: box_move 1s linear 2s alternate  forwards;

    注意:

        1. 一个元素可以同时调用多个动画集,使用逗号隔开。

         例如:

               animation:  box_move 1s,

                       one 1s linear 1s,

                       three 2s ease 5s alternate;

        2.  可以将一个完整的动画分割成若干个阶段执行

            @keyframes one {

                0% {}

                10% {}

                20% {}

                ...

                100%{}

            }

         注意:

             百分比是相对整个动画执行时间而设置的。
demo
    <style type="text/css">

        .box {

          width: 50px;

          height: 50px;

          background-color: red;

          /* 第二步: 调用动画集 */

          /* 1. 通过动画集名称调用动画 */

          animation-name: box_move;

          /* 2.设置动画执行时间 */

          animation-duration: 2s;

          /* 3. 动画默认执行次数是1次, infinite: 无限次 */

          animation-iteration-count: infinite;

          /* 4. 设置动画的速度类型:  ease ; */

          animation-timing-function: linear;

          /* 5. 设置延时执行时间 */

          animation-delay: 0.5s;

          /* 6. 设置动画逆播【动画怎么正着播放,倒着播放的时候也是一样的效果】 */

          animation-direction: alternate;

          /* 7. 设置动画执行完后的一个状态 */

          animation-fill-mode: forwards;

          animation: box_move 1s,

            one 1s linear 1s,

            three 2s ease 5s alternate;

        }

        .box:hover {

          /* 动画暂停 */

          animation-play-state: paused;

        }

        /* 第一步: 先定义个动画集(动画序列) */

        @keyframes box_move {

          /* 定义动画的开始效果(开始状态) */

          from {

            transform: translateX(0px);

          }

          /* 定义动画的结束状态 */

          to {

            transform: translateX(500px);

          }

        }

      </style>

      <div class="box"></div>

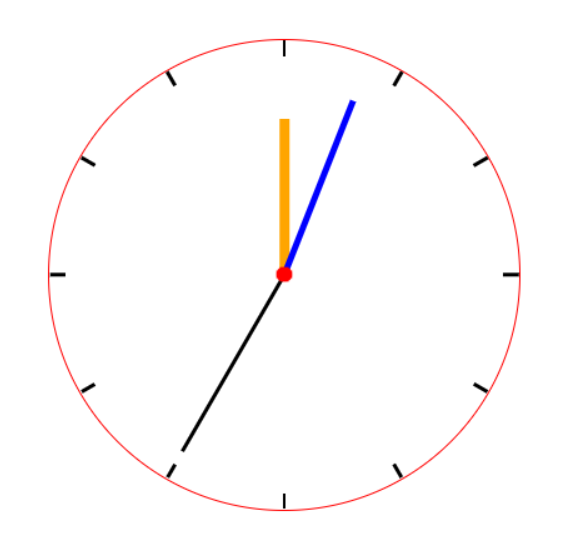
demo钟表案例
    <style type="text/css">

        .clock {

             width: 300px;

             height: 300px;

             border: 1px solid red;

             border-radius: 50%;

             margin: 100px auto;

             position: relative;

        }

        .line {

            width: 2px;

            height: 100%;

            background-color: #000;

            /* 目的为了让元素重叠到一块 */

            position: absolute;

            left: 50%;

            margin-left: -1px;

        }

        .line:nth-child(2) {

             transform: rotateZ(30deg);

        }

        .line:nth-child(3) {

             transform: rotateZ(60deg);

        }

        .line:nth-child(4) {

             transform: rotateZ(90deg);

        }

        .line:nth-child(5) {

             transform: rotateZ(120deg);

        }

        .line:nth-child(6) {

             transform: rotateZ(150deg);

        }

        .cover {

             width: 280px;

             height: 280px;

             background-color: #fff;

             border-radius: 50%;

             position: absolute;

             left: 50%;

             top: 50%;

             transform: translate(-50%, -50%);

        }

        .h {

             width: 6px;

             height: 100px;

             background-color: orange;

             position: absolute;

             left: 50%;

             top: 40px;

             transform: translate(-50%);

             /* animation: rotate 3600s linear infinite; */

        }

        .m {

             width: 4px;

             height: 120px;

             background-color: blue;

             position: absolute;

             left: 50%;

             top: 20px;

             transform: translate(-50%);

             transform-origin: bottom;

             animation: rotate 3600s linear infinite;

        }

        .s {

             width: 2px;

             height: 130px;

             background-color: #000;

             position: absolute;

             left: 50%;

             top: 10px;

             transform: translate(-50%);

             transform-origin: bottom;

             /* 注意: 设置steps的时候不能再次使用linear速度类型 */

             animation: rotate 60s steps(60) infinite;

        }

        .dotted {

             width: 10px;

             height: 10px;

             background-color: red;

             border-radius: 50%;

             position: absolute;

             left: 50%;

             top: 50%;

             transform: translate(-50%, -50%);

        }

        /* 定义动画集 */

        @keyframes rotate {

            from {

                transform:translate(-50%) rotate(0deg);

            }

            to {

                transform:translate(-50%) rotate(360deg);

            }

        }

    </style>

<div class="clock">

    <div class="line"></div>

    <div class="line"></div>

    <div class="line"></div>

    <div class="line"></div>

    <div class="line"></div>

    <div class="line"></div>

    <div class="cover">

        <div class="h"></div>

        <div class="m"></div>

        <div class="s"></div>

        <div class="dotted"></div>

    </div>

</div>
弹性布局(flex)
  ☞ 伸缩盒子设置:

       1. 如果要实现伸缩盒子布局,那么先将父元素设置为伸缩盒子

       2. 给父元素设置:display: flex;

       3. 在伸缩盒子中,具备两条轴。一条是主轴(默认是水平显示)。,另外一条是侧轴(始终要垂直于主轴)

       4. 由于在伸缩盒子中,所有的元素都是按照主轴方向显示的,所以在伸缩盒子中,所有的子元素默认都是在一行上显示。

  ☞ 设置主轴方向(flex-direction)

         row(水平显示) |  column (垂直显示)

     /* 设置主轴的方向 */

              flex-direction: row;

              flex-direction: column;

  ☞ 主轴方向对齐方式(justify-content)

            /* 设置元素在主轴的对齐方式 */

             justify-content: flex-start;

             justify-content: flex-end;

             justify-content: center;

             /* 两端对齐,中间居中自适应 */

             justify-content: space-between;

            /* 元素周围以空白环绕显示 */

             justify-content: space-around;

  ☞ 侧轴方向对齐方式(align-items)

            /* 设置元素在侧轴的对齐方式 */

            align-items: stretch;  默认值

            align-items: flex-start;

            align-items: flex-end;

            align-items: center;

  ☞ 是否换行显示(flex-wrap)

        注意:

           在伸缩盒子中,盒子默认是一行显示

             /* 控制子元素是否换行显示 */

             flex-wrap: nowrap | wrap;

  ☞ 伸缩比

      flex: 值;
网格布局(grid)
最新文章
- [Error] ld returned 1 exit status
- 接口与继承ppt作业
- Windows Azure Virtual Machine (1) IaaS用户手册
- 图解call、apply、bind的异同及各种实战应用演示
- java 使用cookie记录用户上一次访问的时间 记住 用户的 登录名
- HDU 4704
- angularjs2 学习笔记(六) Form
- 导出到Excel并且取消默认的科学计算法
- jquery定义表格宽度
- javascript的setTimeout以及setInterval休眠问题。
- 浅谈.NET的缓存(依赖和过期)
- Nodejs负载均衡:haproxy,slb以及node-slb - i5ting的个人空间 - 开源中国社区
- hadoop+eclipse集群搭建及测试
- HTTP学习实验8-windows添加telnet功能
- codeforces 622E. Ants in Leaves
- 6、Cocos2dx 3.0游戏开发的基本概念找个小三场比赛
- js 图片转换为base64 (2)
- SQL语法集合
- Android开发 打开已存在的项目(以虹软人脸识别sdk的demo为例)
- 2012 - AD 验证域控是否成功部署