Pmw大控件(二)
Pmw大控件英文名Pmw Python megawidgets
官方参考文档:Pmw 1.3 Python megawidgets
一,如何使用Pmw大控件
下面以创建一个计数器(Counter)为例说明如何使用Pmw大控件
1.初始化
from tkinter import *

import Pmw

root=Tk()

Pmw.initialise(root)
2.创建counter控件,并显示
counter1=Pmw.Counter()

counter1.pack(padx=10,pady=10)
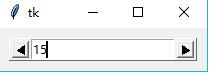
3.使用方法
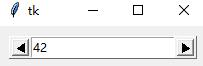
创建了大控件之后,就可以调用它的方法了。下面设置counter里的值,并使之增加
counter1.setentry(41)

counter1.increment()
4.选项
像tkinter控件一样,大控件也允许用户配置选项。选项配置允许大控件使用者指定大控件的外观和行为。counter大控件有一些可配置的选项,如,datetype,用于指定counter如何递增和递减,如按照integers,reals,times 或dates计数。默认为"numeric",表示要求输入整数并按整数递增或递减。
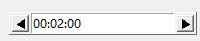
另一个选项是increment,指定递增或递减时一次递增或递减的单位。使用这些选项,你可以创建一个时间计数器,用HH:MM:SS的格式,以分钟minutes为计数单位,如:
counter2=Pmw.Counter(datatype="time",

                     increment=60)

counter2.setentry("00:00:00")

counter2.pack(padx=10,pady=10)
很多大控件选项也可以使用configure()指定,如:
counter2.configure(increment = 60 * 10)
将每次递增设置为10分钟
5.初始化选项
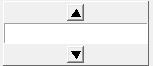
某些选项只能在创建大控件的时候设置,而不能通过调用configure()方法,但是它们仍然可以使用通常的方法查询。如,counter控件包含一个orient的初始化选项,用于指定,箭头的方向是左右方向(horizontal),还是上下方向(vertical)
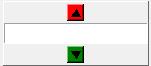
counter3=Pmw.Counter(orient="vertical")

counter3.pack()
6.查询方法
print(counter2.cget("increment"))
print(counter3.configure("orient"))

7.部件(components)
大控件由其他的部件组成,部件都有一个逻辑名,可以是一个tkinter控件,或本身也是一个大控件。Pmw提供用户直接访问部件的方法,使用component()方法
mega.component('comp').doit()(备注,作用不明)
~部件选项
有一种快速访问部件的方法,使用component_option,如下面的例子改变counter控件箭头的背景颜色,箭头部件的名字为向下箭头downarrow和向下箭头uparrow
counter3.configure(downarrow_background="green",

                  uparrow_background="red")
~hull
所有大控件都基于由Pmw基类直接创建的控件。一般的大控件是基于Tkinter Frame控件,而顶层窗口大控件,则基于Tkinter Toplevel控件。基控件可以通过hull部件访问。访问基控件可以使用hull_option,例如设置counter大控件的relief和边框宽度:
counter4=Pmw.Counter(hull_relief="sunken",

                     hull_borderwidth=5).pack()

~The interior
(略)
~子组件和别名,
组成大控件的组件自身也可能是一个大控件,那么访问组件的组件,可以使用component_sub-component方法,如counter大控件的里的entryfield本身是一个大控件,它基于名为entry的tkinter.Entry组件,所以你可以这样它的背景色
counter2.configure(entryfield_entry_background = 'yellow')

大部分组件路径名都有一个更短的别名,如entryfield_entry的是entry,所以这样做也是等效的:
counter2.configure(entry_background = 'yellow')
~改变组件的python类
每个大控件都是一些python类的实例,每个组件的默认类可以参考手册。在创建组件的时候,你可以使用pyclass选项指定它们继承的类,如:
counter5 = Pmw.Counter(

        labelpos = 'w',

        label_text = 'Hello',

        label_pyclass =Button

).pack(padx=10,pady=10)

babel默认继承自Label,这里把它改成继承Button
二,如何创建Pmw大控件
介绍如果通过继承Pmw基类的方法创建Pmw大控件
1.选项组件
我们使用Tkinter.Scale(用于允许用户在一个范围内选择一个值)和Tkinter.Frame(用户,当用户选择的值超过范围的时候,显示一个指示)创建一个大控件,它的效果看上去是这样的:
使用这个控件的程序员,在改变scale的范围的时候,需要访问scale控件。因此,scale将是大控件的一个组件。程序员可能不需要访问指示灯的Frame,但是以防万一,需要修改指示灯的边框宽度和relief,我们也把它做成一个组件。这是关于组件的一个约定:为了最大的可配置性,把所有子控件当成组件(for maximum configurability, make all sub-widgets components.)
2.选项配置
除了组件本身具有的配置选项之外,大控件也需要一些属于自己的配置选项。在这里实例中,它要一个tkreshold选项设置阈值(tkreshold),它可能也需要一个选项去设置指示灯的颜色,在选择是数字高于或低于阈值的时候。其他的,如orient或者indicatorpos用来指定组件的相对位置,margin,padx或pady去指定部件的间隔。在这个例子里,我们定义了三个选项——threshold,colors和value。其中colors选项是2个元素的序列,用来指定两种颜色(低于阈值,超过阈值),value是scale初始化的值。
3.编写大控件
首先为新的大控件取个名字,决定它继承自那个基类,以及着手写它的构造函数。大部分Pmw大控件来源于Pmw.MegaWidget,Pmw.MegaToplevel或者Pmw.Dialog,在这里我们继承Pmw.MegaWidget。大控件的构造函数有一个参数(大控件的hull的父控件,默认为root窗口),和任意数量的关键词参数。
from tkinter import *

class ThresholdScale(Pmw.MegaWidget):

    """Megawidget containing a scale and a indicator.

    """

    def __init__(self,parent=None,**kw):
接下来,我们需要定义大控件支持的选项,每个选项由一个3元素的序列指定。第一个元素是选项的名字,第二个元素是默认的值,第三个元素是一个回调函数,Pmw.INITOPT,或None。首先,函数在构造函数的结束时(在调用self.inialiseoptions期间),或调用configure设置选项时被调用。其次,Pmw.INITOPT表示该选项是一个初始化选项——它可以通过调用configure来设置。None表示选项能被configure设置,但是没有回调函数。
self.defineoptions也包含传递给构造函数的参数。当指定选项的值时,会覆盖默认的值。
        #Define the megawidget options.

        optiondefs=(

            ("color",("green","red"),None),

            ("threshold",50,None),

            ("value",None,Pmw.INITOPT))

        self.defineoptions(kw,optiondefs)
下一步,调用基类构造函数
Pmw.MegaWiget.__init__(self,parent)
接下来创建组件,子控件被创建为大控件内部的子元素或子元素下的子元素。
    #Create the indicator component.

    interior=self.interior()
第一个创建的组件是指示灯,用createcomponent方法创建子控件并且将控件注册为大控件的组件。它带五个参数加上任意数量的关键词参数。这些参数是名字(name),别名(aliases),组(group),类(class)和构造函数参数。查看Pmw.MegaArchetype reference manual获得所有细节。
    self.indicator=self.createcomponent("indicator",

                                        (),None,

                                        Frame,(interior,),

                                        width=16,

                                        height=16,

                                        borderwidth=2,

                                        relief="raised")

    self.indicator.grid()
创建scale的方法也类似,在这里,scale的value设置为选项初始化value一样的值
    self.scale=self.createcomponent("scale",

                                    (),None,

                                    Scale,(interior,),

                                    command=self.doCommand,

                                    tickinterval=20,

                                    length=200,

                                    from_=100,

                                    to=0,

                                    showvalue=0)

    self.scale.grid()
构造函数最后,调用initialiseoptions方法检查所有关键词参数被使用,并调用选项里的回调函数
    #Check keywords and initialise options.

    self.initialiseoptions()
所有其他的方法必须现在定义,在本例中,只需要一个方法
    def _doCommand(self, valueStr):

        if self.scale.get() > self['threshold']:

            color = self['colors'][1]

        else:

            color = self['colors'][0]

        self.indicator.configure(background = color)
完成大控件,来自其他类的方法可以被复制进该类
Pmw.forwardmethods(ThresholdScale, Tkinter.Scale, 'scale')
例子完成代码
import tkinter

import Pmw

class ThresholdScale(Pmw.MegaWidget):

    """ Megawidget containing a scale and an indicator.

    """

    def __init__(self, parent=None, **kw):

        # Define the megawidget options.

        optiondefs = (

            ('colors', ('green', 'red'), None),

            ('threshold', 50, None),

            ('value', None, Pmw.INITOPT),

        )

        self.defineoptions(kw, optiondefs)

        # Initialise base class (after defining options).

        Pmw.MegaWidget.__init__(self, parent)

        # Create the components.

        interior = self.interior()

        # Create the indicator component.

        self.indicator = self.createcomponent('indicator',

                                              (), None,

                                              tkinter.Frame, interior,

                                              width=16,

                                              height=16,

                                              borderwidth=2,

                                              relief='raised')

        self.indicator.grid()

        # Create the scale component.

        self.scale = self.createcomponent('scale',

                                          (), None,

                                          tkinter.Scale, interior,

                                          command=self._doCommand,

                                          tickinterval=20,

                                          length=200,

                                          from_=100,

                                          to=0,

                                          showvalue=0)

        self.scale.grid()

        value = self['value']

        if value is not None:

            self.scale.set(value)

        # Check keywords and initialise options.

        self.initialiseoptions()

    def _doCommand(self, valueStr):

        if self.scale.get() > self['threshold']:

            color = self['colors'][1]

        else:

            color = self['colors'][0]

        self.indicator.configure(background=color)

Pmw.forwardmethods(ThresholdScale, tkinter.Scale, 'scale')

# Initialise Tkinter and Pmw.

root = Pmw.initialise()

root.title('Pmw ThresholdScale demonstration')

# Create and pack two ThresholdScale megawidgets.

mega1 = ThresholdScale()

mega1.pack(side='left', padx=10, pady=10)

mega2 = ThresholdScale(

    colors=('green', 'yellow'),

    threshold=75,

    value=80,

    indicator_width=32,

    scale_width=25)

mega2.pack(side='left', padx=10, pady=10)

# Let's go.

root.mainloop()
>>

最新文章
- angularjs UI Libraries
- iOS - UITabBarController
- SYN Cookie的原理和实现
- openstack(liberty):部署实验平台(三,简单版本软件安装 之cinder,swift)
- 大家注意:升级 win8.1 火狐浏览器 谷歌浏览器 搜狗五笔输入法 都不能用啦
- 关于 unity5.3.1 录制 animation 带有 rotation 信息打包 Android 会运动错乱的问题
- Black Box
- Android音频系统之AudioFlinger(二)
- ecshop调用指定分类和个数的文章列表
- Ubutnu16.04安装pytorch
- 原生js+css实现重力模拟弹跳系统的登录页面
- day2 and day3 总结-python基础-坚持就是胜利
- 20165306 2017-2018-2《Java程序设计》课程总结
- ----这是一个register code----
- 761. Special Binary String
- android listview优化:滑动时颜色错乱问题
- Masonry 动画
- JavaScript学习总结(四)——this、原型链、javascript面向对象
- 01 - nginx - 安装、配置文件、默认网站、虚拟主机
- [Visual Studio] 重置默认设置 还原默认设置
热门文章
- 在linux上建立多个ORACLE的实例
- 2020/2/22 74cms3.5.1 代码审计
- Ubuntu安装Python版本管理工具pyenv
- QObject的timerEvent使用
- linux下安装redis,按照redis官网安装不成功需要提前安装c++环境(安装成功并可以测试)
- 第二阶段scrum-9
- 腾讯云服务器上搭建Jenkins配置邮箱通知
- yarn调度器 FairScheduler 与 CapacityScheduler
- vue学习(三)组件传值
- [ WARN ] Keyword 'Capture Page Screenshot' could not be run on failure: URLError: <urlopen error [Errno 10061] Connection refused>