RabbitMQ简单应用の简单队列
2024-10-18 22:25:31
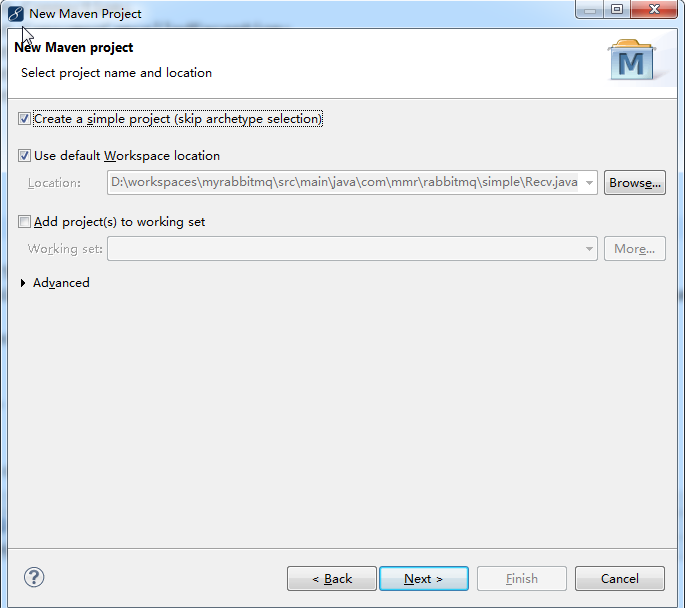
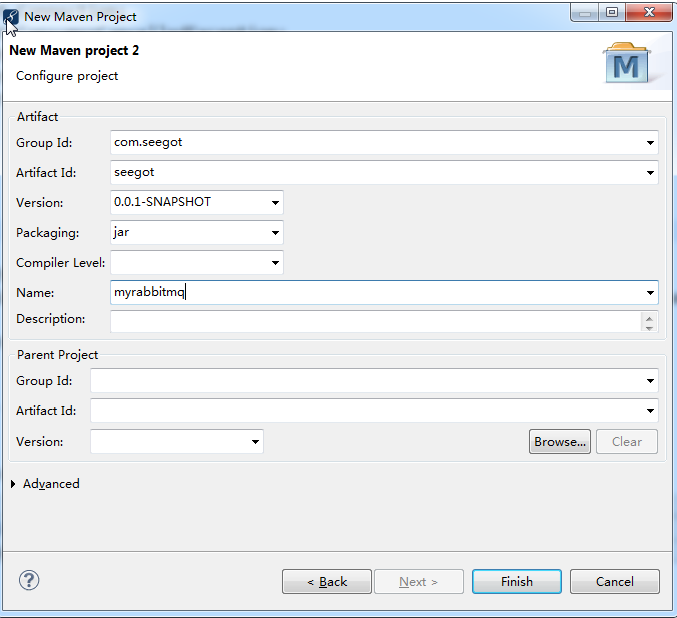
(1)首先创建一个maven项目:
pom.xml,重点是配置RabbitMQ
     <dependencies>

         <dependency>

             <groupId>junit</groupId>

             <artifactId>junit</artifactId>

             <version>4.11</version>

             <!-- 表示开发的时候引入,发布的时候不会加载此包 -->

             <scope>test</scope>

         </dependency>

         <!-- spring核心包 -->

         <dependency>

             <groupId>org.springframework</groupId>

             <artifactId>spring-core</artifactId>

             <version>${spring.version}</version>

         </dependency>

         <dependency>

             <groupId>org.springframework</groupId>

             <artifactId>spring-web</artifactId>

             <version>${spring.version}</version>

         </dependency>

         <dependency>

             <groupId>org.springframework</groupId>

             <artifactId>spring-oxm</artifactId>

             <version>${spring.version}</version>

         </dependency>

         <dependency>

             <groupId>org.springframework</groupId>

             <artifactId>spring-tx</artifactId>

             <version>${spring.version}</version>

         </dependency>

         <dependency>

             <groupId>org.springframework</groupId>

             <artifactId>spring-jdbc</artifactId>

             <version>${spring.version}</version>

         </dependency>

         <dependency>

             <groupId>org.springframework</groupId>

             <artifactId>spring-webmvc</artifactId>

             <version>${spring.version}</version>

         </dependency>

         <dependency>

             <groupId>org.springframework</groupId>

             <artifactId>spring-aop</artifactId>

             <version>${spring.version}</version>

         </dependency>

         <dependency>

             <groupId>org.springframework</groupId>

             <artifactId>spring-context-support</artifactId>

             <version>${spring.version}</version>

         </dependency>

         <dependency>

             <groupId>org.springframework</groupId>

             <artifactId>spring-test</artifactId>

             <version>${spring.version}</version>

         </dependency>

         <!-- mybatis核心包 -->

         <dependency>

             <groupId>org.mybatis</groupId>

             <artifactId>mybatis</artifactId>

             <version>${mybatis.version}</version>

         </dependency>

         <!-- mybatis/spring包 -->

         <dependency>

             <groupId>org.mybatis</groupId>

             <artifactId>mybatis-spring</artifactId>

             <version>1.2.2</version>

         </dependency>

         <!-- 导入java ee jar 包 -->

         <dependency>

             <groupId>javax</groupId>

             <artifactId>javaee-api</artifactId>

             <version>7.0</version>

         </dependency>

         <!-- 导入Mysql数据库链接jar包 -->

         <dependency>

             <groupId>mysql</groupId>

             <artifactId>mysql-connector-java</artifactId>

             <version>5.1.30</version>

         </dependency>

         <!-- 导入dbcp的jar包,用来在applicationContext.xml中配置数据库 -->

         <dependency>

             <groupId>commons-dbcp</groupId>

             <artifactId>commons-dbcp</artifactId>

             <version>1.2.2</version>

         </dependency>

         <!-- JSTL标签类 -->

         <dependency>

             <groupId>jstl</groupId>

             <artifactId>jstl</artifactId>

             <version>1.2</version>

         </dependency>

         <!-- 日志文件管理包 -->

         <!-- log start -->

         <dependency>

             <groupId>log4j</groupId>

             <artifactId>log4j</artifactId>

             <version>${log4j.version}</version>

         </dependency>

         <!-- 格式化对象,方便输出日志 -->

         <dependency>

             <groupId>com.alibaba</groupId>

             <artifactId>fastjson</artifactId>

             <version>1.1.41</version>

         </dependency>

         <dependency>

             <groupId>org.slf4j</groupId>

             <artifactId>slf4j-api</artifactId>

             <version>${slf4j.version}</version>

         </dependency>

         <dependency>

             <groupId>net.sf.json-lib</groupId>

             <artifactId>json-lib</artifactId>

             <version>2.4</version>

             <classifier>jdk15</classifier>

         </dependency>

         <!-- https://mvnrepository.com/artifact/org.apache.ant/ant -->

         <dependency>

             <groupId>org.apache.ant</groupId>

             <artifactId>ant</artifactId>

             <version>1.8.2</version>

         </dependency>

         <dependency>

             <groupId>org.slf4j</groupId>

             <artifactId>slf4j-log4j12</artifactId>

             <version>${slf4j.version}</version>

         </dependency>

         <!-- log end -->

         <!-- 映入JSON -->

         <dependency>

             <groupId>org.codehaus.jackson</groupId>

             <artifactId>jackson-mapper-asl</artifactId>

             <version>1.9.13</version>

         </dependency>

         <!-- 上传组件包 -->

         <dependency>

             <groupId>commons-fileupload</groupId>

             <artifactId>commons-fileupload</artifactId>

             <version>1.3.1</version>

         </dependency>

         <dependency>

             <groupId>commons-io</groupId>

             <artifactId>commons-io</artifactId>

             <version>2.4</version>

         </dependency>

         <dependency>

             <groupId>commons-codec</groupId>

             <artifactId>commons-codec</artifactId>

             <version>1.9</version>

         </dependency>

         <dependency>

             <groupId>net.sourceforge.jexcelapi</groupId>

             <artifactId>jxl</artifactId>

             <version>2.6.12</version>

         </dependency>

         <!-- https://mvnrepository.com/artifact/org.json/json -->

         <dependency>

             <groupId>org.json</groupId>

             <artifactId>json</artifactId>

             <version>20171018</version>

         </dependency>

         <dependency>

             <groupId>com.sun.jna</groupId>

             <artifactId>jna</artifactId>

             <version>3.0.9</version>

         </dependency>

         <dependency>

             <groupId>com.examples</groupId>

             <artifactId>examples</artifactId>

             <version>1.1.2</version>

         </dependency>

         <dependency>

             <groupId>com.rabbitmq</groupId>

             <artifactId>amqp-client</artifactId>

             <version>3.5.1</version>

         </dependency>

         <dependency>

             <groupId>org.springframework.amqp</groupId>

             <artifactId>spring-rabbit</artifactId>

             <version>1.4.5.RELEASE</version>

         </dependency>

     </dependencies>
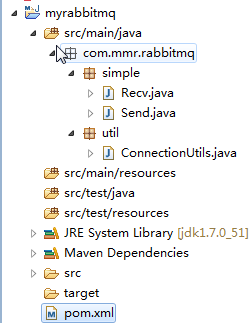
项目结构:
(1)首先创建获取MQ的链接工厂ConnectionUtils
 package com.mmr.rabbitmq.util;

 import java.io.IOException;

 import com.rabbitmq.client.Connection;

 import com.rabbitmq.client.ConnectionFactory;

 public class ConnectionUtils {

     /**

      * @desc 获取Mq 的链接

      * @author zp

      * @throws IOException

      * @date 2018-7-19

      */

     public static  Connection getConnection() throws IOException {

         // 1.定义一个链接工厂

         ConnectionFactory factroy = new ConnectionFactory();

         // 2.设置服务地址

         factroy.setHost("127.0.0.1");

         // 3.设置端口号

         factroy.setPort(5672);

         // 4.vhost  设置数据库

         factroy.setVirtualHost("vhtest");

         // 5.设置用户名

         factroy.setUsername("jerry");

         // 6. 设置密码

         factroy.setPassword("123456");

         // 7.返回链接

         return factroy.newConnection();

     }

 }
(2)其次创建消息生产者Send,这里消息生产者每发送一次消息,我们就可以通过rabbitmq(http://localhost:15672)的服务Queues进行查看
 package com.mmr.rabbitmq.simple;

 import java.io.IOException;

 import com.mmr.rabbitmq.util.ConnectionUtils;

 import com.rabbitmq.client.Channel;

 import com.rabbitmq.client.Connection;

 public class Send {

     private static final String QUEUE_NAME = "test_simple_queue";

     public static void main(String[] args) throws IOException {

         // 1.获取一个链接

         Connection connection = ConnectionUtils.getConnection();

         // 2.获取一个通道

         Channel channel = connection.createChannel();

         // 3.创建队列 创建队列声明

         channel.queueDeclare(QUEUE_NAME, false, false, false, null);

         //

         String msg = "hello simple";

         channel.basicPublish("", QUEUE_NAME, null, msg.getBytes());

         System.out.println("---send msg :"+msg);

         channel.close();

         connection.close();

     }

 }
(3)最后创建消息消费者Recv,这里我们通过while循环可以获取每次rabbitmq(http://localhost:15672)的服务Queues接收到消息(方法一)
 package com.mmr.rabbitmq.simple;

 import java.io.IOException;

 import com.mmr.rabbitmq.util.ConnectionUtils;

 import com.rabbitmq.client.Channel;

 import com.rabbitmq.client.Connection;

 import com.rabbitmq.client.ConsumerCancelledException;

 import com.rabbitmq.client.QueueingConsumer;

 import com.rabbitmq.client.QueueingConsumer.Delivery;

 import com.rabbitmq.client.ShutdownSignalException;

 /**

  * @desc 消费者获取消息

  * @author zp

  * @date 2018-7-19

  */

 public class Recv {

     private static final String QUEUE_NAME = "test_simple_queue";

     public static void main(String[] args) throws IOException, ShutdownSignalException, ConsumerCancelledException, InterruptedException {

         // 获取链接

         Connection  connection = ConnectionUtils.getConnection();

         // 创建通道

         Channel channel = connection.createChannel();

         // 定义队列消费者

         QueueingConsumer consumer = new QueueingConsumer(channel);

         // 监听队列

         channel.basicConsume(QUEUE_NAME, true, consumer);

         while (true) {

             Delivery delivery = consumer.nextDelivery();// 下一个到达的

             String msgString = new String(delivery.getBody());

             System.out.println("[recv] msg:"+msgString);

         }

     }

 }
(3)最后创建消息消费者Recv,这里我们通过while循环可以获取每次rabbitmq(http://localhost:15672)的服务Queues接收到消息(方法二)
 package com.mmr.rabbitmq.simple;

 import java.io.IOException;

 import com.mmr.rabbitmq.util.ConnectionUtils;

 import com.rabbitmq.client.Channel;

 import com.rabbitmq.client.Connection;

 import com.rabbitmq.client.ConsumerCancelledException;

 import com.rabbitmq.client.DefaultConsumer;

 import com.rabbitmq.client.Envelope;

 import com.rabbitmq.client.QueueingConsumer;

 import com.rabbitmq.client.AMQP.BasicProperties;

 import com.rabbitmq.client.QueueingConsumer.Delivery;

 import com.rabbitmq.client.ShutdownSignalException;

 /**

  * @desc 消费者获取消息

  * @author zp

  * @date 2018-7-19

  */

 public class Recv {

     private static final String QUEUE_NAME = "test_simple_queue";

     public static void main(String[] args) throws IOException{

         // 获取链接

         Connection connection = ConnectionUtils.getConnection();

         // 获取通道

         Channel channel = connection.createChannel();

         // 队列声明

         channel.queueDeclare(QUEUE_NAME, false, false, false, null);

         // 定义消费者

         DefaultConsumer consumer = new DefaultConsumer(channel){

             // 获取到到达的消息

             @Override

             public void handleDelivery(String consumerTag, Envelope envelope,

                     BasicProperties properties, byte[] body) throws IOException {

                 // TODO Auto-generated method stub

                 //super.handleDelivery(consumerTag, envelope, properties, body);

                 String msg = new String(body,"utf-8");

                 System.out.println("new api recv:"+msg);

             }

         };

         // 监听队列

         channel.basicConsume(QUEUE_NAME, true,consumer);

     }

 }
这样一个简单的队列应用就完成了。

最新文章
- ubuntu14.04下安装node.js
- Uva442 hdu 1082 Matrix Chain Multiplication
- List,Set,Map用法以及区别(转)
- nginx配置文件重写url不带index.php
- sql 截取字符串第一次出现字符之前的数据
- 【LeetCode】66 & 67- Plus One & Add Binary
- 【Unity3D】Unity3D之 Resources.Load 动态加载资源
- C#.NET开发ActiveX控件
- Objective-c初始化和便利构造
- 使用GetLogicalProcessorInformation获取逻辑处理器的详细信息(NUMA节点数、物理CPU数、CPU核心数、逻辑CPU数、各级Cache)
- 对于JDBC数据库的初始化操作
- elasticSearch安装 Kibana安装 Sense安装
- T-SQL 数值函数
- Golang 容器和不同header的解析
- Android GridView使用View.GONE只隐藏内容而不隐藏空间的解决方案
- Windows7下Java运行时环境搭建
- 编写VBA宏生成页面
- 如何用Elasticsearch实现类似SQL中的IN查询实例
- 【jdbc】【c3p0】c3p0三种配置方式【整理】
- shell特殊字符汇总【转】