使用Maven插件构建Spring Boot应用程序镜像
2024-10-16 14:26:11
使用Maven插件构建Spring Boot应用程序的Docker镜像。
环境准备
1.Linux系统
2.安装JDK,Maven
3.安装Docker
应用实践
1.在应用程序根目录下添加Dockerfile文件
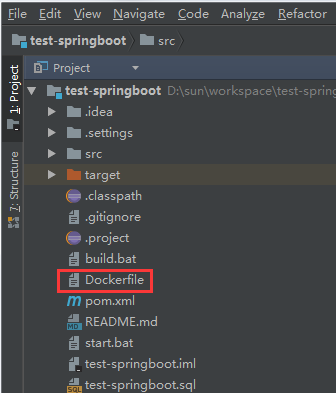
并在Dockerfile中编辑构建内容:
FROM openjdk:8-jdk-alpine

VOLUME /tmp

ARG JAR_FILE

COPY ${JAR_FILE} app.jar

ENTRYPOINT ["java","-Djava.security.egd=file:/dev/./urandom","-jar","/app.jar"]
2.在项目pom.xml中添加docker镜像构建插件dockerfile-maven-plugin
<build>

    <plugins>

        <!-- 使用Maven插件直接将应用打包为一个Docker镜像 -->

        <plugin>

            <groupId>com.spotify</groupId>

            <artifactId>dockerfile-maven-plugin</artifactId>

            <version>1.3.6</version>

            <configuration>

                <repository>${docker.image.prefix}/${project.artifactId}</repository>

                <buildArgs>

                    <JAR_FILE>target/${project.build.finalName}.jar</JAR_FILE>

                </buildArgs>

            </configuration>

        </plugin>

    </plugins>

</build>
显然,在插件dockerfile-maven-plugin中配置了2个参数:
<repository>:指定镜像仓库信息及镜像名称,如:springio/test-springboot<buildArgs>:设置构建参数,该参数可以直接在Dockerfile中使用(但是必须在Dockerfile使用ARG指令声明)
3.执行构建
在Spring Boot应用根目录下执行构建:
mvn install dockerfile:build
将会看到如下构建日志:
...

[INFO] Building Docker context /home/chench/workspace/java/test-springboot

[INFO]

[INFO] Image will be built as springio/test-springboot:latest

[INFO]

[INFO] Step 1/5 : FROM openjdk:8-jdk-alpine

[INFO]

[INFO] Pulling from library/openjdk

[INFO] Image ff3a5c916c92: Pulling fs layer

[INFO] Image 5de5f69f42d7: Pulling fs layer

[INFO] Image fd869c8b9b59: Pulling fs layer

[INFO] Image 5de5f69f42d7: Downloading

[INFO] Image 5de5f69f42d7: Verifying Checksum

[INFO] Image 5de5f69f42d7: Download complete

[INFO] Image ff3a5c916c92: Downloading

[INFO] Image fd869c8b9b59: Downloading

[INFO] Image ff3a5c916c92: Verifying Checksum

[INFO] Image ff3a5c916c92: Download complete

[INFO] Image ff3a5c916c92: Extracting

[INFO] Image ff3a5c916c92: Pull complete

[INFO] Image 5de5f69f42d7: Extracting

[INFO] Image 5de5f69f42d7: Pull complete

[INFO] Image fd869c8b9b59: Verifying Checksum

[INFO] Image fd869c8b9b59: Download complete

[INFO] Image fd869c8b9b59: Extracting

[INFO] Image fd869c8b9b59: Pull complete

[INFO] Digest: sha256:e82316151c501a2a0f73b3089da8dc867816470a464fcb191db9f88c2343ad53

[INFO] Status: Downloaded newer image for openjdk:8-jdk-alpine

[INFO]  ---> 224765a6bdbe

[INFO] Step 2/5 : VOLUME /tmp

[INFO]

[INFO]  ---> Running in 99fc0b2bbcf7

[INFO] Removing intermediate container 99fc0b2bbcf7

[INFO]  ---> 74c89740c46e

[INFO] Step 3/5 : ARG JAR_FILE

[INFO]

[INFO]  ---> Running in 54d9bf00c9c6

[INFO] Removing intermediate container 54d9bf00c9c6

[INFO]  ---> 81d324efe92b

[INFO] Step 4/5 : COPY ${JAR_FILE} app.jar

[INFO]

[INFO]  ---> f11354b41c33

[INFO] Step 5/5 : ENTRYPOINT ["java","-Djava.security.egd=file:/dev/./urandom","-jar","/app.jar"]

[INFO]

[INFO]  ---> Running in 74d40fc4f99c

[INFO] Removing intermediate container 74d40fc4f99c

[INFO]  ---> fbc5e8d75beb

[INFO] Successfully built fbc5e8d75beb

[INFO] Successfully tagged springio/test-springboot:latest

[INFO]

[INFO] Detected build of image with id fbc5e8d75beb

[INFO] Building jar: /home/chench/workspace/java/test-springboot/target/test-springboot-0.0.1-dev-docker-info.jar

[INFO] Successfully built springio/test-springboot:latest

[INFO] ------------------------------------------------------------------------

[INFO] BUILD SUCCESS

[INFO] ------------------------------------------------------------------------

[INFO] Total time: 02:41 min

[INFO] Finished at: 2018-05-07T10:41:05+08:00

[INFO] Final Memory: 47M/132M

[INFO] ------------------------------------------------------------------------
从构建日志中可以很清晰地看到,一开始下载Maven的依赖配置,随后就开始使用Dockerfile中的构建指令定制镜像,并且将项目根路径作为构建上下文。
另外,在项目的target目录下将会生成一个名为docker的目录:
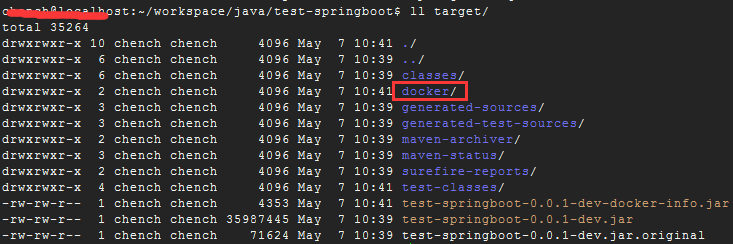
在该docker目录下存在如下几个文件:image-id,image-name,repository,tag,其中保存的就是最新构建出来的镜像信息。

构建完毕之后查看在本地镜像仓库是否存在对应镜像:
$docker image ls

REPOSITORY                 TAG                 IMAGE ID            CREATED             SIZE

springio/test-springboot   latest              fbc5e8d75beb        49 seconds ago      138MB
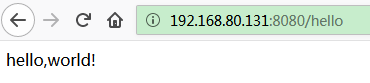
4.验证镜像是否正确
$docker run --name test-springboot -d -p 8080:8080 springio/test-springboot

438246b5f8e8ed7808b3127ed8fce867cd162f050135369c02f09cb2cdc8d49d

$docker container ps

CONTAINER ID        IMAGE                      COMMAND                  CREATED             STATUS              PORTS                    NAMES

438246b5f8e8        springio/test-springboot   "java -Djava.securit…"   5 seconds ago       Up 4 seconds        0.0.0.0:8080->8080/tcp   test-springboot
而且,还可以直接在docker run命令中传递环境变量设置Spring Boot应用程序的运行环境,如:-e "SPRING_PROFILES_ACTIVE=test"。
$docker run --name test-springboot-env2 -e "SPRING_PROFILES_ACTIVE=test" -p 8080:8080 -d springio/test-springboot
5.将镜像推送到仓库
有2种方式可以实现将构建好的Spring Boot应用程序镜像推送到镜像仓库:
(1)构建完毕之后手动推送
mvn dockerfile:push
(2)配置Maven插件在构建完毕之后自动推送
<!-- 使用Maven插件直接将应用打包为一个Docker镜像 -->

<plugin>

    <groupId>com.spotify</groupId>

    <artifactId>dockerfile-maven-plugin</artifactId>

    <version>1.3.6</version>

    <configuration>

        <repository>${docker.image.prefix}/${project.artifactId}</repository>

        <buildArgs>

            <JAR_FILE>target/${project.build.finalName}.jar</JAR_FILE>

        </buildArgs>

    </configuration>

    <!-- 镜像构建完毕之后自动推送到仓库 -->

    <executions>

        <execution>

            <id>default</id>

            <phase>install</phase>

            <goals>

                <goal>build</goal>

                <goal>push</goal>

            </goals>

        </execution>

    </executions>

</plugin>
注意事项
1.可以使用Maven插件便捷地构建Spring Boot应用程序的Docker镜像,但是最核心的还是如何编写Dockerfile构建脚本。
2.在使用Maven插件构建Spring Boot应用程序镜像时,会使用应用程序根路径作为构建上下文。
【参考】
https://spring.io/guides/gs/spring-boot-docker/
最新文章
- javascript中Date对象的应用——简易日历的实现
- matlab中图像显示函数
- JSON.stringify()的使用--将string转换成json
- Python闭包与javascript闭包比较
- vss搭建于操作
- 懒猫们终究要付出代码(本领是一生的),鲸鱼们的短视(逐小利而暴死)——这么说我应该只去互联网公司:IM,云存储,邮箱(别的一概不考虑)
- 间隔Ns请求某函数并且有timeout
- Java基础(5)- 输出输入
- hive的join
- nodejs开发辅助工具nodemon
- Perl的子程序
- TensorFlow从入门到理解(三):你的第一个卷积神经网络(CNN)
- ArrayList和LinkedList的区别以及优缺点
- #科委外文文献发现系统——导出word模板1.0
- (转)eclipse下配置tomcat7的几个重要问题,值得一看
- (转)Maven学习总结(二)——Maven项目构建过程练习
- 获得assets文件夹中文件内容
- Linux信号机制
- hive SQL 字母大小写转换
- 工作总结 EntityFramework中出现DateTime2异常的完美解决办法