springmvc和activemq的整合使用
1、简介:ActiveMQ 是Apache出品,最流行的,能力强劲的开源消息总线。ActiveMQ 是一个完全支持JMS1.1和J2EE 1.4规范的 JMS Provider实现,尽管JMS规范出台已经是很久的事情了,但是JMS在当今的J2EE应用中间仍然扮演着特殊的地位。
2、建议在使用以前了解一下jms的一些知识
3、第一步:我们部署相关的activemq(我这里是采用自己本地linux虚拟机来实现的,以模拟中间推送消息的原理)
activemq下载地址:http://archive.apache.org/dist/activemq/我用的是目前最新的5.14.5版本

这里有这个zip的是windows用的,tar.gz的是Linux用的。我这里采用的Linux部署

将activemq的tar解压启动
启动方式在:
/root/apache-activemq-5.14./bin/linux-x86-
启动:./activemq start 暂停: ./activemq stop 重启:./activemq restart
启动起来后,访问地址为:http://192.168.5.10:8161/admin 账号密码:都是admin(默认)
开机自启:vi /etc/rc.local 然后在末尾加入
su - root -c '/usr/local/activemq/bin/activemq start'

这样整个activemq就部署好了,因为activemq是单独的项目,启动过后不用再理会
4、第二步:Java代码实现,具体项目的配置
1)导包:pom.xml
<project xmlns="http://maven.apache.org/POM/4.0.0" xmlns:xsi="http://www.w3.org/2001/XMLSchema-instance" xsi:schemaLocation="http://maven.apache.org/POM/4.0.0 http://maven.apache.org/xsd/maven-4.0.0.xsd">

  <modelVersion>4.0.0</modelVersion>

  <groupId>com.troy</groupId>

  <artifactId>activemq</artifactId>

  <version>0.0.1-SNAPSHOT</version>

  <packaging>war</packaging>

  <dependencies>

      <dependency>

      <groupId>org.springframework</groupId>

      <artifactId>spring-webmvc</artifactId>

      <version>3.2.8.RELEASE</version>

    </dependency>

    <dependency>

      <groupId>org.apache.activemq</groupId>

      <artifactId>activemq-spring</artifactId>

      <version>5.14.5</version>

    </dependency>

    <dependency>

      <groupId>org.springframework</groupId>

      <artifactId>spring-jms</artifactId>

      <version>3.2.8.RELEASE</version>

    </dependency>

  </dependencies>

</project>
2)根据相关jar的属性进行xml的配置
(1)配置activemq的连接spring-config.properties
activemq_url=tcp://192.168.5.10:61616

activemq_username=admin

activemq_password=admin
(2)配置相关的activeMQ
<?xml version="1.0" encoding="UTF-8"?>

<beans xmlns="http://www.springframework.org/schema/beans"

    xmlns:xsi="http://www.w3.org/2001/XMLSchema-instance"

    xmlns:context="http://www.springframework.org/schema/context"

    xmlns:jdbc="http://www.springframework.org/schema/jdbc"

    xmlns:jee="http://www.springframework.org/schema/jee"

    xmlns:tx="http://www.springframework.org/schema/tx"

    xmlns:aop="http://www.springframework.org/schema/aop"

    xmlns:mvc="http://www.springframework.org/schema/mvc"

    xmlns:util="http://www.springframework.org/schema/util"

    xmlns:jpa="http://www.springframework.org/schema/data/jpa"

    xmlns:amq="http://activemq.apache.org/schema/core"

    xmlns:jms="http://www.springframework.org/schema/jms"

    xsi:schemaLocation="

        http://www.springframework.org/schema/beans http://www.springframework.org/schema/beans/spring-beans-3.2.xsd

        http://www.springframework.org/schema/context http://www.springframework.org/schema/context/spring-context-3.2.xsd

        http://www.springframework.org/schema/jdbc http://www.springframework.org/schema/jdbc/spring-jdbc-3.2.xsd

        http://www.springframework.org/schema/jee http://www.springframework.org/schema/jee/spring-jee-3.2.xsd

        http://www.springframework.org/schema/tx http://www.springframework.org/schema/tx/spring-tx-3.2.xsd

        http://www.springframework.org/schema/data/jpa http://www.springframework.org/schema/data/jpa/spring-jpa-1.3.xsd

        http://www.springframework.org/schema/aop http://www.springframework.org/schema/aop/spring-aop-3.2.xsd

        http://www.springframework.org/schema/mvc http://www.springframework.org/schema/mvc/spring-mvc-3.2.xsd

        http://www.springframework.org/schema/util http://www.springframework.org/schema/util/spring-util-3.2.xsd

        http://www.springframework.org/schema/jms http://www.springframework.org/schema/jms/spring-jms-4.0.xsd

        http://activemq.apache.org/schema/core http://activemq.apache.org/schema/core/activemq-core-5.14.5.xsd

        ">

    <context:annotation-config/>

    <context:component-scan base-package="com.troy"/>

    <!-- 读取配置文件 -->

    <bean id="propertyPlaceholderConfigurer" class="org.springframework.beans.factory.config.PropertyPlaceholderConfigurer">

        <property name="locations">

            <array>

                <value>classpath:conf/spring-config.properties</value>

            </array>

        </property>

    </bean>

    <!-- 连接 activemq-->

    <amq:connectionFactory id="amqConnectionFactory" brokerURL="${activemq_url}" userName="${activemq_username}" password="${activemq_password}"/>

    <!-- 这里可以采用连接池的方式连接PooledConnectionFactoryBean -->

    <bean id="connectionFactory" class="org.springframework.jms.connection.CachingConnectionFactory">

        <!-- 配置连接 -->

        <property name="targetConnectionFactory" ref="amqConnectionFactory"/>

        <!-- 会话的最大连接数 -->

        <property name="sessionCacheSize" value="100"/>

    </bean>

    <!-- 定义消息队列topic类型,queue的方式差不多 -->

    <bean id="topic" class="org.apache.activemq.command.ActiveMQTopic">

        <!-- 定义名称 -->

        <constructor-arg index="0" value="topic"/>

    </bean>

    <!-- 配置JMS模板(topic),Spring提供的JMS工具类,它发送、接收消息。 -->

    <!-- 为了测试发送消息,保留jmsTemplate的配置,实际不存在发送,只需要配置监听即可 -->

    <bean id="jmsTemplate" class="org.springframework.jms.core.JmsTemplate">

        <property name="connectionFactory" ref="connectionFactory"/>

        <property name="defaultDestination" ref="topic"/>

        <!-- 非pub/sub模型(发布/订阅),true为topic,false为queue -->

        <property name="pubSubDomain" value="true"/>

    </bean>

    <!-- 监听方式,这种方式更实用,可以一直监听消息 -->

    <bean id="topicMessageListen" class="com.troy.activemq.TopicMessageListen"/>

    <bean id="defaultMessageListenerContainer" class="org.springframework.jms.listener.DefaultMessageListenerContainer">

        <property name="connectionFactory" ref="connectionFactory"/>

        <!-- 注册activemq名称 -->

        <property name="destination" ref="topic"/>

        <property name="messageListener" ref="topicMessageListen"/>

    </bean>

</beans>
3)代码层面我谢了两个:方便测试
(1)一个是监听接口获取数据(TopicMessageListen)
public class TopicMessageListen implements MessageListener{

    public void onMessage(Message message) {

        System.out.println("监听==================监听");

        try {

            System.out.println(message);

            TextMessage tm = (TextMessage)(message);

            System.out.println(tm.getText());

        } catch (Exception e) {

            e.printStackTrace();

        }

    }

}
因为我们在配置文件里面加入了监听,这里只需要实现MessageListener接口就可以了,然后在处理message信息
(2)发送消息(TopicSendMessage)
public class TopicSendMessage {

    private  ApplicationContext ac = new ClassPathXmlApplicationContext("classpath:spring/spring-mvc.xml");

    private  JmsTemplate jmsTemplate = (JmsTemplate) ac.getBean("jmsTemplate");

    public void send(){

        jmsTemplate.send(new MessageCreator() {

            public Message createMessage(Session session) throws JMSException {

                TextMessage msg = session.createTextMessage();

                msg.setText("发送数据++++++++++++发送数据");

                System.out.println("发送数据++++++++++++发送数据");

                return msg;

            }

        });

    }

    public void receive(){

        Message msg = jmsTemplate.receive();

        TextMessage tm = (TextMessage)msg;

        System.out.println("非监听------------------非监听");

        System.out.println(msg);

    }

    public static void main(String[] args) {

        new TopicSendMessage().send();

    }

}
说明:发送数据的方式基本上大同小异通过获取jmsTemplate来实现发送的操作,因为我没有直接启动容器,所以采用获取bean的方式
接收上面没有运行,因为接收的这个receive()方法是同步运行的,会卡线程这里不做演示,我通过启动两个方式测试可以成功的,但是不建议这种方式
(3)展示结果:
(4)activemq的简单使用和配置方式就才不多这么多
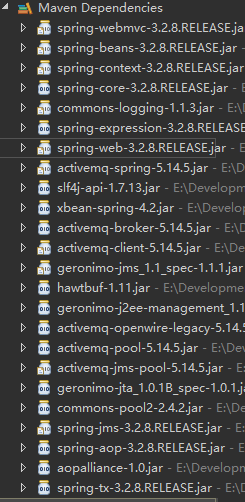
5、我的项目结构

最新文章
- Mysql的视图、存储过程、函数、索引全解析
- [Qt5] How to connect c++ with QML
- 硬盘安装win2003
- BizTalk开发系列(七) Hello World2
- [MyBean-插件]MyBean通用报表免费无限制版本发布
- 守护进程和inetd超级服务器
- Python开发【第一篇】Python基础之函数递归
- net user命令
- Python新手学习基础之数据类型——字符串的切片截取
- HDU 2517 / POJ 1191 棋盘分割 区间DP / 记忆化搜索
- Archives for the category: Fisheye/Crucible
- VS2012以后版本MFC程序发布记录,支持XP
- R语言-逻辑回归建模
- SQL SERVER 字符串按数字排序
- Chrome 插件PPAPI 开发(一)环境搭建
- 对flexbox伸缩概念的深入浅出解释
- Codeforces 1139D Steps to One dp
- 学习Hibenate随笔
- windows系统中hosts文件位置
- LCT摘要