IDEA创建一个Spring MVC 框架Java Web项目,Gradle构建
2024-08-25 10:22:50
注:此篇有些细节没写出,此文主要写重要的环节和需要注意的地方,轻喷
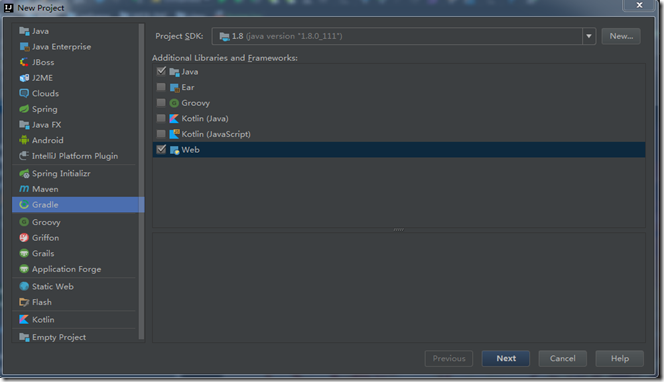
新建项目
选择Gradle , 勾选java 和 web。之后就是设定项目路径和名称,这里就不啰嗦了。
build.gradle文件下导入所需要的包,刷新一下。
  1 group 'com.benjious.createTest'

  2 version '1.0-SNAPSHOT'

  3

  4 apply plugin: 'java'

  5 apply plugin: 'war'

  6

  7 sourceCompatibility = 1.8

  8

  9 repositories {

 10     mavenCentral()

 11 }

 12

 13 dependencies {

 14     testCompile group: 'junit', name: 'junit', version: '4.11'

 15     testCompile group: 'junit', name: 'junit', version: '4.12'

 16

 17

 18     compile'org.springframework:spring-context:4.3.6.RELEASE'

 19     compile'org.springframework:spring-webmvc:4.3.6.RELEASE'

 20     compile'org.springframework:spring-test:4.3.6.RELEASE'

 21 }

 22
目录结构
设置项目结构
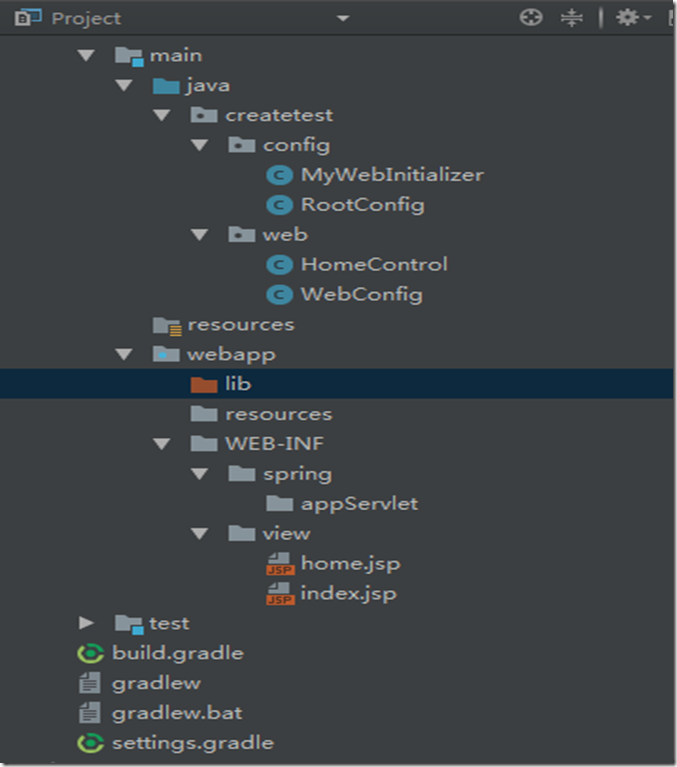
贴出各个类的代码
  1 public class MyWebInitializer extends AbstractAnnotationConfigDispatcherServletInitializer {

  2

  3     @Override

  4     protected Class<?>[] getRootConfigClasses() {

  5         return new Class[]{RootConfig.class};

  6     }

  7

  8     @Override

  9     protected Class<?>[] getServletConfigClasses() {

 10         return new Class[]{WebConfig.class};

 11     }

 12

 13     @Override

 14     protected String[] getServletMappings() {

 15         return new String[] { "/" };

 16     }

 17 }

 18
  1 //exclude : 过滤掉

  2 @Configuration

  3 @ComponentScan(basePackages = {"createtest"},excludeFilters = {@ComponentScan.Filter(type = FilterType.ANNOTATION,value = EnableWebMvc.class)})

  4 public class RootConfig {

  5

  6 }

  7
  1 @Configuration

  2 @EnableWebMvc

  3 @ComponentScan("createtest.web")

  4 public class WebConfig extends WebMvcConfigurerAdapter {

  5

  6

  7     @Bean

  8     public ViewResolver viewResolver() {

  9         InternalResourceViewResolver resolver = new InternalResourceViewResolver();

 10         resolver.setPrefix("/WEB-INF/view/");

 11         resolver.setSuffix(".jsp");

 12         return resolver;

 13     }

 14

 15

 16     @Override

 17     public void configureDefaultServletHandling(DefaultServletHandlerConfigurer configurer) {

 18         configurer.enable();

 19     }

 20

 21 }
  1 @Controller

  2 public class HomeControl {

  3

  4     @RequestMapping("/home")

  5     public String home() {

  6         return "home";

  7     }

  8

  9 }
  1 <%@ page contentType="text/html;charset=UTF-8" language="java" %>

  2 <html>

  3 <head>

  4     <title>Home</title>

  5 </head>

  6 <body>

  7 <p>home界面</p>

  8 </body>

  9 </html>
配置Tomcat
首先配置好Tomcat ,下面是配置好的界面
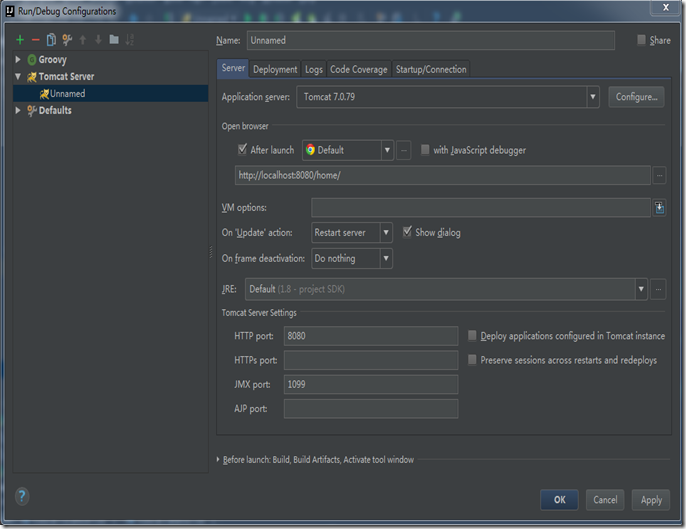
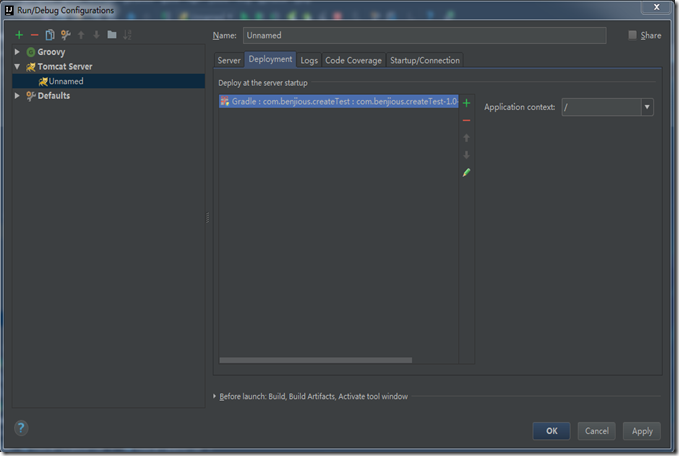
运行项目, 访问 http://localhost:8080/home/
这里需要的是在配置 Tomcat 中,设置 Application Context ,例如 Application Context 为 “/home ” ,那么 该项目的服务器的根地址为 :
http://localhost:8080/home/ , 那么要显示 home.jsp 界面应该为: http://localhost:8080/home/home .
参考:
- 《Sring in Action 》Spitrr 项目
- Spring Example
最新文章
- 怎么使用jquery判断一个元素是否含有一个指定的类(class)
- POJ3207+tarjan+2-sat
- 【HDOJ】3560 Graph’s Cycle Component
- 几款开源的图形化Redis客户端管理软件推荐
- 解决selenium 启动ie浏览器报错:Unexpected error launching Internet Explorer. Protected Mode settings are not the same for all zones
- jquery设置select选中
- 实例甜点 Unreal Engine 4迷你教程(1)之如何用C++将纹理绘制在UserWidget的Image小部件上
- 【转】宽带路由器应用(三)—ARP欺骗防护功能的使用
- 【NOIP 2016】Day1 T2 天天爱跑步
- spring获取jdbc链接底层原理
- Suse系统中不使用SFTP的话,还可以使用lrzsz。
- python学习笔记——multiprocessing 多进程中的重构方法__init__
- [mysql] 随机查询 效率比较
- Python实现自动登录/登出校园网网关
- install phalcon on mac with XAMPP
- [CentOS]使用yum命令报出Error: Cannot retrieve repository metadata (repomd.xml) for repository的解决方法
- 【.Net】Socket小示例
- 解决因为链表过长,sql查询慢的问题
- Qt 学习之路 2(39):遍历容器
- C#实现打印