HTML5 VUE单页应用 SEO 优化之 预渲染(prerender-spa-plugin)
前言:当前 SPA 架构流行的趋势如日中天,前后端分离的业务模式已经成为互联网开发的主流方式,但是 单页面 应用始终存在一个痛点,那就是 SEO,
对于那些需要推广,希望能在百度搜索时排名靠前的网站而言,使用单页面应用的是无法被 百度的 蜘蛛 爬到的,为此,众多流行的 MVVM 框架都推出了
很多解决方案,有官方的也有三方的,VUE也不例外,本文章就来分享一下 vue-cli 结合 prerender-spa-plugin 插件这种预渲染的 SEO 优化解决方案
1,使用 vue-cli 创建一个项目,安装依赖 并启动 (如果不会使用脚手架创建项目或 对 VUE 框架不太熟的,建议先系统学习 VUE 基础部分在看该文章)
vue init webpack vue-prerender

cd vue-prerender

npm install

npm run dev
2,脚手架创建的项目默认会给我们 一个 名称为 HelloWorld.vue 的主键,我们将其内容修改为
<style scoped="scoped">

</style>

<template>

    <div class="hello">

        <router-link to="/test">/test</router-link>

    </div>

</template>

<script>

    export default {

        name: 'HelloWorld',

        data() {

            return {}

        }

    }

</script>
3,我们在创建一个名为 Test.vue 的组建,内容如下
<style scoped="scoped">

</style>

<template>

    <div class="test">

        <router-link to="/">回到首页</router-link>

    </div>

</template>

<script type="text/javascript">

    export default {

        name: "Test",

        data() {

            return {}

        }

    }

</script>
4,修改 src/router/index.js 路由文件如下,特别注意这里要将 mode 设置为 history 模式,目前预渲染只支持该种模式
import Vue from 'vue'

import Router from 'vue-router'

import HelloWorld from '../components/HelloWorld'

import Test from '../components/Test'

Vue.use(Router)

export default new Router({

    mode: 'history',

    routes: [

        {

            path: '/',

            name: 'HelloWorld',

            component: HelloWorld

        },

        {

            path: '/test',

            name: 'Test',

            component: Test

        }

    ]

})
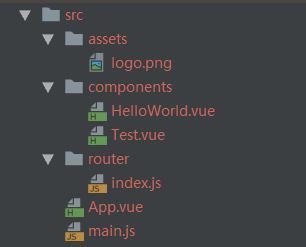
5,这样我们就实现了两个互相跳转的路由,我们可以 使用 npm run dev 命令启动项目测试一下 (src 目录结构如下)
6,测试无误后,我们下载预加载插件 prerender-spa-plugin
npm install prerender-spa-plugin -D
7,我们修改 build/webpack.prod.conf.js 配置文件,将预渲染插件加入进去 (我们一般会将网站的首页 和 一些变动不大的页面做预渲染,变动频繁的页面不适合改插件)
const PrerenderSpaPlugin = require('prerender-spa-plugin')

plugins: [

        // 配置 prerender-spa-plugin 预渲染插件

        // 生成文件的路径,此处需要与 webpack 打包地址一致,所以直接使用 config.build.assetsRoot

        // 数组为 需要预渲染的 路由,基本上是首页或者 变动不大的列表页等等,目前只支持 h5 history 方式

        new PrerenderSpaPlugin(

            path.join(config.build.assetsRoot),

            ['/', '/test']

        ),

       ......
8,完成上面的步骤我们就可以开始编译项目了
npm run build
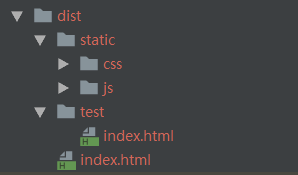
9,编译后的 dist 目录结构如下,其中 index.html 对应路由 '/', test/index.html 对应路由 '/test',我们可以打开看看,里面的内容很多
10,注意,不要直接把 index.html 拖动到浏览器访问,那样会有路径的问题,我们可以搭建一个静态服务器来测试打包后的项目是否有效
11,我们本着一事不烦二主的原则,就直接使用 node 的 express 框架 搭建一个静态服务器做测试使用
npm i express -D
12,我们在项目根目录下创建一个脚本 server.js,内容如下
const path = require('path')

const express = require('express')

const app = express();

app.use(express.static(path.join(__dirname, 'dist')))

app.listen(8080)
13,我们在 package.json 文件中添加启动脚本,下面代码标红的部分为 添加的内容
"scripts": {

    "dev": "webpack-dev-server --inline --progress --config build/webpack.dev.conf.js",

    "start": "npm run dev",

    "build": "node build/build.js",

    "server": "node server.js"

  },
14,启动静态服务器
npm run server
15,在浏览器中输入 localhost:8080 访问打包生成后的页面,一切 OK

16,优缺点分析
优点:简单易上手,相对于一些需要服务器渲染的方式如 vue 官方的 vue-ssr,该方法最终将代码打包成静态资源,可以部署到任何服务器上,不依赖于服务器就能满足 SEO 的要求
缺点:只支持 h5 history,并且不太适合变动较频繁的页面
最新文章
- tomcat远程部署应用
- struts2 中属性驱动(其实就是struts2 action 中处理 request 的参数【old 方式servlet api 封装数据到javabean中(or beanutils)】),这里属性驱动是新方式
- fancybox iframe 刷新父页面(项目经验)
- hiho_1049 二叉树遍历
- 邮件发送工具类 SendMail.java
- 实现IHttpModule接口,给每个页面输出一段脚本
- 在sql-server上建立mysql链接库
- Xcode5 编译ffmpeg,arm64版本;H264
- BFS zoj 1649
- chapter11_1 Lua数组、列表
- WPF中的imagesource 和内存图片的处理
- c++学习笔记---04---从另一个小程序接着说
- 对图片进行索引,存入数据库sqlite3中,实现快速搜索打开
- Flink开发环境搭建(maven)
- python基础--windows环境下 安装python2和python3
- python技巧 计算字符串中字母出现的次数并取出最大
- 运行java程序的方法-DOS命令和Eclipse方法
- SSO集成方案[随笔]
- SpringBoot与Docker1
- Could not find a package configuration file provided by "ecl_build",.................couldn't find required component 'ecl_build'
热门文章
- httprunner学习4-variables变量声明与引用
- 20180516模拟赛T1——queen
- GitHub & GitHub Desktop能帮我们做什么
- 【Spark】ScalaIDE运行spark,A master URL must be set in your configuration
- Sitemap Error : XML declaration allowed only at the start of the document解决方法
- React.js Tutorial: React Component Lifecycle
- Educational Codeforces Round 47 (Rated for Div. 2) G. Allowed Letters
- 22-1 web传输视频 Opencv+usb摄像头 树莓派+Flask实现视频流媒体WEB服务器
- linux学习14 Linux运维高级系统应用-glob通配及IO重定向
- word2vector的tensorflow代码实现