基于Keras实现mnist-官方例子理解
2024-08-27 08:58:45
前言
久闻keras大名,最近正好实训,借着这个机会好好学一下。
首先推荐一个API,可能稍微有点旧,但是写的是真的好
https://keras-cn.readthedocs.io/en/latest/
还有一个tensorflow的API
https://www.w3cschool.cn/tensorflow_python/?
还有强烈推荐使用vscode+anaconda 配置环境
环境
安装anaconda和vscode,在conda中新建keras的环境。
conda create -n keras python=3.6

pip install tensorflow # 如果有GPU改为pip install tensorflow-gpu

pip install keras
正题
mnist是入门级别的数据集,是一个基本的分类数据集。这次尝试构造深度神经网络来构造一个图像分类器。
import keras
from keras.datasets import mnist
import numpy as np
from PIL import Image
import matplotlib.pyplot as plt
from keras.models import Sequential
from keras.layers import Dense,Conv2D,MaxPooling2D,Flatten
import cv2
import matplotlib
matplotlib.use('TkAgg')
batch_size=32
num_classes=10
(train_images,train_labels),(test_images,test_labels) = mnist.load_data()
print(train_images.shape,train_labels.shape)
print(test_images.shape,test_labels.shape)
"""
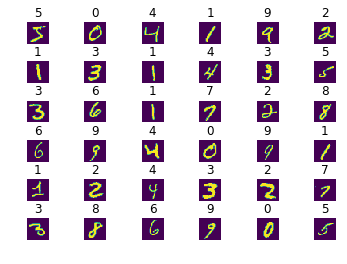
将数据集中图片展示出来
"""
def show_mnist(train_image,train_labels):
n = 3
m = 3
fig = plt.figure()
for i in range(n):
for j in range(m):
plt.subplot(n,m,i*n+j+1)
#plt.subplots_adjust(wspace=0.2, hspace=0.8)
index = i * n + j #当前图片的标号
img_array = train_image[index]
img = Image.fromarray(img_array)
plt.title(train_labels[index])
plt.imshow(img,cmap='Greys')
plt.show()
img_row,img_col,channel = 28,28,1
mnist_input_shape = (img_row,img_col,1)
#将数据维度进行处理
train_images = train_images.reshape(train_images.shape[0],img_row,img_col,channel)
test_images = test_images.reshape(test_images.shape[0],img_row,img_col,channel)
train_images = train_images.astype("float32")
test_images = test_images.astype("float32")
## 进行归一化处理
train_images /= 255
test_images /= 255
# 将类向量,转化为类矩阵
# 从 5 转换为 0 0 0 0 1 0 0 0 0 0 矩阵
train_labels = keras.utils.to_categorical(train_labels,num_classes)
test_labels = keras.utils.to_categorical(test_labels,num_classes)
"""
构造网络结构
"""
model = Sequential()
model.add(Conv2D(32,kernel_size=(3,3),
activation="relu",
input_shape=mnist_input_shape))
# kernalsize = 3*3 并没有改变数据维度
model.add(Conv2D(16,kernel_size=(3,3),
activation="relu"
))
model.add(MaxPooling2D(pool_size=(2,2)))
# 进行数据降维操作
model.add(Flatten())#Flatten层用来将输入“压平”,即把多维的输入一维化,
#常用在从卷积层到全连接层的过渡。Flatten不影响batch的大小。
model.add(Dense(32,activation="relu"))
#全连接层
model.add(Dense(num_classes,activation='softmax'))
"""
编译网络模型,添加一些超参数
"""
model.compile(loss=keras.losses.categorical_crossentropy,
optimizer=keras.optimizers.Adadelta(),
metrics=['accuracy'])
model.fit(train_images,
train_labels,
batch_size=batch_size,
epochs=5,
verbose=1,
validation_data=(test_images,test_labels),
shuffle=True
)
score = model.evaluate(test_images,test_labels,verbose=1)
print('test loss:',score[0])
print('test accuracy:',score[1])
其中涉及到几个keras中的点,感觉看完以后很透彻,但是这只是初步应用,之后还会继续再写的。
jupyter notebook 版本的请访问:https://github.com/pprp/keras-example/tree/master/implement/mnist_keras/
欢迎访问我的Github:https://www.github.com/pprp/ star fork 感激不尽
最新文章
- Neural Style学习3——操作
- 使用Expression Tree构建动态LINQ查询
- 20160622001 GridView 删除列 用模板实现删除时提示确认框
- [转]C# WinForm动态调用远程Web服务
- 一个新人对JavaScript的内容简单介绍
- tensor
- HTML(Open Method)翻译自MSDN
- hiho_1067_最近公共祖先2
- NOIP2009解题报告
- 5个最顶级jQuery图表类库插件-Charting plugin
- MySQL Date 函数
- UVA 524
- iOS开发-自动布局和自动旋转
- 二十六、Jcreator使用初步
- 探究绑定事件的this指向以及event传参的小问题
- 关于JQuery获取宽度和高度在chrome和IE下的不同
- hdoj 1285 确定比赛名次 【拓扑排序】
- ifconfig中lo、eth0、br0、wlan0接口
- 安装MySQL5.7.19 网上的文章参考 并做了部分修改
- 自定义AXI-IP核(转)