Centos下的GitLab的安装汉化和数据备份以及管理员密码重置
前言:
安装版本:gitlab-ce-8.8.5-ce.1.el7.x86_64.rpm
下载地址: https://mirrors.tuna.tsinghua.edu.cn/gitlab-ce/yum/el7/gitlab-ce-8.8.5-ce.1.el7.x86_64.rpm
汉化包:gitlabhq-8.8.5.zh1.tar.gz
下载地址:https://github.com/larryli/gitlabhq.git
安装包和汉化包的版本需要一致
安装:
[root@localhost ~]#ls
gitlab-ce-8.8.5-ce.1.el7.x86_64.rpm
[root@localhost ~]# rpm -ivh gitlab-ce-8.8.5-ce.1.el7.x86_64.rpm #安装
Preparing...################################# [100%]
Updating / installing...
1:gitlab-ce-8.8.5-ce.1.el7 ################################# [100%]
gitlab: Thank you for installing GitLab!
gitlab: To configure and start GitLab, RUN THE FOLLOWING COMMAND:
sudo gitlab-ctl reconfigure #配置并启动gitlab
gitlab: GitLab should be reachable at http://linux-node1 默认的访问地址
gitlab: Otherwise configure GitLab for your system by editing /etc/gitlab/gitlab.rb file #gitlab的配置文件,修改之后需要重新gitlab-ctl reconfigure
gitlab: And running reconfigure again.
gitlab:
gitlab: For a comprehensive list of configuration options please see the Omnibus GitLab readme
gitlab: https://gitlab.com/gitlab-org/omnibus-gitlab/blob/master/README.md
gitlab:
It looks like GitLab has not been configured yet; skipping the upgrade script.
修改配置文件:
[root@localhost ~]#vim /etc/gitlab/gitlab.rb #修改配置文件
external_url '自己的IP地址'
[root@localhost ~]#gitlab-ctl reconfigure #配置并启动gitlab
测试:
再浏览器中输入本机IP地址:
故障:
gitlab本身采用80端口,如安装前服务器有启用80,安装完访问会报错。需更改gitlab的默认端口。
修改vim /etc/gitlab/gitlab.rb:
external_url 'http://localhost:90'
如果就想用80端口,那没问题。如果更改了端口,后边可以自行调整nginx配置文件进行nginx反向代理设置。
这里可以绑定自己的gitlab的域名或者公网、内网IP替换localhost进行公网访问,具体根据自己的实际情况。安全起见,一般会将gitlab部署于内网。具体部署到哪里,请根据自己的实际情况来定。(基于安全原因,这里不建议设置公网IP进行暴露,可以通过nginx设置IP绑定进行return或者其他规则进行IP回避访问。)
unicorn本身采用8080端口,如果你那里没有8080使用,可以后边不用修改了。如安装前服务器有启用8080,安装完访问会报错。需更改unicorn的默认端口:
修改
/etc/gitlab/gitlab.rb:
unicorn['listen'] = '127.0.0.1'
unicorn['port'] = 3000
每次重新配置,都需要执行sudo gitlab-ctl reconfigure 使之生效。日志位置:/var/log/gitlab 可以进去查看访问日志以及报错日志等,供访问查看以及异常排查。
gitlab-ctl tail #查看所有日志
gitlab-ctl tail nginx/gitlab_access.log #查看nginx访问日志
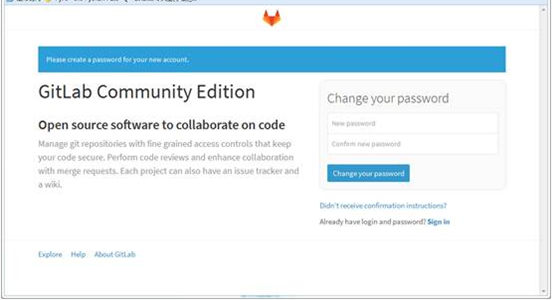
第一次登录要求设置root密码
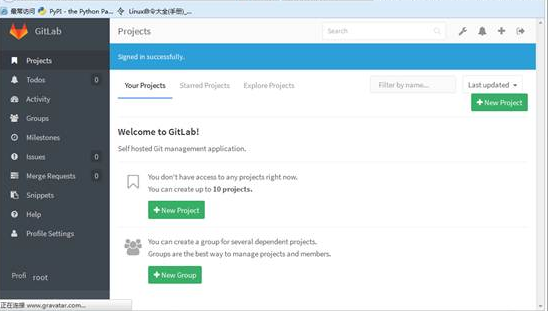
登录成功之后,是这样的
汉化:【如不清楚gitlab版本以及git,请不要操作,否则gitlab瘫痪!建议运维人员或者对gitlab比较熟悉的人操作】
[root@localhost ~]#tar xf gitlabhq-8.8.5.zh1.tar.gz
[root@localhost ~]# cp -r /opt/gitlab/embedded/service/gitlab-rails{,.ori}
[root@localhost ~]#gitlab-ctl stop
ok: down: gitlab-workhorse: 1s, normally up
ok: down: logrotate: 0s, normally up
ok: down: nginx: 0s, normally up
ok: down: postgresql: 1s, normally up
ok: down: redis: 0s, normally up
ok: down: sidekiq: 0s, normally up
ok: down: unicorn: 0s, normally up
[root@localhost ~]#\cp -rf /root/gitlabhq/* /opt/gitlab/embedded/service/gitlab-rails/ # gitlabhq为解压的文件名
cp: cannot overwrite non-directory ‘/opt/gitlab/embedded/service/gitlab-rails/log’ with directory ‘/root/gitlabhq/log’
cp: cannot overwrite non-directory ‘/opt/gitlab/embedded/service/gitlab-rails/tmp’ with directory ‘/root/gitlabhq/tmp’
错误忽略,因为之前登陆过,设置了root密码
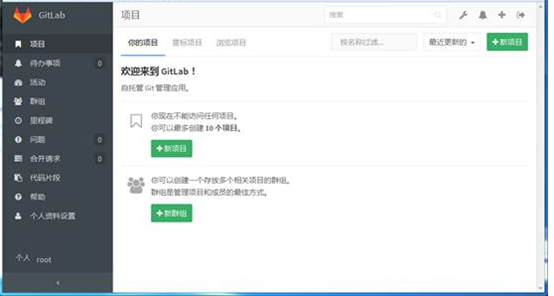
汉化完成效果:
数据迁移:
备份:
手动备份gitlab
gitlab-rake gitlab:backup:create
这里要特别说明,如果 /etc/gitlab/gitlab.rb 配置了参数“backup_path”(例如gitlab_rails['backup_path'] = '/backup'),则备份的目录就是该目录下(/backup/);
如果没有配置参数“backup_path”,则gitlab把备份文件生成到默认目录/var/opt/gitlab/backups
定时自动备份gitlab(本地)
定时备份的思路建立在手动的基础上,通过crontab添加定时计划就可以解决这个问题。
一般添加定时计划可以有2种方式:
1.使用命令crontab -e,将定时任务添加后保存。
2.将定时任务添加到/etc/crontab文件中。
我这里采取第一种,使用crontab -e。
crontab -e
我设计一天备份2次,分别在每天12:00、19:00,故我添加下面的内容,并保存
0 12 * * * /opt/gitlab/bin/gitlab-rake gitlab:backup:create
0 19 * * * /opt/gitlab/bin/gitlab-rake gitlab:backup:create
重启crontab
systemctl restart crond
但是仅仅实现自动备份还是不够,备份如果不能及时清理硬盘的空间很快会不够用,同时也要能够自动清理不需要人工花时间在这一块
自动清理
这一块由于gitlab已经支持,我就走简单的方案,配置gitlab来实现自动清理功能。
vim /etc/gitlab/gitlab.rb
将其中backup_keep_time的配置取消注释,根据需要设置自动清理多少天前的备份,我这里是设置备份保留7天(7*3600*24=604800),保存。
gitlab_rails['backup_keep_time'] = 604800
重新加载gitlab的配置文件
gitlab-ctl reconfigure
恢复数据:
停止相关数据连接服务
gitlab-ctl stop unicorn
gitlab-ctl stop sidekiq

错误:
PG::ConnectionBad: could not connect to server: No such file or directory。上网查了一圈,发现这篇文章的解决方案有点像。遗憾的是,按照文章中的说法,不能解决问题。无奈之下,发现有gitlab-psql命令,运行gitlab-psql help,输出和gitlab-ctl reconfigure的类似:Is the server running locally and accepting connections on Unix domain socket “/var/opt/gitlab/postgresql/.s.PGSQL.5432?这个错误输出就比较清晰:postgresql没有运行。
运行gitlab-ctl start postgresql,再执行gitlab-ctl reconfigure。postgresql的错误顺利解决,接着出现redis的错误:No such file or directory – connect(2) for /var/opt/gitlab/redis/redis.socket。参考postgresql的问题,解决起来也非常轻松:先执行gitlab-ctl start redis,然后再执行gitlab-ctl reconfigure。配置成功
从指定时间戳的备份恢复(backups目录下有多个备份文件时):
sudo gitlab-rake gitlab:backup:restore BACKUP=1500809139
从默认备份恢复(backups目录下只有一个备份文件时):
sudo gitlab-rake gitlab:backup:restore
启动Gitlab
sudo gitlab-ctl start
sudo gitlab-ctl reconfigure
有些情况,恢复后能够正常登陆,但当进入具体项目时出现500错误,查看日志 /srv/gitlab/logs/gitlab-rails/production.log 发现以下错误
|
OpenSSL::Cipher::CipherError (bad decrypt):
app/models/project.rb:456:in `import_url'
app/models/project.rb:486:in `external_import?'
app/models/project.rb:478:in `import?'
app/models/project.rb:494:in `import_in_progress?'
app/controllers/projects_controller.rb:93:in `show'
lib/gitlab/middleware/go.rb:16:in `call'
|
这是gitlab迁移的一个缺陷,不知道后面版本有没有修复,修复方法如下:
1 找到旧gitlab配置的db_key_base,网友说在 /etc/gitlab/gitlab-secrets.json里,然而我们的却没有这个文件,但这并不妨碍我们找到它,在旧gitlab安装目录执行下
|
find ./ -name *.yml | xargs grep "db_key_base"
|
|
find ./ -name *.json | xargs grep "db_key_base"
|
无论是json还是yml,总能搜索它,我们的是在 安装路径/apps/gitlab/htdocs/config/secrets.yml里,将值覆盖新gitlab中 /srv/gitlab/config/gitlab-secrets.json里的db_key_base值。
2 在容器里执行
|
gitlab-rails runner "Project.where.not(import_url: nil).each { |p| p.import_data.destroy if p.import_data }"
|
执行完再试下,500错误没了,项目可以正常访问了!
卸载gitlab
停止gitlab
sudo gitlab-ctl stop
卸载gitlab
sudo rpm -e gitlab-ce
查看gitlab进程
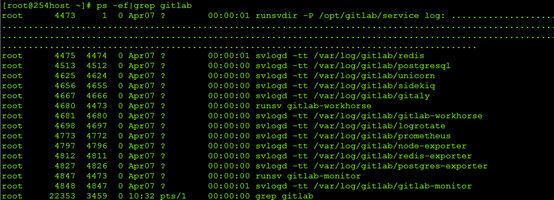
杀掉第一个守护进程
kill -9 4473
再次查看gitlab进程是否存在
删除gitlab文件
find / -name gitlab|xargs rm -rf 删除所有包含gitlab的文件及目录
删除gitlab-ctl uninstall时自动在root下备份的配置文件

通过以上几步就可以彻底卸载gitlab
GitLab忘记管理员密码:
gitlab-rails console production
Loading production environment (Rails 4.1.1)
irb(main):001:0> user = User.where(id:1).first
irb(main):002:0> user.password='66668888'
irb(main):003:0> user.save!
=> true
#成功会反回true
GitLab的常用命令:
维护命令
查看状态
sudo gitlab-ctl status
启停
# 启动Gitlab所有组件
sudo gitlab-ctl start
# 停止Gitlab所有组件
sudo gitlab-ctl stop
# 重启Gitlab所有组件
sudo gitlab-ctl restart
最新文章
- MVC 缓存
- pycharm 启动后一直更新index的问题
- csuoj 1115: 最短的名字
- Redis基本操作-20150608
- HDU 4821 String hash
- ecshop标签大全
- ISO-7816-1-2-3协议
- 18、MySQL内存体系架构及参数总结
- I - Tunnel Warfare - hdu 1540(区间合并更新)
- 使用Kotlin开发Android应用(I):简单介绍
- HTML解析HtmlAgilityPack
- redis cluster中添加删除重分配节点例子
- Jenkins集成taffy进行自动化测试并输出测试报告
- CSS 三条横线等分
- UOJ#219/BZOJ4650 [NOI2016]优秀的拆分 字符串 SA ST表
- C#调用接口注意要点 socket,模拟服务器、客户端通信 在ASP.NET Core中构建路由的5种方法
- vue组件知识点
- 安装.NET Framework 3.5
- 怎样在centos安装python-mysql?
- js基本数据类型 BigInt 和 Number 的区别