孟老板 ListAdapter封装, 告别Adapter代码 (三)
- BaseAdapter系列
- ListAdapter封装, 告别Adapter代码 (一)
- ListAdapter封装, 告别Adapter代码 (二)
- ListAdapter封装, 告别Adapter代码 (三)
- ListAdapter封装, 告别Adapter代码 (四)
- Paging3 系列
ListAdapter封装 (三) - 多条目, 头尾, 嵌套, 单多选.
前言:
上一篇文章已经讲解 SimpleAdapter 的基本封装. 这次我们将用 ConcatAdapter 封装头尾, 并封装多类型Adapter, 嵌套RecycleView, 单多选Adapter;
目录:
- 用 ConcatAdapter 封装头尾;
- 用泛型, 改建 BaseAdapter
- 多条目 MultipleAdapter
- 嵌套 NestedAdapter
- 单选 SingleChoice
- 多选 MultipleChoice
1.用 ConcatAdapter 封装头尾;
题外话: 博主之前学 ListAdapter 的时候, 为封装头尾可费了老劲 [撇嘴] ;
一开始用多条目类型, 汇总条目数的方式; 然后 头是出来了,但是首次刷列表会自动滚到底??? 博主四眼懵逼. 也没找到原因;
然后 博主改用假实体的方式, 单独设置头尾对象, 重写 submitList 带上头尾实体计算. 最终Ok, 想的是MVVM对 position不是太敏感了. 然后出现了 ConcatAdapter [鼓掌]
1.1 ConcatAdapter 顺序的连接其他 Adapter:
ConcatAdapter 是 recyclerview: 1.2.0-alpha 04 中提供的一个新组件;
它可以帮我们顺序地组合多个 Adapter,并让它们显示在同一个 RecyclerView 中。
想了解小伙伴 点这里
recyclerview = '1.2.0'

implementation androidx.recyclerview:recyclerview:${recyclerview}
1.2 思路:
以前我们头尾是单独 ViewType; 现在呢,它们变成了单独的 Adapter; 所以, 现在要创建 单条目的Adapter
EndAdapter: 只有一个条目, 也不需要绑定数据, View由Activity或Fragment控制;
EndHolder: 继承 ViewHolder, 传递View即可
/**

 * 头尾 Adapter;   View由外部 维护;

 */
class EndAdapter(val view: View) : RecyclerView.Adapter<EndHolder>(){

    override fun onCreateViewHolder(parent: ViewGroup, viewType: Int) = EndHolder(view)

    override fun onBindViewHolder(holder: EndHolder, position: Int) {}

    override fun getItemCount() = 1

}

class EndHolder(itemView: View) : RecyclerView.ViewHolder(itemView)
1.3 在我们的 BaseAdapter加入:
withHeaderAndFooter() 传入头尾View 就OK了;
/**
 * 组装头尾, 返回一个新的 ConcatAdapter 实体, 需要将新实体设置给 RecycleView
 */
fun withHeaderAndFooter(
    header: View? = null,
    footer: View? = null
) = when{
        header != null && footer != null -> ConcatAdapter(EndAdapter(header), this, EndAdapter(footer))
        header != null && footer == null -> ConcatAdapter(EndAdapter(header), this)
        header == null && footer != null -> ConcatAdapter(this, EndAdapter(footer))
        else -> this
    }
1.4 使用:
只需要将 withHeaderAndFooter() 返回的 Adapter 赋给 RecycleView即可, 我们还是操作 主Adapter
val headBinding = ViewHeaderTjBinding.inflate(LayoutInflater.from(mActivity), mView as @Nullable ViewGroup, false)

//主数据 Adapter

mAdapter = MultipleAdapter()

//将这个由 withHeaderAndFooter() 返回的 ConcatAdapter 赋给 RecycleView 即可

val mmAdapter = mAdapter.withHeaderAndFooter(headBinding.root)

mDataBind.rvRecycle.let {

    it.layoutManager = LinearLayoutManager(mActivity)

    it.adapter = mmAdapter

}
2. BaseAdapter 改造, 传入实体泛型;
2.1 首先 DiffCallback 必须要用泛型改造;
class DiffCallback<T : BaseItem>: DiffUtil.ItemCallback<T>() {

    /**

     * 比较两个条目对象  是否为同一个Item

     */

    override fun areItemsTheSame(oldItem: T, newItem: T): Boolean {

        return oldItem === newItem

    }

    /**

     * 再确定为同一条目的情况下;  再去比较 item 的内容是否发生变化;

     * 我们使用 状态标识方式判断;

     * @return true: 代表无变化;  false: 有变化;

     */

    override fun areContentsTheSame(oldItem: T, newItem: T): Boolean {

        return !oldItem.hasChanged

    }

}
2.2 在 BaseAdapter 中加入方便本地操作的 增删改 方法; 最终代码如下
abstract class BaseAdapter<T: BaseItem>(

    protected val handler: BaseHandler? = null) :

    ListAdapter<T, NewViewHolder>(DiffCallback()) {

    override fun onBindViewHolder(holder: NewViewHolder, position: Int) {

        holder.bind(getItem(position))

    }

    /**

     * 重写 提交数据方法, 让它必定以新数据集合对象传入

     */

    override fun submitList(list: MutableList<out T>?) {

        val newData = mutableListOf<T>()

        if(list != null){

            newData.addAll(list)

        }

        super.submitList(newData)

    }

    /**

     * 删除指定条目

     */

    fun remove(entity: BaseItem){

        removeAt(currentList.indexOf(entity))

    }

    fun removeAt(position: Int){

        if(position == -1) return

        if(position >= currentList.size) return

        val newData = mutableListOf<T>()

        newData.addAll(currentList)

        newData.removeAt(position)

        super.submitList(newData)

    }

    /**

     * 修改指定条目

     */

    fun update(entity: T){

        updateAt(currentList.indexOf(entity))

    }

    fun updateAt(position: Int){

        if(position == -1) return

        if(position >= currentList.size) return

        notifyItemChanged(position)

    }

    /**

     * 新增条目

     */

    fun insert(entity: T, position: Int = -1){

        val newData = mutableListOf<T>()

        newData.addAll(currentList)

        if(position < newData.size && position >= 0){

            newData.add(position, entity)

        }else{

            newData.add(entity)

        }

        super.submitList(newData)

    }

    /**

     * 组装头尾, 返回一个新的 ConcatAdapter 实体, 需要将新实体设置给 RecycleView

     */

    fun withHeaderAndFooter(

        header: View? = null,

        footer: View? = null

    ) = when{

            header != null && footer != null -> ConcatAdapter(EndAdapter(header), this, EndAdapter(footer))

            header != null && footer == null -> ConcatAdapter(EndAdapter(header), this)

            header == null && footer != null -> ConcatAdapter(this, EndAdapter(footer))

            else -> this

        }

}
2.3 SimpleAdapter 只需要改成 继承 BaseAdapter<BaseItem> 即可;
open class SimpleAdapter(

    private val layout: Int,

    handler: BaseHandler? = null

) : BaseAdapter<BaseItem>(handler)
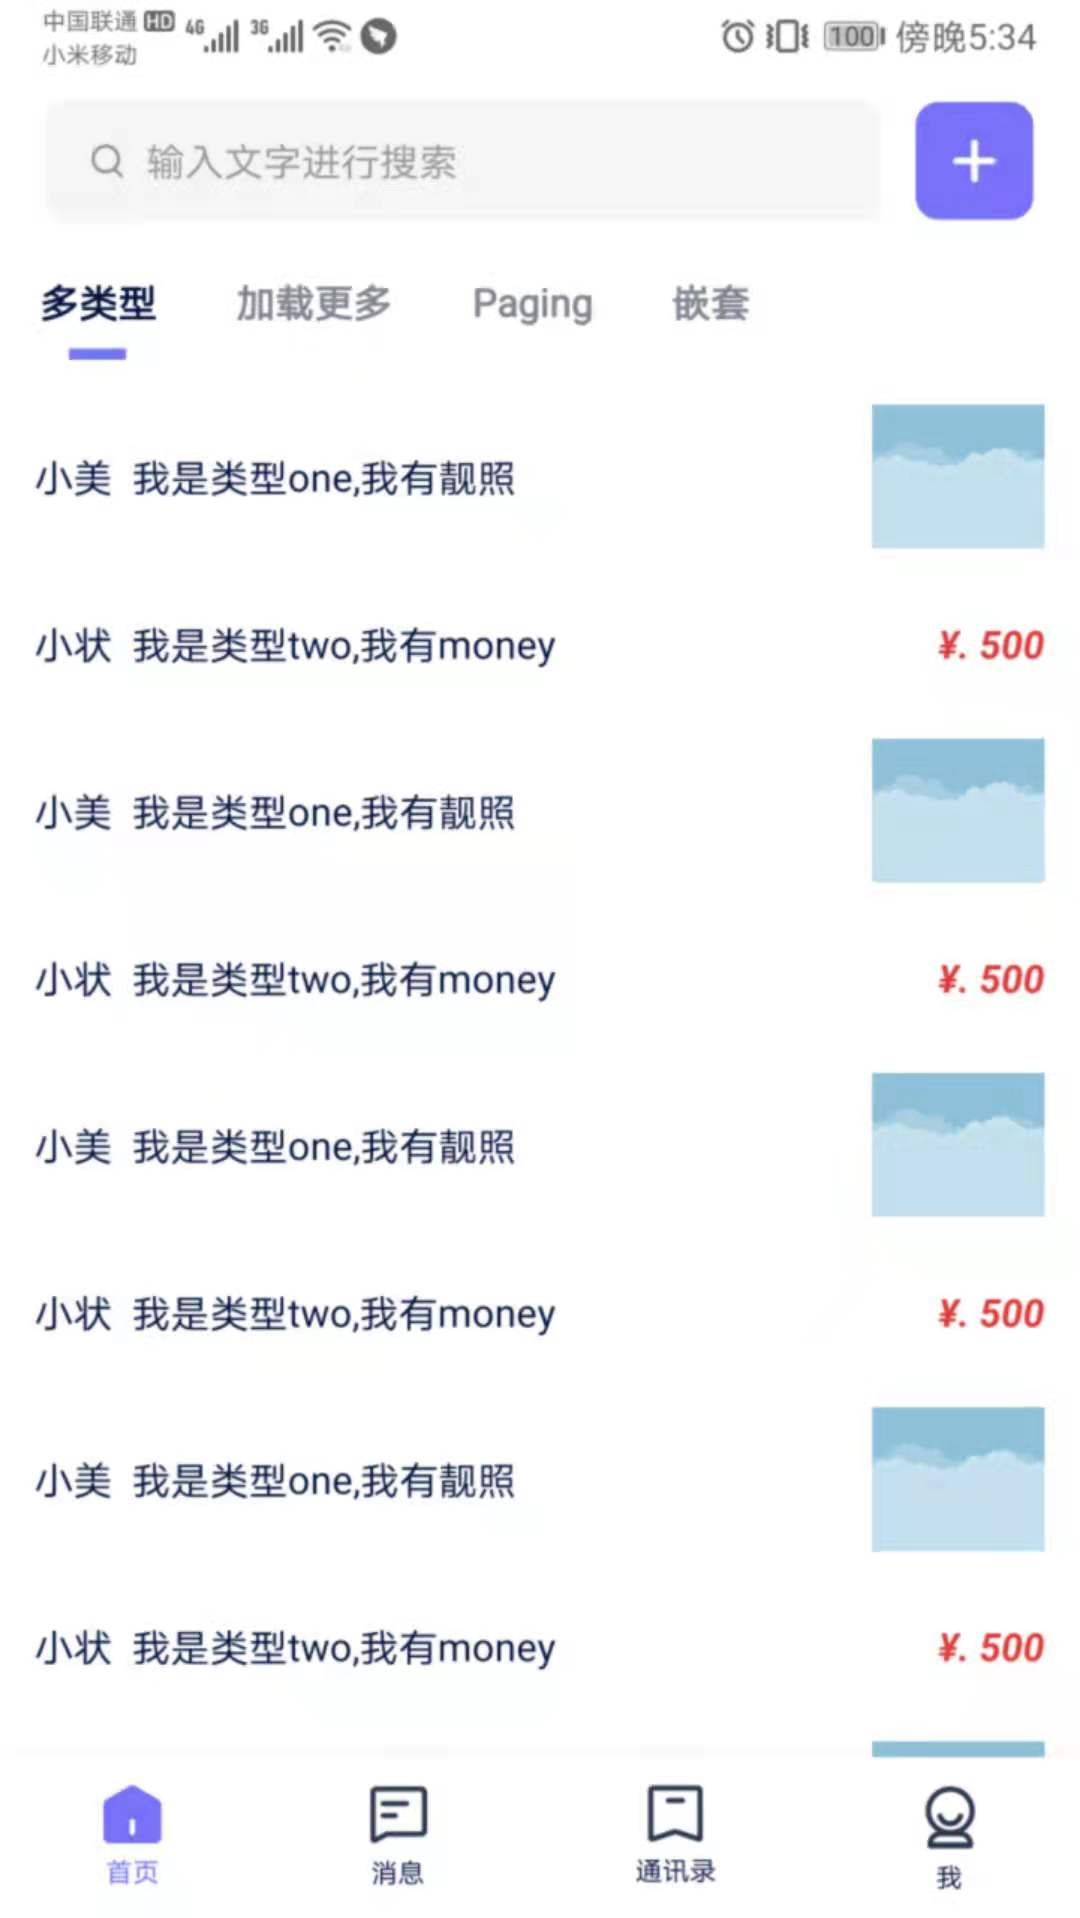
3. 多条目类型 MultipleAdapter
多类型其实是很简单的, 还是重写 getItemViewType();
有区别的是, getItemViewType() 的返回值, 直接返回 布局文件ID. 然后实体类自行判断给出 LayoutId
3.1 实体类:
还是实现 BaseItem, 重写 getMItemType() , 返回布局文件 ID
class MultipleEntity(

    var name: String,

    var index: Int = 0,

    override var hasChanged: Boolean = false)

    : BaseItem {

    /**

     * 实体类自行判断, 并给出 布局id

     */

    override fun getMItemType(): Int {

        return if(index % 2 == 0){

            R.layout.item_multiple_one

        }else{

            R.layout.item_multiple_two

        }

    }

}
3.2 MultipleAdapter:
需要重写 getItemViewType() 并将实体类的 getMItemType() 结果返回;
创建 ViewHolder 的时候, 直接用 viewType 作为布局ID (因为我们用布局ID做的ViewType)
/**

 * 多条目 类型 Adapter;

 * 1.实体类需要重写  {@link BaseItem} 的 getMItemType() 方法; 并根据类型,返回不同的 LayoutId

 * 2.复杂 Adapter. 还需要自定义;  继承 MultipleAdapter 并重写 getItemViewType()

 */

open class MultipleAdapter(handler: BaseHandler? = null) :

    BaseAdapter<BaseItem>(handler) {

    /**

     * Item类型, 同 layoutId;

     */

    override fun getItemViewType(position: Int): Int {

        return currentList[position].getMItemType()

    }

    /**

     * viewType 同 layoutId

     */

    override fun onCreateViewHolder(parent: ViewGroup, viewType: Int): NewViewHolder {

        if(viewType == 0) throw RuntimeException("Undefined itemViewType")

        return NewViewHolder(

            DataBindingUtil.inflate(

                LayoutInflater.from(parent.context),

                viewType, parent, false

            ), handler

        )

    }

}
3.3 接下来就是用了;
很简单是不是, 直接把数据集合塞进Adapter里 就完事了
mAdapter = MultipleAdapter()

mDataBind.rvRecycle.let {
    it.layoutManager = LinearLayoutManager(mActivity)
    it.adapter = mAdapter
}

val data = mutableListOf<MultipleEntity>()
repeat(30){
    if(it % 2 == 0){
        data.add(MultipleEntity("小美", it))
    }else{
        data.add(MultipleEntity("小状", it))
    }
}
mAdapter.submitList(data)
3.4 布局文件也帖出来吧
item_multiple_one.xml

<layout>

    <data>

        <variable

            name="item"

            type="com.example.kotlinmvpframe.yiyou.entity.MultipleEntity" />

    </data>

<androidx.constraintlayout.widget.ConstraintLayout xmlns:android="http://schemas.android.com/apk/res/android"

    android:layout_width="match_parent"

    android:layout_height="wrap_content"

    xmlns:app="http://schemas.android.com/apk/res-auto"

    android:padding="12dp">

    <TextView

        style="@style/tv_base_16_dark"

        android:layout_width="wrap_content"

        android:layout_height="wrap_content"

        android:text='@{item.name + "  我是类型one,我有靓照"}'

        app:layout_constraintTop_toTopOf="parent"

        app:layout_constraintBottom_toBottomOf="parent"

        app:layout_constraintStart_toStartOf="parent"/>

    <ImageView

        style="@style/img_wrap"

        android:layout_width="60dp"

        android:layout_height="50dp"

        android:src="@drawable/bg"

        app:layout_constraintTop_toTopOf="parent"

        app:layout_constraintBottom_toBottomOf="parent"

        app:layout_constraintEnd_toEndOf="parent"/>

</androidx.constraintlayout.widget.ConstraintLayout>

</layout>

item_multiple_two.xml

<layout>

    <data>

        <variable

            name="item"

            type="com.example.kotlinmvpframe.yiyou.entity.MultipleEntity" />

    </data>

<androidx.constraintlayout.widget.ConstraintLayout xmlns:android="http://schemas.android.com/apk/res/android"

    android:layout_width="match_parent"

    android:layout_height="wrap_content"

    xmlns:app="http://schemas.android.com/apk/res-auto"

    android:padding="12dp">

    <TextView

        style="@style/tv_base_16_dark"

        android:layout_width="wrap_content"

        android:layout_height="wrap_content"

        android:text='@{item.name + "  我是类型two,我有money"}'

        app:layout_constraintTop_toTopOf="parent"

        app:layout_constraintBottom_toBottomOf="parent"

        app:layout_constraintStart_toStartOf="parent"/>

    <TextView

        style="@style/tv_base_16_dark"

        android:layout_width="wrap_content"

        android:layout_height="wrap_content"

        android:textStyle="italic|bold"

        android:textColor="@color/shape_red"

        android:text="¥. 500"

        app:layout_constraintTop_toTopOf="parent"

        app:layout_constraintBottom_toBottomOf="parent"

        app:layout_constraintEnd_toEndOf="parent"/>

</androidx.constraintlayout.widget.ConstraintLayout>

</layout>
3.5 再贴上效果图 : [奸笑]
4. 嵌套 NestedAdapter
4.1 嵌套 RecycleView 的注意点:
嵌套子层数据集合: 一般在外层实体中; 例如 一条朋友圈中多张图片. 外层实体持有 Image集合; 我们就用接口的方式, 规范这个集合
子层RecycleView: 如果固定的 ViewDataBinding 对象, 我们可以直接拿它的 RecycleVIew. 但是 它不固定咋办? 也没法封装继承啊! 好吧, 好办 [机智]
子层的 Adapter: 这个好办, 上一篇我们已经封装好了 SimpleAdapter;
子层列表事件: 子层的事件, 还是用 handler 处理, 但最终由回调函数,调到主界面处理;
4.2 思路
首先外层列表的主数据绑定, 没有变化, 还是用总的 ViewHolder.bind() 方式;
其次我们规范 嵌套子层 RecycleView 的ID, 用 findViewById 的方式 把它存到 ViewHolder 里;
实体类实现 BaseNestedItem 接口的 getNestedList() 函数; 把子层集合返回;
4.3 上代码:
/**

 * 单条目, 简单Item MVVM Adapter

 * 复杂类型 还是得自定义 Adapter

 */

open class NestedAdapter<T: BaseNestedItem>(

    /**

     * 外层列表 item布局;

     */

    private val layout: Int,

    /**

     * 内层列表 item布局;

     */

    private val nestedLayoutId: Int,

    /**

     * 生成子层Recycle的 LayoutManager; 可以是 LinearLayoutManager GridLayoutManager 等;

     * 默认 横向 LinearLayoutManager

     */

    private val childLayoutManager: (() -> RecyclerView.LayoutManager)? = null,

    /**

     * 子层列表点击回调; 此方式可能不太优雅. 有待改进

     * arg1 子层点击 View

     * arg2 外层点击 position;  这个position并不保险; 当存在 Header 时, 它需要 -1

     * arg3 子层实体对象

     */

    private val childClickListener: ((View, Int, BaseItem) -> Unit)? = null,

    /**

     * 外层类表点击事件;

     */

    handler: BaseHandler? = null

) :

    BaseAdapter(handler) {

    override fun onCreateViewHolder(parent: ViewGroup, viewType: Int): NewViewHolder {

        val bingding: ViewDataBinding = DataBindingUtil.inflate(LayoutInflater.from(parent.context), layout, parent, false)

        // 统一规范 子层 RecycleView 的id;  将 RecyclerView 存入 NestedHolder

        val rvNested = bingding.root.findViewById<RecyclerView>(R.id.rv_nested_item)

        return NestedHolder(rvNested, bingding, handler)

    }

    override fun onBindViewHolder(holder: NewViewHolder, position: Int) {

        if(holder is NestedHolder){

            //绑定子层 Recycle Adapter

            createNestedAdapter(holder)

            //绑定子层 数据

            (holder.rvNested?.adapter as SimpleAdapter?)?.submitList(getItem(position).getNestedList())

        }

        super.onBindViewHolder(holder, position)

    }

    /**

     * 绑定子层 Recycle 的 Adapter

     */

    private fun createNestedAdapter(holder: NestedHolder) {

        holder.rvNested?.let {

            if(it.adapter == null){

                //子层点击事件;  null 则不设置;

                val handler = if(childClickListener == null){

                    null

                }else{

                    object : Handler<BaseItem>(){

                        override fun onClick(view: View, info: BaseItem) {

                            childClickListener.invoke(view, holder.layoutPosition, info)

                        }

                    }

                }

                val adapter = SimpleAdapter(nestedLayoutId, handler)

                it.layoutManager = childLayoutManager?.invoke() ?: LinearLayoutManager(it.context, RecyclerView.HORIZONTAL, false)

                it.adapter = adapter

            }

        }

    }

    /**

     * 重写 ViewHoleder,  附带 RecyclerView

     */

    class NestedHolder(val rvNested: RecyclerView?, binding: ViewDataBinding, handler: BaseHandler?) : NewViewHolder(binding, handler)

}
4.4 讲解:
可以看出, NestedAdapter 的内外层布局 ID直接传入; 内层 LayoutManager, 及事件响应 由kotlin高阶函数提供;
注意: 内层事件响应时, 回调给了外层position 是通过 holder.layoutPosition; 但是在有头部的Adapter中 layoutPosition 是需要 -1 的;
还有一个 holder.bindingAdapterPosition 参数, 但是它在 带头部的ConcatAdapter 中使用时, 经常返回 -1; 不知道是不是博主使用姿势不对;
4.5 BaseNestedItem: getNestedList() 函数统一规范子集合;
interface BaseNestedItem : BaseItem{

    fun getNestedList(): MutableList<out BaseItem>?

}
4.6 实体类:
class MultipleEntity(

    var name: String,

    override var hasChanged: Boolean = false)

    : BaseNestedItem {

    var imgs: MutableList<ImageEntity>? = null

    // 返回子层集合

    override fun getNestedList(): MutableList<ImageEntity>? = imgs

    /**

     * 子层集合实体类

     */

    class ImageEntity(val res: Int, override var hasChanged: Boolean = false) : BaseItem

}
4.7 使用:
mAdapter = NestedAdapter<MultipleEntity>(

    //主列表布局 ID

    R.layout.item_nested_one,

    //子列表布局 ID

    R.layout.item_img,

    //事件响应

    childClickListener = {

        _, layoutPosition, info ->

        val childIndex = (mAdapter.currentList[layoutPosition] as MultipleEntity).imgs?.indexOf(info) ?: 0

        Toast.makeText(mActivity.applicationContext, "点击了第${layoutPosition + 1} 的第${childIndex + 1}个条目", Toast.LENGTH_SHORT).show()

})

mDataBind.rvRecycle.let {

    it.layoutManager = LinearLayoutManager(mActivity)

    it.adapter = mAdapter

}

val data = mutableListOf<MultipleEntity>()

repeat(5){

    val entity = if(it % 2 == 0){

        MultipleEntity("小美", it)

    }else{

        MultipleEntity("小状", it)

    }

    entity.imgs = mutableListOf(

        ImageEntity(R.drawable.bg), ImageEntity(R.drawable.bg), ImageEntity(R.drawable.bg), ImageEntity(R.drawable.bg),

        ImageEntity(R.drawable.bg), ImageEntity(R.drawable.bg), ImageEntity(R.drawable.bg), ImageEntity(R.drawable.bg))

    data.add(entity)

}

mAdapter.submitList(data)
4.8 布局贴出来
item_nested_one.xml

<layout>

    <data>

        <variable

            name="item"

            type="com.example.kotlinmvpframe.yiyou.entity.MultipleEntity" />

    </data>

<androidx.constraintlayout.widget.ConstraintLayout xmlns:android="http://schemas.android.com/apk/res/android"

    android:layout_width="match_parent"

    android:layout_height="wrap_content"

    xmlns:app="http://schemas.android.com/apk/res-auto"

    android:padding="12dp">

    <TextView

        android:id="@+id/tv_name_item"

        style="@style/tv_base_16_dark"

        android:layout_width="wrap_content"

        android:layout_height="wrap_content"

        android:text='@{item.name}'

        app:layout_constraintTop_toTopOf="parent"

        app:layout_constraintStart_toStartOf="parent"/>

    <androidx.recyclerview.widget.RecyclerView

        android:id="@+id/rv_nested_item"

        android:layout_width="match_parent"

        android:layout_height="wrap_content"

        android:layout_marginTop="10dp"

        app:layout_constraintTop_toBottomOf="@id/tv_name_item"/>

</androidx.constraintlayout.widget.ConstraintLayout>

</layout>

item_img.xml

<layout>

    <data>

        <variable

            name="item"

            type="com.example.kotlinmvpframe.yiyou.entity.MultipleEntity.ImageEntity" />

        <variable

            name="handler"

            type="com.example.kotlinmvpframe.test.testtwo.Handler" />

    </data>

<FrameLayout

    xmlns:android="http://schemas.android.com/apk/res/android"

    xmlns:app="http://schemas.android.com/apk/res-auto"

    android:layout_width="wrap_content"

    android:layout_height="wrap_content"

    android:onClick="@{v -> handler.onClick(v, item)}"

    android:padding="8dp">

    <ImageView

        style="@style/img_wrap"

        android:layout_width="80dp"

        android:layout_height="80dp"

        app:imgRes="@{item.res}"/>

</FrameLayout>

</layout>
4.9 效果图来了:
5. SingleChoiceAdapter 单选
5.1 分析:
- 实体需要有 checked 字段, 我们用 BaseCheckedItem 作为实体基类
- 规范 布局文件中 CheckBox 的 ID, onCreateViewHolder 时 通过 findViewById 将控件保存到 ViewHolder
- 选中某个条目时, 之前选中的条目需要反选. 所以必须要知道上一次选中的 实体和CheckBox
- 监听 onCheckedChanged 事件, 新实体选中, 就实体反选.
- 单选时, 不允许反选, 此时不用 CheckBox, 而用 RadioButton
5.2 BaseCheckedItem
它是 BaseItem 的实现类, 并增加了 hasChecked 字段
/**

 * 普通单多选列表 实体类

 */

interface BaseCheckedItem : BaseItem{

    var hasChecked: Boolean     // 是否被勾选中

}
5.3 实体类
class CheckEntity(

    var name: String? = null,

    override var hasChecked: Boolean = false,

    override var hasChanged: Boolean = false)

    : BaseCheckedItem
5.4 重点来了: SingleChoiceAdapter
直接上代码吧, 已经写了注释
class SingleChoiceAdapter<T : BaseCheckedItem>(

    /**

     * 布局id;

     */

    private val layout: Int,

    handler: BaseHandler? = null

): BaseAdapter<T>(handler), CompoundButton.OnCheckedChangeListener {

    //弱引用,  当选中条目被删除时, 应当释放资源

    var wearEntity: WeakReference<T>? = null

    var wearView: WeakReference<CompoundButton>? = null

    override fun onCreateViewHolder(parent: ViewGroup, viewType: Int): NewViewHolder {

        val bingding: ViewDataBinding = DataBindingUtil.inflate(LayoutInflater.from(parent.context), layout, parent, false)

        // 统一规范 CheckBox 的id;  将 RecyclerView 存入 ChoiceHolder

        val cbCheck = bingding.root.findViewById<CompoundButton>(R.id.cb_check_item)

        return ChoiceHolder(cbCheck, bingding, handler)

    }

    override fun onBindViewHolder(holder: NewViewHolder, position: Int) {

        if(holder is ChoiceHolder){

            val entity = currentList[position]

            if(entity.hasChecked){

                wearEntity = WeakReference(entity)

                wearView = WeakReference(holder.cbCheck)

            }

            //用 tag 将对象实体存储;

            holder.cbCheck?.tag = entity

            holder.cbCheck?.setOnCheckedChangeListener(this)

            //这一行是测试用的, 应当删掉

            (entity as CheckEntity).name = Integer.toHexString(holder.cbCheck?.hashCode() ?: 0)

        }

        super.onBindViewHolder(holder, position)

    }

    /**

     * checkbox 选中事件

     */

    override fun onCheckedChanged(buttonView: CompoundButton?, isChecked: Boolean) {

        //判断是否是 手动操作

        if(buttonView?.isPressed == true){

            Log.d("pppppppppppppppppp", "手动操作了 ChekcBox")

            wearEntity?.let {

                it.get()?.hasChecked = false

                it.clear()

            }

            // 因 RecycleView 复用机制, 这里新旧 Button 可能为同一个;

            // 当同一个button 时, 不需要重置原button 的选中状态;  不需要重新 new WeakReference

            val isSameBtn = buttonView == wearView?.get()

            if(!isSameBtn){

                wearView?.let {

                    it.get()?.isChecked = false

                    it.clear()

                }

                wearView = WeakReference(buttonView)

            }

            val entity = buttonView.tag as T?

            entity?.hasChecked = true

            wearEntity = WeakReference(entity)

        }

    }

    /**

     * 重写 ViewHoleder,  附带 ImageView;  勾选是使用 ImageView 切换图片的方式

     */

    class ChoiceHolder(val cbCheck: CompoundButton?, binding: ViewDataBinding, handler: BaseHandler?) : NewViewHolder(binding, handler)

}
5.5 布局文件: item_test_choise
<layout xmlns:android="http://schemas.android.com/apk/res/android"

    xmlns:app="http://schemas.android.com/apk/res-auto">

    <data>

        <variable

            name="item"

            type="com.example.kotlinmvpframe.yiyou.entity.CheckEntity" />

        <variable

            name="handler"

            type="com.example.kotlinmvpframe.test.testtwo.Handler" />

    </data>

    <androidx.constraintlayout.widget.ConstraintLayout

        android:layout_width="match_parent"

        android:layout_height="wrap_content">

        <TextView

            android:layout_width="0dp"

            android:layout_weight="1"

            android:layout_height="wrap_content"

            android:layout_marginStart="20dp"

            android:text="@{item.name}"

            app:layout_constraintTop_toTopOf="parent"

            app:layout_constraintBottom_toBottomOf="parent"

            app:layout_constraintStart_toStartOf="parent"/>

        <RadioButton

            android:id="@+id/cb_check_item"

            android:layout_width="match_parent"

            android:layout_height="wrap_content"

            android:drawableEnd="@drawable/checkbox_selector"

            android:padding="24dp"

            android:background="@null"

            android:button="@null"

            android:checked="@{item.hasChecked}"

            app:layout_constraintTop_toTopOf="parent"/>

    </androidx.constraintlayout.widget.ConstraintLayout>

</layout>
5.6 使用:
很简单, 只需要 初始化 Adapter, RecycleView; 并设置数据源即可
mAdapter = SingleChoiceAdapter(R.layout.item_test_choise)

mDataBind.rvRecycle.let {

    it.layoutManager = LinearLayoutManager(mActivity)

    it.adapter = mAdapter

}

val data = mutableListOf<CheckEntity>()

repeat(15){

    data.add(CheckEntity("小华"))

}

mAdapter.submitList(data)

//以下, 没用

mDataBind.btnLeft.setOnClickListener {

    val entity = mAdapter.wearEntity?.get()

    if(entity == null){

        Toast.makeText(mActivity, "当前未选中", Toast.LENGTH_SHORT).show()

        return@setOnClickListener

    }

    val position = mAdapter.currentList.indexOf(entity)

    Toast.makeText(mActivity, "当前选中${entity.name}, index=${position}", Toast.LENGTH_SHORT).show()

}

mDataBind.btnRight.setOnClickListener {

    mAdapter.notifyDataSetChanged()

}
5.7 效果图:

6. MultipleChoiceAdapter 多选
多选就简单了; 注意, 需要将 item_test_choise 中的 RadioButton 换成 CheckBox
6.1 直接上代码:
class MultipleChoiceAdapter<T : BaseCheckedItem>(

    /**

     * 布局id;

     */

    private val layout: Int,

    handler: BaseHandler? = null

): BaseAdapter<T>(handler), CompoundButton.OnCheckedChangeListener {

    override fun onCreateViewHolder(parent: ViewGroup, viewType: Int): NewViewHolder {

        val bingding: ViewDataBinding = DataBindingUtil.inflate(LayoutInflater.from(parent.context), layout, parent, false)

        // 统一规范 CheckBox 的id;  将 RecyclerView 存入 NestedHolder

        val cbCheck = bingding.root.findViewById<CompoundButton>(R.id.cb_check_item)

        return SingleChoiceAdapter.ChoiceHolder(cbCheck, bingding, handler)

    }

    override fun onBindViewHolder(holder: NewViewHolder, position: Int) {

        if(holder is SingleChoiceAdapter.ChoiceHolder){

            val entity = currentList[position]

            holder.cbCheck?.tag = entity

            holder.cbCheck?.setOnCheckedChangeListener(this)

        }

        super.onBindViewHolder(holder, position)

    }

    /**

     * checkbox 选中事件

     */

    override fun onCheckedChanged(buttonView: CompoundButton?, isChecked: Boolean) {

        //判断是否是 手动操作

        if(buttonView?.isPressed == true){

            val entity = buttonView.tag as T?

            entity?.hasChecked = isChecked

        }

    }

}
6.2 使用跟 单选Adapter一样, 初始化RecycleVIew, 设置数据源即可;
遍历的话这样:
val list = mAdapter.currentList.filter {

    it.hasChecked

}

Toast.makeText(mActivity, "当前选中${list.size}条", Toast.LENGTH_SHORT).show()
6.3 效果图

好的! 终于 over
最新文章
- EF里的默认映射以及如何使用Data Annotations和Fluent API配置数据库的映射
- 【Win10 应用开发】从前台应用触发后台任务
- Kooboo CMS 之TextContent详解
- auto refresh iframe
- Windows Server 2008R2服务器安装及设置教程
- linux新内核的时钟机制代码
- 【转】使用Web墨卡托辅助球体切片方案的地图公共属性
- PHP5新语法学习
- Mysql 常用命令和注意事项
- Implementing a builder: Combine
- HTTPS协议入门
- 八大排序算法——插入排序(动图演示 思路分析 实例代码java 复杂度分析)
- 000 Python的运行
- max_execution_time with sleep
- docker探索-Docker 1.13 编排能力进化(十三)
- InstallShield打包,以及集成TFS、JenKins
- centos7的FTP服务vsftpd里建立虚拟用户不同目录分配不同权限
- Memorize and recite an important historical speech
- Atitit. 真正的全中国文字attilax易语言的特点以及范例
- JAVA EE配TOMCAT