SpringBoot源码分析-编译环境与新建测试模块
建议
分析源码建议不要使用Idea或者Eclipse等IDE工具的反编译功能或者导入源码包的方式看源码,那样不能给框架的源码做注释,所以分析源码之前都得先下载源码并构建,然后在项目中新建一个Module看代码是否能够正常启动与运行。
另外因为博客是在看源码后写的,我自己看的源码版本是2.1.X,这里演示的2.2.X,方法和2.1.X是一样的。
备注:无意中发现一个比较优质的博客:https://blog.csdn.net/qq_26000415/article/list/7,速览了一下他的文章列表,都是挺高级的货,推广一下(当然每个博主写的文章都可能有误,建议大家在阅读的时候一定要自己验证)
官方BUILD SOURCE建议
下面这段英文对于想要快速构建编译环境的同学就不要尝试了,因为它会下载一个Maven,使用默认的配置重新下载一些依赖包,下载Maven耗时,下载你之前已经下载过的包更耗时。。。但是它有应该有一个优点简单一步构建成功,否则就不是官方文档。
You don’t need to build from source to use Spring Boot (binaries in repo.spring.io), but if you want to try out the latest and greatest, Spring Boot can be easily built with the maven wrapper. You also need JDK 1.8.
$ ./mvnw clean install
If you want to build with the regular mvn command, you will need Maven v3.5.0 or above.
| Note | You may need to increase the amount of memory available to Maven by setting a MAVEN_OPTS environment variable with the value -Xmx512m. Remember to set the corresponding property in your IDE as well if you are building and running tests there (e.g. in Eclipse go to Preferences→Java→Installed JREs and edit the JRE definition so that all processes are launched with those arguments). This property is automatically set if you use the maven wrapper. |
|---|---|
Also see CONTRIBUTING.adoc if you wish to submit pull requests, and in particular please fill out the Contributor’s Agreement before your first change, however trivial.
Building reference documentation
First of all, make sure you have built the project:
$ ./mvnw clean install
The reference documentation requires the documentation of the Maven plugin to be available so you need to build that first since it’s not generated by default.
$ ./mvnw clean install -pl spring-boot-project/spring-boot-tools/spring-boot-maven-plugin -Pdefault,full
The documentation also includes auto-generated information about the starters. You might have that in your local repository already (per the first step) but if you want to refresh it:
$ ./mvnw clean install -f spring-boot-project/spring-boot-starters
Once this is done, you can build the reference documentation with the command below:
$ ./mvnw clean prepare-package -pl spring-boot-project/spring-boot-docs -Pdefault,full
使用已有Maven构建
下载
地址:https://github.com/spring-projects/spring-boot/tree/2.2.x

修改Maven配置
有的同学从来没有使用过Maven命令行编译过代码,那么使用命令行编译,Maven读取的还是Maven自己目录下的setting.xml文件,所以要修改里面的内容
修改1,将Maven本地仓库目录修改为IDE工具中Maven本地仓库目录,比如:
<localRepository>F:\data\maven\repository</localRepository>
修改2:为了能更快的下载,可以将配置文件中的Maven仓库镜像设置为阿里云的
   <mirrors>

        <!-- 阿里云仓库 central-->

        <mirror>

            <id>alimaven</id>

            <mirrorOf>central</mirrorOf>

            <name>aliyun maven</name>

            <url>http://maven.aliyun.com/nexus/content/repositories/central/</url>

        </mirror>

        <!-- 中央仓库1 -->

        <mirror>

            <id>repo1</id>

            <mirrorOf>central</mirrorOf>

            <name>Human Readable Name for this Mirror.</name>

            <url>http://repo1.maven.org/maven2/</url>

        </mirror>

        <!-- 中央仓库2 -->

        <mirror>

            <id>repo2</id>

            <mirrorOf>central</mirrorOf>

            <name>Human Readable Name for this Mirror.</name>

            <url>http://repo2.maven.org/maven2/</url>

        </mirror>

        <!-- 阿里云的maven-public路径 -->

        <mirror>

            <id>nexus-aliyun</id>

            <mirrorOf>*</mirrorOf>

            <name>Nexus aliyun</name>

            <url>http://maven.aliyun.com/nexus/content/groups/public</url>

        </mirror>

    </mirrors>
如果嫌这个比较麻烦,直接将自己IDE中指定的setting.xml文件覆盖MAVEN_HOME/conf/setting.xml
构建
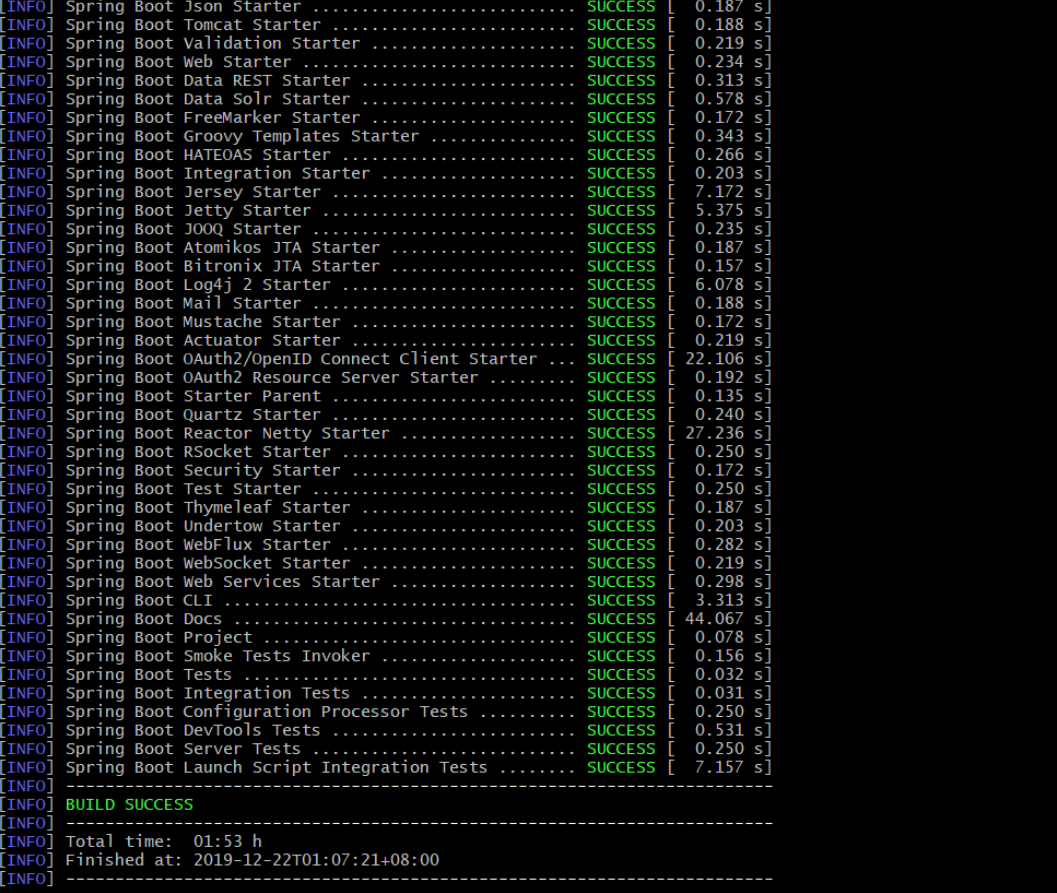
使用命令构建,使用skipTests跳过SpringBoot中的测试,
mvn clean install -DskipTests -Pfast
整个构建过程花的时间比较长,我自己使用了1小时53分钟,构建成功的结果页
导入项目
打开Idea,选择File-open file-选择构建成功目录下pom.xml,然后选择open as project选项

最后等待导入成功

新建测试工程
在spring-boot-project目录下新建一个工程

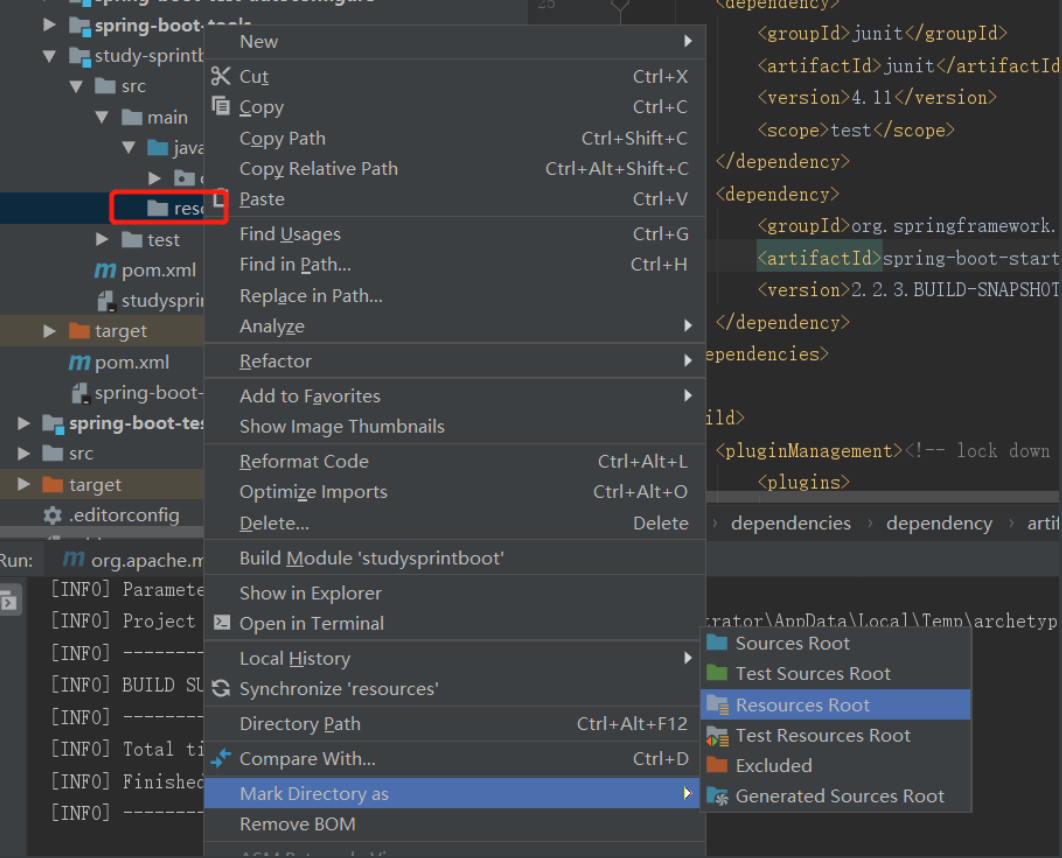
在main目录下新建一个resources目录,并标记为“Resources root”
导入spring-boot-starter-web依赖
<dependencies>

        <dependency>

            <groupId>junit</groupId>

            <artifactId>junit</artifactId>

            <version>4.11</version>

            <scope>test</scope>

        </dependency>

        <dependency>

            <groupId>org.springframework.boot</groupId>

            <artifactId>spring-boot-starter-web</artifactId>

            <version>2.2.3.BUILD-SNAPSHOT</version>

        </dependency>

        <dependency>

            <groupId>org.projectlombok</groupId>

            <artifactId>lombok</artifactId>

            <version>1.18.0</version>

            <scope>provided</scope>

        </dependency>

    </dependencies>
新建启动类和Controller
@SpringBootApplication

public class BootApplication {

    public static void main(String[] args) {

        SpringApplication.run(BootApplication.class,args);

    }

}
@RestController
public class UserController {
@RequestMapping("/query")
public User query(){
return new User("Messi",33);
}
}
@Setter
@Getter
public class User {
private String userName;
private Integer age;
public User(){}
public User(String userName,Integer age){
this.userName=userName;
this.age=age;
}
}
启动-测试
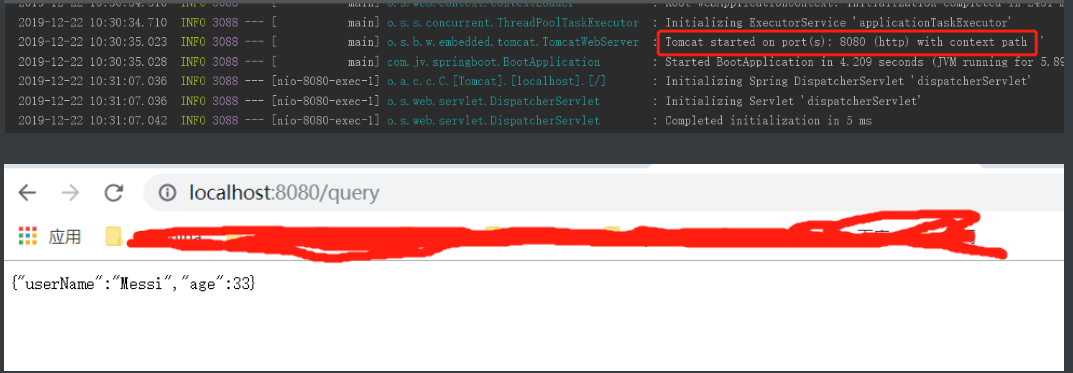
那么恭喜,接下来就可以开始分析源码之旅了
来源:沈阳网站优化
最新文章
- python操作mysql总结
- iOS图片如何按比例显示
- js断点调试心得
- 01.FastDFS的安装部署
- Oracle数据库之二
- hdu1573-X问题
- AutoMapper使用简单总结
- UICollectionView 很简单的写个瀑布流
- 音频压缩编码 opus 附完整C++代码示例
- ●BZOJ 3527 [Zjoi2014]力
- Angular7上手体验
- vue中动态加载组件+开发者模式+JS参数值传递和引用传递
- CentOS 使用yum命令安装出现错误提示”could not retrieve mirrorlist http://mirrorlist.centos.org
- 第一节20181109 《Linux就该这么学》
- js框架封装简单实例
- 关于layer.photos即照片显示的问题。
- xml 注释中不允许出现字符串“--“(再也不要来坑爹了,好么,XML)
- 国际时区 TimeZone ID列表
- 为My97DatePicker日期插件设置默认日期
- 【hdoj_1257】最小拦截系统