disconf-web 分布式配置管理平台
2024-08-24 16:33:20
一、需求
实现分布式配置中心:
(1)集中管理外部依赖的服务配置和服务内部配置
(2)提供web管理平台进行配置和查询
(3)支持服务注册与发现
(4)支持客户端拉取配置
(5)支持订阅与发布,配置变更主动通知到client,实时变更配置
二、开源解决方案
http://disconf.readthedocs.io/zh_CN/latest/index.html disconf官方wiki文档及其他开源解决方案
注: disonf目前客户端只支持Java版本 https://github.com/knightliao/disconf-demos-java
三、disconf-web部署
3.1 How to deploy
安装依赖软件
- 安装Mysql(Ver 14.12 Distrib 5.0.45, for unknown-linux-gnu (x86_64) using EditLine wrapper)
- 安装Tomcat(apache-tomcat-7.0.50)
- 安装Nginx(nginx/1.5.3)
- 安装 zookeeeper (zookeeper-3.3.0)
- 安装 Redis (2.4.5)
- 从github获取disconf项目
[root@minion data]# git clone https://github.com/knightliao/disconf.git
目录结构说明
[root@minion data]# tree disconf -L

disconf

├── disconf-client       # 分布式配置客户端模块, 依赖disconf-core包。 用户程序使用它作为Jar包进行分布式配置编程。

│   ├── deploy

│   ├── pom.xml

│   ├── README.md

│   ├── src

│   └── tools

├── disconf-core        #分布式配置基础包模块

│   ├── pom.xml

│   ├── README.md

│   └── src

├── disconf-web       #分布式配置平台服务模块, 依赖disconf-core包。采用SpringMvc+纯HTML方式实现。 用户使用它来进行日常的分布式配置管理。

│   ├── bin

│   ├── deploy

│   ├── html

│   ├── pom.xml

│   ├── profile

│   ├── README.md

│   ├── sql          #初始化数据库sql文件

│   └── src

├── docs

│   ├── make.bat

│   ├── Makefile

│   ├── myMake.sh

│   ├── README.md

│   └── source

├── LICENSE

├── pom.xml

├── README.md

└── sql

 directories,  files
配置准备
假定程序部署目录为:/data/disconf 配置模板文件路径为:/data/disconf/disconf-web/profile/rd
[root@minion disconf]# cd /data/disconf/    进入程序目录

[root@minion disconf]# mkdir -p /data/disconf/disconf-rd/{online-resources,war}  #创建配置文件存放目录及war包存放路径,可自行设定目录

[root@minion disconf]# cd /data/disconf/disconf-web/profile/rd/    进入模板文件路径

[root@minion rd]# ls

application-demo.properties  jdbc-mysql.properties  log4j.properties  logback.xml  redis-config.properties  zoo.properties

[root@minion rd]# cp application-demo.properties jdbc-mysql.properties redis-config.properties zoo.properties /data/disconf/disconf-rd/online-resources/     #复制模板配置文件

[root@minion rd]# ll /data/disconf/disconf-rd/online-resources/

total

-rw-r--r--  root root  Apr   : application-demo.properties   #应用配置,邮件及应用相关

-rw-r--r--  root root  Apr   : jdbc-mysql.properties       #数据库配置

-rw-r--r--  root root  Apr   : redis-config.properties     #Redis配置,主要用于web登录使用
-rw-r--r--  root root  Apr  : zoo.properties            #Zookeeper配置
[root@minion rd]# cd /data/disconf/disconf-rd/online-resources/
[root@minion online-resources]# cp application-demo.properties application.properties     #切记,将模板文件application-demo.properties复制成application.properties
注意,即使只有一个redis,也应该配置两个redis client,否则将造成内部错误。
[root@minion online-resources]# cat redis-config.properties

redis.group1.retry.times=

redis.group1.client1.name=BeidouRedis1

redis.group1.client1.host=127.0.0.1

redis.group1.client1.port=

redis.group1.client1.timeout=

redis.group1.client1.password=foobared

redis.group1.client2.name=BeidouRedis2

redis.group1.client2.host=127.0.0.1

redis.group1.client2.port=

redis.group1.client2.timeout=

redis.group1.client2.password=foobared

redis.evictor.delayCheckSeconds=

redis.evictor.checkPeriodSeconds=

redis.evictor.failedTimesToBeTickOut=
项目构建
注: 安装前需确保mysql/tomcat/redis/zookeeper软件环境部署完成
[root@minion disconf]# ONLINE_CONFIG_PATH=/data/disconf/disconf-rd/online-resources

[root@minion disconf]# WAR_ROOT_PATH=/data/disconf/disconf-rd/war

[root@minion disconf]# export ONLINE_CONFIG_PATH

[root@minion disconf]# export WAR_ROOT_PATH

[root@minion disconf]# cd disconf-web

[root@minion disconf-web]# sh deploy/deploy.sh

脚本运行结束后会在/data/disconf/disconf-rd/war/路径下生成web部署所用到的程序文件
-disconf-web.war

-html

-META-INF

-WEB-INF
3.2 数据库初始化
可以参考 sql/readme.md 来进行数据库的初始化。注意sql文件导入顺序
0-init_table.sql---->1-init_data.sql---->201512/20151225.sql---->20160701/20160701.sql
数据库初始化完成后,里面默认有6个用户,可以使用默认的账号登陆disconf-web服务器页面(请注意线上环境删除这些用户以避免潜在的安全问题)
mysql> select * from disconf.user;

+---------+------------+------------------------------------------+------------------------------------------+---------+---------+   用户名对应的密码

| user_id | name       | password                                 | token                                    | ownapps | role_id |

+---------+------------+------------------------------------------+------------------------------------------+---------+---------+

|        | testUser1  | 5eec8499597a115c88e0a9580ae1562ab85d0b1a | b9070d385a13357efa09e50e080607c2b299241b |        |        |  -->MhxzKhl9209

|        | testUser2  | 71e9dc667eefa5a3a4840cb4f1ce22bc246f22f0 | b169dec42f61ec6cbad88d70e7c4c6b89630ccfb |        |        |  -->MhxzKhl167

|        | testUser3  | e2cdc4a9195030543e38e19a923f075d54471cc4 | a1a20b0e03a5191c530cbfc064eda3c16254df64 |        |        |  -->MhxzKhl783

|        | testUser4  | 5cef2d7e4ada5a615f03e12b569d80aedfb056fc | 007b07fccbc1c82c987f7b8e4651e85cca01cf2b |        |        |  -->MhxzKhl8758

|        | testUser5  | f996eeaa224abe0037d99adbce73c315e13238f9 | c9dfdcb50a3d84f2b6a4771dcb7c2ceb19e7d281 |        |        |  -->MhxzKhl112

|        | admin      | d033e22ae348aeb5660fc2140aec35850c4da997 | f28d164d23291c732f64134e6b7d92be3ff8b1b3 |         |        |  -->admin

|        | admin_read | b76f3e20d1c8d0bc17d40158e44097d5eeee8640 | 2022ab9c2754d62f9ddba5fded91e4238247ebaf |        |        |

|        | mobiledsp  | 0855b44a368e44dc6e6825532073b29a368584af | 132069654193f802203d1c6c86e753ecede698f6 |        |        |

+---------+------------+------------------------------------------+------------------------------------------+---------+---------+

 rows in set (0.00 sec)

如果想自己设置初始化的用户名信息,可以参考代码来自己生成用户:

[root@minion disconf-web]# cat /data/disconf/disconf-web/src/main/java/com/baidu/disconf/web/tools/UserCreateTools.java    源代码文件
3.3 部署war包
修改tomcat中server.xml文件,在Host结点下设定Context:
[root@shuke conf]# vim /opt/apache-tomcat-9.0..M18/conf/server.xml

......
69  <Connector port="8014" protocol="HTTP/1.1"      #设定端口为8014,可自行设定端口
70        connectionTimeout="20000"
71        redirectPort="8443" />
.......

148      <Host name="localhost"  appBase="webapps"

149            unpackWARs="true" autoDeploy="true">

150      <Context path="" docBase="/data/disconf/disconf-rd/war"></Context>     #增加内容
[root@shuke bin]# sh /opt/apache-tomcat-9.0.0.M18/bin/startup.sh 启动tomcat程序
3.4 部署前端nginx代理
[root@shuke conf.d]# cat /etc/nginx/conf.d/disconf.conf

upstream disconf {

    server 127.0.0.1:;      #代理tomcat,动态请求转发至后端tomcat程序

}

server {

    listen   ;

    server_name 192.168.1.100;     #如果使用域名,可以设置为disconf.com(可以自定义),但它必须与 application.properties配置文件中的domain保持一致。

    access_log /var/logs/disconf/access.log;

    error_log /var/logs/disconf/error.log;

    location / {

        root /data/disconf/disconf-rd/war/html;

        if ($query_string) {

            expires max;

        }

    }

    location ~ ^/(api|export) {

        proxy_pass_header Server;

        proxy_set_header Host $http_host;

        proxy_redirect off;

        proxy_set_header X-Real-IP $remote_addr;

        proxy_set_header X-Scheme $scheme;

        proxy_pass http://disconf;

    }

    location = /favicon.ico {

        log_not_found off;

        access_log off;

    }

}
浏览器访问:http://192.168.1.100:8081, 访问异常可查看nginx或tomcat日志
3.5 disconf-web使用说明
首页,点击登陆后,输入用户名:admin,密码:admin登陆即可

主界面
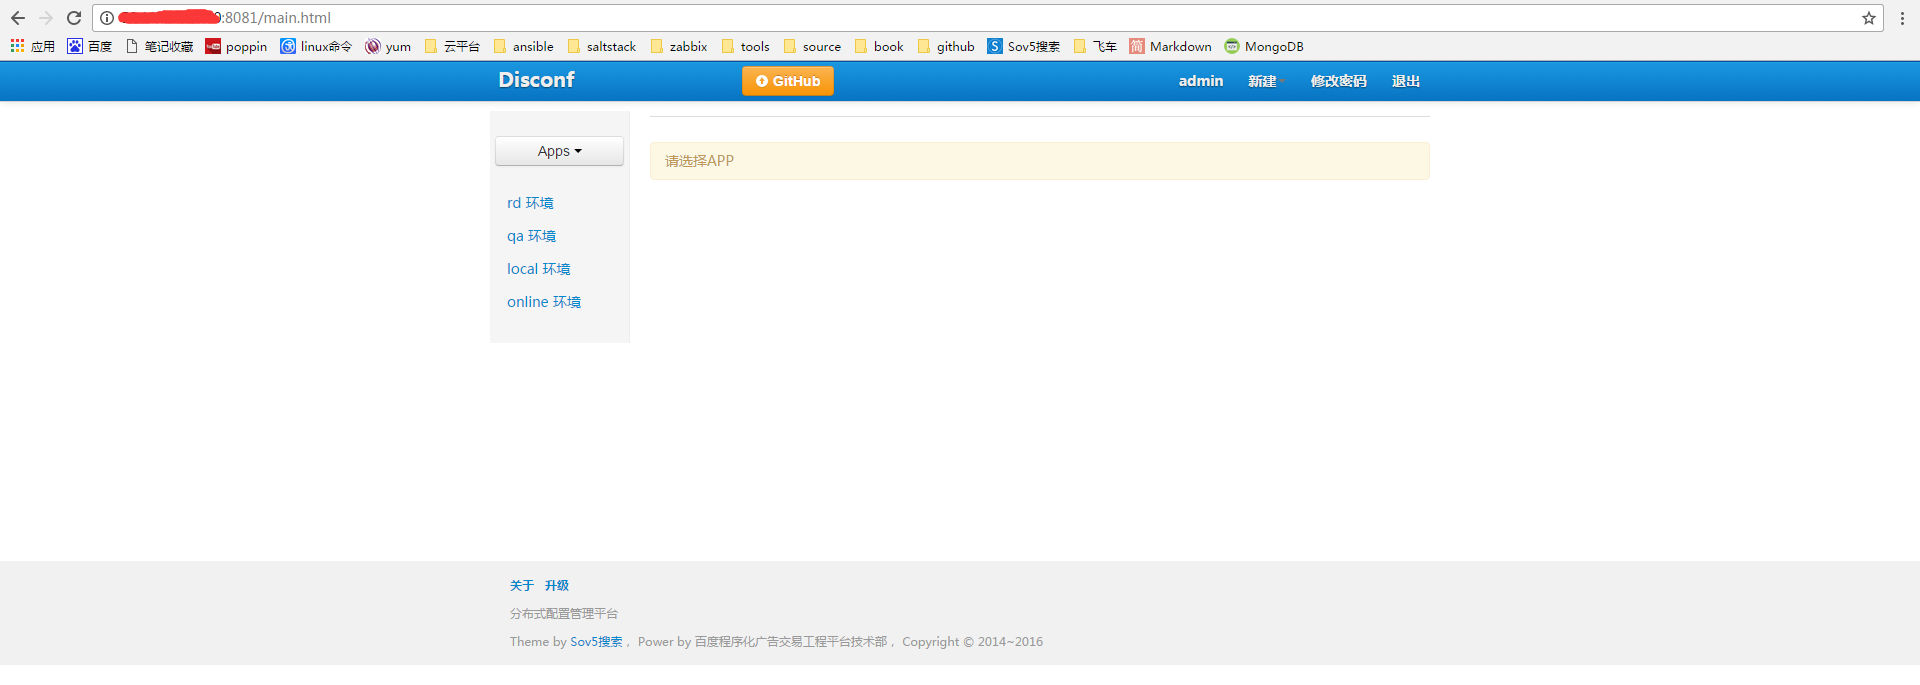
左上角可以选择APP和环境,选择之后,就会在中间出现若干个版本,
选择版本后,就会显示 APP、环境、版本 三个条件下的配置列表:

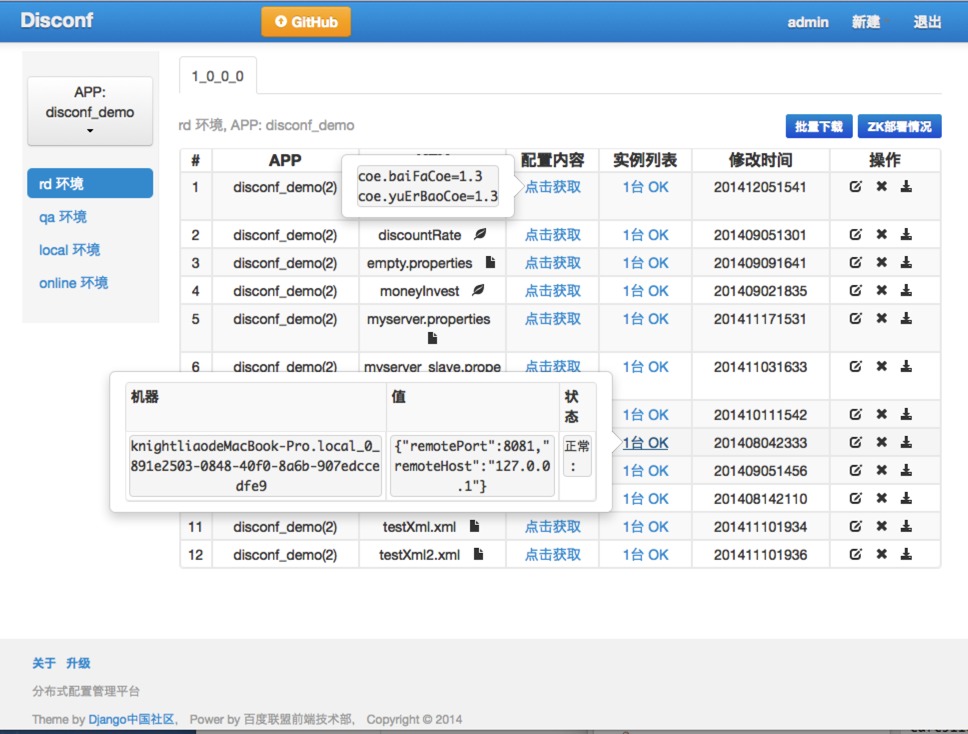
表格中 各个列的意义是:
- APP:使用哪个APP,及它的ID
- KEY:配置文件或配置项
- 配置内容:配置文件或配置项在配置中心中的值
- 实例列表:使用此配置文件或配置项的所有实例列表,及每个实例的配置值。如果实例的配置值与配置中心的值不一致,这里会标识出来。
- 修改时间:修改此配置的最后一次时间
- 操作:个性、删除、下载
右上角可以
新建配置项、新建配置文件、新建APP
表格右上方
可以批量下载所有配置文件至本地,还可以查看ZK上的部署情况。
至此,disconf-web端已经部署完成!
最新文章
- GridView控件RowDataBound事件中获取列字段途径
- PowerDesigner的使用一
- How to enable logging
- angularJs之模块化
- gcc g++ 参数介绍
- Redis' High Availability
- Java LinkedBlockingQueue和ArrayBlockingQueue分析
- android 如何分析java.lang.IllegalArgumentException: Cannot draw recycled bitmaps异常
- Cocos2d-x shader学习2: 模糊(Blur)
- redis集群主从集群搭建、sentinel(哨兵集群)配置以及Jedis 哨兵模式简要配置
- 论AOP面向切面编程思想
- ASP.NET Core知多少(6):VS Code联调Angular + .NetCore
- MATLAB 中 ksvdbox和ompbox 工具箱的安装和使用
- 三月pat(转)
- tmux 没有默认配置文件。
- SG Input 软件安全分析之逆向分析
- CentOS安装中文支持包
- JComBox的用法
- HTTP.ContentType
- MAP参数估计