IdentityServer4服务器配置
Session认证和JWT(Json Web Token)
Token认证就是基于JWT
1.Session认证
1. 用户输入其登录信息
2. 服务器验证信息是否正确,并创建一个session,然后将其存储在数据库中
3. 服务器为用户生成一个sessionId,将具有sesssionId的Cookie将放置在用户浏览器中
4. 在后续请求中,会根据数据库验证sessionID,如果有效,则接受请求
5. 一旦用户注销应用程序,会话将在客户端和服务器端都被销毁
2.JWT认证
1. 用户输入其登录信息
2. 服务器验证信息是否正确,并返回已签名的token
3. token储在客户端,例如存在local storage或cookie中
4. 之后的HTTP请求都将token添加到请求头里
5. 服务器解码JWT,并且如果令牌有效,则接受请求
6. 一旦用户注销,令牌将在客户端被销毁,不需要与服务器进行交互一个关键是,令牌是无状态的。后端服务器不需要保存令牌或当前session的记录。
JWT里面只存放了一些不敏感的信息 比如一些重要的信息是用户发起请求 验证身份成功 再去 ProfileService 中把敏感信息放到HttpContext中 比如租户ID 等
服务器不保存生成Token Token由三部分组成 根据客户端请求的Token 根据Token的前部和中部和密钥计算出来跟尾部相同 就验证通过 节约了服务器内存
http://www.ruanyifeng.com/blog/2014/05/oauth_2_0.html
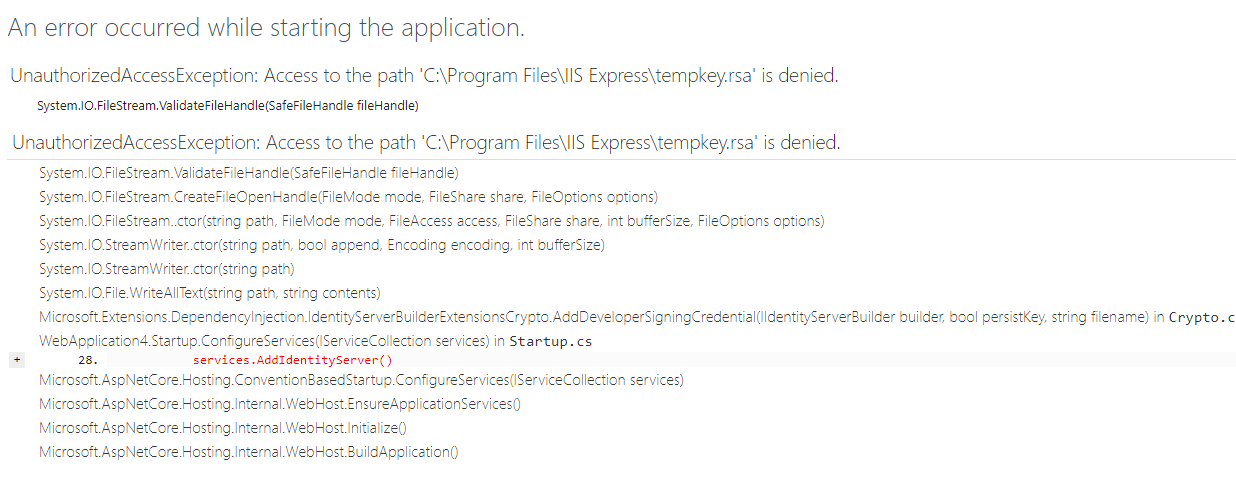
用VS 直接运行就报错 但是用VS Core打开 用dotnet run命令运行就没有报这个错误
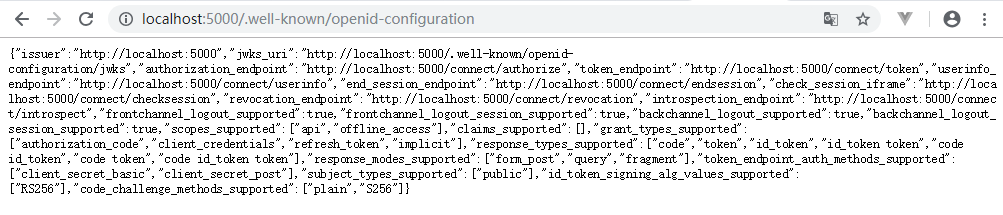
IdentityServer4配置成功后 配置页面 localhost:xxxx/.well-known/openid-configuration
身份验证服务器需要添加IdentityServer4 包
客户端只需要添加IdentityServer4.AccessTokenValidation 包
进销存用的是密码模式
相当于经销存和protal protal是身份验证服务器
经销存只是一个客户端 只需要添加IdentityServer4.AccessTokenValidation

1.用户在第三方客户端上操作的时候 想要访问接口地址 先去授权服务器认证
2.授权服务器通过验证后 会通过ProfileService 把用户信息包装成一个Claim 放返回
3.请求会加上返回的Claim 里面有用户信息 资料 token
注:如果是通过Postman测试 下面这样传参没问题 如果是通过前端来获取token 会报错400 Bad Request
都是post接口 通过抓包软件分析 传递的参数是

在前端需要对参数进行格式化 转成字符串 然后把Content-type改成application/x-www-form-urlencoded
    var param = '';

    let data = {

      client_id:'Consoleclient',

      client_secret:'511536EF-F270-4058-80CA-1C89C192F69A',

      grant_type:'client_credentials'

    };

    for (let property in data) {

      param += `&${property}=${data[property]}`

    }

    param = param.substring(, param.length)

    this.apiService.identityLoginAPI(param).then(res => {
Claim是用户身份 一个用户可以有多个身份
Scope是API资源的权限
1.客户端模式
进销存前端需要调用后端API 需要先到protal 的IdentityServer服务器 经过授权 拿到token 才能访问到后端API
获取token 传参方式

2.密码模式
需要输入真实账户和密码 这种模式body 可以设置为form-data 也可以设置为x-www-form-urlencoded

3.授权码模式
做一个统一的登陆界面 比如Pc端在Web上进行QQ登陆 然后比如登陆斗鱼的时候 可以用QQ账号密码登陆 也会跳转到QQ登陆的统一界面
搭建身份验证服务器
.Net Core的项目模版生成出来后 默认是https访问 在properties中的launchSettings.json中把sslport改为0
    "iisExpress": {

      "applicationUrl": "http://localhost:5000",

      "sslPort":

    }
1.新建一个空web Api项目
添加IdentityServer4包 这里用的版本都是2.1
添加Config.cs配置类信息
这是客户端模式配置
    public class Config

    {

        /// <summary>

        /// 配置资源服务器

        /// </summary>

        /// <returns></returns>

        public static IEnumerable<ApiResource> GetResource()

        {

            return new List<ApiResource>

            {

                new ApiResource("api","My Api")

            };

        }

        /// <summary>

        /// 配置客户端

        /// </summary>

        /// <returns></returns>

        public static IEnumerable<Client> GetClients()

        {

            return new List<Client>

            {

                new Client()

                {

                    ClientId = "client",

                    AllowedGrantTypes = GrantTypes.ClientCredentials,

                    ClientSecrets ={

                        new Secret("secret".Sha256())

                    },

                    AllowedScopes = { "api"}

                }

            };

        }

    }
2.把IdentityServer添加到依赖注入配置项
        public void ConfigureServices(IServiceCollection services)

        {

            services.AddIdentityServer()
          //添加开发证书

                .AddDeveloperSigningCredential()
          //添加资源Api

                .AddInMemoryApiResources(Config.GetResource())
          //添加客户端

                .AddInMemoryClients(Config.GetClients());

            services.AddMvc().SetCompatibilityVersion(CompatibilityVersion.Version_2_2);

        }
3.在管道中添加身份验证服务器中间件
app.UseIdentityServer();
4.启动的时候可能会报错 第一次配报错 第二次配没有报错 如果报错用Vs Code 打开 用dotnet run 命令运行
进入http://localhost:5000/.well-known/openid-configuration查看配置
"token_endpoint":"http://localhost:5000/connect/token", 这个地址就是获取token的地址
到这里 身份验证服务器搭建完毕 后面开始搭建客户端服务器 也就是接口服务器
1.新建一个Web Mvc空项目
添加IdentityServer4.AccessTokenValidation包
注入是身份验证服务器 这里的地址就是上面配的验证服务器地址
            services.AddAuthentication("Bearer")

                .AddIdentityServerAuthentication(Options =>

                {

                    Options.Authority = "http://localhost:5000";

                    Options.RequireHttpsMetadata = false;

                    Options.ApiName = "api";

                });
2.在管道中开启授权验证中间件
app.UseAuthentication();
3.在需要保护的接口上添加[Authorize]特性
4.直接访问现在的接口 就会报错401 没有授权
先通过http://localhost:5000/connect/token 身份验证服务器拿到token 再去访问api接口
第二种 帐号密码模式
修改验证服务器的Config.cs
    public class Config

    {

        public static IEnumerable<ApiResource> GetResource()

        {

            return new List<ApiResource>

            {

                new ApiResource("api","My Api")

            };

        }

        public static IEnumerable<Client> GetClients()

        {

            return new List<Client>

            {

                //客户端模式

                new Client()

                {

                    ClientId = "client",

                    AllowedGrantTypes = GrantTypes.ClientCredentials,

                    ClientSecrets ={

                        new Secret("secret".Sha256())

                    },

                    AllowedScopes = { "api"}

                },

                //账号密码模式

                new Client()

                {

                    ClientId = "pwdClient",

                    AllowedGrantTypes = GrantTypes.ResourceOwnerPassword,

                    ClientSecrets ={

                        new Secret("secret".Sha256())

                    },

                    AllowedScopes = { "api"}

                }

            };

        }

        /// <summary>

        /// 添加一个模拟的帐号密码

        /// </summary>

        /// <returns></returns>

        public static List<TestUser> GetTestUsers()

        {

            return new List<TestUser>{

                new TestUser{

                    SubjectId = "",

                    Username="jcb",

                    Password = ""

                }

            };

        }

    }
2.把账号密码模式也进行注入 修改Startup.cs
            services.AddIdentityServer()

                .AddDeveloperSigningCredential()

                .AddInMemoryApiResources(Config.GetResource())

                .AddInMemoryClients(Config.GetClients())

                .AddTestUsers(Config.GetTestUsers());
这样就完成了帐号密码模式的配置
把账号密码模式改为动态的 通过数据库进行匹配
1.新增登录验证器类LoginValidator 继承IResourceOwnerPasswordValidator 接口有一个验证方法ValidateAsync
    public class LoginValidator : IResourceOwnerPasswordValidator

    {

        public async Task ValidateAsync(ResourceOwnerPasswordValidationContext context)

        {

            Customers customers = new Customers() { Name = context.UserName };

            var res = await Login(customers);

            if (res != null)

            {

                //GrantValidationResult实例根据构造函数传参不同来进行判断是否成功

                context.Result = new GrantValidationResult(res.Id.ToString(), "password", (IEnumerable<Claim>)null, "local", (Dictionary<string, object>)null);

            }

            else

            {

            }

        }
      //登录验证可以写这里

        public async Task<Customers> Login(Customers customer)

        {

            using (MyDbContext db = new MyDbContext())

            {

                var res = db.customers.FirstOrDefault(t=>t.Name == customer.Name);

                if (res != null)

                {

                    return res;

                }

                return null;

            }

        }

    }
2.在注册身份验证服务器的时候 把这个登录验证添加进来
.AddResourceOwnerValidator<LoginValidator>();
3.这样子执行的时候 默认会使用自带的DefaultProfileService 执行到内部IsActiveAsync()方法会报错 这个类在C:\Users\jiangchengbiao\.nuget\packages\identityserver4\2.1.0\lib\netstandard2.0\IdentityServer4.dll
解决方式:需要新建一个类 继承IProfileService 重写里面的IsActiveAsync() 然后再把这个注册到身份验证服务器上
    public class ProfileService : IProfileService

    {

        public async Task GetProfileDataAsync(ProfileDataRequestContext context)

        {

            //通过第一次验证输出的账号密码 查询到租户ID等其他信息   添加到身份信息中

            List<Claim> claims = Enumerable.ToList<Claim>(context.Subject.Claims);

            claims.Add(new Claim("http://schemas.xmlsoap.org/ws/2005/05/identity/claims/nameidentifier", "蒋承标"));

            claims.Add(new Claim("http://schemas.xmlsoap.org/ws/2005/05/identity/claims/name", "浙江工贸"));

            claims.Add(new Claim("http://jcb.org/identity/claims/tenantId", "租户ID"));

            context.IssuedClaims = claims;

        }

        public async Task IsActiveAsync(IsActiveContext context)

        {

            context.IsActive = true;

            int num = await(Task<int>) Task.FromResult<int>();

        }

    }
4.把重写的ProfileService 注册到身份验证服务器上
        public void ConfigureServices(IServiceCollection services)

        {

            services.AddIdentityServer()

                .AddDeveloperSigningCredential()

                .AddInMemoryApiResources(Config.GetResource())

                .AddInMemoryClients(Config.GetClients())

                .AddTestUsers(Config.GetTestUsers())

                .AddProfileService<ProfileService>()

                .AddResourceOwnerValidator<LoginValidator>();

            services.AddMvc().SetCompatibilityVersion(CompatibilityVersion.Version_2_1);

        }
到这里就完成了 可以根据输入的帐号密码到数据库进行比对
然后在客户端(也就是经销商系统)启动JWT中间件 参数一定要是这个 还没具体去看
app.UseJwtTokenMiddleware("IdentityBearer");
ctx.AuthenticateAsync会去身份验证服务器中把 各种身份信息查询出来 这里面有租户ID 用户姓名等 放到HttpContext中
    public static class JwtTokenMiddleware

    {

        public static IApplicationBuilder UseJwtTokenMiddleware(this IApplicationBuilder app, string schema = JwtBearerDefaults.AuthenticationScheme)

        {

            return app.Use(async (ctx, next) =>

            {

                if (ctx.User.Identity?.IsAuthenticated != true)

                {

                    var result = await ctx.AuthenticateAsync(schema);

                    if (result.Succeeded && result.Principal != null)

                    {

                        ctx.User = result.Principal;

                    }

                }

                await next();

            });

        }

    }
授权码模式
1.比如登录斗鱼,选择QQ登录,跳转到QQ统一登录页面并携带returnUrl
2.输入账号密码,同意授权,页面会回到returnUrl并携带Authorization Core
3.斗鱼向自己的服务发起登录请求传入Authorization Core
4.斗鱼后台服务通过Authorization Core参数向QQ发起获取AccessToken
5.获取AccessToken后,在向QQ发起获取用户信息
6.通过QQ返回的用户信息创建斗鱼账号,创建斗鱼服务颁发的Token返回给浏览器
第4-6步都是在后台完成的
open id connect
在授权码模式的第2步,QQ在返回的时候会直接返回用户信息和Access token,免去了后面的环节
使用OpenID Connect添加用户认证
1.客户端安装Nuget包
IdentityServer4.AccessTokenValidation
Microsoft.AspNetCore.Authentication.Abstractions
Microsoft.AspNetCore.Authentication.Cookies
Microsoft.AspNetCore.Authentication.OpenIdConnect
客户端代码
        public void ConfigureServices(IServiceCollection services)

        {

            services.AddDbContext<SchoolDbContext>(d=>d.UseSqlServer(Configuration.GetConnectionString("Default")));

            JwtSecurityTokenHandler.DefaultInboundClaimTypeMap.Clear();

            services.AddAuthentication(options =>

            {

                options.DefaultScheme = "Cookies";

                options.DefaultChallengeScheme = "oidc";

            })

            .AddCookie("Cookies")

            .AddOpenIdConnect("oidc", options =>

            {

                options.Authority = "http://localhost:5000";

                options.RequireHttpsMetadata = false;

                options.ClientId = "mvc";

                options.SaveTokens = true;

            });

            services.AddMvc();

        }
最新文章
- vim的一些常用命令(一)
- ionic2+angular2中踩的那些坑
- 百度UEditor在线编辑器的配置和图片上传
- 预写式日志(Write-Ahead Logging (WAL))
- 查看IIS哪个应用程序池占用CPU过高
- Android NDK构建资料
- 关于css3 中filter的各种特效
- JS中图片的放大缩小没反应
- Codeforces Round #359 div2
- 关于List<T> 的排序
- ssh商城源码 2017.6.30
- scala可变var与不可变val的理解
- LoadRunner录制脚本时没有响应——无法启动浏览器问题总结
- 未完全弄懂的题的题51nod1532
- HDUOJ---老人是真饿了
- springboot 项目单元测试
- webpack中,require的五种用法
- 【SSH网上商城项目实战07】Struts2和Json的整合
- Oracl闪回数据命令。
- 【BZOJ1061】【NOI2008】志愿者招募