SpringSpringBoot上传文件到七牛云
准备工作
maven
pom.xml添加七牛云的sdk依赖
        <dependency>

            <groupId>com.qiniu</groupId>

            <artifactId>qiniu-java-sdk</artifactId>

            <version>7.2.27</version>

        </dependency>
配置项
七牛云上传必要的配置有:accessKey、secretKey、bucket
其中accessKey、secretKey在该网址可查看
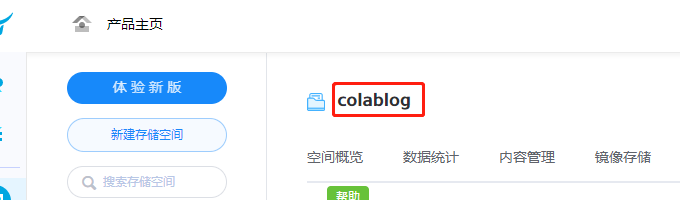
bucket为你的存储空间名,如下:
实现
application.yml配置
upload:

  qiniu:

    domain: 填你的域名

    access-key: 你的accesskey

    secret-key: 你的secretKey

    bucket: 你的存储空间名,我这里为colablog
可以看到我的七牛云上传配置中有domain这项配置,这个配置是七牛云buket的存储域名,在内容管理下,主要用于上传文件成功后把文件访问路径返还回去。

但是这个域名是限时30天使用的,所以你最好绑定一个新的域名。
上传配置类
使用SpringBoot的@ConfigurationProperties和@Component注解实现上传的配置类UploadProperties,
因为上传配置可能会有本地上传和云上传或者其他上传的,所以该配置类我留了扩展点。因为受到了rabbitmq的配置类启发,而且上传的配置不会很多,所以用内部类来分割这种配置类。上传配置类如下:
import org.springframework.boot.context.properties.ConfigurationProperties;

import org.springframework.stereotype.Component;

/**

 * @author Johnson

 * @date 2019/12/16/ 09:35:36

 */

@Component

@ConfigurationProperties(prefix = "upload")

public class UploadProperties {

    private Local local = new Local();

    public Local getLocal() {

        return local;

    }

    /**

     * @author: Johnson

     * @Date: 2019/12/16

     * 本地上传配置

     */

    public class Local {

        ...

    }

    private Qiniu qiniu = new Qiniu();

    public Qiniu getQiniu() {

        return qiniu;

    }

    /**

     * @author: Johnson

     * @Date: 2019/12/16

     * 七牛云上传配置

     */

    public class Qiniu {

        /**

         * 域名

         */

        private String domain;

        /**

         * 从下面这个地址中获取accessKey和secretKey

         * https://portal.qiniu.com/user/key

         */

        private String accessKey;

        private String secretKey;

        /**

         * 存储空间名

         */

        private String bucket;

        public String getDomain() {

            return domain;

        }

        public void setDomain(String domain) {

            this.domain = domain;

        }

        public String getAccessKey() {

            return accessKey;

        }

        public void setAccessKey(String accessKey) {

            this.accessKey = accessKey;

        }

        public String getSecretKey() {

            return secretKey;

        }

        public void setSecretKey(String secretKey) {

            this.secretKey = secretKey;

        }

        public String getBucket() {

            return bucket;

        }

        public void setBucket(String bucket) {

            this.bucket = bucket;

        }

    }

}
七牛云上传接口和类
上传接口如下:
public interface UploadFile {

    String uploadFile(MultipartFile file);

}
上传类
import cn.colablog.blogserver.utils.properties.UploadProperties;

import com.qiniu.http.Response;

import com.qiniu.storage.Configuration;

import com.qiniu.storage.Region;

import com.qiniu.storage.UploadManager;

import com.qiniu.util.Auth;

import org.springframework.web.multipart.MultipartFile;

import java.io.IOException;

import java.util.UUID;

/**

 * @author Johnson

 * @date 2019/12/14/ 17:20:16

 * 上传文件到七牛云

 */

public class UploadFileQiniu implements UploadFile {

    private UploadProperties.Qiniu properties;

    //构造一个带指定Region对象的配置类

    private Configuration cfg = new Configuration(Region.region2());

    private UploadManager uploadManager= new UploadManager(cfg);

    public UploadFileQiniu(UploadProperties.Qiniu properties) {

        this.properties = properties;

    }

    /**

    * @author: Johnson

    */

    @Override

    public String uploadFile(MultipartFile file) {

        Auth auth = Auth.create(properties.getAccessKey(), properties.getSecretKey());

        String token = auth.uploadToken(properties.getBucket());

        try {

            String originalFilename = file.getOriginalFilename();

            // 文件后缀

            String suffix = originalFilename.substring(originalFilename.lastIndexOf("."));

            String fileKey = UUID.randomUUID().toString() + suffix;

            Response response = uploadManager.put(file.getInputStream(), fileKey, token, null, null);

            return properties.getDomain() + fileKey;

        } catch (IOException e) {

            e.printStackTrace();

        }

        return "error";

    }

}
Region配置,这里代表空间的存取区域,因为我的存储空间的区域为华南。所以为Region.region2(),查看自己的存储区域可在空间概览的最下方查看到,这里就不截图了,图片占位太大。
Region对应的设置:

好了,准备工作已完成,现在就到调用了,调用类如下:
@RestController

@RequestMapping("/upload")

public class UploadFileController {

    @Autowired

    UploadProperties uploadProperties;

    @PostMapping("/img")

    public String uploadFileYun(MultipartFile file) {

        // 上传到七牛云

        UploadFile uploadFile = new UploadFileQiniu(uploadProperties.getQiniu());

        return uploadFile.uploadFile(file);

    }

}
是不是很简单呢?屁啊!简单个毛线,其实这个我是已经简化了,实际上在我的项目的结构是比这个复杂的。
总结
一:我的类名都是以Upload开头的,类名已经写死了只有上传功能,就限制了这个类的可扩展性了,假如添加文件删除功能,就不应该添加到这个类中。现在已经在重构文件操作(非文件上传了)的功能模块了。
二:一开始我觉得文件上传功能可能使用的比较少,所以使用到的时候才去实例化文件上传类,但是这需要根据开发场景来决定,因为我的项目是一个博客后台管理系统,会经常上传图片,所以上传文件类可以注入到Spring容器中,这样也可以减少实例化的开销(虽然很小)。注入的话就是用@Component类注解。
三:配置文件我为什么会想到使用内部类来分割配置项呢?其实大家在编写一些类似功能的时候,都可以去参照一下别人的源码,当然,这里指的是大神的源码。因为我在写配置项的时候就想看看大神的配置项是怎么写的,就点进了rabbitmq的配置项。所以啊,看到了大神的代码是真的有长进的。
如果你需要查看更详细的官方文档,请点击下方链接:
最后:感谢大家的阅读,Thanks♪(・ω・)ノ
个人博客网址: https://colablog.cn/
如果我的文章帮助到您,可以关注我的微信公众号,第一时间分享文章给您

最新文章
- 关闭电脑SSD的磁盘碎片整理
- hough变换检测线和圆
- pyQuery
- 转: 在.NET中操作数字证书
- 正则化方法 exec 和match以及test
- asp.net mvc 删除栏目、栏目下又有子栏目的处理方式
- Js中JSON.stringify()与JSON.parse()与eval()详解及使用案例
- java基础知识拾遗(二)
- IIS 错误代码
- 【Linux】日志分析工具grep sed sort
- ES6学习笔记(let,const,变量的解构赋值)
- jQuery实现Ajax请求时,页面显示等待的效果,超过指定请求时间后,进行其他操作
- spring 中连接多个数据源
- componentWillReceiveProps详解(this.props)状态改变检测机制
- 20155332 2016-2017-2 《Java程序设计》第6周学习总结
- 68.iOS设备尺寸及型号代码(iPhoneXR/XS)
- A Theoretical Analysis of Feature Pooling in Visual Recognition
- python里面的引用
- window.opener()方法
- div 在css中透明度怎么调?
热门文章
- nyoj 29-求转置矩阵问题 (行,列位置调换)
- 关于IP网段划分
- [机器学习笔记]kNN进邻算法
- C#解析XML之流模型-XMLTextReader类
- ubuntu 16.04上源码编译libjpeg-turbo和使用教程 | compile and use libjpeg-turbo on ubuntu 16.04
- Spring 5 响应式编程
- 微信中使用popup等弹窗组件时点击输入框input键盘弹起导致IOS中按钮无效处理办法
- <编译原理 - 函数绘图语言解释器(2)语法分析器 - python>
- ubuntu 交叉编译 busybox 1.31.1
- 迁移桌面程序到MS Store(13)——动态检查Win10 API是否可用