9、手写一个starter
2024-09-08 17:59:20
一、starte详解:
1、starter场景启动器:
SpringBoot-starter是一个集成接合器,主要完成两件事:
(1)、引入模块所需的相关jar包
(2)、自动配置各自模块所需的属性
注:
spring-boot-starter-*:官方提供
*-spring-boot-starter:第三方提供
2、starter实现原理:
(1)、首先,SpringBoot在启动时会先去依赖的starter包中寻找 resources/META-INF/spring.factories 文件,然后根据文件中配置的Jar包去扫描项目所依赖的Jar包
(2)、然后,根据 spring.factories 配置加载自动配置类。
(3)、最后,根据 @Conditional 注解的条件,进行自动配置,并将Bean注入Spring Context上下文当中。
二、Springboot自动配置原理:
Springboot启动的时候会通过@EnableAutoConfiguration注解找到配置文件中的所有自动配置类(XxxxAutoConfiguration类),并对其进行加载,而这些自动配置类都是以AutoConfiguration结尾来命名的,它实际上就是一个JavaConfig形式的Spring容器配置类,它能通过以Properties结尾命名的类中取得在全局配置文件中配置的属性如:server.port,而XxxxProperties类是通过@ConfigurationProperties注解与全局配置文件中对应的属性进行绑定的。
三、手写一个starter:
手写一个starter。功能很简单,调用starter内对象的一个方法输出"xxx,hello! xxx"
1、hello-spring-boot-starter工程:
(1)、改POM:
<?xml version="1.0" encoding="UTF-8"?>

<project xmlns="http://maven.apache.org/POM/4.0.0" xmlns:xsi="http://www.w3.org/2001/XMLSchema-instance"

         xsi:schemaLocation="http://maven.apache.org/POM/4.0.0 https://maven.apache.org/xsd/maven-4.0.0.xsd">

    <modelVersion>4.0.0</modelVersion>

    <parent>

        <groupId>org.springframework.boot</groupId>

        <artifactId>spring-boot-starter-parent</artifactId>

        <version>2.7.1</version>

        <relativePath/> <!-- lookup parent from repository -->

    </parent>

    <groupId>com.iven</groupId>

    <artifactId>hello-spring-boot-starter</artifactId>

    <version>0.0.1-SNAPSHOT</version>

    <name>hello-spring-boot-starter</name>

    <description>Demo project for Spring Boot</description>

    <properties>

        <java.version>1.8</java.version>

    </properties>

    <dependencies>

        <dependency>

            <groupId>org.springframework.boot</groupId>

            <artifactId>spring-boot-starter</artifactId>

        </dependency>

        <!--SpringBoot框架web项目起步依赖-->

        <dependency>

            <groupId>org.springframework.boot</groupId>

            <artifactId>spring-boot-starter-web</artifactId>

        </dependency>

        <!--自动读取配置元数据:-->

        <!--参考:https://www.jianshu.com/p/ca22783b0a35-->

        <dependency>

            <groupId>org.springframework.boot</groupId>

            <artifactId>spring-boot-configuration-processor</artifactId>

            <optional>true</optional>

        </dependency>

        <!--springBoot自动配置-->

        <dependency>

            <groupId>org.springframework.boot</groupId>

            <artifactId>spring-boot-autoconfigure</artifactId>

        </dependency>

        <!-- Lombok-->

        <dependency>

            <groupId>org.projectlombok</groupId>

            <artifactId>lombok</artifactId>

            <version>1.18.20</version>

        </dependency>

    </dependencies>

    <!--打pom包的插件-->

    <build>

        <plugins>

            <plugin>

                <groupId>org.apache.maven.plugins</groupId>

                <artifactId>maven-compiler-plugin</artifactId>

                <version>3.10.1</version>

                <configuration>

                    <source>8</source>

                    <target>8</target>

                </configuration>

            </plugin>

        </plugins>

    </build>

</project>
(2)、编写业务类Service:
@Data

@AllArgsConstructor  //全参构造

@NoArgsConstructor  //无参构造

public class HelloService {

    private  String name;

    private String detail;

    public String hello() {

        return getName()+",hello! " + getDetail();

    }

}
(3)、编写Configuration配置类(主):
@Configuration    //表明这是一个springBoot的配置类

public class HelloConfig {

    @Value("${com.hello:Iven}")

    private  String name;

    @Value("${com.hello:冲冲冲}")

    private String detail;

    @Bean    //将对象放入IOC容器中,对象名就是方法名

    public HelloService helloService(){

        return new HelloService(name,detail);

    }

}
(4)、编写spring.factories文件:
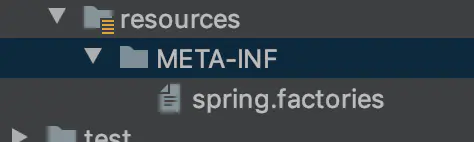
为了让springboot容器扫描到配置类,建一个resource目录,一个META-INF文件夹和spring.factories文件
#等号后面是配置类的全路径(包+配置类名)

org.springframework.boot.autoconfigure.EnableAutoConfiguration=com.iven.hellospringbootstarter.config.HelloConfig
(5)、install打包到本地仓库;
2、test-starter-demo工程:
(1)、添加依赖:
<dependency>

    <groupId>com.iven</groupId>

    <artifactId>hello-spring-boot-starter</artifactId>

    <version>0.0.1-SNAPSHOT</version>

</dependency>
(2)、使用:
@RestController

@RequestMapping("/v1")

public class control {

    @Autowired

    private HelloService helloService;

    @RequestMapping("")

    public String demo(){

        helloService.setName("Pitt");

        return helloService.hello();

    }

}
搜索
复制
最新文章
- 理解OVER子句
- 操蛋的CTex
- MySQL下全文索引
- iOS-消息推送机制的实现
- 文件读写方法1.FileInputStream和FileOutputStream
- HDU 4893 Wow! Such Sequence! (线段树)
- mySQl该数据库不能将中国的做法
- 自动生成Makefile文件
- socket.io 入门篇(一)
- Lua脚本在redis分布式锁场景的运用
- ABAP的匹配
- Android上实现各种风格的隐藏菜单,比如左右滑动菜单、上下滑动显示隐藏菜单
- Flutter框架概览
- Hadoop学习之路(二十一)MapReduce实现Reduce Join(多个文件联合查询)
- TCP深入详解
- python3 之 格式化json
- 【Java密码学】使用Bouncy Castle生成数字签名、数字信封
- cuda中当元素个数超过线程个数时的处理案例
- MongoDB下载安装測试及使用
- Zynq7000系列之芯片系统结构概述
热门文章
- Django 出现 frame because it set X-Frame-Options to deny 错误
- 【算法训练营day7】LeetCode454. 四数相加II LeetCode383. 赎金信 LeetCode15. 三数之和 LeetCode18. 四数之和
- Bootstrap中的dropdown、下拉选择框、dropdown-toggle
- 【第1篇】人工智能(AI)语音测试原理和实践---宣传
- 如何用webgl(three.js)搭建一个3D库房,3D仓库3D码头,3D集装箱,车辆定位,叉车定位可视化孪生系统——第十五课
- Unity——第一人称控制器的实现
- iOS App 上架App Store及提交审核详细教程
- LoadRunner11脚本小技能之同步/异步接口分离+批量替换请求头
- 成熟企业级开源监控解决方案Zabbix6.2关键功能实战-下
- 题解合集 (update on 11.5)