Java Web系列:Spring Boot 基础
Spring Boot 项目(参考1) 提供了一个类似ASP.NET MVC的默认模板一样的标准样板,直接集成了一系列的组件并使用了默认的配置。使用Spring Boot 不会降低学习成本,甚至增加了学习成本,但显著降低了使用成本并提高了开发效率。如果没有Spring基础不建议直接上手。
1.基础项目
这里只关注基于Maven的项目构建,使用Spring Boot CLI命令行工具和Gradle构建方式请参考官网。
(1)创建项目:
创建类型为quickstart的Maven项目,删除默认生成的.java文件保持默认的Maven目录即可。
(2)修改/pom.xml
 <?xml version="1.0" encoding="UTF-8"?>

 <project xmlns="http://maven.apache.org/POM/4.0.0" xmlns:xsi="http://www.w3.org/2001/XMLSchema-instance"

     xsi:schemaLocation="http://maven.apache.org/POM/4.0.0 http://maven.apache.org/xsd/maven-4.0.0.xsd">

     <modelVersion>4.0.0</modelVersion>

     <groupId>com.example</groupId>

     <artifactId>myproject</artifactId>

     <version>0.0.1-SNAPSHOT</version>

     <properties>

         <java.version>1.8</java.version>

     </properties>

     <parent>

         <groupId>org.springframework.boot</groupId>

         <artifactId>spring-boot-starter-parent</artifactId>

         <version>1.3.1.RELEASE</version>

     </parent>

     <dependencies>

         <dependency>

             <groupId>org.springframework.boot</groupId>

             <artifactId>spring-boot-starter-web</artifactId>

         </dependency>

     </dependencies>

 </project>
(3)添加/src/main/sample/controller/HomeController.java文件:
 package simple.controller;

 import org.springframework.web.bind.annotation.*;

 @RestController

 public class HomeController {

     @RequestMapping("/")

     public String index() {

         return "Hello World!";

     }

 }
(4)添加/src/main/sample/Application.java文件:
 package simple;

 import org.springframework.boot.*;

 import org.springframework.boot.autoconfigure.*;

 import simple.controller.*;

 @EnableAutoConfiguration

 public class Application {

     public static void main(String[] args) throws Exception {

         SpringApplication.run(new Object[] { Application.class, HomeController.class }, args);

     }

 }
在浏览器中输入http://localhost:8080/,即可直接看到"Hello World"运行结果。
2. 添加数据访问支持
(1)修改pom,添加spring-boot-starter-data-jpa和h2依赖:
 <?xml version="1.0" encoding="UTF-8"?>

 <project xmlns="http://maven.apache.org/POM/4.0.0" xmlns:xsi="http://www.w3.org/2001/XMLSchema-instance"

     xsi:schemaLocation="http://maven.apache.org/POM/4.0.0 http://maven.apache.org/xsd/maven-4.0.0.xsd">

     <modelVersion>4.0.0</modelVersion>

     <groupId>com.example</groupId>

     <artifactId>myproject</artifactId>

     <version>0.0.1-SNAPSHOT</version>

     <properties>

         <java.version>1.8</java.version>

     </properties>

     <parent>

         <groupId>org.springframework.boot</groupId>

         <artifactId>spring-boot-starter-parent</artifactId>

         <version>1.3.1.RELEASE</version>

     </parent>

     <dependencies>

         <dependency>

             <groupId>org.springframework.boot</groupId>

             <artifactId>spring-boot-starter-web</artifactId>

         </dependency>

         <dependency>

             <groupId>org.springframework.boot</groupId>

             <artifactId>spring-boot-starter-data-jpa</artifactId>

         </dependency>

         <dependency>

             <groupId>com.h2database</groupId>

             <artifactId>h2</artifactId>

             <scope>runtime</scope>

         </dependency>

     </dependencies>

 </project>
如果需要在控制台查看生成SQL语句,可以添加/src/main/resources/application.properties
 spring.h2.console.enabled=true

 logging.level.org.hibernate.SQL=debug
(2)添加实体
添加User、Role、Category和Post实体。
User:
 package simple.domain;

 import java.util.*;

 import javax.persistence.*;

 @Entity

 public class User {

     @Id

     @GeneratedValue

     private Long id;

     private String userName;

     private String password;

     private String Email;

     @javax.persistence.Version

     private Long Version;

     @ManyToMany(cascade = CascadeType.ALL)

     private List<Role> roles = new ArrayList<Role>();

     public Long getId() {

         return id;

     }

     public void setId(Long id) {

         this.id = id;

     }

     public String getUserName() {

         return userName;

     }

     public void setUserName(String userName) {

         this.userName = userName;

     }

     public String getPassword() {

         return password;

     }

     public void setPassword(String password) {

         this.password = password;

     }

     public String getEmail() {

         return Email;

     }

     public void setEmail(String email) {

         Email = email;

     }

     public List<Role> getRoles() {

         return roles;

     }

     public void setRoles(List<Role> roles) {

         this.roles = roles;

     }

     public Long getVersion() {

         return Version;

     }

     public void setVersion(Long version) {

         Version = version;

     }

 }
Role:
 package simple.domain;

 import java.util.*;

 import javax.persistence.*;

 @Entity

 public class Role {

     @Id

     @GeneratedValue

     private Long id;

     private String roleName;

     @ManyToMany(cascade = CascadeType.ALL)

     private List<User> users = new ArrayList<User>();

     public Long getId() {

         return id;

     }

     public void setId(Long id) {

         this.id = id;

     }

     public String getRoleName() {

         return roleName;

     }

     public void setRoleName(String roleName) {

         this.roleName = roleName;

     }

     public List<User> getUsers() {

         return users;

     }

     public void setUsers(List<User> users) {

         this.users = users;

     }

 }
Category:
 package simple.domain;

 import java.util.*;

 import javax.persistence.*;

 @Entity

 public class Category {

     @Id

     @GeneratedValue

     private Long id;

     private String Name;

     @OneToMany

     private List<Post> posts = new ArrayList<Post>();

     public Long getId() {

         return id;

     }

     public void setId(Long id) {

         this.id = id;

     }

     public String getName() {

         return Name;

     }

     public void setName(String name) {

         Name = name;

     }

     public List<Post> getPosts() {

         return posts;

     }

     public void setPosts(List<Post> posts) {

         this.posts = posts;

     }

 }
Post:
 package simple.domain;

 import java.util.*;

 import javax.persistence.*;

 @Entity

 public class Post {

     @Id

     @GeneratedValue

     private Long id;

     private String Name;

     private String Html;

     private String Text;

     private Date CreateAt;

     @ManyToOne

     private Category category;

     public Long getId() {

         return id;

     }

     public void setId(Long id) {

         this.id = id;

     }

     public String getName() {

         return Name;

     }

     public void setName(String name) {

         Name = name;

     }

     public String getHtml() {

         return Html;

     }

     public void setHtml(String html) {

         Html = html;

     }

     public String getText() {

         return Text;

     }

     public void setText(String text) {

         Text = text;

     }

     public Date getCreateAt() {

         return CreateAt;

     }

     public void setCreateAt(Date createAt) {

         CreateAt = createAt;

     }

     public Category getCategory() {

         return category;

     }

     public void setCategory(Category category) {

         this.category = category;

     }

 }
(3)添加资源库
添加UserRepository、RoleRepository、CategoryRepository和PostRepository接口,无需实现。
UserRepository:
 package simple.repository;

 import org.springframework.data.repository.*;

 import simple.domain.*;

 public interface UserRepository extends CrudRepository<User, Long> {

 }
RoleRepository
 package simple.repository;

 import org.springframework.data.repository.*;

 import simple.domain.*;

 public interface RoleRepository extends CrudRepository<Role, Long> {

 }
CategoryRepository
 package simple.repository;

 import org.springframework.data.repository.*;

 import simple.domain.*;

 public interface CategoryRepository extends CrudRepository<Category, Long> {

 }
PostRepository
package simple.repository;

import org.springframework.data.repository.*;

import simple.domain.*;

public interface PostRepository extends CrudRepository<User, Long> {

}
(4)在控制器中注入资源库接口
 package simple.controller;

 import org.springframework.beans.factory.annotation.*;

 import org.springframework.web.bind.annotation.*;

 import simple.repository.*;

 @RestController

 public class HomeController {

     private UserRepository userRepository;

     private RoleRepository roleRepository;

     private CategoryRepository categoryRepository;

     private PostRepository postReppository;

     @Autowired

     public HomeController(UserRepository userRepository, RoleRepository roleRepository,

             CategoryRepository categoryRepository, PostRepository postReppository) {

         this.userRepository = userRepository;

         this.roleRepository = roleRepository;

         this.categoryRepository = categoryRepository;

         this.postReppository = postReppository;

     }

     @RequestMapping("/")

     public long index() {

         return userRepository.count();

     }

 }
使用事务时在方法上应用注解@Transactional
3.添加验证和授权支持
(1)添加spring-boot-starter-security依赖
 <?xml version="1.0" encoding="UTF-8"?>

 <project xmlns="http://maven.apache.org/POM/4.0.0" xmlns:xsi="http://www.w3.org/2001/XMLSchema-instance"

     xsi:schemaLocation="http://maven.apache.org/POM/4.0.0 http://maven.apache.org/xsd/maven-4.0.0.xsd">

     <modelVersion>4.0.0</modelVersion>

     <groupId>com.example</groupId>

     <artifactId>myproject</artifactId>

     <version>0.0.1-SNAPSHOT</version>

     <properties>

         <java.version>1.8</java.version>

     </properties>

     <parent>

         <groupId>org.springframework.boot</groupId>

         <artifactId>spring-boot-starter-parent</artifactId>

         <version>1.3.1.RELEASE</version>

     </parent>

     <dependencies>

         <dependency>

             <groupId>org.springframework.boot</groupId>

             <artifactId>spring-boot-starter-web</artifactId>

         </dependency>

         <dependency>

             <groupId>org.springframework.boot</groupId>

             <artifactId>spring-boot-starter-data-jpa</artifactId>

         </dependency>

         <dependency>

             <groupId>com.h2database</groupId>

             <artifactId>h2</artifactId>

             <scope>runtime</scope>

         </dependency>

         <dependency>

             <groupId>org.springframework.boot</groupId>

             <artifactId>spring-boot-starter-security</artifactId>

         </dependency>

     </dependencies>

 </project>
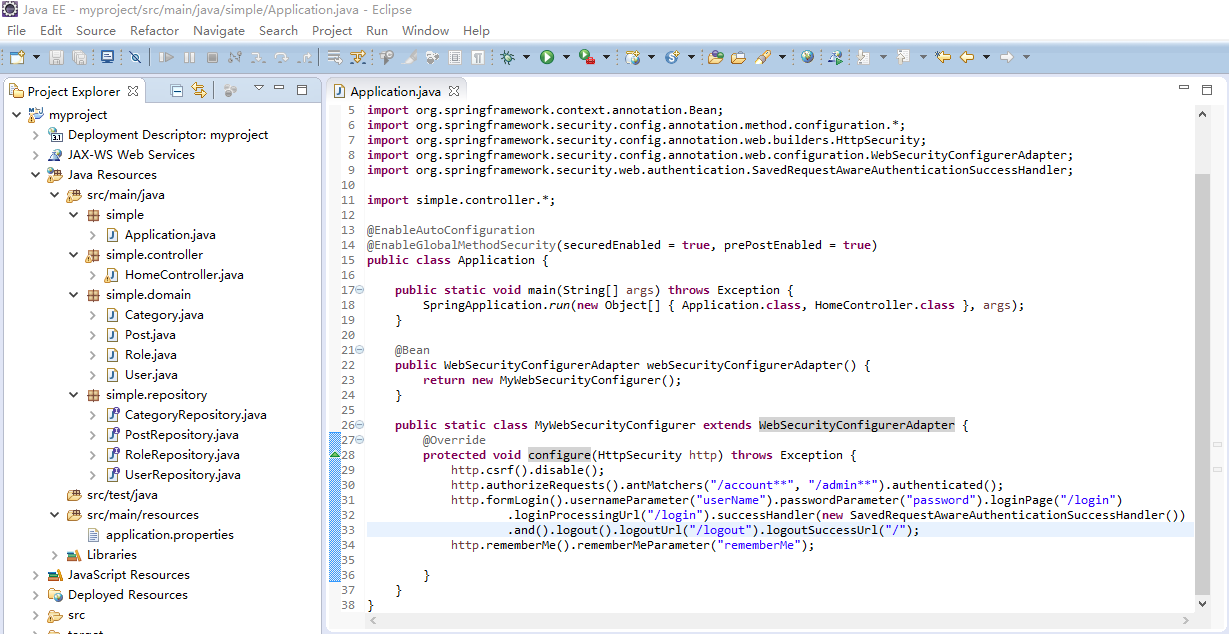
(2)修改Application.java
 package simple;

 import org.springframework.boot.*;

 import org.springframework.boot.autoconfigure.*;

 import org.springframework.context.annotation.Bean;

 import org.springframework.security.config.annotation.method.configuration.*;

 import org.springframework.security.config.annotation.web.builders.HttpSecurity;

 import org.springframework.security.config.annotation.web.configuration.WebSecurityConfigurerAdapter;

 import org.springframework.security.web.authentication.SavedRequestAwareAuthenticationSuccessHandler;

 import simple.controller.*;

 @EnableAutoConfiguration

 @EnableGlobalMethodSecurity(securedEnabled = true, prePostEnabled = true)

 public class Application {

     public static void main(String[] args) throws Exception {

         SpringApplication.run(new Object[] { Application.class, HomeController.class }, args);

     }

     @Bean

     public WebSecurityConfigurerAdapter webSecurityConfigurerAdapter() {

         return new MyWebSecurityConfigurer();

     }

     public static class MyWebSecurityConfigurer extends WebSecurityConfigurerAdapter {

         @Override

         protected void configure(HttpSecurity http) throws Exception {

             http.csrf().disable();

             http.authorizeRequests().antMatchers("/account**", "/admin**").authenticated();

             http.formLogin().usernameParameter("userName").passwordParameter("password").loginPage("/login")

                     .loginProcessingUrl("/login").successHandler(new SavedRequestAwareAuthenticationSuccessHandler())

                     .and().logout().logoutUrl("/logout").logoutSuccessUrl("/");

             http.rememberMe().rememberMeParameter("rememberMe");

         }

     }

 }
访问http://localhost:8080/account会自动跳转到login登录页。Spring Security的具体使用前文已有所述。
参考:
(1)https://github.com/spring-projects/spring-boot
(2)http://projects.spring.io/spring-boot/
(3)https://github.com/qibaoguang/Spring-Boot-Reference-Guide/blob/master/SUMMARY.md
最新文章
- VMware下对虚拟机Ubuntu14系统所在分区sda1进行磁盘扩容
- C#用链式方法表达循环嵌套
- ubuntu-vnc
- Tomcat中间件URL中文字符传递问题
- 读写ZIP文件
- 关于playmaker play animation出现警告 The AnimationClip 'xxx' used by the Animati ...
- gdb调试程序
- Android 4.4 Kitkat Phone工作流程浅析(六)__InCallActivity显示更新流程
- FTP创建与操作
- [编织消息框架][JAVA核心技术]动态代理应用10-水平扩展方案
- Java课程设计-学生基本信息管理 201521123036
- (NO.00003)iOS游戏简单的机器人投射游戏成形记(十八)
- Java线程专栏文章汇总
- 我的 FPGA 学习历程(08)—— 实验:点亮单个数码管
- 一文读懂遗传算法工作原理(附Python实现)
- mybatis的xml映射文件
- java Condition条件变量的通俗易懂解释、基本使用及注意点
- win8下Source Insight has not been installed completely问题的解决
- 2017-2018-1 20155306 《信息安全系统设计基础》嵌入式C语言———提取设置时分秒
- centos7安装MySQL5.7无法设置密码问题