Android AsyncTask 源码解析
1. 官方介绍
public abstract class AsyncTask extends Object
| java.lang.Object | |
| ↳ | android.os.AsyncTask<Params, Progress, Result> |
AsyncTask enables proper and easy use of the UI thread. This class allows to perform background operations and publish results on the UI thread without having to manipulate threads and/or handlers.
AsyncTask is designed to be a helper class around Thread and Handler and does not constitute a generic threading framework. AsyncTasks should ideally be used for short operations (a few seconds at the most.) If you need to keep threads running for long periods of time, it is highly recommended you use the various APIs provided by the java.util.concurrent package such as Executor, ThreadPoolExecutor and FutureTask.
An asynchronous task is defined by a computation that runs on a background thread and whose result is published on the UI thread. An asynchronous task is defined by 3 generic types, called Params, Progress and Result, and 4 steps, called onPreExecute, doInBackground, onProgressUpdate andonPostExecute.
翻译:
- AsyncTask使适当的和容易使用的UI线程。这类允许执行后台操作和发布的结果在UI线程上无需操纵线程和/或处理程序。AsyncTask被设计成一个助手类线程和处理程序和不构成通用线程框架。理想情况下应使用asynctask简称操作(最多几秒钟)。如果你需要保持线程运行很长一段时间,强烈建议你使用各种java.util提供的api。并发包如遗嘱执行人,ThreadPoolExecutor FutureTask。异步任务被定义为一个计算,运行在一个后台线程,其结果发表在UI线程上。异步任务被定义为3泛型类型,称为Params,进展和结果,和4个步骤,称为onPreExecute,doInBackground,onProgressUpdate,onPostExecute。
- 简单来说AsyncTasck是用来处理耗时的操作(如:网络请求/下载图片等等...),说白了就是相当于对Thread+Handler的一种封装,封装了ThreadPool, 比直接使用Thread效率要高,使用它更编码更简洁,更高效.
2.使用方法
- 举一个列子给大家看看
-
package com.edwin.demoasynctask;

import android.app.ProgressDialog;

import android.os.AsyncTask;

import android.os.Bundle;

import android.support.v7.app.AppCompatActivity;

import android.util.Log;

import android.widget.Toast;

public class MainActivity extends AppCompatActivity {

    private String TAG = "Edwin";

    private ProgressDialog mProgressDialog;

    @Override

    protected void onCreate(Bundle savedInstanceState) {

        super.onCreate(savedInstanceState);

        setContentView(R.layout.activity_main);

        new MyAsyncTask().execute("网址地址", "请求参数");

    }

    /**

     * AsyncTask<Params, Progress, Result>三个参数分别介绍一下

     * Params 启动任务执行的输入参数,比如HTTP请求的URL。

     * Progress 后台任务执行的百分比,比如下载的进度值。

     * Result 后台执行任务最终返回的结果,比如String。

     * <p/>

     * GO

     * 这里我做一个模拟下载文件的操作

     */

    private class MyAsyncTask extends AsyncTask<String, Integer, String> {

        /**

         * 1.在分线程工作开始之前在UI线程中执行,初始化进度条视图

         */

        @Override

        protected void onPreExecute() {

            //TODO 准备初始化View

            mProgressDialog = new ProgressDialog(MainActivity.this);

            mProgressDialog.setMax(100);

            mProgressDialog.setProgressStyle(ProgressDialog.STYLE_HORIZONTAL);

            mProgressDialog.setCancelable(false);

            mProgressDialog.show();

            Log.e(TAG, "onPreExecute");

        }

        /**

         * 2.在分线程中执行,完成任务的主要工作,通常需要较长的时间

         *

         * @param params url请求参数等等..

         * @return 请求之后得到的结果

         */

        @Override

        protected String doInBackground(String... params) {

            //TODO 做一些耗时的操作

            String url = params[0];//获取url参数进行网络请求操作

            Log.e(TAG, "doInBackground");

            int i = 0;

            // 下面我们模拟数据的加载,耗时的任务

            for (i = 0; i < 100; i++) {

                try {

                    Thread.sleep(100);

                } catch (InterruptedException e) {

                    e.printStackTrace();

                }

                //在分线程中, 发布当前进度

                publishProgress(i);

            }

            //返回结果

            return "结果:" + i;

        }

        /**

         * 3.在主线程中更新进度

         *

         * @param values 进度值

         */

        @Override

        protected void onProgressUpdate(Integer... values) {

            //TODO 获取进度值,更新View

            mProgressDialog.setProgress(values[0]);

            Log.e(TAG, "onProgressUpdate values[0] = " + values[0]);

        }

        /**

         * 4.执行完之后的结果

         *

         * @param result 结果

         */

        @Override

        protected void onPostExecute(String result) {

            //TODO 获取结果,关闭View

            mProgressDialog.dismiss();

            Log.e(TAG, "onPostExecute result = " + result);

            Toast.makeText(MainActivity.this, "文件下载成功", Toast.LENGTH_SHORT).show();

        }

    }

}
-
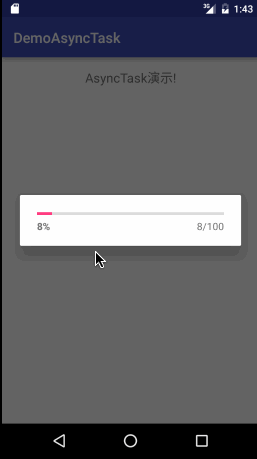
- 效果图

3. 源码解析
- AsyncTask初始化操作分析
 /**

      * Creates a new asynchronous task. This constructor must be invoked on the UI thread.

      */

     public AsyncTask() {

         mWorker = new WorkerRunnable<Params, Result>() {

             public Result call() throws Exception {

                 mTaskInvoked.set(true);

                 Process.setThreadPriority(Process.THREAD_PRIORITY_BACKGROUND);

                 //noinspection unchecked

                 Result result = doInBackground(mParams);

                 Binder.flushPendingCommands();

                 return postResult(result);

             }

         };

         mFuture = new FutureTask<Result>(mWorker) {

             @Override

             protected void done() {

                 try {

                     postResultIfNotInvoked(get());

                 } catch (InterruptedException e) {

                     android.util.Log.w(LOG_TAG, e);

                 } catch (ExecutionException e) {

                     throw new RuntimeException("An error occurred while executing doInBackground()",

                             e.getCause());

                 } catch (CancellationException e) {

                     postResultIfNotInvoked(null);

                 }

             }

         };

     }
第5行是初始化的一些参数,用于存放我们传入的参数execute(Params... params),源码点进去看WorkerRunnable是一个抽象类实现了Callable
-
 private static abstract class WorkerRunnable<Params, Result> implements Callable<Result> {

         Params[] mParams;

     }

     @SuppressWarnings({"RawUseOfParameterizedType"})

     private static class AsyncTaskResult<Data> {

         final AsyncTask mTask;

         final Data[] mData;

         AsyncTaskResult(AsyncTask task, Data... data) {

             mTask = task;

             mData = data;

         }

     }
-
- 第17行是初始化FutureTask而穿进去的参数又是mWorker重写done方法,在完成的时候调用onCancelled()或者onPostExecute()。看源码追踪
  通过源码postResultfNotInvoked(get()),postResultfNotInvoked(null);点进入如下

  private void postResultIfNotInvoked(Result result) {

         final boolean wasTaskInvoked = mTaskInvoked.get(); //如果不为true就执行,因在初始化的时候已经设为了true,所以不会执行

         if (!wasTaskInvoked) {

             postResult(result);

         }

     }
- AsyncTask .execute操作分析
-
 public final AsyncTask<Params, Progress, Result> execute(Params... params) {

        return executeOnExecutor(sDefaultExecutor, params);

    }

 public final AsyncTask<Params, Progress, Result> executeOnExecutor(Executor exec,

             Params... params) {

         if (mStatus != Status.PENDING) {

             switch (mStatus) {

                 case RUNNING:

                     throw new IllegalStateException("Cannot execute task:"

                             + " the task is already running.");

                 case FINISHED:

                     throw new IllegalStateException("Cannot execute task:"

                             + " the task has already been executed "

                             + "(a task can be executed only once)");

             }

         }

         mStatus = Status.RUNNING;

         onPreExecute();

         mWorker.mParams = params;

         exec.execute(mFuture);

         return this;

}- 先看第7行一个switch语句先判断当前的状态,Status是一个枚举类型共三种情况(等待PENDING/运行RUNNING/完成FINISHED),
- 哈哈,看执行到21行代码,很熟悉了吧onPreExecute()初始化的操作,在UI线程做一些准备工作啦!
- 接走执行到23行,刚才我们一进来就讲啦mWorker初始化操作了,他是一个抽象类,这时候我们把我们传入进来的参数赋值给它。
- 最好第24行执行一个异步操作。mFuture参数在初始化的地方讲到了,下面我们之间深入看源码。
- 好,我们在此回过去看FutureTask初始化后done方法里的方法postResultIfNotInvoked(get())和postResultIfNotInvoked(null)
-
 private void postResultIfNotInvoked(Result result) {

         final boolean wasTaskInvoked = mTaskInvoked.get();

         if (!wasTaskInvoked) {

             postResult(result);  //慢慢深入

         }

     }

 8

 private Result postResult(Result result) {

         @SuppressWarnings("unchecked")

         Message message = getHandler().obtainMessage(MESSAGE_POST_RESULT,

                 new AsyncTaskResult<Result>(this, result));

         message.sendToTarget();

         return result;

}- 第11行代码,哇靠!通过Handler发送消息给UI线程,那就去看看Handler的初始化操作
-
 private static Handler getHandler() {

         synchronized (AsyncTask.class) {

             if (sHandler == null) {

                 sHandler = new InternalHandler();

             }

             return sHandler;

         }

     }

 private static class InternalHandler extends Handler {

         public InternalHandler() {

             super(Looper.getMainLooper());

         }

         @SuppressWarnings({"unchecked", "RawUseOfParameterizedType"})

         @Override

         public void handleMessage(Message msg) {

             AsyncTaskResult<?> result = (AsyncTaskResult<?>) msg.obj;

             switch (msg.what) {

                 case MESSAGE_POST_RESULT:

                     // There is only one result

                     result.mTask.finish(result.mData[0]);//源码跟踪进入调用的是onPostExecute()

                     break;

                 case MESSAGE_POST_PROGRESS:

                     result.mTask.onProgressUpdate(result.mData); //调用onProgressUpdate熟悉吧。

                     break;

             }

         }

     }
-
- 第11行代码,哇靠!通过Handler发送消息给UI线程,那就去看看Handler的初始化操作
-
- 我们在回过头来看看,调用execute方法,最终调用的是executeOnExecutor方法,他里面有一个设置好的参数sDefaultExecutor,好对他下手拨开皮看看
- 逆向分析—颜色一一对应
  public final AsyncTask<Params, Progress, Result> execute(Params... params) {

         return executeOnExecutor(sDefaultExecutor, params);

     }

 private static volatile Executor sDefaultExecutor = SERIAL_EXECUTOR;

 public static final Executor SERIAL_EXECUTOR = new SerialExecutor();

 private static class SerialExecutor implements Executor {

         final ArrayDeque<Runnable> mTasks = new ArrayDeque<Runnable>();

         Runnable mActive;

         public synchronized void execute(final Runnable r) {

             mTasks.offer(new Runnable() {

                 public void run() {

                     try {

                         r.run();

                     } finally {

                         scheduleNext();

                     }

                 }

             });

             if (mActive == null) {

                 scheduleNext();

             }

         }

         protected synchronized void scheduleNext() {

             if ((mActive = mTasks.poll()) != null) {

                 THREAD_POOL_EXECUTOR.execute(mActive);

             }

         }

     }

 public static final Executor THREAD_POOL_EXECUTOR

             = new ThreadPoolExecutor(CORE_POOL_SIZE, MAXIMUM_POOL_SIZE, KEEP_ALIVE,

                     TimeUnit.SECONDS, sPoolWorkQueue, sThreadFactory);

   private static final int CPU_COUNT = Runtime.getRuntime().availableProcessors();//可用的CPU个数

   private static final int CORE_POOL_SIZE = CPU_COUNT + 1;//线程池大小

   private static final int MAXIMUM_POOL_SIZE = CPU_COUNT * 2 + 1;//最大线程

   private static final int KEEP_ALIVE = 1;//维持时间
- 逆向分析—颜色一一对应
-
4. AsyncTask曾经缺陷
- API11以前的源码
-
 private static final int CORE_POOL_SIZE = 5;

 private static final int MAXIMUM_POOL_SIZE = 128;

 private static final int KEEP_ALIVE = 1;

 private static final BlockingQueue<Runnable> sWorkQueue =

     new LinkedBlockingQueue<Runnable>(10);

 private static final ThreadPoolExecutor sExecutor =

     new ThreadPoolExecutor(CORE_POOL_SIZE,MAXIMUM_POOL_SIZE, KEEP_ALIVE,

TimeUnit.SECONDS, sWorkQueue, sThreadFactory); - API11以后的源码
-
     private static final int CPU_COUNT = Runtime.getRuntime().availableProcessors();

     private static final int CORE_POOL_SIZE = CPU_COUNT + 1;

     private static final int MAXIMUM_POOL_SIZE = CPU_COUNT * 2 + 1;

     private static final int KEEP_ALIVE = 1;

     private static final BlockingQueue<Runnable> sPoolWorkQueue =

             new LinkedBlockingQueue<Runnable>(128);

     /**

      * An {@link Executor} that can be used to execute tasks in parallel.

      * 一个可用于并行执行的任务。多线程模式

      */

     public static final Executor THREAD_POOL_EXECUTOR

             = new ThreadPoolExecutor(CORE_POOL_SIZE, MAXIMUM_POOL_SIZE, KEEP_ALIVE,

                     TimeUnit.SECONDS, sPoolWorkQueue, sThreadFactory);

     /**

      * An {@link Executor} that executes tasks one at a time in serial

      * order.  This serialization is global to a particular process.

      * 一个串行执行,一次完成一项任务秩序。这个序列化是全球性的一个特定的过程。单线程模式

      */

     public static final Executor SERIAL_EXECUTOR = new SerialExecutor();
-
- 结论
- 在3.0以前,最大支持128个线程的并发,10个任务的等待。
在3.0以后,无论有多少任务,都会在其内部单线程执行;
最新文章
- ubuntu一些基本软件安装方法
- 1,Boost -> Bind
- 读《编写可维护的JavaScript》第四章总结
- 马上搞定Android平台的Wi-Fi Direct开发
- 《web全栈工程师的自我修养》阅读笔记
- CART分类与回归树与GBDT(Gradient Boost Decision Tree)
- String类的一些转换功能(6)
- Django之反向生成url
- 多线程threading 的使用
- 实时输出topk最频繁变动的股价
- 解决: Homestead 环境下, yarn install --no-bin-links, NPM run dev, 命令报错
- TypeError: Fetch argument 0 has invalid type <type 'int'>, must be a string or Tensor. (Can not convert a int into a Tensor or Operation.)
- Symbol Vs String
- vue2.0环境安装
- word 中如何取消格式标记
- Codeforces 600E. Lomsat gelral(Dsu on tree学习)
- \x 和 0x 的区别
- OpenGL笔记(四) API参考
- 1、简单的BackGroundWorker多线程时时刷新UI界面,并显示进度
- SVN-Tips