Code Blocks+gtest环境配置
本文仅介绍Code::Blocks+gtest环境配置,gtest具体使用方法请参考:
玩转Google开源C++单元测试框架Google Test系列(gtest)(总)
http://www.cnblogs.com/coderzh/archive/2009/04/06/1426755.html
环境概要
- Code::Blocks 13.12
- Windows 8.1
- gtest-1.7.0
说明
gtest是一个优秀的开源C++单元测试框架,详细介绍可以参考官方网站。由于某种原因需要在Windows下使用Code::Blocks进行C++开发,特将配置过程进行记录以备之后查阅。
下载安装Code::Blocks,官方网址是http://www.codeblocks.org/,我下载的是codeblocks-13.12mingw-setup.exe版本,由于Code::Blocks的安装比较简单,这里我就不多说了,相信大家看此文章的目的不是查阅Code::Blocks的安装说明。
下载gtest,官方网站是https://code.google.com/p/googletest/,我下的是gtest-1.7.0.zip版本,下载完成之后进行解压,我解压的目录是E:\ gtest-1.7.0\
下载安装CMake,CMake是跨平台的构建工具,官方网站是http://www.cmake.org,我下载的是cmake-3.2.1-win32-x86.exe,安装之后运行cmake-gui,配置源代码目录(之前解压的gtest目录)和要build到的目标目录。可以参考如下截图,但目录设置要根据自己的环境进行配置。

单击Configure,出现如下对话框,按照下图选择合适选项:

单击Finish,会在目标目录产生MinGW Makefiles,之后会出现下图:

选中gtest_disable_pthreads一项,单击Generate,即会产生Code::Blocks工程文件(.cbp)。
用Code::Blocks打开该文件,直接进行编译,会在目标目录产生两个库文件:
- libgtest.a
- libgtest_main.a
此时gtest的编译工作就完成了,用Code::Blocks新建工程目录gtest,在maim.h中写入如下代码:
#include<cstdio>

#include<gtest/gtest.h>

int add(int a, int b)

{

    return a+b;

}

TEST(addtest, HandleNoneZeroInput)

{

    EXPECT_EQ(14, add(4, 10));

    EXPECT_EQ(-2, add(-3, 1));

}

int main(int argc, char *argv[])

{

    testing::InitGoogleTest(&argc, argv);

    return RUN_ALL_TESTS();

    return 0;

}
将gtest源代码目录中的include中的文件拷贝到工程目录中的include文件夹中,将之前build生成的两个文件拷贝到工程目录中的lib文件夹中。右键project,选择Build options...,在Linker settings > Other linker options下填写-lgtest。点击选项卡Search directories,在Compiler子选项卡中Add一项,加入include目录,在Linker子选项卡中Add一项,加入lib目录。点击OK
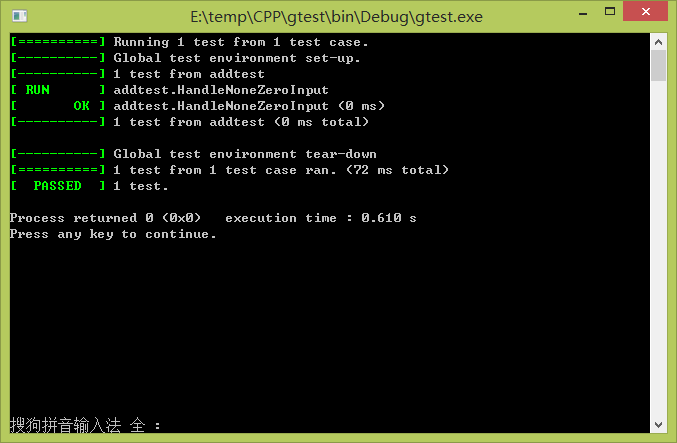
此时build工程如果成功会出现以下结果:
如果工程中想使用C++11的新特征,得用命令行参数-std=gnu++11,而不是-std=c++11。具体做法是右键project,选择Build options...,清除Compiler settings > Compile Flags下与-std=有关的复选框,点击选项卡Compiler settings > Other options,在对话框中填写-std=gnu++11。如果直接使用-std=c++11等选项会出现以下错误:
include/gtest/internal/gtest-port.h: In function 'int testing::internal::posix::StrCaseCmp(const char*, const char*)':

include/gtest/internal/gtest-port.h:1719:25: error: '_stricmp' was not declared in this scope

include/gtest/internal/gtest-port.h: In function 'char* testing::internal::posix::StrDup(const char*)':

include/gtest/internal/gtest-port.h:1721:58: error: '_strdup' was not declared in this scope

include/gtest/internal/gtest-port.h: In function 'int testing::internal::posix::FileNo(FILE*)':

include/gtest/internal/gtest-port.h:1729:52: error: '_fileno' was not declared in this scope

include/gtest/internal/gtest-port.h: In function 'FILE* testing::internal::posix::FDOpen(int, const char*)':

include/gtest/internal/gtest-port.h:1779:71: error: 'fdopen' was not declared in this scope
另外,如果你的project的build option中已经清除Compiler settings > Compile Flags下与-std=有关的复选框,但还是出现这个问题,可能原因是你的global设置有问题,你可以查看Settings->Complier选项卡是否也设置正确,如果没有请正确设置。

最新文章
- Android中AIDL的理解与使用(一)——跨应用启动/绑定Service
- 【开源】OSharp框架解说系列(3):扩展方法
- $smarty获取变量get,post等用法
- lucene-Field.Store解析
- Eclispe怎么给工作空间下的项目分组
- 【转】myeclipse的破解方法
- KnockoutJS(2)-监控属性
- C#常用的集合类型(ArrayList类、Stack类、Queue类、Hashtable类、SortedList类)
- OpenCV 2.4.3在VS2010上的应用
- javascript 冒泡和事件源 形成的事件委托
- Semantic UI基础使用教程
- bootstrap简单图文环绕效果
- linux --> VIM的列编辑操作
- 新手推荐:Hadoop安装教程_单机/伪分布式配置_Hadoop-2.7.1/Ubuntu14.04
- 『网络の转载』关于初学者上传文件到github的方法
- Centos7 Nginx开机启动
- sudo brew install mongodb报错
- Django restframework之Token验证的缺陷及jwt的简单使用
- .NET轻量级任务管理类
- 麒麟Kylin