Angular2.js——主从结构
2024-10-06 23:58:36
学习这一篇的内容,还回到我们快速起步的应用上来。
主从结构,我们想要做一个英雄的列表,我们希望用户在列表中选中一个英雄,然后这个被选中的英雄出现在详情视图中。主视图是英雄列表,从视图则是被选中英雄的详细信息。
1、创建英雄
我们先创建一个由视为英雄组成的数组:
修改app.component.ts文件:
import { Component } from '@angular/core';

//创建Hero类

export class Hero{

    id:number;

    name:string;

}

const HEROES:Hero[]=[

    {id:,name:'A'},

    {id:,name:'B'},

    {id:,name:'C'},

    {id:,name:'D'},

    {id:,name:'E'},

    {id:,name:'F'},

    {id:,name:'G'},

    {id:,name:'H'},

    {id:,name:'I'},

    {id:,name:'J'}

];

@Component({

selector: 'my-app',

template: `

    <h1>My second Angular App</h1>

    `

})

export class AppComponent1 {

}
HEROES是一个由Hero类的实例构成的数组。
2、暴露英雄
在app.component.ts创建一个属性供调用
export class AppComponent1 {

    heroes= HEROES;

}
3、在模板中显示英雄
我们的组件中有了heroes属性,我们就可以在模板中创建一个英雄的无序列表
app.component.ts
<ul class="heroes">

        <li *ngFor="let hero of heroes">

            <span class="badge">{{hero.id}}</span>{{hero.name}}

        </li>

    </ul>
这样我们就在页面中看到了一个英雄列表。
4、添加样式
创建style.css文件,在index.html中引入
.heroes{margin:  20px ;list-style:none;padding:;width:200px;}

.heroes li{cursor:pointer;background:#eee;margin:5px;padding:3px 5px;}

.heroes li.selected:hover{background:#bbd8dc;color:#fff;}

.heroes li:hover{color:#607d8b;background:#ddd;}

.heroes .badge{

    font-size:16px;

    color:#fff;

    display:inline-block;

    padding:5px;

    background:#607d8b;

    width:15px;

    text-align:center;

    margin: 10px  ;

}
我们需要点击列表中某一个英雄时,底部显示其详细信息,这时我们需要点击事件。
5、点击事件
<ul class="heroes">

        <li *ngFor="let hero of heroes" (click)="onSelect(hero)">

            <span class="badge">{{hero.id}}</span>{{hero.name}}

        </li>

        <!--圆括号标识<li>元素上的click事件是绑定的目标,等号右边的表达式调用AppComponent的onSelect方法,并把模板变量hero作为参数传进去-->

    </ul>
6、添加事件处理器
我们的事件绑定了onselect方法,我们就要把它添加到组件中。
export class AppComponent1 {

    heroes= HEROES;

    selectedHero:Hero;

    onSelect(hero:Hero):void{

    this.selectedHero=hero;

}

}
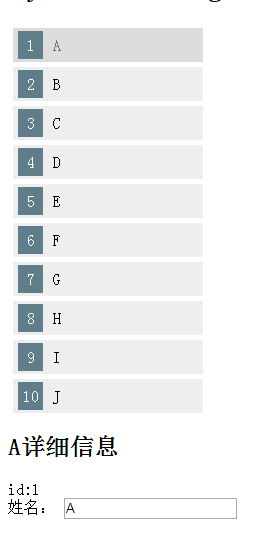
7、把所选的英雄显示在模板中
<div *ngIf="selectedHero">

        <h2>{{selectedHero.name}}详细信息</h2>

        <div><label>id:</label>{{selectedHero.id}}</div>

        <div>

            <label>姓名:</label>

            <input [(ngModel)]="selectedHero.name" placeholder="name">

        </div>

    </div>
当选中时,selectedHero成了真值,就把英雄详情添加到DOM中。
现在基本效果实现了
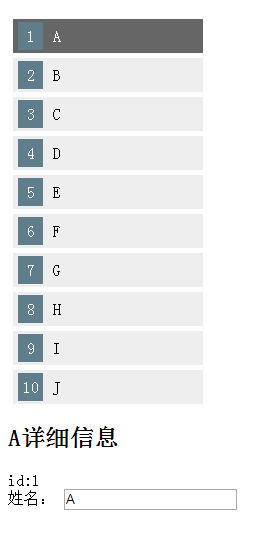
我们想选中一个英雄后有一个背景颜色的变化,凸显出来。
在app.component.ts中添加:
<ul class="heroes">
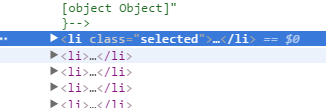
<li *ngFor="let hero of heroes" (click)="onSelect(hero)" [class.selected]="hero===selectedHero">
<span class="badge">{{hero.id}}</span>{{hero.name}}
</li>
<!--圆括号标识<li>元素上的click事件是绑定的目标,等号右边的表达式调用AppComponent的onSelect方法, 并把模板变量hero作为参数传进去-->
</ul>
我们在class上为selected类添加一个属性绑定,我们把绑定的值设置为selectedHero和hero的比较结果。
当被选中时即hero===selectedHero时,添加selected类
在CSS中添加
.heroes li.selected{background:#666;color:#fff;}
这样点击的时候,被选中的这个英雄就与其他英雄有了背景颜色的变化啦。
参考:https://angular.cn/docs/ts/latest/tutorial/toh-pt2.html
最新文章
- 移动端重要的几个CSS3属性设置
- Jquery中的(function($){...})(jQuery)
- python 函数的参数定义及调用
- Unity手撸2048小游戏——模块拆分
- ANE接入平台心得记录(安卓)
- EF数据库初始化策略及种子数据的添加
- 用于 ‘Suse‘ Linux 包管理的 Zypper 命令大全
- Swift静态属性
- Codeforces Round #325 (Div. 2) C. Gennady the Dentist 暴力
- JVM原理
- [Angular 2] Keynote: Lazy Routing -- NGCONF
- python 内部函数,以及lambda,filter,map等内置函数
- 游戏音频技术备忘 (三) 集成Wwise到Unreal Engine
- gzip: File too large错误
- python抢小米6自动化脚本
- java中Collections.sort()方法实现集合排序
- js自执行事件
- 根据flickr id 下载图片
- redis list 清空记录小技巧
- 第四百一十五节,python常用排序算法学习