kaggle 实战 (2): CNN 手写数字识别
2024-09-06 08:13:10
文章目录
Tensorflow 官方示例
import tensorflow as tf

mnist = tf.keras.datasets.mnist

(x_train, y_train),(x_test, y_test) = mnist.load_data()

x_train, x_test = x_train / 255.0, x_test / 255.0

model = tf.keras.models.Sequential([

  tf.keras.layers.Flatten(input_shape=(28, 28)),

  tf.keras.layers.Dense(512, activation=tf.nn.relu),

  tf.keras.layers.Dropout(0.2),

  tf.keras.layers.Dense(10, activation=tf.nn.softmax)

])

model.compile(optimizer='adam',

              loss='sparse_categorical_crossentropy',

              metrics=['accuracy'])

model.fit(x_train, y_train, epochs=5)

model.evaluate(x_test, y_test)
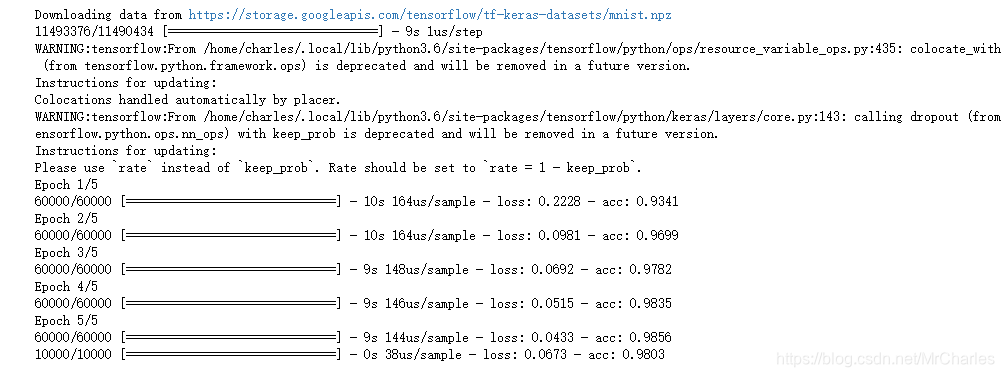
这个本身精度不高,我们可以改变结构提升精度
CNN
from __future__ import division, print_function, absolute_import

# Import MNIST data

from tensorflow.examples.tutorials.mnist import input_data

mnist = input_data.read_data_sets("/tmp/data/", one_hot=False)

import tensorflow as tf

import matplotlib.pyplot as plt

import numpy as np

# Training Parameters

learning_rate = 0.001

num_steps = 2000

batch_size = 128

# Network Parameters

num_input = 784 # MNIST data input (img shape: 28*28)

num_classes = 10 # MNIST total classes (0-9 digits)

dropout = 0.25 # Dropout, probability to drop a unit

# Create the neural network

def conv_net(x_dict, n_classes, dropout, reuse, is_training):

    # Define a scope for reusing the variables

    with tf.variable_scope('ConvNet', reuse=reuse):

        # TF Estimator input is a dict, in case of multiple inputs

        x = x_dict['images']

        # MNIST data input is a 1-D vector of 784 features (28*28 pixels)

        # Reshape to match picture format [Height x Width x Channel]

        # Tensor input become 4-D: [Batch Size, Height, Width, Channel]

        x = tf.reshape(x, shape=[-1, 28, 28, 1])

        # Convolution Layer with 32 filters and a kernel size of 5

        conv1 = tf.layers.conv2d(x, 32, 5, activation=tf.nn.relu)

        # Max Pooling (down-sampling) with strides of 2 and kernel size of 2

        conv1 = tf.layers.max_pooling2d(conv1, 2, 2)

        # Convolution Layer with 64 filters and a kernel size of 3

        conv2 = tf.layers.conv2d(conv1, 64, 3, activation=tf.nn.relu)

        # Max Pooling (down-sampling) with strides of 2 and kernel size of 2

        conv2 = tf.layers.max_pooling2d(conv2, 2, 2)

        # Flatten the data to a 1-D vector for the fully connected layer

        fc1 = tf.contrib.layers.flatten(conv2)

        # Fully connected layer (in tf contrib folder for now)

        fc1 = tf.layers.dense(fc1, 1024)

        # Apply Dropout (if is_training is False, dropout is not applied)

        fc1 = tf.layers.dropout(fc1, rate=dropout, training=is_training)

        # Output layer, class prediction

        out = tf.layers.dense(fc1, n_classes)

    return out

# Define the model function (following TF Estimator Template)

def model_fn(features, labels, mode):

    # Build the neural network

    # Because Dropout have different behavior at training and prediction time, we

    # need to create 2 distinct computation graphs that still share the same weights.

    logits_train = conv_net(features, num_classes, dropout, reuse=False, is_training=True)

    logits_test = conv_net(features, num_classes, dropout, reuse=True, is_training=False)

    # Predictions

    pred_classes = tf.argmax(logits_test, axis=1)

    pred_probas = tf.nn.softmax(logits_test)

    # If prediction mode, early return

    if mode == tf.estimator.ModeKeys.PREDICT:

        return tf.estimator.EstimatorSpec(mode, predictions=pred_classes)

    # Define loss and optimizer

    loss_op = tf.reduce_mean(tf.nn.sparse_softmax_cross_entropy_with_logits(

        logits=logits_train, labels=tf.cast(labels, dtype=tf.int32)))

    optimizer = tf.train.AdamOptimizer(learning_rate=learning_rate)

    train_op = optimizer.minimize(loss_op, global_step=tf.train.get_global_step())

    # Evaluate the accuracy of the model

    acc_op = tf.metrics.accuracy(labels=labels, predictions=pred_classes)

    # TF Estimators requires to return a EstimatorSpec, that specify

    # the different ops for training, evaluating, ...

    estim_specs = tf.estimator.EstimatorSpec(

      mode=mode,

      predictions=pred_classes,

      loss=loss_op,

      train_op=train_op,

      eval_metric_ops={'accuracy': acc_op})

    return estim_specs

# Build the Estimator

model = tf.estimator.Estimator(model_fn)

# Define the input function for training

input_fn = tf.estimator.inputs.numpy_input_fn(

    x={'images': mnist.train.images}, y=mnist.train.labels,

    batch_size=batch_size, num_epochs=None, shuffle=True)

# Train the Model

model.train(input_fn, steps=num_steps)

# Evaluate the Model

# Define the input function for evaluating

input_fn = tf.estimator.inputs.numpy_input_fn(

    x={'images': mnist.test.images}, y=mnist.test.labels,

    batch_size=batch_size, shuffle=False)

# Use the Estimator 'evaluate' method

model.evaluate(input_fn)

import pandas as pd # data processing, CSV file I/O (e.g. pd.read_csv)

#test=pd.read_csv('./input/test.csv')

import numpy

from numpy import genfromtxt

my_data = numpy.double(genfromtxt('./input/test.csv', delimiter=','))

# Prepare the input data

input_fn = tf.estimator.inputs.numpy_input_fn(

    x={'images': numpy.float32(my_data[1:,:])}, shuffle=False)

# Use the model to predict the images class

preds2 = list(model.predict(input_fn))

Submission = pd.DataFrame({

        "ImageId": range(1, len(preds2)+1),

        "Label": preds2

    })

Submission.to_csv("cnnMnistSubmission.csv", index=False)

Submission.head(5)
提交结果

最新文章
- Navicat Premium连接Oracle 问题汇总
- Linux学习笔记——重点推荐的Linux网络在线学习资源
- MSSQL 跨数据库连接
- Redis教程(十五):C语言连接操作代码实例
- C语言的几个有趣问题
- Linux多线程——使用互斥量同步线程
- sudo nopasswd
- JDBC中rs.beforeFirst()
- 版本控制工具——Git常用操作(上)
- org.springframework.core.io.ClassPathResource类
- Docker指令
- 《算法》第四章部分程序 part 13
- ASP.NET MVC2之Model Binder
- 【转载】python import和from import
- JavaScript 中 substr 和 substring的区别
- Java补漏(一)
- 前端工程师(JavaScript)在业余时间如何提高自身能力
- Spark实战练习01--XML数据处理
- Maven如何打包本地依赖包
- fzu2181(点的双连通分量+求奇环)