springBoot学习(二):初学JPA
2024-09-01 13:09:39
依旧跟着大佬学习JPA,在这里记下过程。
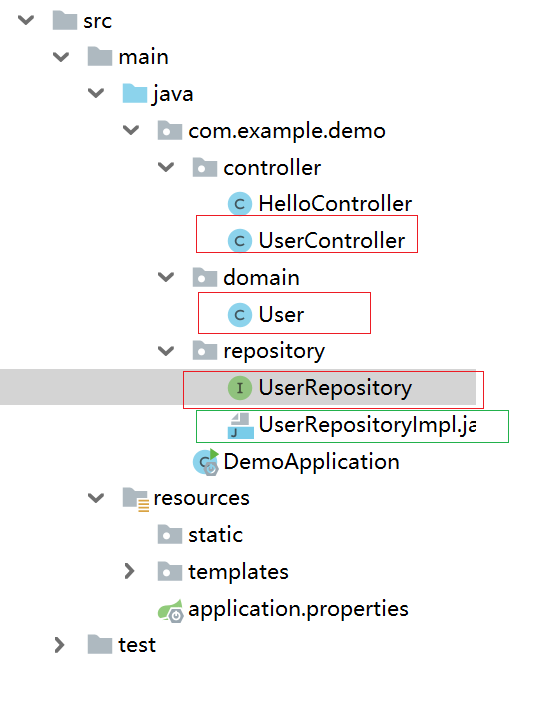
JPA主要做的事情是简化数据库操作,至少现在为止,我觉得还是挺方便简单明了的。在原本代码的基础下,更改UserController、User、UserRepository,删除UserRepositoryImpl
如何使用JPA
1、创建实体类
将User改成实体类,每一个User实例相当于数据库表格的一行。这个User类是最简单的那种,只包含了几个属性以及各个属性必须的getter和setter方法,其中id是自增的主键,不包含各种映射关系。
import javax.persistence.Entity;

import javax.persistence.GeneratedValue;

import javax.persistence.GenerationType;

import javax.persistence.Id;

@Entity //实体

public class User {

    @Id

    @GeneratedValue(strategy = GenerationType.IDENTITY)//自增长策略

    private Long id;//唯一标识

    private  String name;

    private  Integer age;

    protected User() {//无参默认构造器

    }

    public User(Long id, String name, Integer age) {

        this.id = id;

        this.name = name;

        this.age = age;

    }

    public Long getId() {

        return id;

    }

    public void setId(Long id) {

        this.id = id;

    }

    public String getName() {

        return name;

    }

    public void setName(String name) {

        this.name = name;

    }

    public Integer getAge() {

        return age;

    }

    public void setAge(Integer age) {

        this.age = age;

    }

    @Override

    public String toString() {

        return "User{" +

                "id=" + id +

                ", name='" + name + '\'' +

                ", age='" + age + '\'' +

                '}';

    }

}
User
2、修改资源库
import com.example.demo.domain.User;

import org.springframework.data.repository.CrudRepository;

import java.util.List;

public interface UserRepository extends CrudRepository<User , Long> {

}
UserRepository
同时删除原本的UserRepositoryImpl 类
在不考虑复杂的数据处理的情况下,从CrudRepository继承的方法已经足够使用
3、修改controller
import com.example.demo.domain.User;

import com.example.demo.repository.UserRepository;

import org.springframework.beans.factory.annotation.Autowired;

import org.springframework.ui.Model;

import org.springframework.web.bind.annotation.*;

import org.springframework.web.servlet.ModelAndView;

import java.util.Optional;

@RestController

@RequestMapping("/user")

public class UserController {

    @Autowired

    private UserRepository userRepository;

    //查词所有用户

    @GetMapping("/userlist")

    public ModelAndView userList(Model model){

        model.addAttribute("userList",userRepository.findAll());

        model.addAttribute("title","用户管理");

        return  new ModelAndView("user/list","userModel",model);

    }

    //根据id 查询用户

    @GetMapping("{id}")

    public ModelAndView view(@PathVariable("id") Long id, Model model){

        Optional<User> user= userRepository.findById(id);

        model.addAttribute("user",user.get());

        model.addAttribute("title","查看用户");

        return new ModelAndView("user/view" ,"userModel",model);

    }

    //获取创建表单页面

    @GetMapping("/form")

    public ModelAndView createForm(Model model){

        model.addAttribute("user",new User(null,null,null));

        model.addAttribute("title","创建用户");

        return new ModelAndView("user/form","userModel",model);

    }

    //保存用户

    @PostMapping

    public ModelAndView saveOrUpdateUser(User user){

        user =userRepository.save(user);

        return new ModelAndView("redirect:/user/userlist");

    }

    //根据id删除用户

    @GetMapping(value = "delete/{id}")

    public ModelAndView delete(@PathVariable("id") Long id){

        userRepository.deleteById(id);

        return new ModelAndView("redirect:/user/userlist");

    }

    //修改用户界面

    @GetMapping(value = "edit/{id}")

    public ModelAndView editForm(@PathVariable("id") Long id,Model model){

        Optional<User> user =userRepository.findById(id);

        model.addAttribute("user",user);

        model.addAttribute("title","编辑用户");

        return new ModelAndView("user/form" ,"userModel",model);

    }

}
UserController
4、使用MySQL 数据库
首先,创建名为test的数据库,编码为UTF-8 ,修改application.properties文件,增加数据库连接
# DataSource

spring.datasource.url=jdbc:mysql://localhost/test?useSSL=false&serverTimezone=UTC&characterEncoding=utf-8

#注意不是spring.datasource.data-username

#注意不是spring.datasource.data-password

spring.datasource.username=test

spring.datasource.password=test

spring.datasource.driver-class-name=com.mysql.jdbc.Driver

# JPA

spring.jpa.show-sql = true

#每次应用启动,都会主动删除井创建数据库表

#spring.jpa.hibernate.ddl-auto=create-drop
其中spring.datasource.driver-class-name根据你当前mysql版本会有所不同。 5.7 以上的 mysql 要注意在url中增加 useSSL=false&serverTimezone=UTC选项
启动项目
可以发现, Hibernate 会自动在test数据库中创建表user。
通过浏览器访问http://localhost:8080/useruserlist可以看到项目的运行效果
最新文章
- iOS 获取当前点击的坐标
- druid sql黑名单 报异常 sql injection violation, part alway true condition not allow
- 20个JS优化代码技巧
- iOS 常用的向上,向下取整, 四舍五入函数
- swift 项目 oc 和 swift 混用,文件相互引用
- 【VS2013】设定Nuget代理
- 绿书模拟day10 单词前缀
- 2016移动端web5分钟速成(适合新手)
- BizTalk开发系列(十七) 信封架构(Envelop)
- Hubilder快捷键
- 复制pdf文字出来是乱码的一种可能的解决方案
- 构建ASP.NET MVC4+EF5+EasyUI+Unity2.x注入的后台管理系统(21)-权限管理系统-跑通整个系统
- PHP接收JSON格式的数据
- 设计模式多线程方面之Thread-Per-Message 模式
- for循环问题
- Leetcode 35——Search Insert Position
- [转]C# 使用Conditional特性而不是#if条件编译
- MySQL(八)子查询和分组查询
- 基础007_FIFO原理
- HttpContext.Current.Items的用途