Kong管理UI -kong-dashboard
本文仍然是在ubuntu18的环境下进行
https://github.com/PGBI/kong-dashboard
kong dashboart如果要正常使用管理UI,前提为kong已经正常run(可参考)起来,此UI可看作为一层薄薄的皮,包装好了我们需要的请求与返回的显示问题(懒人必备?).
在Kong的git上可以看到丰富的三方工具,本文选用的管理UI也是上面的一个admin ui 项目
Here is a list of third-party tools maintained by the community:
- Ansible role for Kong on Ubuntu
- Biplane: declarative configuration in Crystal
- Bonobo: key management (with Mashery migration scripts)
- Chef cookbook
- Django Kong Admin: Admin UI in Python
- Jungle: Admin UI in JavaScript
- Kong Dashboard: Admin UI in JavaScript
- Kong for CanopyCloud
- Kong image waiting for Cassandra
- Kong image for Tutum
- Kong-UI: Admin UI in JavaScript
- Konga: CLI Admin tool in JavaScript
- Kongfig: Declarative configuration in JavaScript
- Kongfig on Puppet Forge
- Puppet recipe
- Python-Kong: Admin client library for Python
- .NET-Kong: Admin client library for .NET
- 安装
准备工作(整个准备工作以用源码安装为例 form source):
1.使用的管理UI kong-dashboard 基于nodejs 所以需要安装nodejs(友情提示,使用node 5.11.1版本比较好,其他版本例如6.几没有跑起来,或者有朋友运行起来了可以告知一下)
2.由于会使用到github资源和可能偶尔在墙外的资源,所以建议使用淘宝npm;
3.同时会使用到bower;
4.npm install 过程需要c++ 11(由于小Eight用的环境gcc版本低于4.8无法支持c++11 需要升级gcc版本到4.8或4.8以上;关于如何升级的园子里面文章不少如果大家需要我后续可以poll一篇我的升级过程)
5.git clone下来的文件夹权限
6.如果使用root用户进行install 需要修改(如下图)

搞定准备工作之后,就可以根据git步骤上进行安装了(以通过源码安装为例,具体命令有些许不同):
# Pull repository

git clone https://github.com/PGBI/kong-dashboard.git
sudo chmod -R 777 kong-dashboard   (!!!!该步非必须,根据实际使用进行文件夹读写权限调整)
cd kong-dashboard
#npm install
sudo apt install npm # Build Kong Dashboard
sudo npm install --unsafe-perm --registry=https://registry.npm.taobao.org
# Start Kong Dashboard

npm start

# To start Kong Dashboard on a custom port

npm start -- -p [port]

#或者使用下面的命令启动kong-dashboard
# Install Kong Dashboard
npm install -g kong-dashboard # Start Kong Dashboard
kong-dashboard start --kong-url http://kong:8001 # 使用自定义端口启动kong-dashboard
kong-dashboard start \
--kong-url http://localhost:8001 \
--port 8088
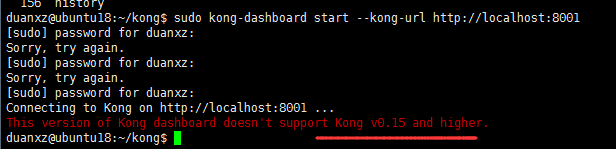
启动成功后访问:http://你的机器或绑定的域名:8080
重新安装kong-0.13.x
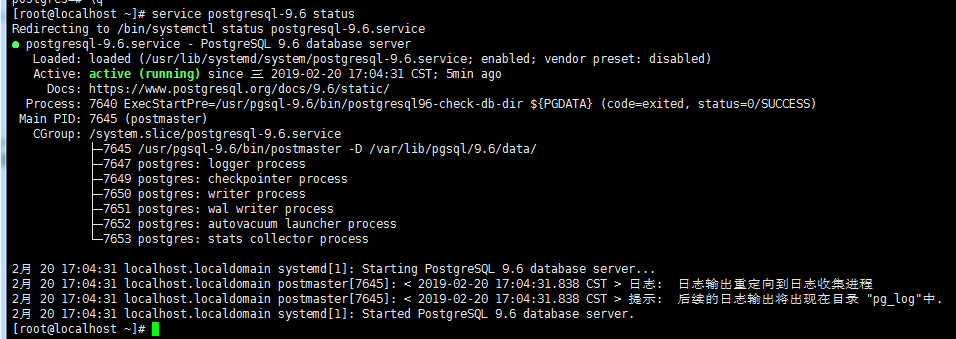
1、安装数据库postgresql9.6
安装环境:CentOS7.2,与此处环境相同
2. 检查数据库服务状态,有绿色,没红色说明启动OK了
service postgresql-9.5 status
2、安装kong
安装包下载:https://kong.bintray.com/kong-community-edition-rpm/centos/7/
目前最新版本kong-community-edition-0.14.0.el7.noarch.rpm
我们安装kong-community-edition-0.13.1.el7.noarch.rpm原因是Kong UI管理工具目前最高支持的版本就是13.1
1)、直接安装
# rpm -vih kong-community-edition-0.13.0.el7.noarch.rpm
2)、配置kong
# vi /etc/kong/kong.conf.default
以下为kong连接postgresql数据库的相关配置
database = postgres   # 指明用哪个数据库

pg_host = 127.0.0.1  #数据库所在主机ip地址

pg_port =                   # 端口号

pg_user = kong                  #  数据库用户

pg_password =kong                   # 数据库密码

pg_database = kong              # 数据库名
3)、启动kong
迁移数据库,将kong所需的表刷入数据库
# kong migrations up -c /etc/kong/kong.conf.default
启动kong
# kong start -c /etc/kong/kong.conf.default
测试kong是否启动成功
# curl -i http://localhost:8001/
3、安装Kong UI管理工具
Using npm (使用 npm)
1. 安装 nodejs:
curl -sL https://rpm.nodesource.com/setup_6.x | bash -
yum install -y nodejs
如果提示你需要安装构建工具 gcc gcc++ 什么的你就安装就行了,安装完了再重新安装 nodejs
命令:node -v 如果输出版本号就安装成功了。
2. 更新 npm (此时的 npm 命令已经随 nodejs 的安装过程给安装了,这里可能只是为了更新一下我也不太明白)
npm install npm@latest -g
命令:npm -v 输出版本号就成功安装了。
开始kong-dashboard安装了
    # Install Kong Dashboard

    npm install -g kong-dashboard

    # Start Kong Dashboard

    kong-dashboard start --kong-url http://kong:8001

    # Start Kong Dashboard on a custom port

    kong-dashboard start \

    --kong-url http://kong:8001 \

    --port [port]

    # Start Kong Dashboard with basic auth

    kong-dashboard start \

    --kong-url http://kong:8001 \

    --basic-auth user1=password1 user2=password2

    # See full list of start options

    kong-dashboard start --help

通过Docker方式安装 Using Docker (使用 Docker )
    # Start Kong Dashboard

    docker run --rm -p : pgbi/kong-dashboard start --kong-url http://kong:8001

    # Start Kong Dashboard on a custom port

    docker run --rm -p [port]: pgbi/kong-dashboard start --kong-url http://kong:8001

    # Start Kong Dashboard with basic auth

    docker run --rm -p : pgbi/kong-dashboard start \

    --kong-url http://kong:8001

    --basic-auth user1=password1 user2=password2

    # See full list of start options

    docker run --rm -p : pgbi/kong-dashboard start --help
使用Admin UI
具体使用和UI上显示内容的含义可参考kong的doc,下面只简单提及一些需要注意的地方,补赘述具体使用
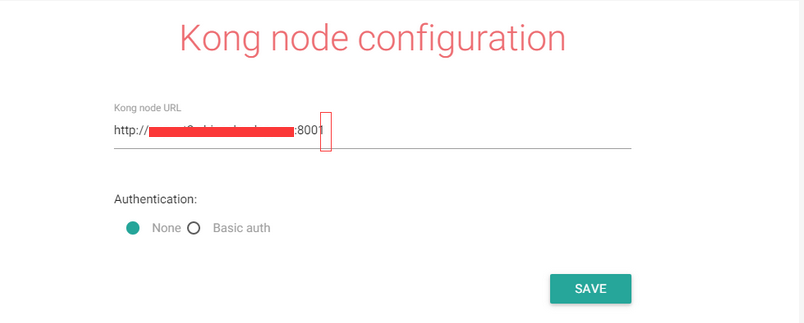
1.配置注意地址(kong的管理地址,默认为http://kong server机器或绑定的域名:8001)后面不要多加"/"如下图 否则点击API会出现not found api之类的提示,当然也要确保kong server正常运行中
2.新增API与使用新增的API时,需要注意如果需要使用地址方式指向api即 需要勾选strip-request path 如果使用head中带请求地址的方式,需要在head中带 X-Host-Override post.demo (即request host)
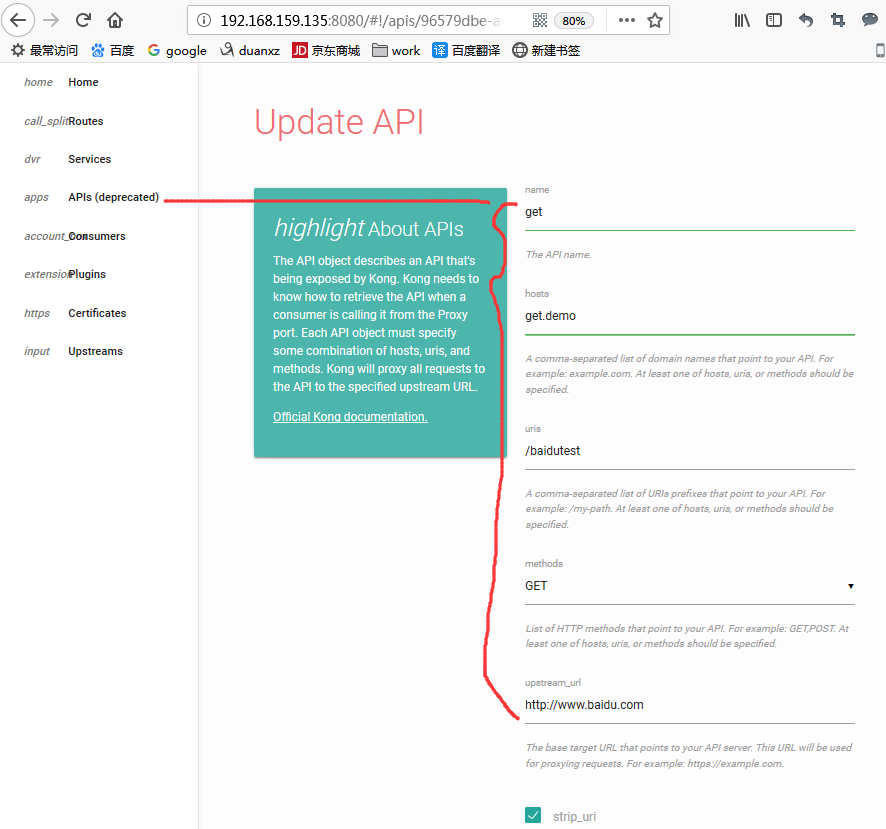
使用时需要注意,请求的地址为http://kong server机器或绑定的域名:8000 (下图为在url中带请求的api的方式)

3.插件使用实例,使用key-
i.需要在api基础上新建插件auth key
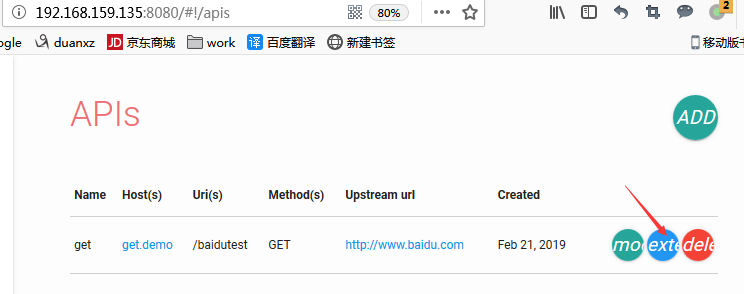

ii.设置插件 keyname(需要注意此keyname会在后面url中使用)

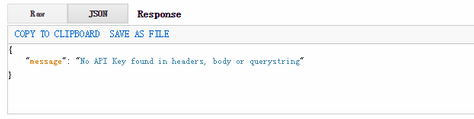
当启用插件后
如果后面keyname在地址栏或header中不正确会有如下提示
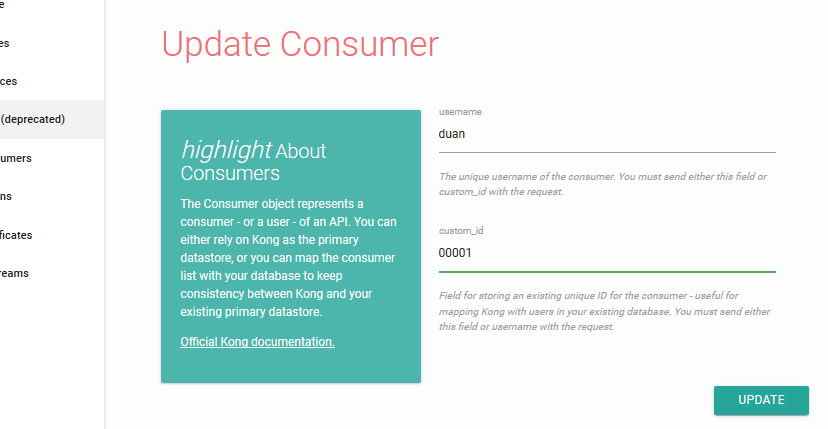
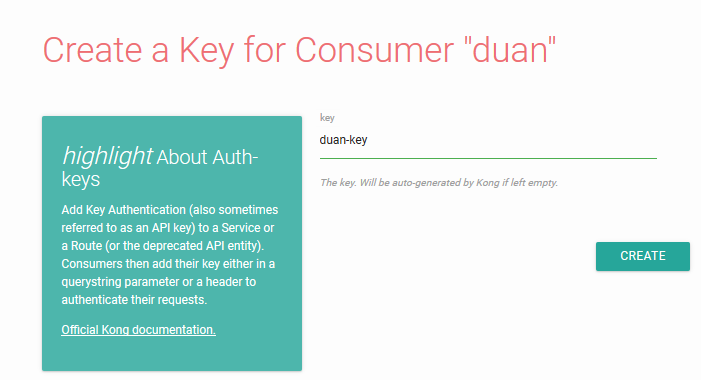
iii.新建customer并设置其key的内容也可以认为为keyname对应的值上面(该处暂时使用的对应上述auth key),用于实际访问使用

在consumers的列表中,点击Auth下的链接:

如下页面:
列表:

iiii.使用(请求的地址为http://kong server机器或绑定的域名:8000)
header方式如下图

后注:
1.其他插件的使用方式大同小异(例如日志等插件大家可以自行检查尝试)
2.对于使用kong来处理webservice的情况,由于我们想达到的效果是可以每次都管控到调用而非仅仅在引用的时候,所以需要对引用后自动生成的配置文件中的endpoint进行修改,实质为wdsl内容进行处理.将地址替换为kong包装过的地址即可.
以c#为例小Eight的处理方式,在引用端调用生成类使用时,只需要指明调用的是那个端口即使用多个endpoint对应的name
1.引入HttpsReflector

using System;

using System.Data;

using System.Configuration;

using System.Linq;

using System.Web;

using System.Web.Security;

using System.Web.UI;

using System.Web.UI.HtmlControls;

using System.Web.UI.WebControls;

using System.Web.UI.WebControls.WebParts;

using System.Xml.Linq;

using System.Web.Services.Description;

namespace WebService4Test

{

    public class HttpsReflector : SoapExtensionReflector

    {

        public override void ReflectMethod()

        {

            //no-op

        }

        public override void ReflectDescription()

        {

            ServiceDescription description = ReflectionContext.ServiceDescription;

            foreach (Service service in description.Services)

            {

                foreach (Port port in service.Ports)

                {

                    foreach (ServiceDescriptionFormatExtension extension in port.Extensions)

                    {

                        SoapAddressBinding binding = extension as SoapAddressBinding;

                        if (null != binding)

                        {

                            binding.Location = binding.Location.Replace("localhost:9933/Service1.asmx", "kong server机器或绑定的域名:8000/wbstest?apikey=testbaidukey"); ;//http://localhost:9933/Service1.asmx

                        }

                    }

                }

            }

        }

    }

}
2.修改Web.Config 新增HttpsReflector system.web中加入如下code
<webServices>

      <soapExtensionReflectorTypes>

        <add type="WebService4Test.HttpsReflector, WebService4Test"/>

      </soapExtensionReflectorTypes>

</webServices>
解决报错: Connecting to Kong on http ... Could not reach Kong on http://xxx.xxx.xxx.xxx:8001
1. Docker 中安装并启动好网关 kong 后,想要安装 kong 的图形化界面 kong-dashboard ,运行命令:
docker run --rm -p 8080:8080 --name kong-dashboard pgbi/kong-dashboard start --kong-url http://xxx.xxx.xxx.xxx:8001
报错如下:
Connecting to Kong on http://xxx.xxx.xxx.xxx:8001 ...
Could not reach Kong on http://xxx.xxx.xxx.xxx:8001
Error details:
{ Error: connect ETIMEDOUT xxx.xxx.xxx.xxx:8001
at Object._errnoException (util.js:1019:11)
at _exceptionWithHostPort (util.js:1041:20)
at TCPConnectWrap.afterConnect [as oncomplete] (net.js:1175:14)
code: 'ETIMEDOUT',
errno: 'ETIMEDOUT',
syscall: 'connect',
address: 'xxx.xxx.xxx.xxx',
port: 8001 }
2. 原因:连接拒绝错误的是因为2个容器(kong 和 kong-dashboard)在默认桥接网络上,这不会执行DNS解析。
需要创建一个用户定义的桥接网络并将这两个容器添加到该网络 。
3. 解决:
创建桥梁网络
docker network create my-net
将Kong容器添加到它
docker network connect my-net kong
运行kong-dashboard时提供网络信息
docker run --rm --network my-net -p 8080:8080 pgbi/kong-dashboard start --kong-url http://kong:8001
PS : 最后一行命令运行 kong-dashboard 时,最末我原本是写的是“http://xxx.xxx.xxx.xxx:8001”,这样报错依旧,直到改为如上写成:“http://kong:8001”才行。
最新文章
- [NOI 2006] 最大获利 80分
- mysql中文乱码问题总结
- How to locate a path? - Unix & Linux Stack Exchange
- [php] How to debug PHP in the terminal
- CodeForces 54C-First Digit Law(数位,概率dp)
- mybatis随意sql语句
- 为什么我刚发表的文章变成了“待审核”,csdn有没有官方解释啊
- 【转】OpenGL基础图形编程(一)
- linux_之sed用法
- hdu1016
- 设备像素,设备独立像素,CSS像素
- mysql技巧
- Python unittest discover()方法与执行顺序补充
- leetcode125. Valid Palindrome
- WebService SOAP
- TCP三次握手--syn攻击
- C#学习之委托和事件
- javascript高级技巧篇(作用域安全、防篡改、惰性载入、节流、自定义事件,拖放)
- Django 常见错误总结
- WinForm POST上传与后台接收