How to enable $Admin Shares in Windows 7
Quote from: http://www.wintips.org/how-to-enable-admin-shares-windows-7/
As “Administrative shares” are defined all the default network shares that can be accessed remotely only from network administrators. The Admin shares are hidden and they are disabled by default in a Windows 7 based computers in order to prevent unauthorized users to access or modify them through a network environment.
In this tutorial, we explain how to SECURELY enable Admin$ shares for your disk volumes (C$, D$, etc.) on a Windows 7 based computer, so they will be accessible (from another computer on your network) only by specific users.

Step 1: Ensure that both computers belong to the same Workgroup.
To check if both computers belong to the same workgroup, do the following:
Malwarebytes™ Protection Removes Spyware, Adware & Malware. Start Your Free Download Now!
1. Right-click on “Computer-Name” icon on your desktop and choose “Properties” or (additionally) navigate to Windows Control Panel, choose “System and Security” and select “System”,

2. Look at “WORKGROUP” name at the right and ensure that it is the same name on both computers (e.g. WORKGROUP)

Step 2: Specify which user(s) can access the Admin Shares (Disk Volumes).
The Administrative shares can be (and must be) accessed from Administrator users only. So if you want a user from your network to be able to access Admin($) shares, you must give to this user local Administrative rights on the computer that you want to enable Admin shares. To do that:
1. Go to your Windows control panel (“Start” > “Control Panel”).
2. Open “Add or remove user accounts”

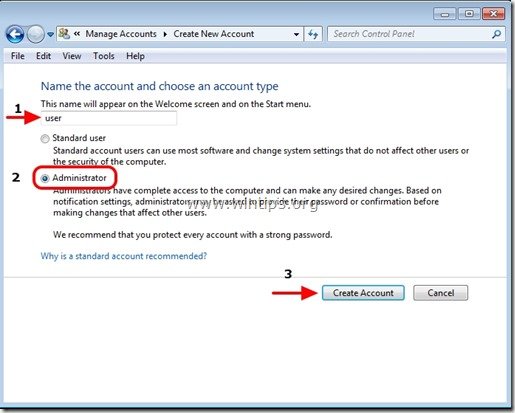
3. Now create a new account on your computer with Administrative privileges. Additionally, if you have already setup an account, ensure that he has Administrator privileges (choose the Account you want, select “Change the account type” option and set him as “Administrator”).

4. Give a username for your new account (e.g. user), set it up as an Administrator user and press “Create Account” button.
5. At this point the “Manage Accounts” options window should look like this:
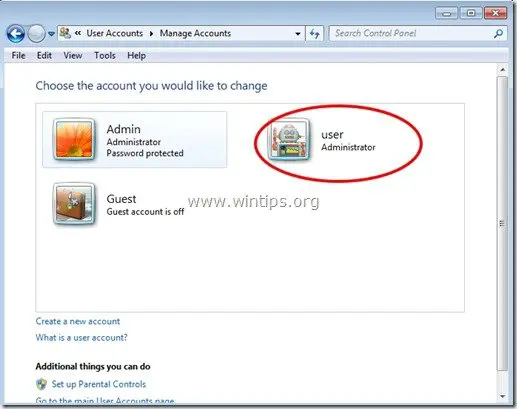
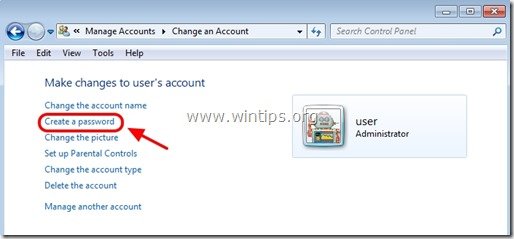
6. After you create your account your must specify a password. So click on the new account (e.g. user) and press “Create a password”.
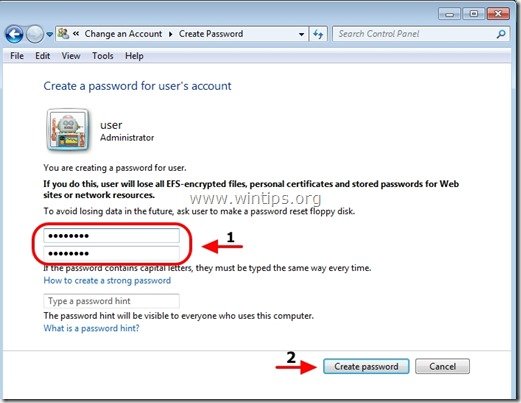
7. Type a strong password (2 times) and press “Create password” button.
Step 3: Enable “File and print sharing” through Windows Firewall.
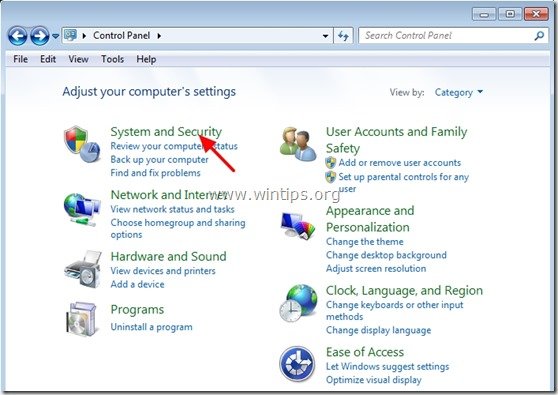
1. Navigate to Windows control panel and click on “System and Security”.
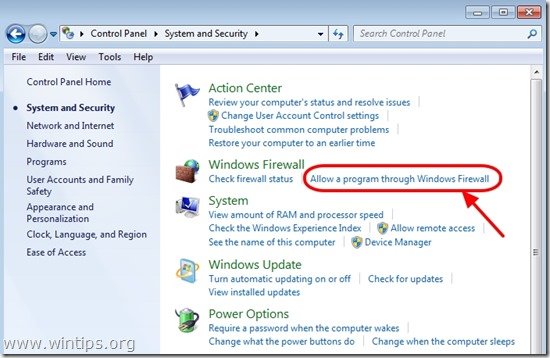
2. On “Windows Firewall” section, press the “Allow a program through Windows Firewall” option.
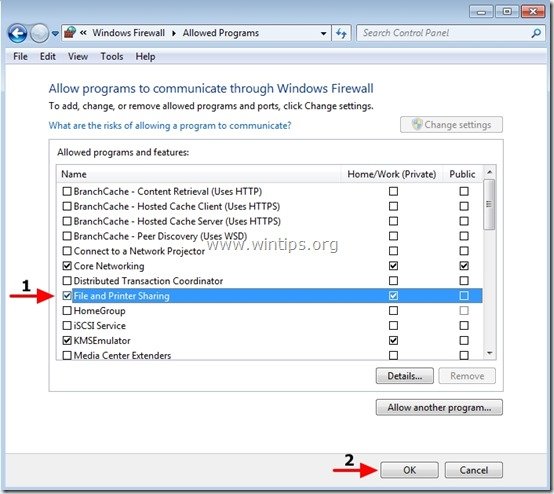
3. In”Allowed programs and features” list, check to enable the “File and Printer Sharing” feature and press “OK”.
4. Restart your computer (Optionally).
Step 4. Check if you can access the admin shares from another computer.
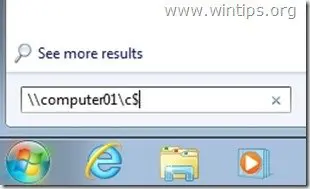
1. From another computer press the “Start” buton and in the search box type the following command:
“\\<ComputerName>\<DiskVolumeName>$” (without the quotes) and hit “Enter”.
Note: As “<ComputerName>” put the name of the computer with the Admin Shares enabled on it (e.g. “Computer01”) and as “<DiskVolumeName>” put the name of the volume that you want to access, (e.g. “C$” = Disk Volume C:\ , “D$” = Disk Volume D:\, etc.)
2. Now type the username & the password to access the remote computer’s admin shares (as specified in Step 1) & hit “Enter”.

3. If you follow the above steps as described, then you can access the remote computer’s admin shares without any problems.
Step 5: Modify registry settings on the computer with the Admin Shares Enabled(Optional)
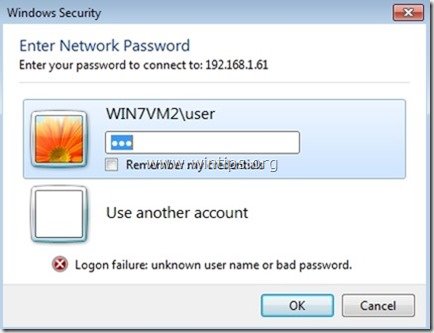
Note: Perform this step ONLY if you face problems/errors when you try to access Admin Shares (e.g.logon failure).
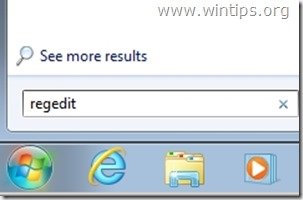
1. Go to the remote computer (with the Admin Shares enabled on it) and open Registry Editor. To do that, press “Start” button and in the search box type “regedit” and hit “Enter”.
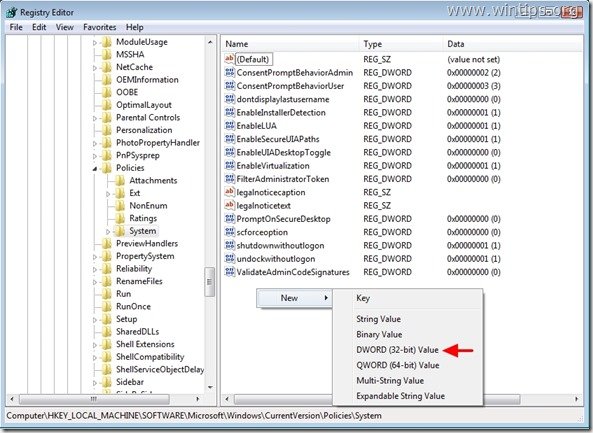
2. In registry editor navigate to the following path:
“HKEY_LOCAL_MACHINE\SOFTWARE\Microsoft\Windows\CurrentVersion\Policies\System”
3. Right-click on the right pane and choose “New” > “DWORD (32-bit) Value”.
4. Type the “LocalAccountTokenFilterPolicy” for value name and press “Enter”.
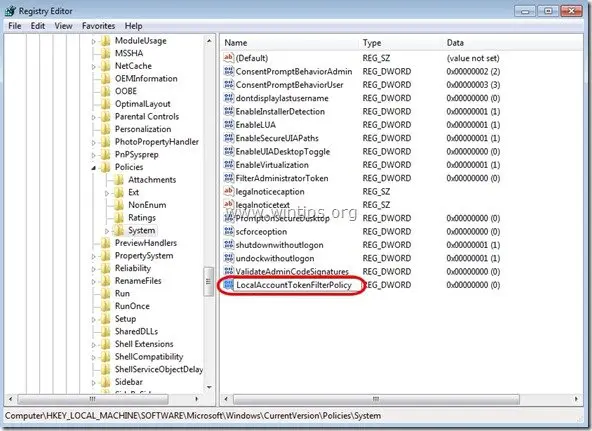
5. Double click on “LocalAccountTokenFilterPolicy” value to modify the “Value Data” from “0” to “1” and press “OK”
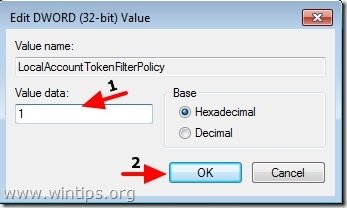
6. Exit Registry Editor and try again to access administrative shares on the remote computer.
最新文章
- Oracle OCP 1Z0-053 Exam Topics
- 【转载】【树形DP】【数学期望】Codeforces Round #362 (Div. 2) D.Puzzles
- iOS多线程解析
- CodeForceS#276-B(求最大值)
- iphone H5 input type="search" 不显示搜索 解决办法
- Codeforces Round #272 (Div. 2)
- JavaScript---网络编程(5)-自定义对象Json、Dom模型概念讲解
- POJ Oulipo (KMP)
- JQuery给元素绑定click事件多次执行的解决方法
- 【2017-2-17】C#基础 - 定义变量,输入输出
- 企业级分布式存储应用与实战-mogilefs实现
- python——常用模块
- 阿里云ECS云服务器的简单使用
- G - Surf Gym - 100819S -逆向背包DP
- CentOS 7上安装PGI 2017编译器
- linux系统命令大全
- libvirt的security
- ASP.NET Web API中实现版本的几种方式
- .NET 除了用 Task 之外,如何自己写一个可以 await 的对象?
- eclipse UTF-8