ssh环境的搭建,基于注解和配置文件使用
搭建spring、Struts2、hibernate三大框架的环境
这里分两部分来讲:一、用myeclipse 2014 快速搭建环境,非常快捷, 大部分配置文件信息系统都帮我们写好,建议老手使用
二、手动搭建环境,包括配置文件的手工编写,jar 的引入 etc
使用myeclipse插件搭建环境
1、新建web 工程(这个不会可以不用往下看了)
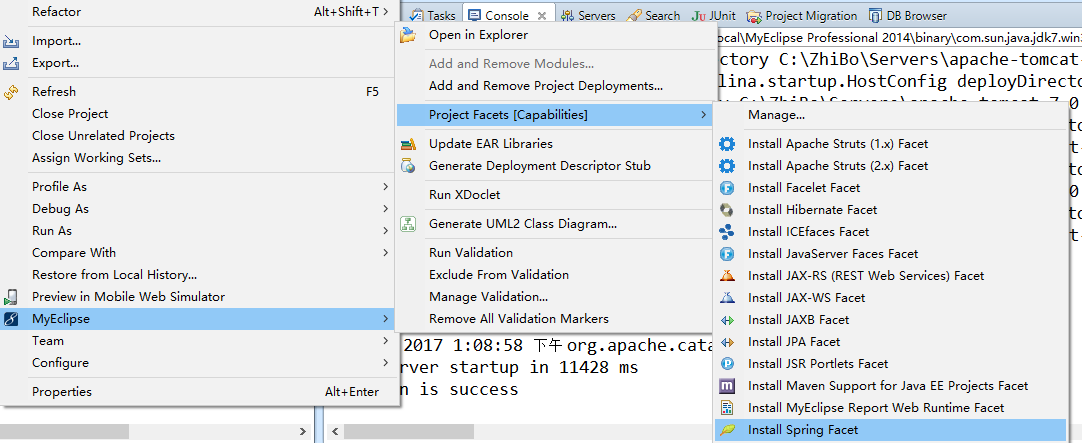
2、使用myeclipse插件
一、添加spring 框架
①版本信息:
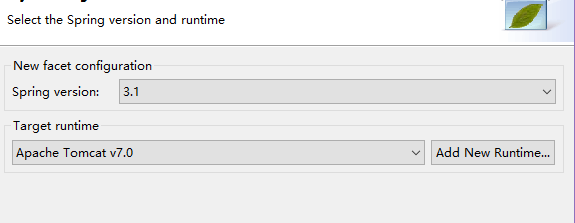
② applicationContext.xml 文件生成位置,直接默认就可以

③ 选择jar 简单的可以使用默认就可以
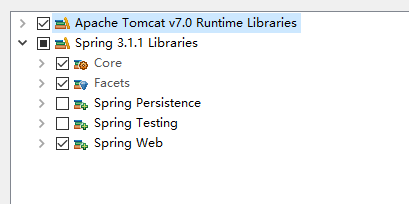
④ 点击finish
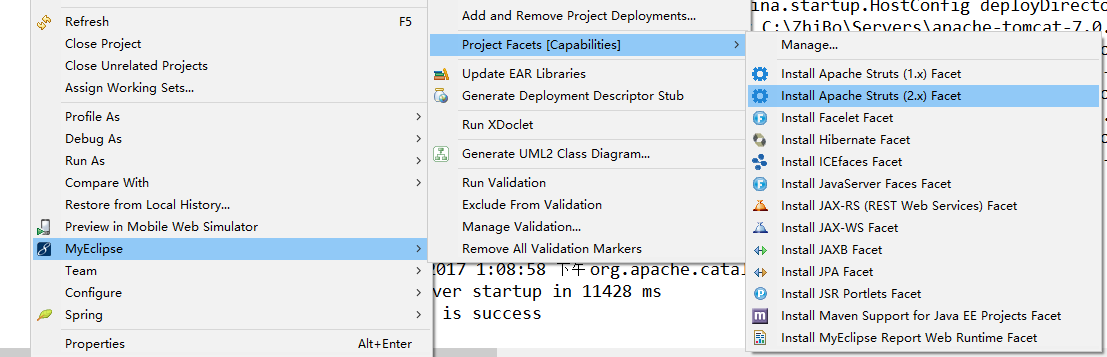
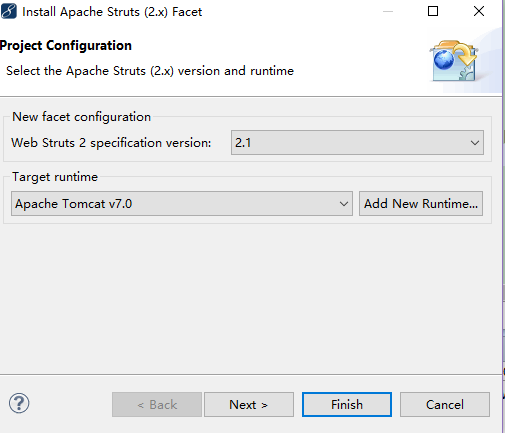
二、添加Struts 2 框架
1、同上操作
2、依旧默认
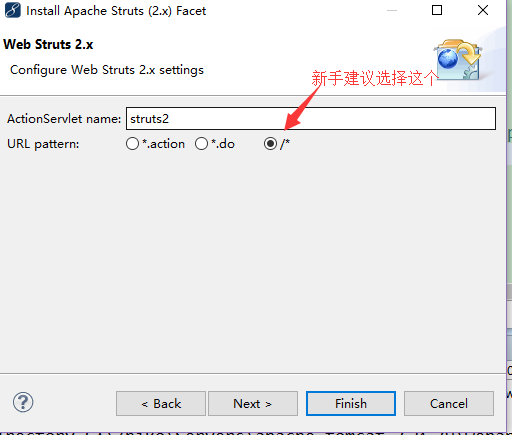
3、选择过滤器过滤的请求的种类
4、jar信息同上,默认就可以

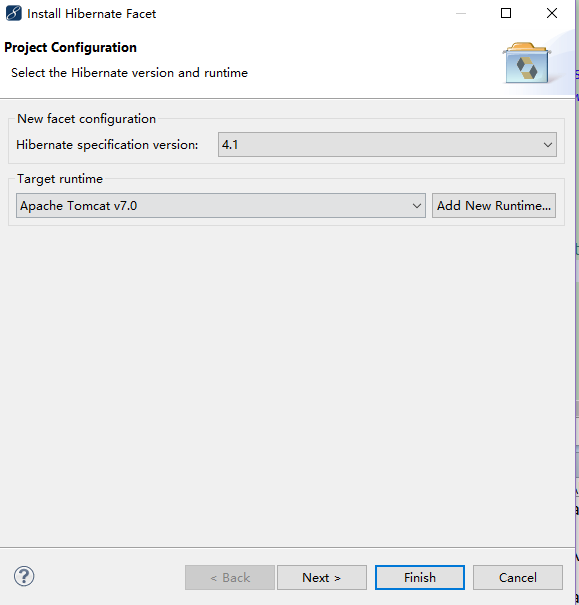
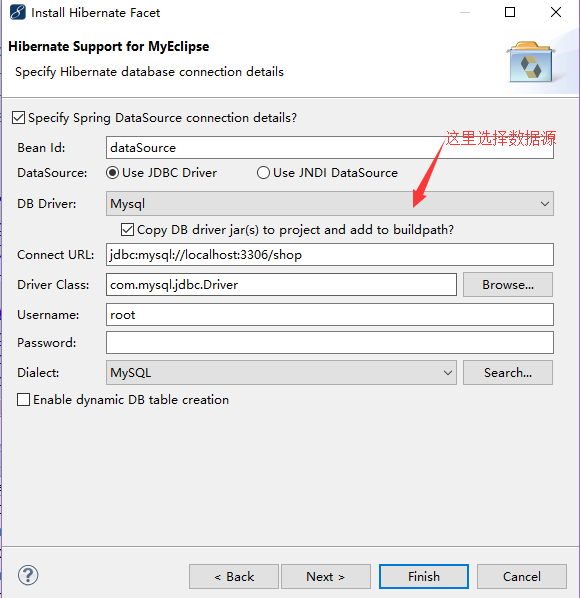
三、添加hibernate 框架

1、版本信息
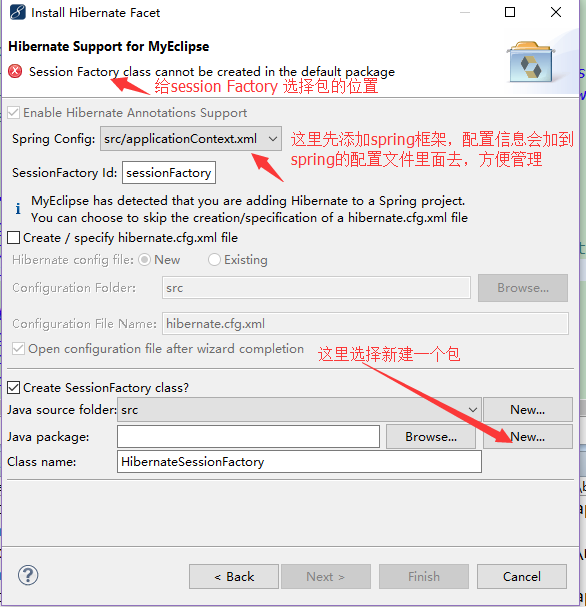
2、hibernate配置文件,以及sessionfactory的新建位置
3、选择数据源,如果不懂可以参照我这篇文章的内容
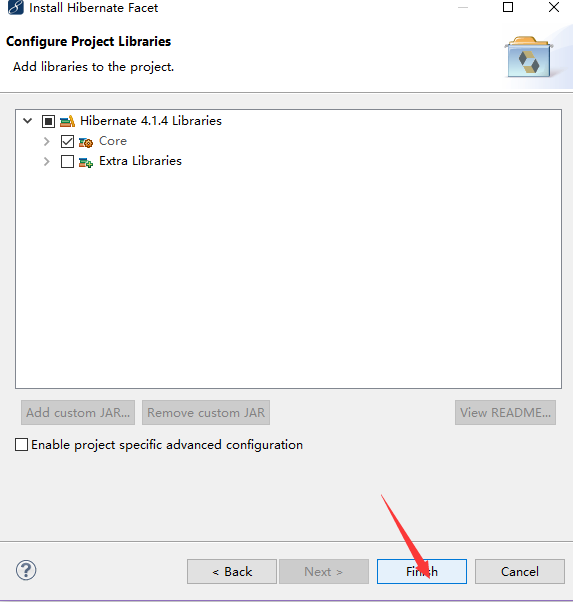
4、jar 默认即可 finish
以上就搭建好了一个完整的ssh框架。
纯手工搭建ssh环境,新手建议这样尝试操作。这里讲的可能更好,因为使用比较好的方法去自行配置
一、搭建spring框架 和hibernate框架:
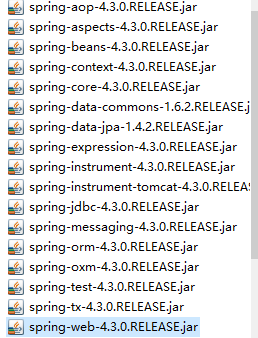
1、把jar 包copy到WEB-INF 目录下面的 lib 下,这些需要的包

2、在src目录下添加applicationContext.xml
<?xml version="1.0" encoding="UTF-8"?>
<beans xmlns="http://www.springframework.org/schema/beans"
xmlns:xsi="http://www.w3.org/2001/XMLSchema-instance"
xmlns:context="http://www.springframework.org/schema/context"
xmlns:aop="http://www.springframework.org/schema/aop"
xmlns:tx="http://www.springframework.org/schema/tx"
xsi:schemaLocation="http://www.springframework.org/schema/beans
http://www.springframework.org/schema/beans/spring-beans.xsd
http://www.springframework.org/schema/context
http://www.springframework.org/schema/context/spring-context-4.0.xsd
http://www.springframework.org/schema/aop
http://www.springframework.org/schema/aop/spring-aop.xsd
http://www.springframework.org/schema/tx
http://www.springframework.org/schema/tx/spring-tx-4.0.xsd
http://www.springframework.org/schema/context
http://www.springframework.org/schema/context/spring-context-4.0.xsd">
<!--引入db.properties -->
<context:property-placeholder location="classpath:db.properties"/>
<!-- 配置自动扫描的包 --><!-- 这个需要使用注解的方式注入属性 -->
<context:component-scan base-package="com.lzb.shop">
<context:exclude-filter type="annotation" expression="org.springframework.stereotype.Controller"/>
<context:exclude-filter type="annotation" expression="org.springframework.web.bind.annotation.ControllerAdvice"/>
</context:component-scan>
<!-- 配置数据源 -->
<bean id="dataSource"
class="com.mchange.v2.c3p0.ComboPooledDataSource">
<property name="user" value="${jdbc.user}"></property>
<property name="password" value="${jdbc.password}"></property>
<property name="driverClass" value="${jdbc.driverClass}"></property>
<property name="jdbcUrl" value="${jdbc.jdbcUrl}"></property>
</bean>
<!-- 配置sessionFactory -->
<bean id="sessionFactory"
class="org.springframework.orm.hibernate4.LocalSessionFactoryBean">
<property name="dataSource">
<ref bean="dataSource" />
</property>
<property name="hibernateProperties">
<props>
<prop key="hibernate.dialect">org.hibernate.dialect.MySQLDialect</prop>
<prop key="hibernate.hbm2ddl.auto">update</prop><!-- 配置自动产生数据表 -->
<prop key="hibernate.show_sql">true</prop><!-- 是否显示sql -->
<prop key="hibernate.format_sql">true</prop><!-- 格式化sql -->
<prop key="hibernate.cache.use_second_level_cache">true</prop><!--开启二级缓存-->
<prop key="hibernate.cache.region.factory_class">org.hibernate.cache.ehcache.EhCacheRegionFactory</prop><!--缓存区工厂类-->
<prop key="hibernate.cache.use_query_cache">true</prop><!-- 使用query-->
</props>
</property>
<!-- 用注解的方式产生数据表 -->
<property name="annotatedClasses">
<list>
<value>com.lzb.shop.entity.Picture</value><!--对应你的实体类-->
</list>
</property>
<!-- 用 hbm.xml 文件的方式产生数据表 -->
<!--
<property name="mappingResources">
<list>
<value>com/lzb/shop/entity/User.hbm.xml</value> 对应你的实体类映射文件
</list>
</property>
-->
</bean>
<!-- 注入sessionFactory -->
<bean id="transactionManager"
class="org.springframework.orm.hibernate4.HibernateTransactionManager">
<property name="sessionFactory" ref="sessionFactory" />
</bean>
<!-- 开启注解事务-->
<tx:annotation-driven transaction-manager="transactionManager" />
<!-- 配置user action -->
<bean id="indexAction" class="com.lzb.shop.controller.IndexAction"></bean>
<bean id="shopAction" class="com.lzb.shop.controller.ShopAction"></bean>
<bean id="productAction" class="com.lzb.shop.controller.ProductAction"></bean>
</beans>
这里建议测试一下有没有搭建成功:
1、推荐使用Junit Test
import org.hibernate.SessionFactory;
import org.springframework.context.ApplicationContext;
import org.springframework.context.support.ClassPathXmlApplicationContext;
ApplicationContext cxt = new ClassPathXmlApplicationContext("applicationContext.xml");

		SessionFactory sessionFactory = (SessionFactory)cxt.getBean(SessionFactory.class);

		System.out.println(sessionFactory.openSession());
如果打印无误就是成功,能够得到session 对象
2、测试能够自动产出数据表
①、写一个实体类
package com.lzb.shop.entity;

import javax.persistence.Column;

import javax.persistence.Entity;

import javax.persistence.GeneratedValue;

import javax.persistence.Id;

import javax.persistence.Table;

/**

 *

 * @ClassName Picture

 * @description

 * @author Enzo

 * @date 2017年8月31日

 */

@Table(name="picture")

@Entity

public class Picture {

	private Integer id;

	private String  userName;

	private String imgName;

	private String imgPath;

	private String imgType;

	private String upTime;

	private String imgDetial;

	@Id

	@GeneratedValue

	@Column(name="ID",unique=true,nullable=false,length=4)

	public Integer getId() {

		return id;

	}

	public void setId(Integer id) {

		this.id = id;

	}

	@Column(name="USERNAME",length=10)

    public String getUserName() {

		return userName;

	}

	public void setUserName(String userName) {

		this.userName = userName;

	}

	@Column(name="IMGNAME",length=20)

	public String getImgName() {

		return imgName;

	}

	public void setImgName(String imgName) {

		this.imgName = imgName;

	}

	@Column(name="IMGPATH",length=50)

	public String getImgPath() {

		return imgPath;

	}

	public void setImgPath(String imgPath) {

		this.imgPath = imgPath;

	}

	@Column(name="IMGTYPE",length=20)

	public String getImgType() {

		return imgType;

	}

	public void setImgType(String imgType) {

		this.imgType = imgType;

	}

	@Column(name="UPTIME")

	public String getUpTime() {

		return upTime;

	}

	public void setUpTime(String upTime) {

		this.upTime = upTime;

	}

	@Column(name="IMGDETIAL",length=100)

	public String getImgDetial() {

		return imgDetial;

	}

	public void setImgDetial(String imgDetial) {

		this.imgDetial = imgDetial;

	}

}
②、再次运行Junit,进入Navicat
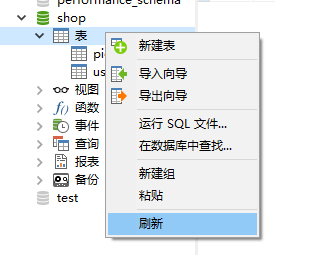
刷新观察有没有出现数据表,出现则测试成功
二、添加Struts2框架
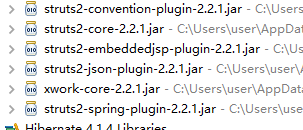
需要以上jar
1、在src 目录下创建一个struts.xml 配置文件
<?xml version="1.0" encoding="UTF-8" ?>

<!DOCTYPE struts PUBLIC "-//Apache Software Foundation//DTD Struts Configuration 2.1//EN" "http://struts.apache.org/dtds/struts-2.1.dtd">

<struts>

	<!-- 开启开发者模式,作用,页面中报错信息会更加详细,默认false -->

   <constant name="struts.devMode" value="true" />

   <!-- 指定由spring负责action对象的创建(必选) -->

   <constant name="struts.objectFactory" value="spring" />

	<package name="index" namespace="/" extends="struts-default">

	 	<action name="index" class="indexAction">

	 		<result name="index">WEB-INF/index.html</result>

	 	</action>

	</package>

	<!-- shop 相关的action -->

	<package name="shop" namespace="/" extends="struts-default">

		<action name="shop" class="shopAction">

	 		<result name="shop">WEB-INF/category.html</result>

	 	</action>

	</package>

</struts>
这样差不多就可以了
写一个action 测试
package com.lzb.shop.controller;

import org.springframework.beans.factory.annotation.Autowired;

import com.lzb.shop.service.IndexService;

public class IndexAction{

	@Autowired  //这里用了注解自动注入了indexService

	private IndexService indexService;

	public String execute(){

		String str = indexService.getStr();

		System.out.println(str);

		return "index";

	}

}
能进入对应的页面说明成功
感谢您的阅读!有问题欢迎留言询问,经常在博客园,相信能够及时回答您的问题。
最新文章
- 1-安装kvm及虚拟机
- tsd-提升IDE对JavaScript智能感知的能力
- 异步dcfifo的读写
- Beta版本冲刺计划
- 关于vue.js 组件的调用
- Android 环境快速搭建-详细步骤-win7-64bit
- SQLite在多线程环境下的应用
- c#(asp.net)杂谈笔记
- Java基础知识强化之多线程笔记05:Java程序运行原理 和 JVM的启动是多线程的吗
- 基于LAMP平台的网站架构(或Web系统架构)
- TypeScript 素描 - 模块解析、声明合并
- Java类加载原理解析
- django 发送手机验证码
- 清明培训 清北学堂 DAY2
- javascript基础的查缺补漏
- 后端判断用户是否关闭浏览器(关闭网站相关的全部tab)
- Uva10048 Audiophobia (Floyd)
- js中改变this指向的call、apply、bind 方法使用
- 在eclipse中执行sql的编码问题
- 操作系统-服务器-百科:Windows Server