springboot实现定时任务,异步操作,统一结果返回,全局异常处理,拦截器及事务处理
本文是作者原创,版权归作者所有.若要转载,请注明出处.
本文都是springboot的常用和实用功能,话不多说开始吧
定时任务
1.启动类开启注解
@EnableScheduling //开启基于注解的定时任务

@MapperScan("com.pdzx.dao")

@SpringBootApplication

public class VideoApplication {

    public static void main(String[] args) {

        SpringApplication.run(VideoApplication.class);

    }

}
2.开启定时任务
@Component
public class ScheduledService { //每2秒 执行任务
@Scheduled(cron = "0/2 * * * * ?")
public void hello(){
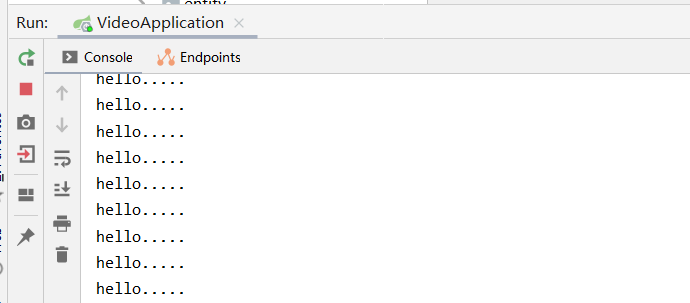
System.out.println("hello.....");
}
}
看结果
注意cron表达式的用法.
6个参数,分别为:秒 分 时 日 月 周
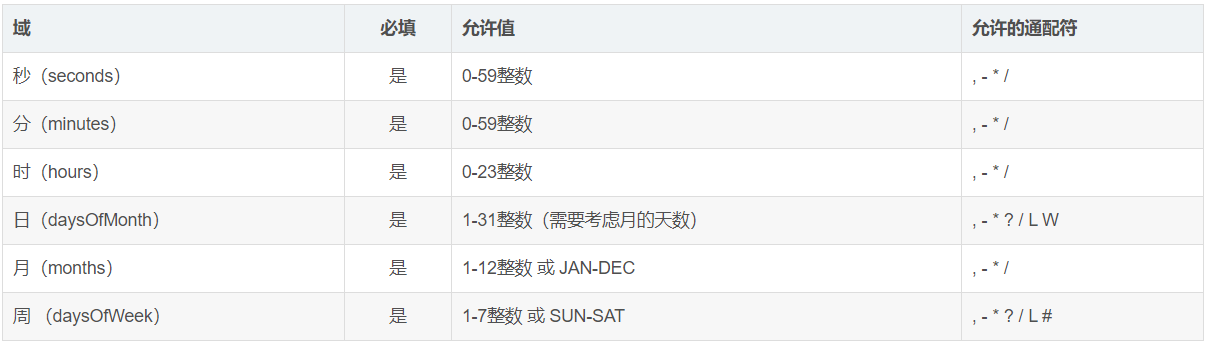
通配符说明:
*:表示匹配该域的任意值。在minutes域使用 * 表示每分钟。在months里表示每个月。在daysOfWeek域表示一周的每一天。
?:只能用在daysofMonth和daysofWeek两个域,表示不指定值,当两个子表达式其中之一被指定了值以后,为了避免冲突,需要将另一个子表达式的值设为 ?。因为daysofMonth和daysofWeek会相互影响。例如想在每月的2号触发调度,不管2号是周几,则只能使用如下写法:0 0 0 2 * ?, 其中最后一位只能用?,而不能使用*,如果使用*表示不管周几都会触发。
-:表示范围。例如在minutes域使用5-20,表示从5分到20分钟每分钟触发一次
/:表示起始时间开始触发,然后每隔固定时间触发一次。例如在minutes域使用5/20,则意味着从当前小时的第5分钟开每20分钟触发一次。
,:表示列出枚举值。例如:在minutes域使用5,20,则意味着在5分和20分时各触发一次。
L:表示最后,是单词“last”的缩写,只能出现在daysofWeek和dayofMonth域。在daysofWeek域使用5L意思是在指定月的最后的一个星期四触发。在dayofMonth域使用5L或者FRIL意思是在指定月的倒数第5天触发。在使用L参数时,不要指定列表或范围。
W:表示有效工作日(周一到周五),只能出现在daysofMonth域,系统将在离指定日期的最近的有效工作日触发事件。例如:在daysofMonth使用5W,如果5号是周六,则将在最近的工作日周五,即4号触发。如果5号是周日,则在6日(周一)触发。如果5日在星期一到星期五中的一天,则就在5日触发。另外,W的最近寻找不会跨过月份 。
LW:这两个字符可以连用,表示指定月的最后一个工作日。
#:用于确定每个月第几个周几,只能出现在daysofMonth域。例如在4#2,表示某月的第二个周三。
常用表达式示例:
例如想在每月的2号触发调度,不管2号是周几,则只能使用如下写法:0 0 0 2 * ?, 其中最后一位只能用?,而不能使用*,如果使用*表示不管周几都会触发
 (1)0/2 * * * * ?   表示每2秒 执行任务

 (1)0 0/2 * * * ?   表示每2分钟 执行任务

 (1)0 0 2 1 * ?   表示在每月的1日的凌晨2点调整任务

 (2)0 15 10 ? * MON-FRI   表示周一到周五每天上午10:15执行作业

 (3)0 15 10 ? 6L 2002-2006   表示2002-2006年的每个月的最后一个星期五上午10:15执行作

 (4)0 0 10,14,16 * * ?   每天上午10点,下午2点,4点

 (5)0 0/30 9-17 * * ?   朝九晚五工作时间内每半小时

 (6)0 0 12 ? * WED   表示每个星期三中午12点

 (7)0 0 12 * * ?   每天中午12点触发

 (8)0 15 10 ? * *   每天上午10:15触发

 (9)0 15 10 * * ?     每天上午10:15触发

 (10)0 15 10 * * ?   每天上午10:15触发

 (11)0 15 10 * * ? 2005   2005年的每天上午10:15触发

 (12)0 * 14 * * ?     在每天下午2点到下午2:59期间的每1分钟触发

 (13)0 0/5 14 * * ?   在每天下午2点到下午2:55期间的每5分钟触发

 (14)0 0/5 14,18 * * ?     在每天下午2点到2:55期间和下午6点到6:55期间的每5分钟触发

 (15)0 0-5 14 * * ?   在每天下午2点到下午2:05期间的每1分钟触发

 (16)0 10,44 14 ? 3 WED   每年三月的星期三的下午2:10和2:44触发

 (17)0 15 10 ? * MON-FRI   周一至周五的上午10:15触发

 (18)0 15 10 15 * ?   每月15日上午10:15触发

 (19)0 15 10 L * ?   每月最后一日的上午10:15触发

 (20)0 15 10 ? * 6L   每月的最后一个星期五上午10:15触发

 (21)0 15 10 ? * 6L 2002-2005   2002年至2005年的每月的最后一个星期五上午10:15触发

 (22)0 15 10 ? * 6#3   每月的第三个星期五上午10:15触发
异步操作
1.启动类开启注解
@EnableAsync //开启异步注解功能

@EnableScheduling //开启基于注解的定时任务

@MapperScan("com.pdzx.dao")

@SpringBootApplication

public class VideoApplication {

    public static void main(String[] args) {

        SpringApplication.run(VideoApplication.class);

    }

}
2.注解标注异步方法
@Component

public class AsyncService {

    //告诉Spring这是一个异步方法,SpringBoot就会自己开一个线程池,进行调用!

    @Async

    public void hello(){

        try {

            Thread.sleep(10000);

        } catch (InterruptedException e) {

            e.printStackTrace();

        }

        System.out.println("业务进行中....");

    }

}
3.控制层测试
@RestController
public class AsyncController {

    @Autowired
    AsyncService asyncService;

    @GetMapping("/async/hello")
    public String hello(){
        long time1 = System.currentTimeMillis();
        asyncService.hello();//调用异步方法
        long time2 = System.currentTimeMillis();
        System.out.println("Controller  :"+(time2-time1));
        return "success";
    }

}
访问该url,看结果

异步生效了
统一结果返回
封装一个统一的返回类
public class Result<T> {

    //是否成功

    private Boolean success;

    //状态码

    private Integer code;

    //提示信息

    private String msg;

    //数据

    private T data;

    public Result() {

    }

    //自定义返回结果的构造方法

    public Result(Boolean success,Integer code, String msg,T data) {

        this.success = success;

        this.code = code;

        this.msg = msg;

        this.data = data;

    }

    //自定义异常返回的结果

    public static Result defineError(DefinitionException de){

        Result result = new Result();

        result.setSuccess(false);

        result.setCode(de.getErrorCode());

        result.setMsg(de.getErrorMsg());

        result.setData(null);

        return result;

    }

    //其他异常处理方法返回的结果

    public static Result otherError(ErrorEnum errorEnum){

        Result result = new Result();

        result.setMsg(errorEnum.getErrorMsg());

        result.setCode(errorEnum.getErrorCode());

        result.setSuccess(false);

        result.setData(null);

        return result;

    }

    public Boolean getSuccess() {

        return success;

    }

    public void setSuccess(Boolean success) {

        this.success = success;

    }

    public Integer getCode() {

        return code;

    }

    public void setCode(Integer code) {

        this.code = code;

    }

    public String getMsg() {

        return msg;

    }

    public void setMsg(String msg) {

        this.msg = msg;

    }

    public T getData() {

        return data;

    }

    public void setData(T data) {

        this.data = data;

    }

}
统一异常
public enum ErrorEnum {

    // 数据操作错误定义

    SUCCESS(200, "nice"),

    NO_PERMISSION(403,"你没得权限"),

    NO_AUTH(401,"你能不能先登录一下"),

    NOT_FOUND(404, "未找到该资源!"),

    INTERNAL_SERVER_ERROR(500, "服务器跑路了"),

    ;

    /** 错误码 */

    private Integer errorCode;

    /** 错误信息 */

    private String errorMsg;

    ErrorEnum(Integer errorCode, String errorMsg) {

        this.errorCode = errorCode;

        this.errorMsg = errorMsg;

    }

    public Integer getErrorCode() {

        return errorCode;

    }

    public String getErrorMsg() {

        return errorMsg;

    }

}
全局异常处理
Springboot对于异常的处理也做了不错的支持,
它提供了一个 @ControllerAdvice注解以及 @ExceptionHandler注解,前者是用来开启全局的异常捕获,后者则是说明捕获哪些异常,对那些异常进行处理。如下
1.自定义异常
public class DefinitionException extends RuntimeException {

    protected Integer errorCode;

    protected String errorMsg;

    public DefinitionException(){

    }

    public DefinitionException(Integer errorCode, String errorMsg) {

        this.errorCode = errorCode;

        this.errorMsg = errorMsg;

    }

    public Integer getErrorCode() {

        return errorCode;

    }

    public void setErrorCode(Integer errorCode) {

        this.errorCode = errorCode;

    }

    public String getErrorMsg() {

        return errorMsg;

    }

    public void setErrorMsg(String errorMsg) {

        this.errorMsg = errorMsg;

    }

}
2.全局异常处理
@ControllerAdvice

public class GlobalExceptionHandler {

    /**

     * 处理自定义异常

     */

    @ExceptionHandler(value = DefinitionException.class)

    @ResponseBody

    public Result bizExceptionHandler(DefinitionException e) {

        return Result.defineError(e);

    }

    /**

     * 处理其他异常

     */

    @ExceptionHandler(value = Exception.class)

    @ResponseBody

    public Result exceptionHandler( Exception e) {

        return Result.otherError(ErrorEnum.INTERNAL_SERVER_ERROR);

    }

}
测试
@RequestMapping("/getDeException")
public Result DeException(){
throw new DefinitionException(400,"我出错了");
}
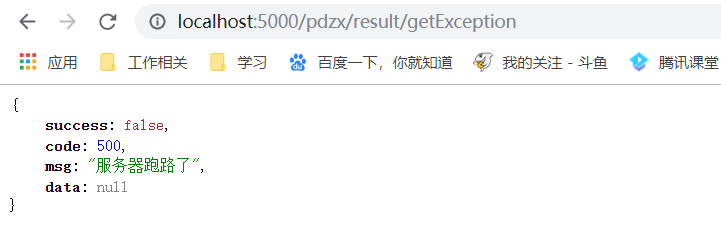
@RequestMapping("/getException")
public Result Exception(){
Result result = new Result();
int a=1/0;
return result;
}
看结果
首先看自定义异常

看其他异常结果
拦截器
拦截器是在servlet执行之前执行的程序(这里就是controller代码执行之前),它主要是用于拦截用户请求并作相应的处理,比如说可以判断用户是否登录,做相关的日志记录,也可以做权限管理。
SpringBoot中的拦截器实现和spring mvc 中是一样的,
它的大致流程是,先自己定义一个拦截器类,并将这个类实现一个HandlerInterceptor类,或者是继承HandlerInterceptorAdapter,都可以实现拦截器的定义。
然后将自己定义的拦截器注入到适配器中,也有两种方式,一种是实现WebMvcConfigurer接口,一种是继承WebMvcConfigurerAdapter。下面我们来看看如何完成。
1.自定义拦截器
/**
 *
 * 自定义的拦截器可以实现HandlerInterceptor接口,也可以继承HandlerInterceptorAdapter类。
 重写三个方法,当然也可以只实现一个最重要的preHandle方法。
 preHandle方法:此方法会在进入controller之前执行,返回Boolean值决定是否执行后续操作。
 postHandle方法:此方法将在controller执行之后执行,但是视图还没有解析,可向ModelAndView中添加数据(前后端不分离的)。
 afterCompletion方法:该方法会在整个请求结束(请求结束,但是并未返回结果给客户端)之后执行, 可获取响应数据及异常信息。
 */
public class MyInterceptor implements HandlerInterceptor {
    @Override
    public boolean preHandle(HttpServletRequest request, HttpServletResponse response, Object handler) {
        System.out.println("进入拦截器了");
        //中间写逻辑代码,比如判断是否登录成功,失败则返回false
        return true;
    }

    @Override
    public void postHandle(HttpServletRequest request, HttpServletResponse response, Object handler, ModelAndView modelAndView) {
        //
        System.out.println("controller 执行完了");
    }

    @Override
    public void afterCompletion(HttpServletRequest request, HttpServletResponse response, Object handler, Exception ex) {
        System.out.println("我获取到了一个返回的结果:"+response);
        System.out.println("请求结束了");
    }
}
2.拦截器注入适配器
@Configuration

public class InterceptorConfig implements WebMvcConfigurer {

    @Override

    public void addInterceptors(InterceptorRegistry registry) {

        registry.addInterceptor(new MyInterceptor())

                .addPathPatterns("/**")//拦截所有的路径

                .excludePathPatterns("/LoginController/*")//配置不需要拦截的路径。

                .excludePathPatterns("/hello/login");//配置多个路径。

    }

}
3.先创建一个登陆的测试,这个接口是不会拦截的。
@RestController

@RequestMapping("LoginController")

public class Login {

    @RequestMapping("/login")

    public String login(){

        System.out.println("controller开始执行");

        return "login success";

    }

}
浏览器测试
http://localhost:5000/pdzx/LoginController/login
看结果
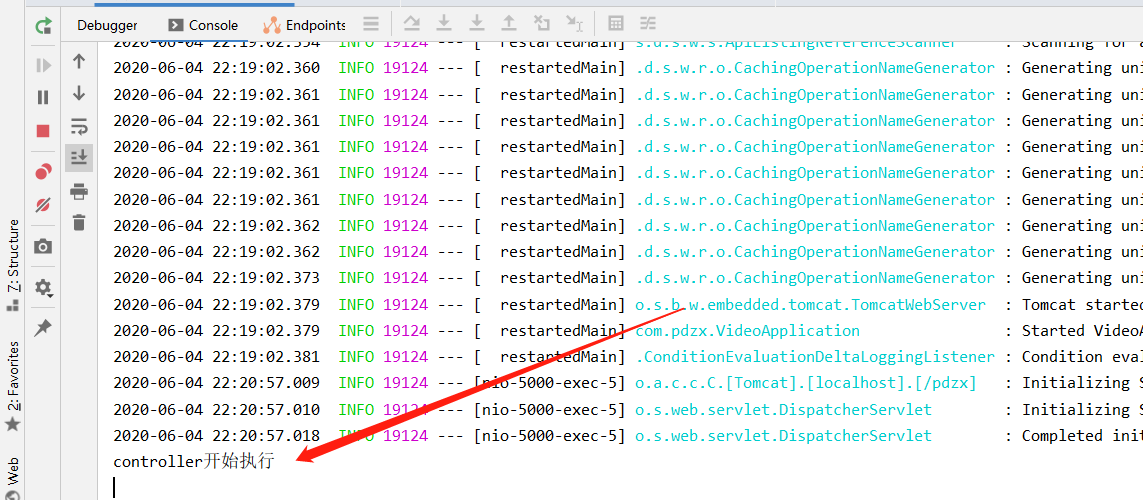
控制台只输出了未拦截接口内的代码,说明这个接口是未拦截的。浏览器的显示就不管了。其实一般是拦截登录接口,这里就将它放开了,以供测试。
4..创建一个拦截的controller
@RestController

@RequestMapping("/hello")

public class HelloController {

    @RequestMapping("/hello")

    public String hello(){

        System.out.println("经过拦截的controller代码执行完毕");

        return "hello";

    }

    @RequestMapping("/login")

    public String login(){

        System.out.println("不拦截的controller代码执行完毕");

        return "hello   login";

    }

}
测试
http://localhost:5000/pdzx/hello/hello
看结果

可以看到,首先是进入了拦截器,
通过拦截器之后,进入了controller中的方法,执行完controller的代码之后就进入了自定义拦截器中的postHandle方法,最后进入afterCompletion方法,并获取到了一个response对象。
事务处理
1.开启事务支持
@EnableTransactionManagement//开启事务支持

@EnableAsync //开启异步注解功能

@EnableScheduling //开启基于注解的定时任务

@MapperScan("com.pdzx.dao")

@SpringBootApplication

public class VideoApplication {

    public static void main(String[] args) {

        SpringApplication.run(VideoApplication.class);

    }

}
2.@Transactional来修饰一个方法
@Service

public class UserInfoServiceImpl {

    @Autowired

    private UserInfoMapper userInfoMapper;

    public int insertSelective(UserInfo record) {

        return userInfoMapper.insertSelective(record);

    }

    public int updateByPrimaryKeySelective(UserInfo record) {

        return userInfoMapper.updateByPrimaryKeySelective(record);

    }

    @Transactional

    public void add1(UserInfo record){

        userInfoMapper.insertSelective(record);

        int i=1/0;

    }

}
3.controller
@RequestMapping("userInfo")

@RestController

public class UserInfoController {

    @Autowired

    private UserInfoServiceImpl userInfoService;

    @RequestMapping("/add1")

    public void add1(){

        UserInfo userInfo=new UserInfo();

        userInfo.setName("张三");

        userInfoService.add1(userInfo);

    }

}
请求该路径之前,看一下数据库
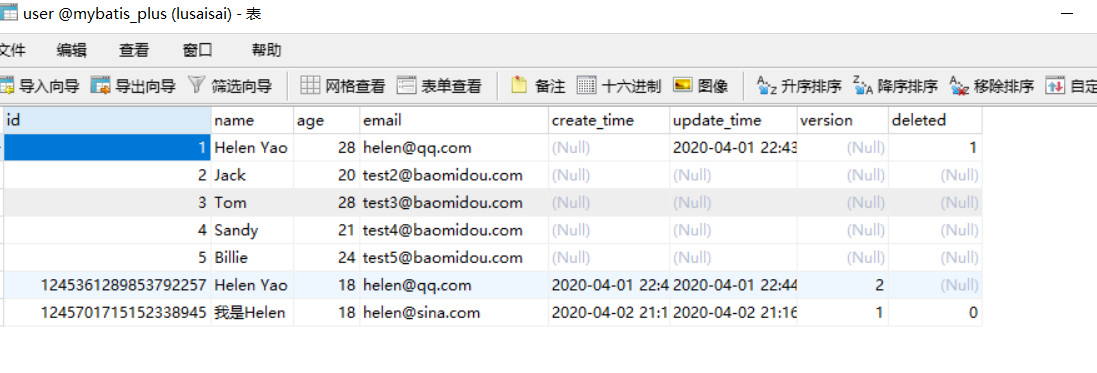
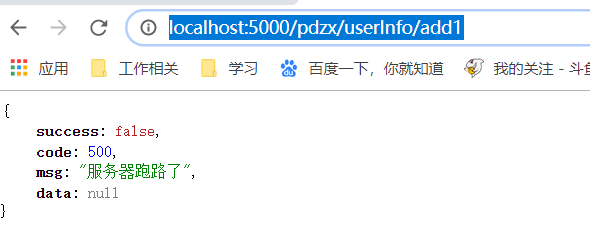
请求该接口
http://localhost:5000/pdzx/userInfo/add1
看结果
看控制台和数据库


数据没进入数据库
我们把那行错误注释掉
@Transactional

    public void add1(UserInfo record){

        userInfoMapper.insertSelective(record);

        //int i=1/0;

    }
再试一下,看结果
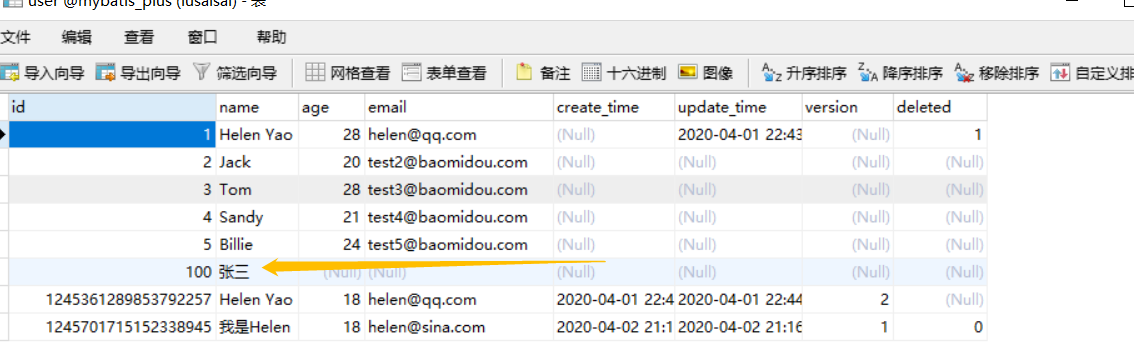
结果了,可以看出,事务处理生效了.
我们再看一个情况:
不带事务的方法调用该类中带事务的方法,不会回滚。
因为spring的回滚是用过代理模式生成的,如果是一个不带事务的方法调用该类的带事务的方法,直接通过this.xxx()调用,而不生成代理事务,所以事务不起作用
看代码,add2,调用带事务处理的updateByPrimaryKeySelective
@Transactional

    public int updateByPrimaryKeySelective(UserInfo userInfo) {

        int i=1/0;

        userInfo=new UserInfo();

        userInfo.setId((long)100);

        userInfo.setName("李四");

        return userInfoMapper.updateByPrimaryKeySelective(userInfo);

    }

    public void add2(UserInfo record){

        userInfoMapper.insertSelective(record);

        updateByPrimaryKeySelective(record);

    }
controller层
@RequestMapping("/add2")

    public void add2(){

        UserInfo userInfo=new UserInfo();

        userInfo.setId((long) 150);

        userInfo.setName("张三");

        userInfoService.add2(userInfo);

    }
测试
http://localhost:5000/pdzx/userInfo/add2
看控制台和数据库


可以看到数据存到数据库了,事物没有生效,这个情况还需注意
最新文章
- [No0000AE]在 Visual Studio 中调试 XAML 设计时异常
- ORACLE 中ROWNUM用法总结(转)
- 浅谈python web框架中的orm设计
- AppVeyor-CI为GitHub项目做自动化集成(dotnet为主)
- window.location和window.open
- php实现显示网站运行时间-秒转换年月日时分秒
- Android(java)学习笔记160:Framework运行环境之 Android进程产生过程
- JVM学习笔记-运行时数据区
- 国内国外MD5在线解密站点
- 根据XPATH去查看修改xml文件节点的内容
- Spring+SpringMVC+MyBatis+easyUI整合基础篇(七)JDBC url的连接参数
- 【WPF】学习笔记(三)——这个家伙跟电子签名板有个约定
- [转]python执行bash指令,如果指令返回错误,如何优雅的结束python程序
- HighCharts之2D堆柱状图
- Linux C启动时创建pid文件
- 半导体制造、Fab以及Silicon Processing的基本知识
- Android Studio 好用的设置
- Python3 tkinter基础 Canvas coords 移动直线,itemconfig 设置矩形的颜色, delete 删除一条直线
- GIS工具-shp浏览器
- mysql性能测试